
Are you interested in tapping into the lucrative world of web hosting? With Ubuntu, you can transform your passion into a thriving business.
You don’t need to be a tech wizard to get started. In this guide, you’ll discover straightforward steps to become a web hosting provider using Ubuntu. Imagine the satisfaction of offering seamless online services and seeing your clients’ websites thrive.
We’ll unlock the secrets to setting up your own hosting environment, ensuring reliability and security. Dive in to find out how Ubuntu can empower you to create a successful hosting platform that stands out in the digital landscape.
Getting Started With Web Hosting
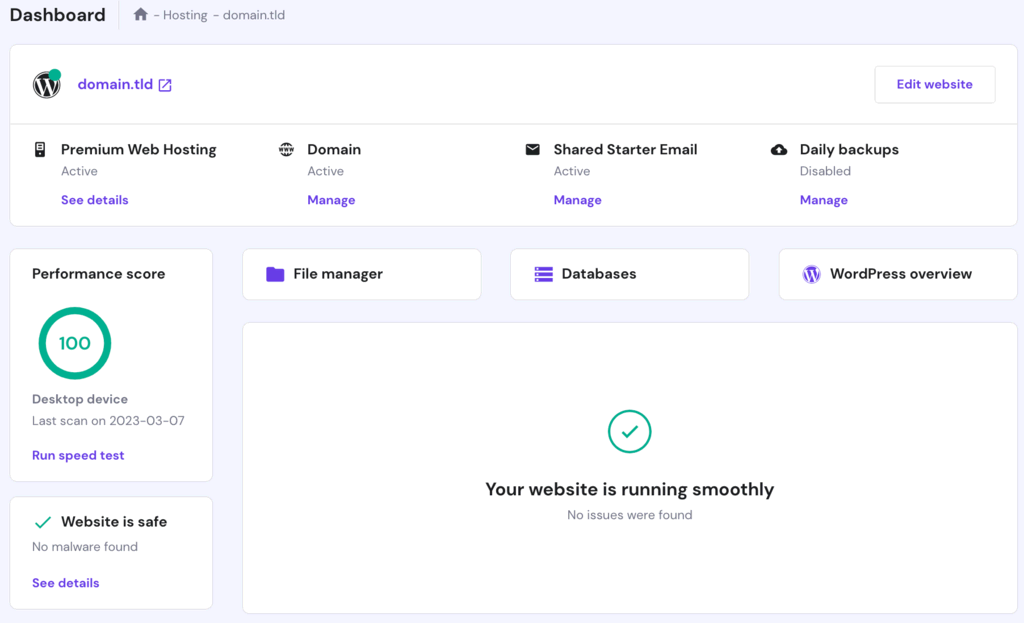
Web hosting lets people see websites on the internet. Websites store files on a server. Servers are powerful computers. They run all the time. Web hosting providers manage these servers. They keep websites online. Think of hosting as renting space online. People pay for this space. Hosting providers offer different plans. Plans vary in price and features.
Ubuntu is a popular choice for hosting. It is free and open-source. Many hosting providers use Ubuntu. It is reliable and easy to use. Ubuntu has strong security features. It gets regular updates. Community support is available. Many guides and forums help users. Ubuntu supports different software. You can install web servers easily. Apache and Nginx work well with Ubuntu.
Credit: www.hostinger.com
Preparing Your Ubuntu Server
Ubuntu needs a computer with at least 2GB RAM. A dual-core processor is recommended. Make sure you have 20GB of free disk space. This space is for the system and files. A stable internet connection is also needed. It helps in downloading updates. These requirements ensure smooth operation.
First, download the Ubuntu Server ISO file. Burn it to a DVD or USB stick. Insert the media into your server. Restart the server to boot from the media. Follow the installation prompts. Choose your language and keyboard layout. Set up the network and user accounts. Wait for the installation to complete. Remove the media when done. The server will restart with Ubuntu ready to use.
Setting Up Server Environment
Ensure your server has a static IP address. This helps in stable connections. Access the terminal and edit the network file. Use the command: sudo nano /etc/netplan/01-netcfg.yaml. Add your IP details. Remember to save the changes. Apply the settings using: sudo netplan apply. This sets up the network.
Start with updating the server. Run: sudo apt-get update. This fetches the latest packages. Install Apache for hosting websites. Use the command: sudo apt-get install apache2. Ensure Apache is running with: sudo systemctl status apache2. Next, install MySQL. It manages databases. Use: sudo apt-get install mysql-server. Finally, install PHP. It helps run web applications. Use: sudo apt-get install php libapache2-mod-php.
Domain And Dns Management
Start by choosing a unique domain name for your website. This is your website’s address on the internet. Use domain registrars like GoDaddy or Namecheap to register it. These platforms are easy to use. They guide you through each step. Pay the fee to secure your domain. Domains usually renew yearly. Keep track of renewal dates. Avoid losing your domain.
DNS records connect your domain to your server. Use your registrar’s control panel to set them up. The most common type is the A record. It points your domain to an IP address. There are also CNAME records. These are used for subdomains. You might also need MX records for email. Each record type has a special job. Check your settings carefully. Mistakes can cause problems.
Web Server Configuration
Setting up a web server with Ubuntu can help you become a web hosting provider. Start by installing necessary software like Apache or Nginx. Configure the server for hosting multiple websites efficiently.
Choosing A Web Server Software
Choosing the right web server is important. Two popular options are Apache and Nginx. Apache is very popular and easy to use. Nginx is fast and handles many users at once. Consider your needs before choosing. If your website is small, Apache might be better. If you need speed, Nginx is a good choice. Both have great features. Make sure to choose wisely.
Configuring Apache Or Nginx
After choosing, you need to configure the server. Start with installing the software. Use Ubuntu’s package manager for this. Next, edit the configuration files. For Apache, it’s httpd.conf. For Nginx, it’s nginx.conf. Set the server name and port number. Don’t forget to set up security settings. Enable SSL for secure connections. Test the configuration to avoid mistakes. Restart the server to apply changes. Follow these steps to ensure your server works well.
Database Setup
Setting up a database is crucial for becoming a web hosting provider with Ubuntu. This process involves installing database software, configuring settings, and ensuring security. Easy steps make it accessible even for beginners.
Installing Mysql Or Postgresql
Begin by installing MySQL or PostgreSQL on Ubuntu. Use the terminal for this task. Type sudo apt-get update to ensure your system is updated. Next, for MySQL, type sudo apt-get install mysql-server. For PostgreSQL, use sudo apt-get install postgresql. Follow the instructions on the screen. Ensure that the service starts successfully. Check the status with sudo systemctl status mysql or sudo systemctl status postgresql. This confirms your installation is complete and running.
Configuring Database Access
Setting up database access is crucial. Start by creating a new database user. For MySQL, use the command mysql -u root -p. Create a user with CREATE USER 'newuser'@'localhost' IDENTIFIED BY 'password';. Grant privileges with GRANT ALL PRIVILEGES ON . TO 'newuser'@'localhost';. For PostgreSQL, use sudo -u postgres psql. Create a user with CREATE USER newuser WITH PASSWORD 'password';. Grant access with ALTER USER newuser WITH SUPERUSER;. Remember to save your changes.
Securing Your Server
Starting your web hosting journey with Ubuntu requires understanding server security. Ensure robust firewall settings to protect sensitive data. Regular software updates keep vulnerabilities at bay, safeguarding your server from potential threats.
Implementing Firewall Protection
A firewall keeps your server safe. It blocks bad traffic. Use Ubuntu’s UFW tool for easy setup. Allow only necessary ports. Close all others. This keeps hackers out. Always update your firewall. New threats come every day. Stay ahead. Keep your server protected.
Setting Up Ssl Certificates
SSL makes data safe. It encrypts information. Install SSL on your server. Use Let’s Encrypt for free SSL. It’s simple and secure. Follow the steps on their website. Renew your SSL regularly. This keeps connections safe. Users trust sites with SSL. Protect their data always.
Credit: docs.vultr.com
Managing User Accounts
Use the terminal to create user accounts. Type sudo adduser followed by the username. This command adds a new user. Next, set a password for the user. It must be secure but easy to remember. Follow the prompts carefully. Always note the password.
You can add a user to a group. Type sudo usermod -aG groupname username. This command adds the user to the specified group. Groups help manage user permissions. They keep things organized.
Permissions control what users can do. Use chmod to set file permissions. Type chmod 755 filename. This command grants read, write, and execute permissions. Understand the numbers. They represent user, group, and others. Be careful with permissions. Too many can be unsafe.
Check existing permissions using ls -l. This command lists files with details. Keep permissions tight. It protects your server. Always review permissions for safety.
Monitoring And Maintenance
Starting as a web hosting provider with Ubuntu requires regular monitoring and maintenance. Ensure servers run smoothly by checking updates and security patches. Regular backups protect data and minimize downtime.
Setting Up Monitoring Tools
Choose tools that help you track server health. These tools send alerts for server issues. Popular tools include Nagios, Zabbix, and Prometheus. Install these tools on your server. Set them to monitor CPU, memory, and disk usage. They also track network traffic and error logs. Monitoring tools ensure your server runs smoothly. If something breaks, you will know right away. This helps you fix problems quickly.
Regular Server Maintenance Tasks
Servers need regular care. Check your server logs daily. This helps spot errors early. Update your server software often. Updates fix bugs and improve security. Clean up disk space by removing old files. Test backups to ensure data safety. Restart your server occasionally. This clears memory and improves performance. Regular maintenance keeps your server healthy and fast.
Scaling Your Hosting Services
Explore becoming a web hosting provider with Ubuntu. Set up and manage servers efficiently using this open-source platform. Ubuntu’s user-friendly nature makes it ideal for beginners entering the hosting market.
Planning For Future Growth
Web hosting needs may grow over time. Plan for growth early. Use scalable solutions to handle more users. Upgrade hardware when users increase. Optimize software for better performance. Ensure your system can expand easily. This keeps things running smoothly.
Load Balancing And Redundancy
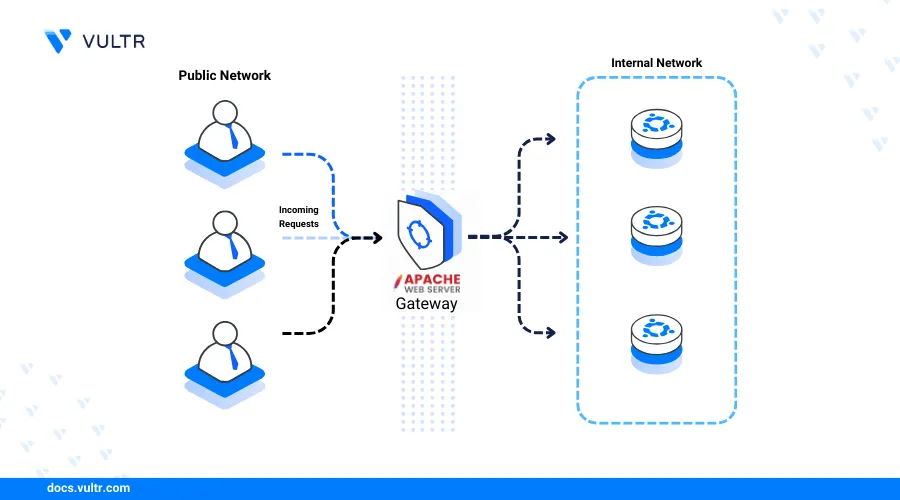
Balance the load across servers. It prevents overload. Overload causes slowdowns. Use redundant systems for reliability. Redundancy means having backups. Backups work when main systems fail. This keeps services up and running. Customers expect reliable hosting.

Credit: www.facebook.com
Frequently Asked Questions
How Do I Become My Own Hosting Provider?
To become your own hosting provider, set up a server with reliable hardware and software. Install a web server application like Apache or Nginx. Ensure a stable internet connection and configure DNS settings. Manage security features and offer customer support.
This allows you to host websites independently.
Can Ubuntu Be Used As A Web Server?
Yes, Ubuntu can be used as a web server. It supports Apache, Nginx, and other server software efficiently. Ubuntu offers strong security features and regular updates, making it reliable for hosting websites. Its user-friendly interface and extensive community support enhance ease of use for server management.
How Do You Become A Web Hosting Provider?
To become a web hosting provider, research the industry. Choose a reliable server infrastructure. Register your business and secure a domain. Set up your hosting platform and pricing plans. Market your services effectively to attract clients.
How To Host A Website From Ubuntu?
Install Apache, MySQL, and PHP using terminal commands. Configure Apache for your domain. Upload website files to `/var/www/html/`. Adjust permissions for web access. Test your site by entering your IP or domain in a browser. Secure with firewall settings and SSL certificates for encryption.
Conclusion
Becoming a web hosting provider with Ubuntu is achievable. Start by installing Ubuntu on your server. Configure Apache or Nginx for web services. Set up MySQL for database management. Secure your server with firewalls and updates. Offer customer support to build trust.
Monitor performance for optimal service. Keep learning to improve your skills. Ubuntu provides flexibility and control for hosting services. Follow these steps, and you can succeed. Enjoy the journey of becoming a web hosting provider. Remember, patience and persistence are key.


