
Are you struggling to upload files to your web hosting server? You’re not alone.
Many people find this task daunting, but it doesn’t have to be. Imagine having the power to seamlessly manage your website files with confidence. Whether you’re launching your first website or updating an existing one, mastering file uploads is crucial for your online success.
In this guide, you’ll discover easy, step-by-step methods to upload files effectively. Say goodbye to confusion and hello to simplicity. Ready to take control and enhance your website’s performance? Read on to transform your web hosting experience.
Choosing The Right Web Hosting Service
Web hosting plans come in different types. Shared hosting is very popular. Many websites use one server. It is cheap but can be slow. VPS hosting means Virtual Private Server. It gives more control and speed. It is good for bigger sites. Dedicated hosting means one server for one site. It is very fast and private. But, it costs more. Cloud hosting uses many servers. It is very stable and reliable.
Price is important. Choose a plan you can afford. Check the speed of the server. Faster is better. Security must be strong to protect data. Look at the customer support. They should help quickly. Think about scalability. Your site might grow. Make sure the plan can grow too.

Credit: developer.mozilla.org
Preparing Files For Upload
Keep files in one folder. Name the folder clearly. Use easy names like “images” or “docs”. Organize files by type. Group photos together. Group text files together. This helps find them fast. Avoid clutter. Delete files not needed. Check file sizes. Big files take longer to upload. Compress big files if needed. It saves space and time.
Choose compatible file formats. Common ones are JPEG for images. PNG is also good. Use PDF for documents. HTML works well for web pages. Check server requirements. Some servers need specific formats. Avoid rare formats. They might not work. Convert files if needed. Use online tools for conversion. Keep files simple for easy upload.
Accessing Your Web Hosting Account
First, visit your web hosting site. Find the login button. Enter your username and password. Click on the login button. Ensure your details are correct. If wrong, you cannot access your account. Use secure passwords. Avoid sharing them.
After login, find the control panel. It might be named differently. Look for terms like Dashboard or Admin Area. Click to enter it. Inside, find tools for your tasks. Use them to manage your website. Explore different settings. Some might be new to you.
Using Ftp For File Upload
First, download an FTP client. Some popular ones are FileZilla and WinSCP. These tools help you move files. Install the software on your computer. Open the program after installation. Now, you need to add the server details. Find your FTP server address in your hosting account. Look for the username and password too. Type these details in the FTP client. Save the settings for future use.
Open your FTP client. Use the saved settings to connect. Click the connect button. Wait for the connection to establish. You will see two panels. The left panel shows your computer files. The right panel shows the server files. Now, you can start uploading. Select the files you want to upload. Drag and drop them to the server panel. Watch them upload one by one. Your files are now on the server!
Uploading Files Via The Control Panel
File Manager is easy to use. It helps you upload files to your server. Open the control panel. Find the File Manager. Click to open it. You see folders and files. Choose the folder. Want to upload a file? Click “Upload”. Select your file from the computer. Wait for it to finish. Done! Your file is now on the server.
Drag and Drop makes uploading simple. Open the File Manager. Drag the file from your computer. Drop it in the browser window. Watch as it uploads. Much like magic! It saves time. No need for extra clicks. Easy for everyone. Try it today.
Credit: www.namecheap.com
Command Line File Upload
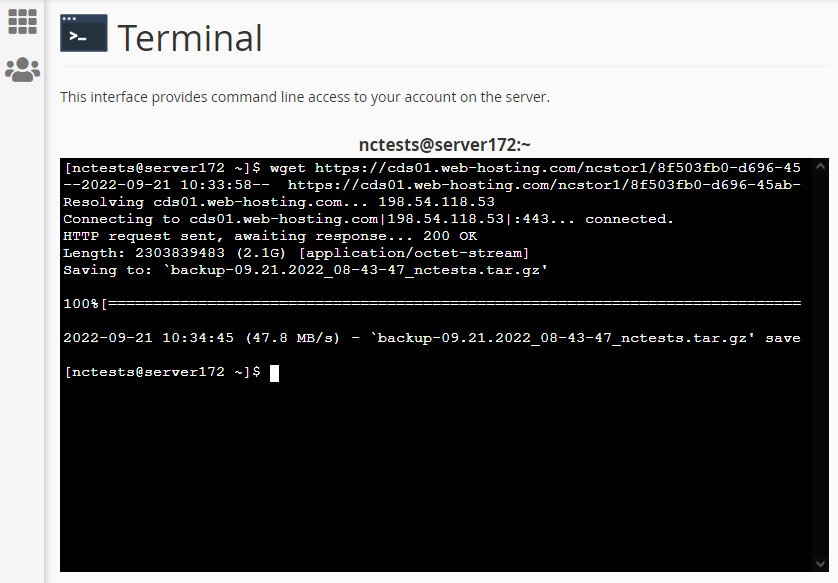
SSH is a tool for secure server access. SSH stands for Secure Shell. It helps you connect to a server safely. You need a username and password. Sometimes, a special key is used. This key is called an SSH key. It makes the connection even safer. Once connected, you can control the server. This is like having a remote control for the server.
Use SCP to move files to the server. SCP stands for Secure Copy Protocol. It helps in transferring files safely. Type the command in the terminal. Use this format: `scp file.txt username@server:/path`. Replace “file.txt” with your file name. Replace “username” with your server username. Replace “server” with your server address. The “/path” is where the file will go. Remember to check the file after transfer. Make sure it is in the right place.
Troubleshooting Common Upload Issues
Uploading files to a web hosting server can face issues like incorrect file paths or permissions. Check the file size and format, ensuring they meet server requirements. Use FTP clients for a smoother process, and verify server settings to avoid errors.
File Size Limitations
Many servers have file size limits. Files too big may not upload. Check your hosting plan for size limits. Compress large files before uploading. Use zip or rar formats. They reduce file size. Choose the right tool to compress files. Some hosting plans allow bigger files. Upgrading may solve the problem. Always check server settings first. They often show file limits.
Permission Errors
Permission errors occur often when uploading files. Files need correct permissions to upload. Check file settings on your computer. Ensure correct read and write permissions. Change settings if needed. Hosting servers have permission settings too. Check these settings. Confirm you have access rights. Contact your host if unsure. They can help with settings. Permissions must be set correctly. This avoids upload issues.
Ensuring File Security
Transferring files needs care. Use secure protocols like SFTP or FTPS. They keep files safe during transfer. These protocols protect data from hackers. They use encryption to hide information. Always choose encrypted methods. Avoid unsecured connections. Your files will be safer.
Backups are very important. They save your files from loss. Do regular backups. Store copies in different places. Use cloud storage for safety. Backup every week or month. It depends on how often files change. Backup protects against server crashes. Always have a backup plan ready.
Verifying Successful Upload
After uploading, confirm your files are in the right spot. Use your file manager to look at the directories. Ensure each file is in its proper folder. This helps the website run smoothly. If files are missing, upload them again. Keep a checklist. This will make your work easier and faster.
Open your website in a browser. Click on different links. Check if each page loads well. Look at images to see if they show up. Test forms to see if they work. Fix any errors you find. This ensures your website is ready for visitors. Always test on different devices. It helps make sure everything works for everyone.

Credit: www.inmotionhosting.com
Frequently Asked Questions
How Do You Upload Files To A Web Server?
To upload files to a web server, use FTP software or web hosting control panel. Connect with server credentials, select files, and transfer. Ensure proper file permissions.
What Is The Process Of Putting Files On A Web Server?
Upload files using an FTP client or web hosting control panel. Access server with login credentials. Drag and drop files into the desired directory. Verify uploads by checking file paths and permissions. Ensure proper file formats and configurations for web compatibility.
How Do I Upload A File To A Website?
Visit the website’s upload page. Click the “Upload” button, select your file, and confirm. Ensure the file meets the site’s requirements.
Which Protocol Is Used To Upload Files On A Web Server?
The File Transfer Protocol (FTP) is commonly used to upload files to a web server. It enables efficient data transfer between local and remote systems. Secure alternatives like SFTP and FTPS also offer encrypted file transfers, enhancing security during the upload process.
Conclusion
Uploading files to a web hosting server seems tricky at first. Yet, with the right steps, it’s quite manageable. First, choose a reliable hosting provider. Then, organize your files clearly. Use FTP clients or control panels to upload. Check file permissions.
Keep backups for safety. Regular practice improves your skill. Remember to maintain your site regularly. A well-managed site ensures smooth operation. With patience and practice, file uploading becomes easier. Your website will thrive with proper file management. Keep learning and adapting to new tools.
Your site deserves the best care.


