
Have you ever felt limited by the customization options available in your Bridge WordPress theme? If you’re looking to add more functionality and style, incorporating JavaScript (JS) can unlock a world of possibilities.
Imagine having the power to enhance your website’s interactive features, engage visitors more effectively, and create a truly unique user experience. This guide will walk you through the steps of inputting JavaScript into your Bridge WordPress theme, making the process straightforward and stress-free.
Stay with us to discover how you can elevate your site’s performance and captivate your audience like never before.
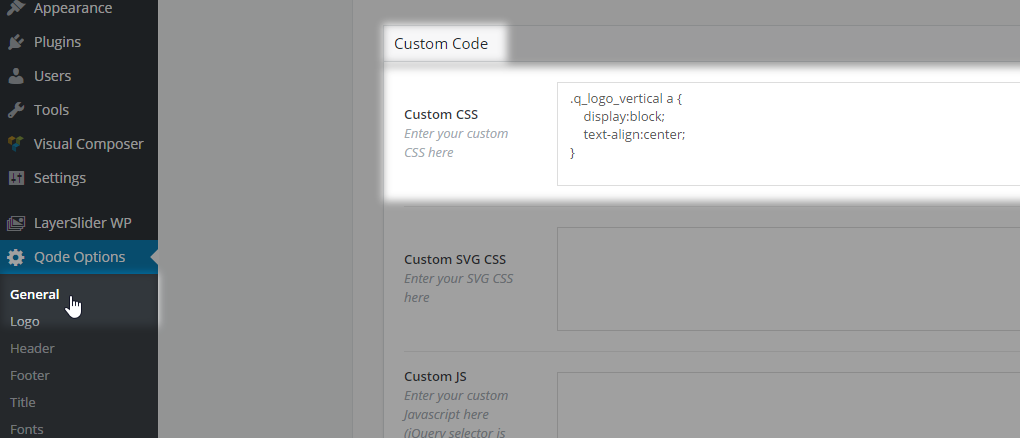
Credit: bridge.qodeinteractive.com
Setting Up Your Development Environment
Start with a code editor like Visual Studio Code. It’s easy to use. Download Node.js to run JavaScript. It works on many systems. Ensure you have Git for version control. It helps track changes. Install WordPress locally using tools like XAMPP or Local by Flywheel. This setup allows testing without affecting live sites.
Check for browser compatibility. Chrome and Firefox are good options. They offer debugging tools. Debugging helps find errors quickly. Keep your software updated. Updates fix bugs and improve security. Regular updates are crucial for smooth operation.
A child theme is important. It lets you add changes safely. Never edit the main theme files. Create a new folder in the themes directory. Name it something unique. Add a style.css file. It should have theme information. Add a functions.php file. Use it to enqueue styles and scripts. This keeps your changes intact after updates.
Copy the template files you want to change. Place them in your child theme folder. Edit these files carefully. Keep your code clean and organized. Test your child theme regularly. Testing ensures everything works well together.
Locating Theme Files
The theme directory holds all the important files. Each theme has its own folder. Inside the folder, you find many files. These files help the theme work. Check the style.css file first. It tells the name and version of the theme. Look for other files like functions.php. This file lets you add more code. Remember, each file has a job to do.
JavaScript files are important for making the website active. Check the js folder inside the theme. Here, you find files with .js at the end. These are JavaScript files. Sometimes, the files hide in subfolders. Look for folders named assets or scripts. Don’t forget to check the header and footer files. They often call JavaScript files.
Adding Javascript To The Theme
The Theme Customizer is a simple tool. It lets you add small JavaScript. Navigate to the customizer area in WordPress. Choose the option for custom code. Write your JavaScript in the box. Click save to make it live. This method is best for small scripts. It is easy for beginners.
Use the functions.php file for bigger scripts. Open the file in your theme editor. Write a new function to enqueue your script. Use the wp_enqueue_script() function. Make sure to include the correct path. Save your changes. Your JavaScript should now load with the page. This method is for advanced users. It allows more control over script loading.

Credit: blogs.duanemorris.com
Using WordPress Hooks And Filters
Action hooks help add JavaScript to a theme. They run at specific times. Use wp_enqueue_script to load scripts. Place this code in the functions.php file. This ensures scripts load correctly. They execute when pages load. This is vital for dynamic content. Action hooks make themes more interactive.
Filter hooks change existing scripts. They adjust how scripts behave. Use them for custom scripts. Place filters in functions.php. They modify script output. This is useful for personalized content. Filter hooks ensure scripts match site needs. They help maintain site performance.
Best Practices For Javascript Integration
Compatibility is key for smooth website function. Check if your JavaScript works with all browsers. Use modern tools to test and fix any problems. Sometimes, old scripts might not work. So, update them to new versions. This helps your site run well on all devices.
Also, make sure that your JavaScript does not clash with other scripts. Use a sandbox to test new code. This keeps your website safe from errors. It is important to maintain a stable site. Careful testing ensures this.
Fast websites make users happy. To keep load times short, minimize your JavaScript. Remove any extra code that is not needed. This reduces the time it takes for your site to load. A quick site keeps visitors engaged.
Use asynchronous loading for scripts. This means they load in the background. It helps the rest of the site appear quickly. Also, compress your files to save space. Smaller files download faster. Optimize your site’s speed for a better user experience.
Testing And Debugging
Integrating JavaScript into the Bridge WordPress theme involves accessing the theme’s settings. Open the theme’s customizer, navigate to the ‘Additional CSS’ section, and paste your JavaScript code. Testing and debugging ensure the script runs smoothly without errors, enhancing functionality and user experience.
Tools For Debugging Javascript
Debugging JavaScript is important. Use tools like Chrome DevTools. It helps find errors. Firebug is another tool. It works with Firefox. Sublime Text has plugins for debugging too. Visual Studio Code is great for this job. These tools make spotting problems easy.
Common Javascript Issues In WordPress
JavaScript issues can break your site. Sometimes, scripts do not load properly. Conflicts between plugins can happen. jQuery errors are common in WordPress. Scripts may load in the wrong order. This causes trouble. Always check console logs for errors. They show what is wrong. Keeping themes and plugins updated helps reduce problems.

Credit: themeforest.net
Frequently Asked Questions
How To Add Javascript In Bridge Theme?
To add JavaScript in the Bridge theme, use the WordPress admin panel. Navigate to Appearance > Editor, and locate your theme’s functions. php file. Insert your JavaScript code within the wp_enqueue_script function to ensure it loads correctly. This method is both safe and efficient for adding custom scripts.
Can I Use Plugins To Insert Js?
Yes, you can use plugins to insert JavaScript into your Bridge theme. Plugins like “Insert Headers and Footers” or “Custom JavaScript” allow you to add code easily. They provide a user-friendly interface for adding scripts without modifying theme files, ensuring your changes remain intact during updates.
Where To Place Javascript In Bridge Theme?
Place JavaScript in the Bridge theme’s header, footer, or specific pages using the functions. php file. Alternatively, use WordPress hooks like wp_head or wp_footer for broader implementation. These methods ensure your scripts load at the desired location without affecting the site’s performance or layout.
Is Custom Js Safe For Bridge Theme?
Custom JavaScript is safe for the Bridge theme if implemented correctly. Ensure your scripts are error-free and tested on a staging site first. Using WordPress hooks and functions to add scripts minimizes risks. Always back up your site before making changes to prevent data loss.
Conclusion
Adding JavaScript to the Bridge WordPress theme is simple. Start by accessing your theme’s files. Modify the child theme to keep changes safe. Carefully paste your JavaScript code in the proper section. Check your site for any errors. This ensures everything runs smoothly.
Make sure to backup before making changes. This protects your hard work. Follow these steps to enhance your website’s functionality. You’ll soon see improvements in your site’s performance. Enjoy the new features and possibilities. Happy coding!


