
Are you eager to transform your WordPress site into something truly unique? Learning how to create a WordPress theme in PHP can be your gateway to complete customization and control.
Imagine the satisfaction of crafting a tailor-made design that reflects your style and meets your specific needs. This guide will walk you through the process, breaking down complex coding concepts into simple steps that anyone can understand. By the end, you’ll not only have a custom theme but also a deeper understanding of how WordPress works.
Ready to take charge of your website’s look and feel? Let’s dive into the fascinating world of WordPress theme development and unleash your creativity.
Credit: wordpress.stackexchange.com
Choosing The Right Tools
Creating a WordPress theme needs the right tools. Text editors like Visual Studio Code or Sublime Text are perfect. They help you write clean code. PHP is the backbone for WordPress themes. Install the latest version. MySQL is needed to manage your data. Don’t forget a web server like Apache. Local servers like XAMPP or WAMP make things easy.
First, install your text editor. Next, set up PHP and MySQL. Then, choose a local server. Install it on your computer. This lets you work offline. Create a new folder for your theme. Start coding your theme files here. Use a browser to check your changes. Refresh to see updates quickly. Keep everything organized. This makes development smoother.
Understanding WordPress Theme Structure
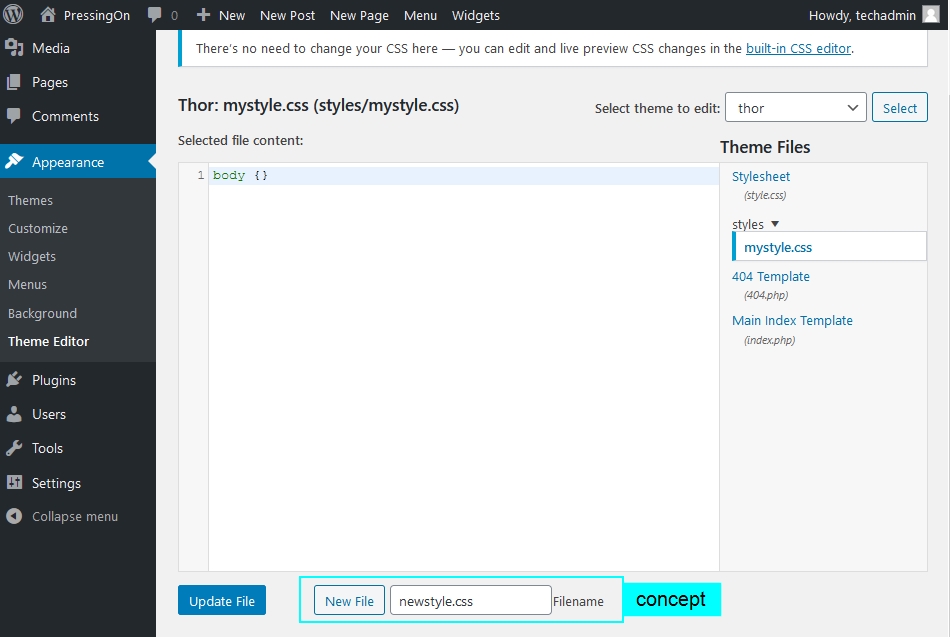
The style.css file is important. It holds the theme’s information. Another key file is functions.php. It adds features to your theme. The index.php file is the main template. It is the fallback template for your theme.
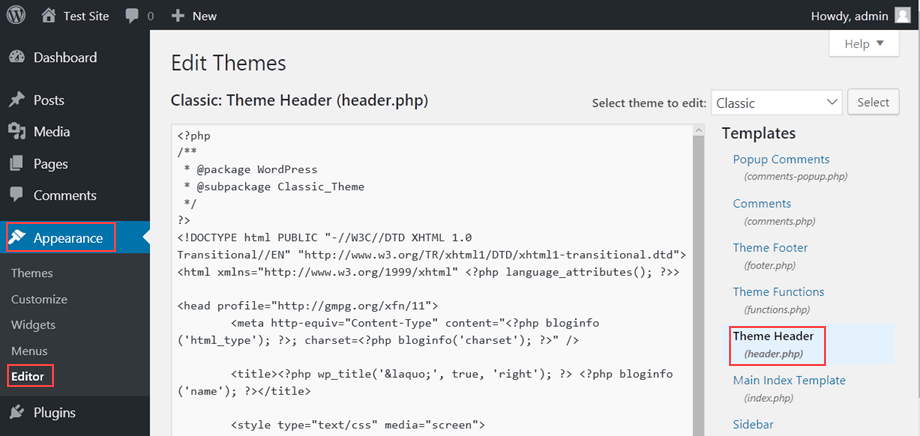
Every theme has a header.php file. This file manages the top part of your site. The footer.php file controls the bottom part. The sidebar.php file is for the side areas. These files make your site look good.
WordPress uses a template hierarchy. This structure decides which template is used. When visiting a page, WordPress checks the hierarchy. It starts with the most specific template.
If a specific template is missing, WordPress uses the next one. The hierarchy is smart. It makes sure your site displays correctly. Understanding this helps in creating themes.
Creating The Theme Folder
Start by making a new folder. This will hold your theme. Name it wisely. The name should be unique. Avoid spaces and special characters. Use lowercase letters. Good names help in identifying themes.
Naming is important. Use lowercase letters and dashes. Avoid using spaces or special characters. This helps in avoiding errors. Keep it simple and clear. Good names are easy to remember.
| File Name | Description |
|---|---|
| index.php | Main file for the theme |
| style.css | Defines the theme’s styles |
| functions.php | Adds extra features |
These files are crucial. Index.php is the main file. Style.css makes the theme look nice. Functions.php adds extra features. Start with these files. They form the base of your theme.
Building The Style Sheet
CSS makes websites look pretty. It styles the web pages. You use CSS to change colors, fonts, and layouts. Start with a basic CSS file. Name it style.css. This file will hold all your styles. Add it to your theme folder. Use simple CSS rules at first. For example, change the background color with body { background-color: blue; }.
Try changing font size with p { font-size: 16px; }. Practice makes perfect in CSS. Remember, CSS is all about styling. Keep your styles clean and simple. This helps your website look good.
Every WordPress theme needs a header in style.css. This tells WordPress about the theme. Use comments to add this information. Here is an example:
| Theme Name: | My Awesome Theme |
| Description: | A beautiful theme for blogs |
| Version: | 1.0.0 |
| Author: | Your Name |
Place this at the top of the style.css file. WordPress reads this and knows about your theme. This is very important. Without it, the theme might not work.
Developing The Theme Header
Crafting a WordPress theme in PHP starts with developing the theme header. This section sets the tone and style. It includes essential elements like metadata, links, and scripts, ensuring seamless integration and functionality.
Html Structure
The header of a WordPress theme is important. It is the top part of the page. It usually has a logo, a menu, and sometimes a search bar. Use or tags. This helps organize elements. Keep the HTML code clean and simple. Make sure each element has a clear role. This makes it easy to read. It also improves the layout. The header should look good on all devices.
Php Functions For Header
Use PHP functions to make the header dynamic. Add php wp_head(); ? to load scripts and styles. Use php bloginfo('name'); ? to display the site name. With php wp_nav_menu(); ?, add a menu. This makes it easy to change the menu in WordPress admin. The wp_head() function is crucial. It ensures the theme works well with plugins. Always test the header after making changes. This confirms everything functions correctly.
Creating The Footer
The footer is the bottom part of your page. It can show important details. You might want to include your contact information there. You can also add links to other pages. This helps users find what they need. A basic footer can be written with simple HTML.
PHP makes footers smart. With PHP, you can change what is shown. You can add the current year in the footer. This happens automatically. You do not need to update it every year. This saves time.
You can also show different messages for logged-in users. This is done using PHP code. Such as a welcome message. PHP helps make the footer unique for each visitor.
Designing The Main Template
The main template controls the look of your WordPress theme. Start with a simple design. Use HTML and CSS to style it. PHP helps make the template dynamic. Add a header and footer. These parts stay the same on each page. The main area will change. It shows different content. You can add sidebars too. They hold widgets or ads. Make sure your design is responsive. This means it looks good on phones and computers.
Looping Through Posts
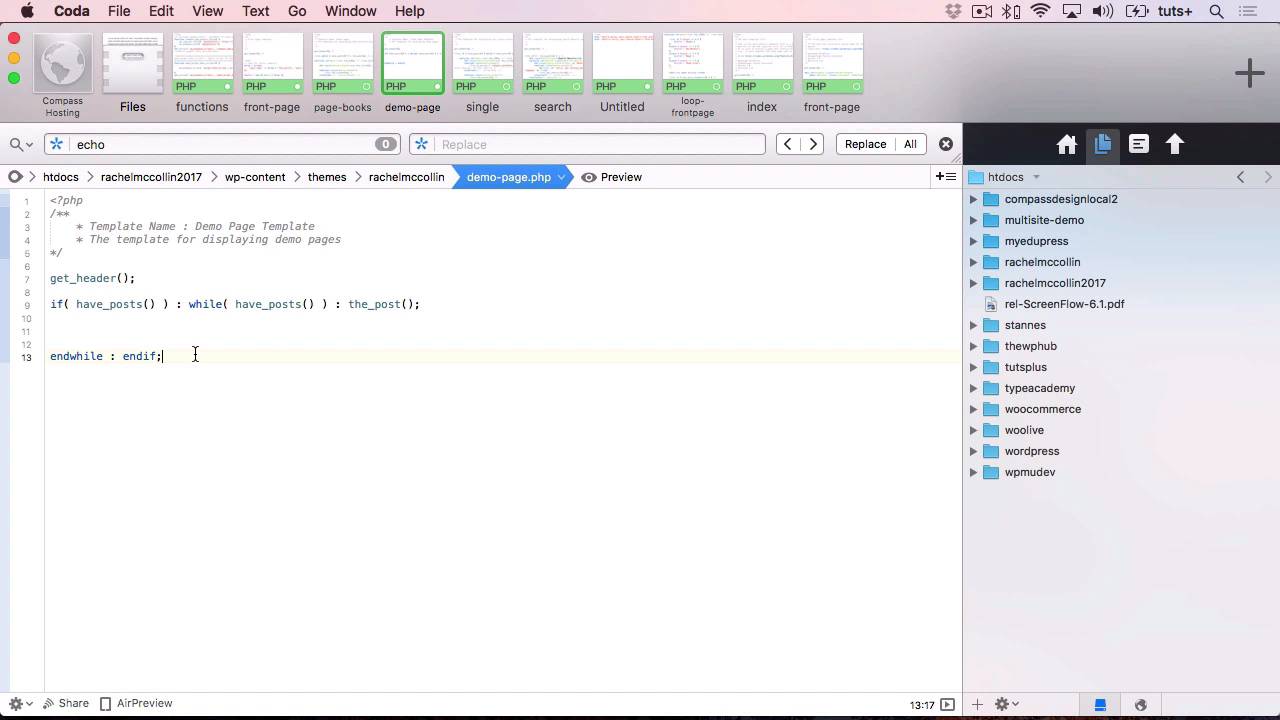
The loop is a PHP code. It fetches and shows your posts. Each post has a title and content. PHP helps you loop through them. This makes your blog dynamic. You can show posts in a list or grid. The loop helps display posts one by one. It repeats for each post. This is how WordPress shows many posts on one page.
Customizing Post Appearance
Change how each post looks. Use CSS to style titles and text. Add colors and fonts. PHP can help add special features. You can show a post’s author or date. This makes each post unique. Use images to make posts interesting. Customize the post layout. You might want different layouts for different posts. This makes your blog more fun to read.
Credit: webdesign.tutsplus.com
Incorporating Sidebar
Adding a sidebar in a WordPress theme using PHP enhances functionality and layout. It allows easy navigation and content display. By customizing sidebars, themes become more user-friendly and dynamic, improving the visitor experience.
Creating Widget Areas
To add a sidebar, use widget areas in your WordPress theme. Widgets are little boxes for extra content. Themes often have many widget areas. Use them to place things like a search bar or categories list.
In the functions.php file, define widget areas. Use the register_sidebar() function. This function helps you create space for widgets in your theme. Each widget area needs a name and ID. The ID must be unique for each area.
Next, update the sidebar.php file. This file displays the sidebar on your site. Use the dynamic_sidebar() function. This function shows the widgets you added. Place this code where you want the sidebar to appear.
Dynamic Sidebar Content
Sidebars can change based on the page. This makes your site more flexible. Use conditional tags in your sidebar code. Tags like is_home() or is_single() check the page type. They display widgets only on certain pages.
Also, add plugins for more widget choices. Some plugins add social media buttons. Others might add recent posts or comments. Always check plugin compatibility with your theme.
Adding Navigation Menus
Creating navigation menus in a WordPress theme using PHP is essential for user-friendly design. Define menu locations in your theme’s functions. php file, then utilize the wp_nav_menu() function in your template files to display menus seamlessly. This enhances site navigation and improves user experience.
Registering Menus
To create a menu, you need to register it first. Use the register_nav_menus() function. This function registers multiple menus. Each menu gets a unique key. This key helps you to identify the menu. Here’s a simple example:
function register_my_menus() {
    register_nav_menus(
        array(
            'header-menu' => __( 'Header Menu' ),
            'footer-menu' => __( 'Footer Menu' )
        )
    );
}
add_action( 'init', 'register_my_menus' );
Displaying Menus
Once registered, you can display the menus. Use the wp_nav_menu() function. Place this function in the theme files. Usually, it goes in header.php or footer.php. Here’s how you can display a menu:
wp_nav_menu( array(
    'theme_location' => 'header-menu'
) );
This code shows the menu in the header. It helps users to navigate. Remember to replace ‘header-menu’ with your own menu key.
Customizing Theme Features
Crafting a WordPress theme in PHP involves tailoring features to fit your unique needs. Begin by editing the functions. php file to add or modify theme functionalities. Experiment with custom templates and widgets for a personalized touch, enhancing user experience and site functionality.
Adding Support For Post Thumbnails
Post thumbnails make your blog look nice. They are the pictures that show with your posts. You can add support for them easily. Use the add_theme_support function. Write it in your theme’s functions.php file. Like this: add_theme_support('post-thumbnails');. This line tells WordPress to use post thumbnails. Now, you can add pictures to your posts. It’s simple and fun.
Implementing Custom Logo
A custom logo makes your site special. It is the picture at the top of your page. You can add it with code. Use add_theme_support for this too. Write: add_theme_support('custom-logo');. Place this code in functions.php. It tells WordPress to use your logo. Now go to the WordPress dashboard. Upload your logo from there. Your site now has its own face. It looks cool and unique.
Testing And Debugging
Creating a WordPress theme in PHP involves testing and debugging to ensure functionality and visual appeal. Spot errors early by examining code thoroughly. Use debugging tools to identify and fix issues swiftly, enhancing the theme’s performance and user experience.
Common Issues And Fixes
Themes sometimes don’t look right. CSS could be the problem. Check the paths. Make sure they are correct. Plugins might also cause issues. Deactivate them one by one. Find the culprit. Errors in functions.php are common. Check for missing semicolons. Typos can cause headaches. Debug mode helps a lot. Turn it on in wp-config.php. Look for error messages. They guide you to the problem.
Validation And Performance Checks
Use tools to check your theme. W3C Validator checks HTML. It finds errors. PageSpeed Insights helps with speed. Faster sites are better. Use caching plugins. They improve performance. Minify CSS and JavaScript. This makes the site load faster. Test your theme on different browsers. Each browser might show it differently. Fix any issues you find. This ensures a good user experience.
Credit: www.hostpapa.com
Packaging And Distributing
First, check your theme code for any errors. It should be clean. Make sure it follows WordPress standards. Create a readme.txt file. This file tells users about your theme. Include installation instructions and features.
Visit the WordPress Theme Review page. Here, you can submit your theme. Create a WordPress.org account if you do not have one. Follow the steps to upload your theme. Your theme will be reviewed by WordPress team. After approval, it will be available for everyone. Users can now download and use your theme.
Frequently Asked Questions
How To Start Creating A WordPress Theme?
Begin by setting up a local development environment using tools like XAMPP or MAMP. Next, create a new folder in the WordPress themes directory. Add essential files such as `style. css`, `index. php`, and `functions. php`. Use HTML, CSS, and PHP to design your layout and functionalities.
What Files Are Needed For A WordPress Theme?
A WordPress theme requires a minimum of two files: `style. css` and `index. php`. `style. css` defines the theme’s style, while `index. php` serves as the main template file. Additional files like `functions. php` and `header. php` can enhance theme features and structure.
Can I Use Php For WordPress Themes?
Yes, PHP is the primary language for WordPress theme development. It handles dynamic content, interacts with the WordPress database, and processes user inputs. PHP allows you to create custom functionalities and templates, making your theme unique and adaptable to different needs.
How To Customize WordPress Theme Functions?
Customize theme functions by editing the `functions. php` file in your theme directory. Add PHP code snippets to modify functionalities, register menus, or enqueue scripts. Ensure any changes align with WordPress coding standards to maintain compatibility and performance.
Conclusion
Creating a WordPress theme with PHP opens doors to customization. You can tailor your site to fit your needs. Start small, experiment, and learn. PHP makes it possible to create unique designs. Practice makes perfect, so keep tweaking your code.
Remember, patience is key in theme development. Seek online tutorials if stuck. Engage with the community for tips. Share your creations and gather feedback. Enjoy the journey of building themes. Your website can truly reflect your vision. Keep exploring new possibilities in WordPress.


