
Are you looking to give your website a fresh new look but don’t know where to start? Changing the header in the Divi theme on WordPress might just be the perfect solution.
The header is one of the first things your visitors see, and a well-designed one can set the tone for your entire site. Whether you want to add a personal touch or simply update your branding, altering your header can make a significant impact.
Imagine having complete control over this crucial element, allowing you to reflect your brand’s personality and captivate your audience right from the start. In this guide, you’ll discover simple steps that will help you transform your header with ease. Unlock the potential of your website and keep your visitors engaged from the very first glance. Ready to dive in and make your header stand out? Let’s get started!
Accessing The Divi Theme Options
First, open your WordPress dashboard. Look for the Divi option on the left menu. Click it. This takes you to the Divi Theme Options page. Here, you can make changes to your site’s header. Ensure you have the right permissions to make changes.
Find the Builder tab. Click it. Now, look for the Advanced section. This is where you can change header settings. You can adjust the logo, menu, and other header elements. Remember to save changes. This ensures your new settings are applied.
Credit: diviextended.com
Customizing The Header Using Divi Builder
To start, make sure the Divi Builder is enabled. This tool allows you to change your website’s look. Navigate to the Divi theme options. Enable the builder if it’s not active. Your site needs a fresh look? Divi Builder can help. It offers many design choices.
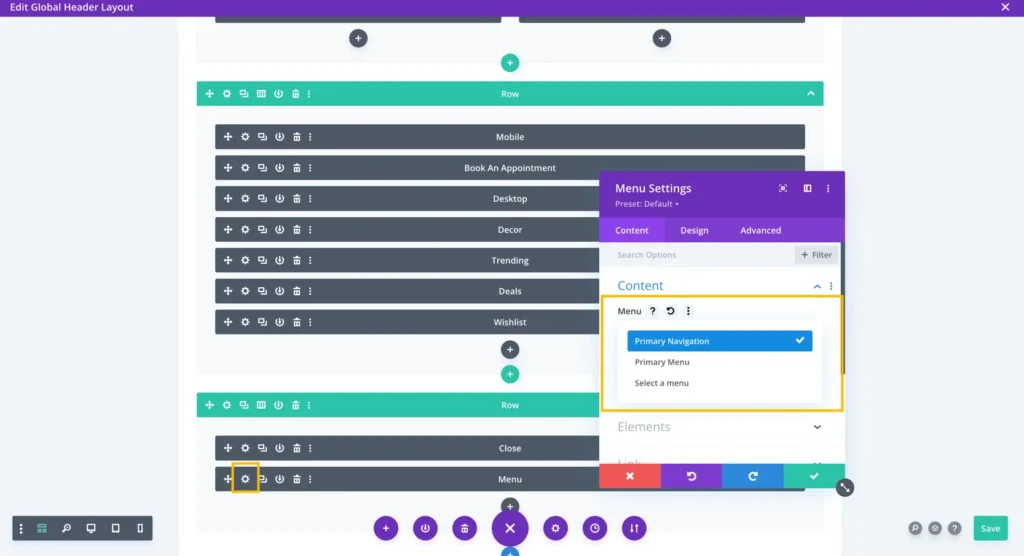
Begin by creating a new header layout. Choose the header section in Divi Builder. Add rows and modules to your layout. Want a logo? Add a logo module. Need a menu? Add a menu module. Adjust size and colors to fit your style. Save your work when done. Your new header will now appear on your site.
Using Pre-made Header Layouts
Start by opening the Divi Theme Builder. Find the “Add New Template” button. Click it. Now, choose the Header section. Look for the “Add Global Header” option. Click on “Add From Library”. This will show pre-made layouts. Pick one you like. It’s easy to import. Click “Use This Layout”. Wait for it to load. The new header is now ready.
Open the Visual Builder. Find the header section. You can change texts and colors. Click on any part to edit. Use the settings to adjust. Make the header fit your style. Save changes by clicking the green check. Check your site to see the changes. Now, you have a header that fits your needs.
Adding Custom Css For Advanced Styling
Custom CSS transforms WordPress Divi headers with unique styles. Change font size, color, and layout effortlessly. Elevate your site’s visual appeal by tailoring header aesthetics to match your brand vision.
Locating The Custom Css Section
Open your WordPress dashboard. Click on Appearance and then Customize. Look for the Additional CSS section. This is where you can add your custom styles. It’s a simple way to change your site’s look. You don’t need advanced coding skills. Just paste your CSS here. Save your changes when done. Preview your site to see the effects.
Inserting Custom Css Codes
Copy your desired CSS code. Make sure it is correct. Paste it into the Additional CSS box. Check for errors in your code. Use the preview button to see changes. If it looks good, click publish. This makes the changes live on your site. You can always edit or remove codes later. Keep experimenting with styles. Make your site unique!
Incorporating Widgets And Plugins
Widgets help customize the header. Choose widgets that fit your design. Some widgets show social media icons. Others show search bars or menus. Test each widget. Make sure it improves the header. Consider the layout and colors. Keep the design simple and clean. Use widgets wisely for better function.
Plugins change the header style. Select header plugins that are easy to use. Some plugins offer drag-and-drop features. Others offer custom coding options. Explore plugins in the WordPress store. Read reviews for plugin quality. Install the best plugin for your needs. Activate the plugin to see changes. Keep plugins updated for safety.
Credit: www.elegantthemes.com
Ensuring Mobile Responsiveness
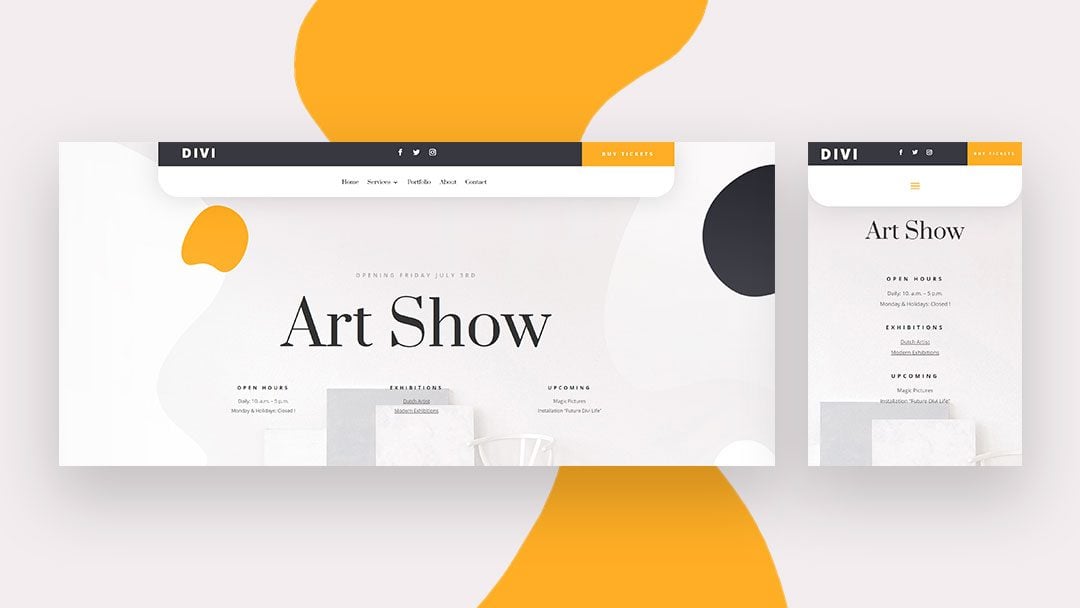
Check how the header looks on different devices. Use a tablet, phone, and desktop. Each device shows your site in a new way. Make sure the header is clear. Words should not be cut off.
Test it on both small and big screens. This helps catch any mistakes. You want everyone to see a good header.
Go to the Divi theme settings. Find the mobile options. Here, you can change the header size. Make the text smaller if needed. Change the image size too.
Use the preview to see changes. Ensure it looks good and neat. A clear header helps users find what they need.
Saving And Publishing Your Changes
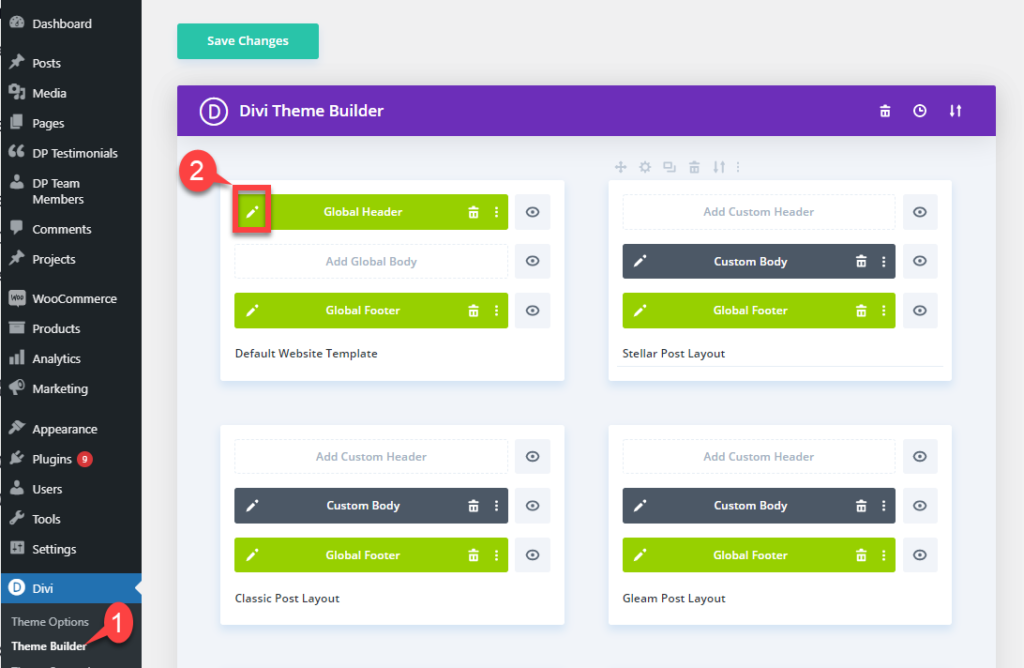
Easily change the header in the WordPress Divi Theme by accessing the Theme Builder. Customize your design, then click ‘Save’ to apply changes. Publish to make your new header live.
Previewing The New Header
Always preview your new header before saving. This helps you see how it looks. Click the preview button on the top right. Check if everything is in place. Make sure the colors and fonts are correct. Ensure the layout is neat. If you see any issues, go back and fix them.
Publishing The Final Design
After previewing, it’s time to publish. Click the save button. This makes sure your changes are live. Users will see the new header now. Double-check the website again. Ensure all changes are visible. It’s important to be sure everything looks good. If satisfied, your work is done!
Credit: diviextended.com
Frequently Asked Questions
How To Customize Divi Theme Header?
To customize the Divi theme header, navigate to the Theme Builder in the Divi settings. Use the builder to add modules, change colors, and adjust layout. Save changes to update the header instantly on your WordPress site.
Can I Change Divi Header Logo?
Yes, you can change the logo in Divi. Go to Divi settings and select “Theme Options. ” Upload a new logo under the “Logo” section. Save changes to replace the header logo with your new design.
How Do I Edit Header Menu In Divi?
Edit the header menu by visiting the “Menus” section under “Appearance” in WordPress. Add, remove, or rearrange menu items as needed. Save your changes to update the header menu on your Divi theme.
Is Divi Theme Header Mobile-friendly?
Yes, Divi theme headers are mobile-friendly. They automatically adjust to fit various screen sizes. You can also customize mobile settings in the Theme Builder for better mobile optimization.
Conclusion
Changing the header in Divi is simple with practice. You gain control over your website’s look. A custom header reflects your style. It enhances user experience and makes navigation easy. Follow the steps outlined to make adjustments. Remember to save changes regularly.
Experiment with design elements to find what fits best. With Divi’s flexibility, your creativity shines. You can update the header anytime to keep it fresh. This guide helps you personalize your site easily. Explore more Divi features to improve your website further.
Happy designing!


