
Struggling with a cluttered or outdated footer on your WordPress Storefront theme? You’re not alone.
A well-designed footer isn’t just the finishing touch on your website; it’s a powerful tool for navigation and branding. Imagine transforming that often-overlooked space into a dynamic hub of information, engaging visitors and guiding them exactly where you want them to go.
In this guide, you’ll learn simple, step-by-step instructions to update and customize your Storefront theme’s footer. Whether you’re looking to add social media links, update copyright information, or enhance your site’s overall aesthetic, we’ve got you covered. Dive in and discover how easy it can be to take control of your website’s design and functionality, making every inch of your site work for you. Don’t let your footer be an afterthought; optimize it for success!

Credit: www.businessbloomer.com
Accessing The WordPress Dashboard
First, open your web browser. Go to your WordPress login page. Enter your username and password. Click the login button. Now, you are inside your WordPress dashboard.
Look at the left sidebar. Find the Appearance menu. Click on it. A dropdown will open. In the dropdown, find Customize. Click on it. Now, you can see many options.
Understanding The Storefront Theme
Storefront is a popular theme for WordPress. It is designed for online stores. It works well with WooCommerce. Many people use it for their shops. Storefront has a simple design. It is easy to customize. Users can change colors and fonts. They can add their logo too.
Features Of Storefront
Storefront has many useful features. It is responsive. This means it looks good on phones and tablets. It also supports many plugins. Users can add features to their store. Storefront is SEO-friendly. It helps stores rank higher in search results. Users can make their shop unique. This helps attract more customers.
Importance Of Footer Customization
Customizing the footer is important. It helps brand your store. You can add your shop’s contact information. Add links to social media. It can also include important pages. These are like privacy policy and terms of service. A good footer makes your site look professional. It can make your shop stand out.
Editing Footer Widgets
Change the footer on your WordPress Storefront theme easily by editing the footer widgets. Navigate to the Widgets section in your WordPress dashboard and select the Footer area. Customize the content by dragging and dropping widgets to suit your website’s style.
Locating Footer Widgets
Find the footer widgets by going to your dashboard. Click on Appearance and then Widgets. Here, you will see a list of available widgets. The footer section will usually be at the bottom. Drag and drop widgets to this area. This is where you can make changes. The process is simple and easy to follow.
Customizing Widget Content
To change the content, click on the widget. A new window will open. You can add text, images, or links. Make sure to save changes after editing. The customization options are user-friendly. You can update the footer design to match your site. Play around with different settings. See what looks best for your website.
Customizing Footer Text
The Theme Customizer in WordPress is very useful. It helps you change the footer text easily. First, go to your WordPress dashboard. Find the “Appearance” option and click “Customize”. This opens the Theme Customizer. Look for the “Footer” option. Click on it. You can see different options for your footer. Here, you can type your new footer text. Make sure it’s simple and clear. After editing, click “Publish” to save changes.
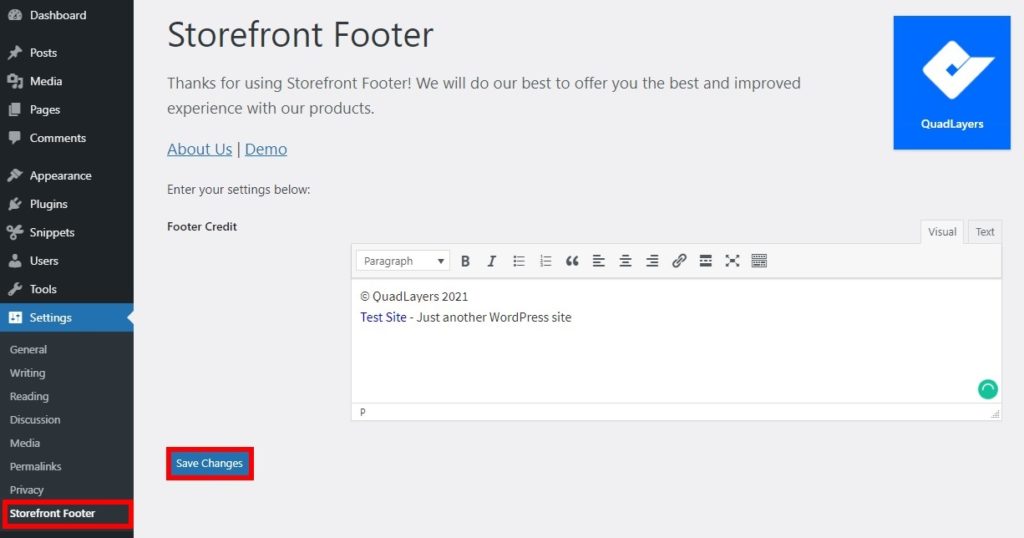
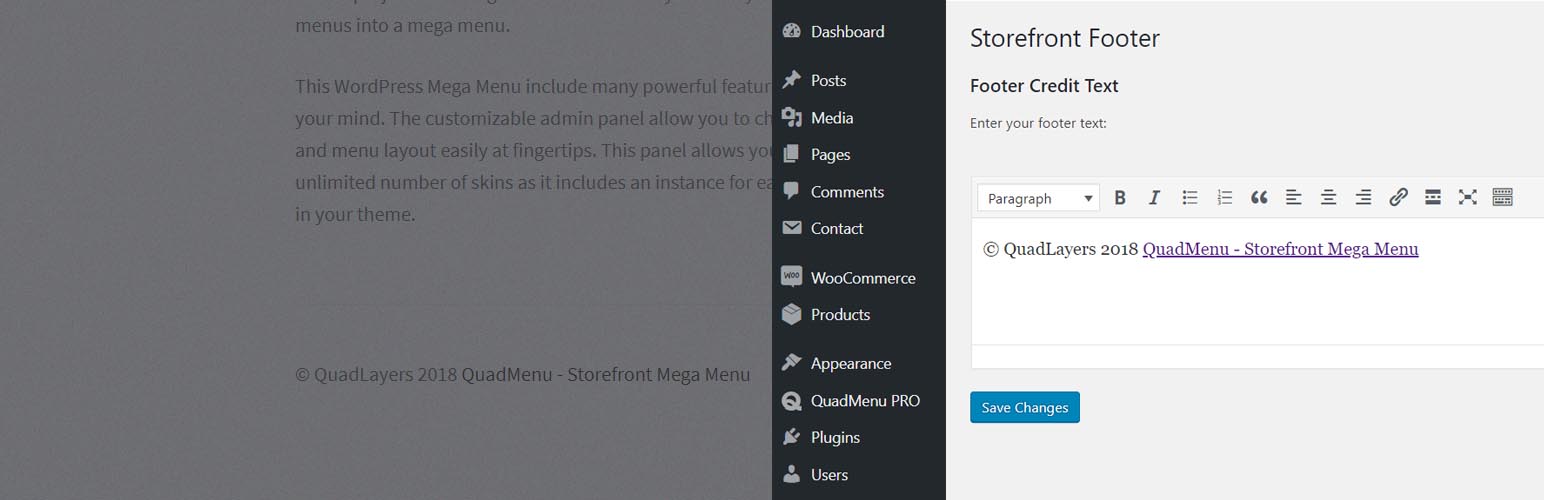
The footer credit is the small text at the bottom. Often, it shows “Proudly powered by WordPress”. To change it, a simple plugin helps. Install a plugin like “Remove Footer Credit”. Activate it. Next, go to “Tools” in your dashboard. Click on “Remove Footer Credit”. Type the text you want to remove. Add your new text. Click “Save”. Your footer credit now looks different.
Adding Custom Css For Footer
Customize the footer in WordPress Storefront by adding custom CSS. Easily change colors, fonts, and layout. Improve your site’s look and feel with simple code tweaks.
Accessing Additional Css
Start by opening your WordPress dashboard. Go to the Appearance section. Click on Customize. Look for the Additional CSS option. This is where you add your custom styles. It is easy to find. Just look on the left side menu.
Implementing Custom Styles
Here, you can write your CSS code. Add styles for your footer. Make your footer unique. You can change colors, fonts, and sizes. Ensure you save changes after adding your code. Preview to see the changes. If it looks good, you are done. If not, tweak the code until satisfied. Remember, small changes make a big difference.
Credit: quadlayers.com
Installing Footer Plugins
Enhance your WordPress Storefront theme by installing footer plugins to customize and update the footer area. These plugins allow easy changes, offering options to add widgets, menus, and custom text, creating a unique and functional footer. Explore various plugins to match your design needs effortlessly.
Recommended Plugins For Footer Customization
Plugins can make your footer look better. Some plugins are easy to use. Elementor lets you design your footer. WPForms helps you add forms to your footer. Footer Mega Grid Columns is good for making columns. Try Insert Headers and Footers for simple changes.
How To Install And Activate Plugins
First, go to your WordPress dashboard. Click on Plugins. Choose Add New. Search for the plugin name. Click Install Now. Wait for the installation to finish. After that, click Activate. Your plugin is now ready to use.
Testing And Saving Changes
Before saving, preview the footer changes. This helps to see how it looks. Use the Preview Changes button. It shows the new footer on your site. Check if everything appears as expected. Fix any errors or layout issues. This step ensures a smooth update.
Previewing The Footer
The preview lets you see the footer live. It’s a chance to catch mistakes. You can view the design and content. Make sure colors and fonts match. Adjust anything that seems off. This helps to avoid surprises after publishing.
Publishing Changes Safely
Once satisfied, save the changes. Use the Save or Publish button. This updates the footer for all visitors. Confirm everything looks right. Test the site on different devices. Ensure the footer works everywhere. It’s important to keep the site looking good.
Credit: wordpress.org
Troubleshooting Common Issues
Changing the footer on a WordPress Storefront theme is easy with a few steps. Access the WordPress dashboard, navigate to Appearance, then Customize. Find the Footer section to make edits and save changes.
Resolving Widget Conflicts
Widgets can sometimes clash. This happens when two widgets fight for the same space. Remove one of the conflicting widgets. Check which widget is needed. Deactivate the unnecessary widget. Refresh the page to see changes. Check for updates to your widgets. Updates can fix conflicts. Always keep your widgets updated. Clear your browser cache. A fresh start might solve issues.
Fixing Css Errors
CSS errors can break your site. Inspect the footer with browser tools. Look for red error messages. Correct any mistakes in CSS code. Save changes after fixing errors. Preview your website again. Ensure the footer looks right. Check if custom CSS is causing problems. Remove custom code if needed. Test changes on different browsers. Ensure all browsers display the footer correctly.
Frequently Asked Questions
How Do I Customize The Storefront Footer?
To customize the Storefront footer, go to Appearance > Widgets. Add or edit widgets in the Footer Widget Areas. You can also use custom CSS for styling. This allows you to tailor the footer to better match your website’s branding and design preferences.
Can I Add Social Media Links To The Footer?
Yes, you can add social media links to the footer. Use the Social Media Icons widget in the footer area. This widget allows you to easily add and customize social media links, enhancing your website’s connectivity and engagement.
How To Remove ‘powered By WordPress’ From Footer?
You can remove ‘Powered by WordPress’ by editing the footer. php file. Locate the relevant code and delete it. Ensure you back up the file before making changes to avoid potential errors. This helps in creating a cleaner and more professional footer.
How Do I Change Footer Color In Storefront?
Change the footer color by navigating to Appearance > Customize > Colors. Select Footer Background Color and choose your preferred color. This simple adjustment can significantly enhance your website’s aesthetic appeal and align it with your brand’s color scheme.
Conclusion
Changing the footer in WordPress Storefront theme is simple. Follow these steps to personalize your site. Start by accessing the WordPress dashboard. Navigate to Appearance and select Customize. Choose Footer and make your desired changes. You can update text, links, or design.
Preview your changes before saving. These steps help improve your site’s look. A well-designed footer enhances user experience. It also boosts your site’s professionalism. Keep experimenting to find what works best. With practice, you’ll become comfortable with customization. Engage visitors with a unique footer.
Your WordPress site deserves to shine.


