
Creating a WordPress theme in Dreamweaver might seem like a challenging task, but it’s simpler than you think. Imagine having the power to craft a unique look and feel for your website, tailored exactly to your vision.
With Dreamweaver, you can do just that without getting lost in complex codes. Are you tired of generic templates that don’t quite capture your brand’s essence? Or perhaps you’re seeking a more hands-on approach to web design that aligns perfectly with your style?
By following a few straightforward steps, you can design a WordPress theme that is uniquely yours. This guide will show you how to use Dreamweaver’s intuitive interface to bring your creative ideas to life. Ready to dive in and make your website stand out? Let’s explore how you can turn your design dreams into reality with Dreamweaver and WordPress.
Choosing The Right Tools
Dreamweaver is a powerful tool. It helps you make websites. You can design and code in one place. With Dreamweaver, you see changes live. This makes work easy and fun. It supports many languages like HTML and CSS. These are important for websites.
Using Dreamweaver, you can drag and drop elements. This saves time. You don’t have to write all the code. The tool also checks errors for you. This helps in making less mistakes. Dreamweaver has many templates. These can be a good start for new users.
WordPress is a popular website builder. Many people use it. It is free and open source. You can create a blog or a business site. WordPress has many themes and plugins. These make your site look good and work well. Themes change how your site looks. Plugins add extra features.
WordPress is easy to use. You do not need to be a tech expert. It has a simple dashboard. From there, you can add posts and pages. You can also change settings. WordPress is a great choice for beginners.

Credit: www.youtube.com
Setting Up Your Environment
Begin by setting up WordPress on your computer. Use software like XAMPP or MAMP. These tools create a server on your machine. Download WordPress from its official site. Unzip the files into the server’s folder. Open the browser and type localhost. Follow the steps to install WordPress. Use a simple database name. This process is quick and easy.
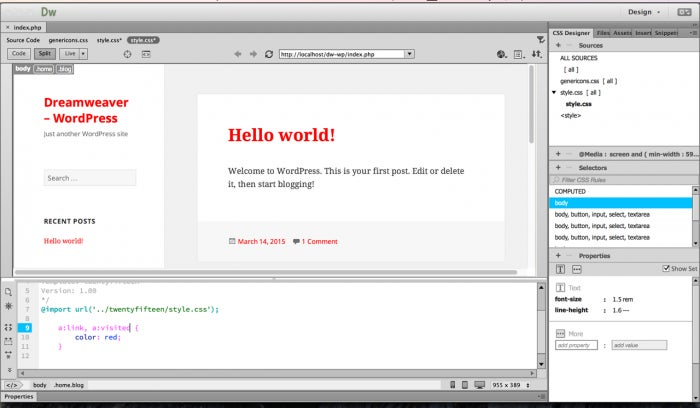
Open Dreamweaver and start a new site. Set the local root folder to WordPress. This helps Dreamweaver find your files. Adjust the settings for PHP. Dreamweaver works well with WordPress themes. Use the split view to see code and design. This makes editing easier. Save your changes often. Dreamweaver helps build beautiful themes.
Designing The Theme Layout
Start by drawing a simple layout. Use pen and paper or design tools. This is your theme’s blueprint. Make sure the main parts are clear. Header, footer, sidebar, and content area. Each part should have a place. This helps to see the whole picture. Adjust as needed before coding.
Choose colors that match your theme’s purpose. Use a color wheel to find matching colors. Keep it simple. Too many colors can confuse users. Stick to two or three main colors. Use these colors throughout your design. This makes your theme look consistent.
Pick fonts that are easy to read. Sans-serif fonts are great for screens. Use one or two fonts only. Too many fonts can look messy. Make headings bold to stand out. Keep paragraph text regular. This makes reading smooth and pleasant.
Developing The Theme Structure
Start by creating a simple header. Add your site’s name and logo. The navigation menu should be clear. Use simple words for menu items. The footer can include contact details and links. Keep it neat. Both header and footer should look similar on all pages.
The main content area holds the most important info. Use a clean layout. Text should be easy to read. Add images to make it lively. Make sure the text and images fit well. This helps users to read and understand better.
The sidebar is for extra info. Add links to other pages. Include a small search bar. This helps users find what they need fast. You can also add a list of recent posts. Keep the sidebar tidy. Too much info can be confusing.
Implementing WordPress Templates
Creating a WordPress theme in Dreamweaver begins with designing a layout. Customize elements using HTML, CSS, and PHP. Test the theme frequently to ensure functionality and design accuracy.
Understanding Template Hierarchy
WordPress uses a template hierarchy to decide which template file to use. This hierarchy is like a map. It starts from specific and goes to general. For example, WordPress looks for a single post template first. If it can’t find it, it uses the index template. Knowing this helps you choose which template to edit.
Customizing The Index And Blog Pages
The index page is the main page. It shows all your blog posts. You can make it look different. Change colors, fonts, or layout. The blog page is similar. It shows posts with a summary. Make sure it looks neat. People read more if the page is tidy.
Developing Single And Page Templates
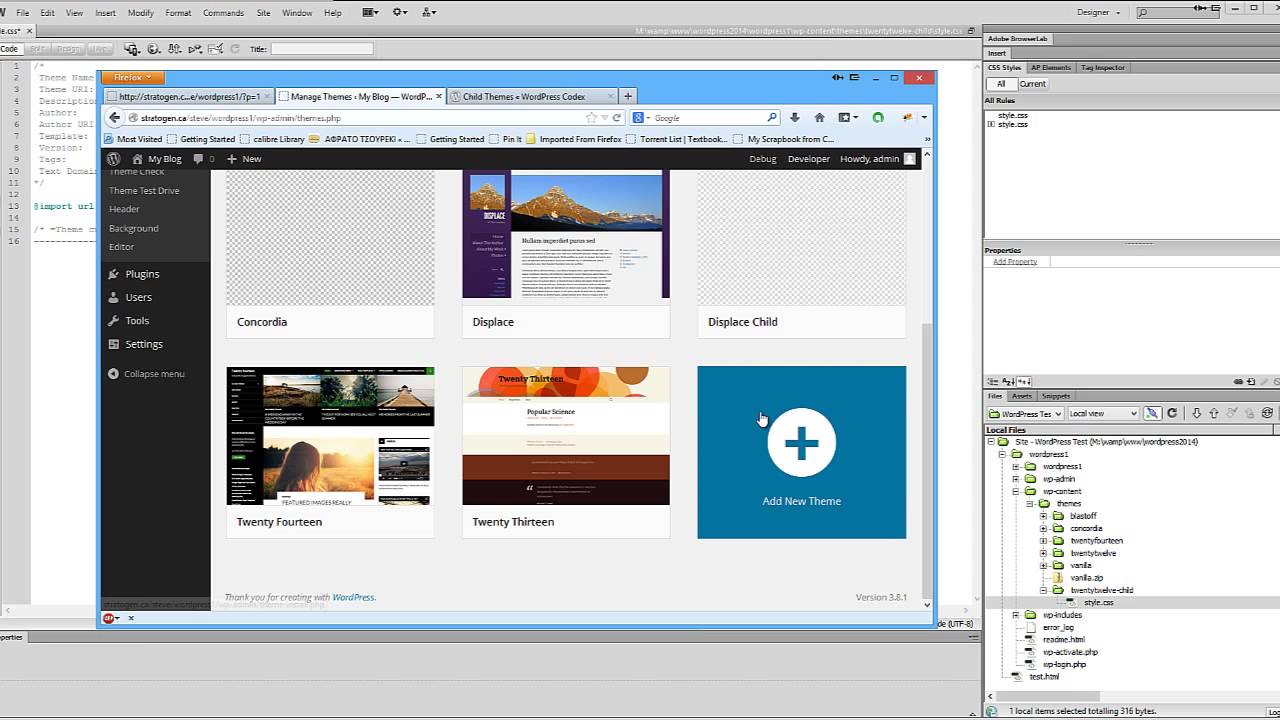
Single templates are for individual posts. They show one post at a time. You can add special features here. Like comments or related posts. Page templates are for static pages. Pages like “About” or “Contact.” Customize them to look unique. Add images or text boxes. Make each page special.
Credit: www.youtube.com
Styling With Css
Responsive styles help your website look good on all devices. Use media queries to change styles on different screen sizes. For example, make text smaller on phones. Use percentages instead of fixed pixels for widths. This helps elements adjust on different screens. Flexbox and Grid are tools that make layouts flexible. Always check how your design looks on mobile and tablet screens.
CSS frameworks like Bootstrap can speed up design. They have ready-made styles and layouts. This saves time and effort. Use their grid system for neat layouts. Frameworks come with components like buttons and forms. Customize these to fit your theme. Make sure to only use what you need. Too much can slow down your site.
Different browsers can show styles in different ways. Test your theme on Chrome, Firefox, and Safari. Fix issues that appear in some browsers. Use tools like BrowserStack to see how your site looks. Always check on desktop and mobile views. This ensures a consistent experience for all users.
Adding Functionality With Php
Creating a WordPress theme in Dreamweaver can be enhanced with PHP. PHP adds dynamic functionality, allowing customization and interaction within your theme. By integrating PHP, you can create responsive and engaging themes tailored to user needs.
Integrating WordPress Functions
Using WordPress functions makes your theme dynamic. These functions help in pulling data from the database. For example, the_title() displays the post title. the_content() shows the main content of a post. To add these functions, edit the PHP files in your theme. Make sure you use the correct template tags. This ensures everything works smoothly. It’s important to test the theme after adding functions.
Creating Custom Widgets
Custom widgets add unique features to your theme. Widgets can be added through the functions.php file. Use the register_sidebar() function to create a widget area. Define the widget’s name and ID. This helps in placing the widget in the right spot. Once created, users can drag and drop widgets in the admin panel. This makes the theme flexible and user-friendly.
Building Custom Menus
Custom menus enhance the navigation of a site. Add menus using the register_nav_menus() function. Define locations like header or footer. This helps users find content easily. Use the wp_nav_menu() function to display the menu. Add this function in the theme’s header or footer file. Custom menus make the website look professional and organized.
Testing And Debugging
Utilizing WordPress Debugging Tools helps find mistakes in themes. Turn on WP_DEBUG in WordPress. It shows errors and warnings. Use debugging plugins for deeper checks. Plugins like Query Monitor can be helpful. They show database queries and PHP errors.
Addressing Common Errors is important for a smooth theme. Syntax errors can break the site. Fix them with code editors. Missing files lead to broken links. Check file paths in the theme. Compatibility issues with plugins can occur. Test with different plugins to ensure everything works.
Optimizing Theme Performance makes the site fast. Use minified CSS and JavaScript. They reduce load time. Image optimization is key. Smaller images load faster. Enable caching for quicker access. Caching stores data temporarily. It boosts speed.
Finalizing And Launching
Crafting a WordPress theme in Dreamweaver involves finalizing design elements and launching them effectively. Ensure all functionalities work smoothly before going live. Testing thoroughly helps catch errors early, ensuring a seamless user experience.
Exporting The Theme
Save your work. Click on the File menu. Choose Export. Ensure all files are included. Don’t forget the images and stylesheets. These are important. Save them in a folder. Name the folder clearly. Something like “MyTheme”. This helps you find it later. Organize it well.
Uploading To WordPress
Open your WordPress dashboard. Go to the Appearance section. Click on Themes. Find the Upload Theme button. Choose your exported folder. Make sure it’s a zip file. Upload it. Wait for the upload to finish. It may take a few minutes. Be patient.
Activating And Testing
After uploading, find your theme. Click Activate. Visit your site. Check how it looks. Click on different pages. Make sure everything works. Look for errors. Fix any problems. Test on different devices. Phones and tablets too. It’s important for everyone to see it well.
Credit: blog.adobe.com
Frequently Asked Questions
How Do I Start A WordPress Theme In Dreamweaver?
To start a WordPress theme in Dreamweaver, first install WordPress locally. Open Dreamweaver, create a new site, and link to your WordPress directory. Use Dreamweaver’s code view to create PHP files like header. php, index. php, and style. css. Customize these files to design your theme.
Can Dreamweaver Manage WordPress Files?
Yes, Dreamweaver can manage WordPress files effectively. It supports PHP, HTML, CSS, and JavaScript editing. You can view and edit theme files using its code view. Dreamweaver’s site management tools help organize and synchronize WordPress files, making theme development more efficient and streamlined.
Is Dreamweaver Good For WordPress Development?
Dreamweaver is good for WordPress development, especially for beginners. It offers a visual interface and supports code editing. It provides features like live view, code hinting, and FTP integration. These features make it easier to design and develop WordPress themes efficiently.
Do I Need Coding Skills For Dreamweaver Themes?
Yes, basic coding skills are needed for Dreamweaver themes. Understanding HTML, CSS, and PHP is crucial. These skills help customize WordPress themes effectively. Dreamweaver’s interface aids in learning and applying these languages, making theme development more approachable for beginners.
Conclusion
Creating a WordPress theme with Dreamweaver is straightforward. Start with planning your design. Next, build your theme using HTML, CSS, and PHP. Dreamweaver simplifies coding with its intuitive interface. Preview your work frequently to ensure quality. Customize fonts, colors, and layouts to match your vision.
Always test your theme on different devices for responsiveness. Check for compatibility with various browsers. Make adjustments as needed. Once satisfied, upload your theme to WordPress. Enjoy your personalized website. Experiment with different styles to find what works best. Share your creation with the world.
Celebrate your achievement in web design.


