
Are you tired of your WordPress theme not quite matching your vision? Changing the column structure could be the solution you’ve been searching for.
Whether you’re looking to create a more balanced layout or simply want your content to stand out, mastering this skill can transform your website. Imagine the satisfaction of seeing your site perfectly organized, with every section in its rightful place.
In this guide, you’ll learn how to easily adjust the theme column structure, making your WordPress site not only look better but also work better for your visitors. Get ready to elevate your website’s design and user experience in just a few simple steps. Keep reading to discover how you can make these changes effortlessly.
Choosing The Right Theme
Picking the right theme for your WordPress site is important. Check if the theme supports your website’s goals. Look at the theme’s design. Does it fit your site’s purpose? Some themes are for blogs. Others are for shops. Make sure the theme works with all your plugins. Some themes might not support some plugins. Check the theme’s update history. A good theme gets updates often.
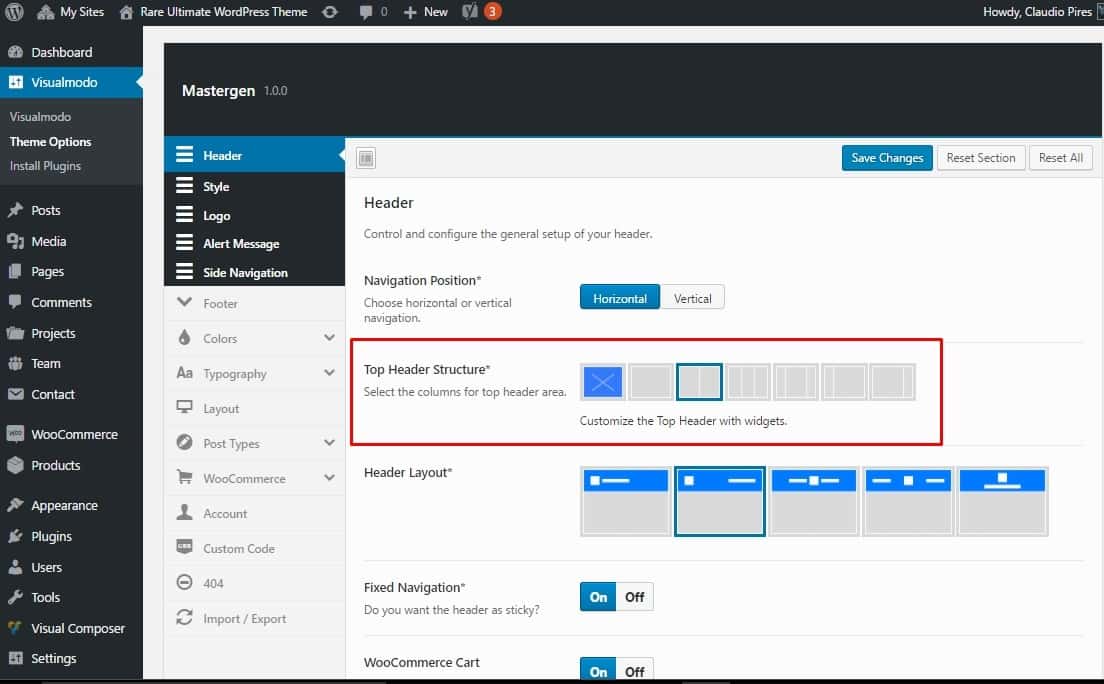
Themes come with many features. Some have custom layouts. Others offer different color schemes. Check if the theme has a responsive design. This means it looks good on phones and tablets. See if you can change the header and footer. Some themes let you add widgets. Others allow custom menus. Pick a theme that matches your needs. Always choose a theme that is easy to use.
Credit: wcanvas.com
Accessing Theme Editor
Access the WordPress Theme Editor to change theme column structure easily. Navigate to Appearance, then Editor in your dashboard. Adjust the column layout to suit your design needs efficiently.
Navigating To The Editor
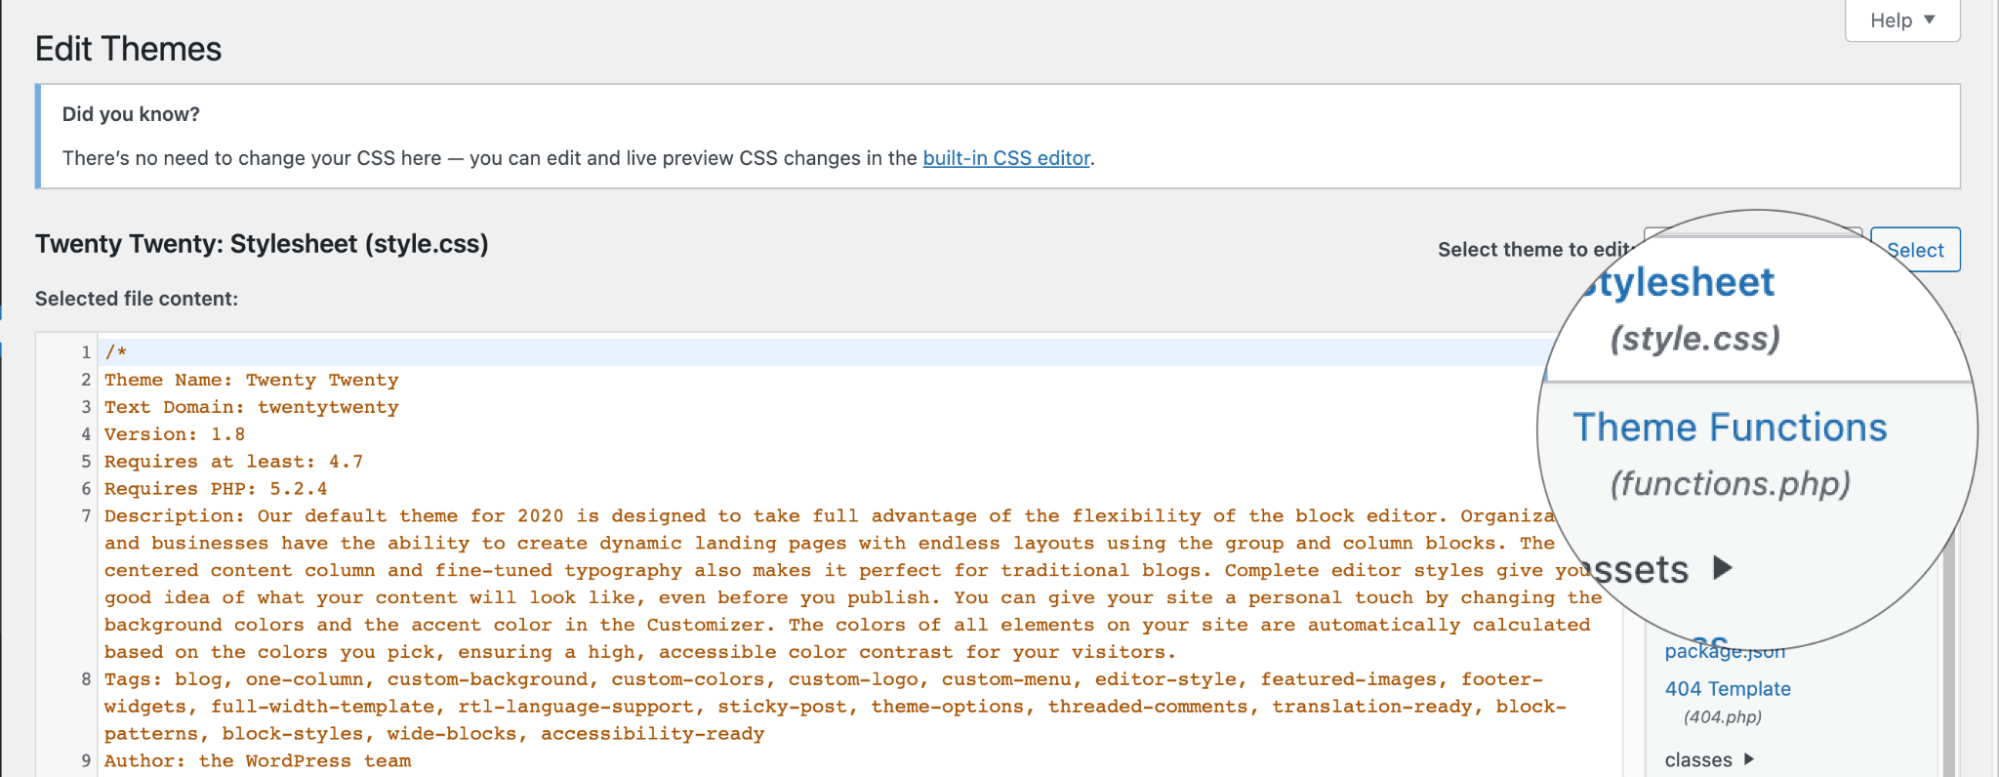
First, log into your WordPress dashboard. Find the Appearance tab on the left. Click on it. You will see Theme Editor. Choose it. This takes you to the editor page. Here, you can change theme files. Make sure you know what you want to change. Find the right file. It can be style.css or functions.php. Edit carefully. Mistakes can break your site.
Backup Before Making Changes
Always make a backup before editing. This saves your work. Use a plugin or download files. Backups keep your site safe. If something goes wrong, you can restore. Losing data is bad. Keep your site secure. Backups are easy. They give peace of mind. Better safe than sorry.
Modifying Column Structure
Find the column code in the theme files. It is usually in the style.css or functions.php file. Use the editor in WordPress to open these files. Search for terms like column or layout. This will help you find the right code.
Column width changes the look. Use percentages or pixels for width. This is done by editing CSS. For example, width: 50% makes a column half the page. Save your changes to see the new look.
Layouts decide how columns appear. You can make columns side-by-side or stacked. Use CSS properties like float or flexbox. These help to arrange columns in many ways. Try different settings to get the best look. Always preview before saving.
Using Page Builders
Page builders are tools for creating websites. They help you design pages easily. Most have drag-and-drop features. This means you can move elements with your mouse. No coding needed. Kids can use it too!
Many page builders are popular. Elementor is one of them. Another is Divi. There’s also Beaver Builder. These tools are user-friendly. People love them for their ease of use.
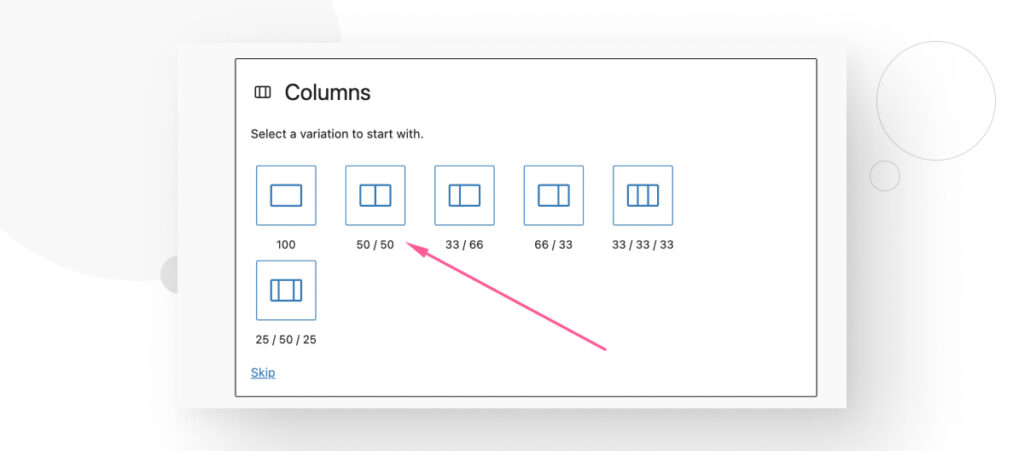
Changing columns is simple with page builders. First, select your layout. Choose how many columns you want. Next, drag elements into each column. Adjust their sizes as needed. Save your work. Your page now looks different!
Custom Css For Columns
Custom CSS helps change the column structure in WordPress. It is easy to write CSS for columns. You can define width, padding, and color. This makes your theme look unique.
Writing Custom Css
Start with a plan. Think about how you want your columns to look. Write CSS code to match your plan. Use simple rules. For example, use width to set column size. Add padding for space inside columns. Use background-color for different colors.
Adding Css To Theme
Add CSS to your theme using the WordPress customizer. Go to Appearance, then Customize. Find the Additional CSS section. Paste your CSS code there. Save changes to apply the new style.
Testing Css Changes
Check your website after adding CSS. Look at different pages. Make sure columns look right. Use different devices to check responsiveness. Adjust CSS if needed. This ensures everything looks good everywhere.
Credit: www.a2hosting.com
Utilizing Child Themes
A child theme is like a copy of your main theme. You make it to save your changes. This way, updates to the main theme will not erase your edits. To create one, make a new folder in the themes directory. Give it a special name. Add a style.css file. Inside, write some basic information. Link it to the main theme with a template tag.
Always test changes in your child theme. Use a local server or a staging site. This ensures everything works well before going live. Backup your site often. It helps if something goes wrong. If you need to change code, do it in the child theme. This keeps the main theme safe.
Testing And Troubleshooting
Change your WordPress theme’s column structure effortlessly. Navigate to the theme editor. Adjust settings for desired layout. Test changes and troubleshoot issues for a polished look.
Previewing Changes
Before saving, always preview your changes. This ensures everything looks good. The preview button is often at the top. Click it to see your changes. Check if the columns align properly. Look for any text overlap or missing elements. Adjust as needed. This saves time and avoids surprises later.
Common Issues And Fixes
Sometimes, changes don’t show up. This could be due to browser cache. Clear your cache and refresh the page. Another issue is plugin conflicts. Deactivate plugins one by one to find the problem. Some themes have custom settings. Check the theme’s documentation for guidance. If problems persist, consider seeking help from a developer.
Credit: visualmodo.com
Frequently Asked Questions
How To Change Column Layout In WordPress Theme?
To change column layout, access the theme’s settings or customizer. Look for layout options under “Appearance. ” Adjust the column structure as needed. Some themes offer drag-and-drop builders for easy customization. Always preview changes before saving to ensure the desired look.
Can I Customize Columns Without Coding Skills?
Yes, many WordPress themes come with intuitive builders that require no coding. These visual editors allow you to drag and drop elements. Look for themes with a built-in page builder for ease. Check theme documentation for instructions on column customization.
What Plugins Help With Column Customization?
Plugins like Elementor and WPBakery Page Builder offer advanced column customization features. These plugins provide visual editing tools and pre-designed templates. Install and activate the plugin, then use it to adjust column settings. Always ensure plugin compatibility with your theme.
Do All Themes Support Column Changes?
Not all themes support customizable columns. While many modern themes offer flexible layouts, some have fixed designs. Always check theme documentation or settings before purchasing. Opt for themes labeled as “responsive” or “customizable” for more layout options.
Conclusion
Changing the theme column structure in WordPress is straightforward. Start by selecting the right theme. Use the WordPress customizer to adjust columns. Themes often offer flexible layouts. Experiment with different options. Preview changes before saving them. This ensures your site looks great.
A well-structured theme improves user experience. It also enhances readability and navigation. Keep your site’s design clean and organized. This attracts more visitors. Remember, a user-friendly website keeps readers engaged. Happy customizing!


