
Are you tired of seeing the same fonts on your WordPress site? Do you wish your website could stand out with a unique style?
You’re not alone. Many WordPress users feel the need to add a personal touch to their site’s appearance. The good news is that customizing your font family can make a huge difference in how your site looks and feels. Imagine capturing your audience’s attention with elegant typography that perfectly aligns with your brand’s personality.
In just a few simple steps, you can transform your WordPress theme and leave a lasting impression on every visitor. This guide will show you exactly how to add a font family to your WordPress theme, ensuring your site not only looks amazing but also reflects your unique style. Ready to make your website unforgettable? Let’s dive in!
Choosing The Right Font
Fonts come in different types. Some are fancy, some are simple. Fancy fonts can be hard to read. Simple fonts are usually better for websites. Serif fonts have little lines at the ends of letters. Sans-serif fonts do not have these lines. They are cleaner and modern. Script fonts look like handwriting. These are often used for special occasions.
Some fonts are safe for all web browsers. They are called web-safe fonts. Examples include Arial, Times New Roman, and Courier New. These fonts look the same on all computers. Using web-safe fonts ensures your website looks good everywhere. It’s smart to choose from these fonts for your WordPress theme. It helps your text stay readable for everyone.
Using Google Fonts
Adding a font family in a WordPress theme enhances your site’s look. First, choose a Google Font. Then, integrate it into your theme’s style. css file using the @import rule or link it in the header. php file. This simple step customizes your website’s typography effectively.
Accessing Google Fonts Library
Google Fonts is a big library of free fonts. You can find many styles there. To start, go to Google Fonts. Choose a font you like. Click the “+” button to select it. A box will appear at the bottom. Click it to open. You will see a code snippet. Copy this code.
Embedding Google Fonts In Theme
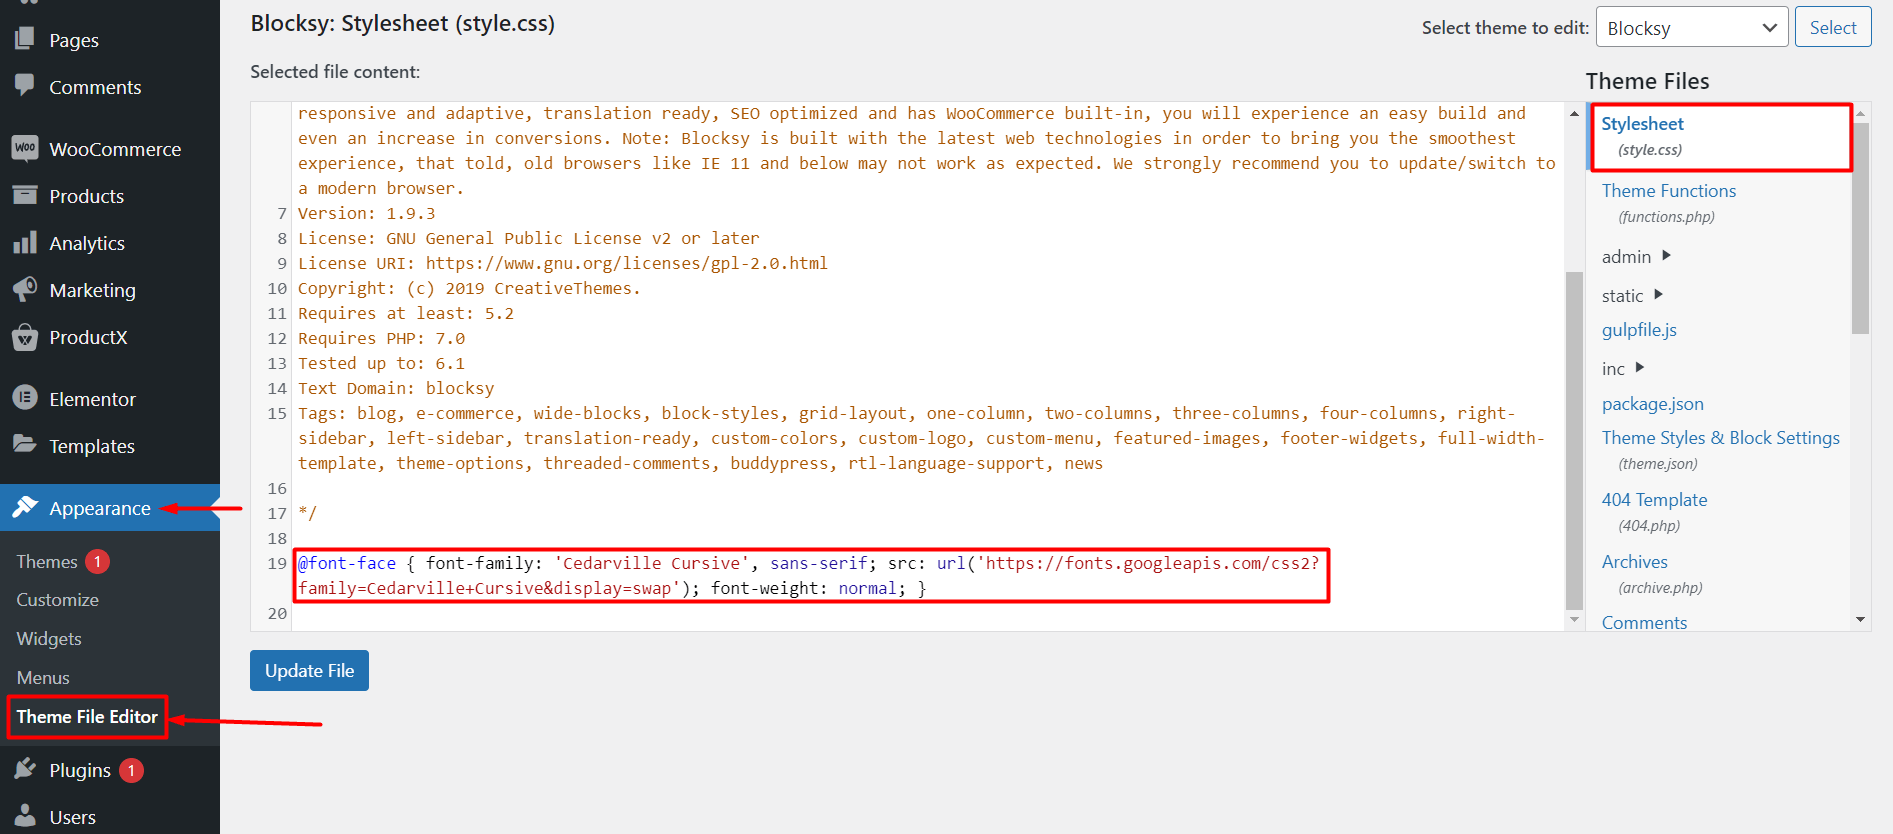
Now, add the font to your WordPress theme. Go to the WordPress dashboard. Click on Appearance and then Theme Editor. Find the style.css file. Paste the code you copied at the top. This links the font to your site. Next, use the font in your CSS. Write font-family: 'Font Name', sans-serif; where needed.
Adding Custom Fonts
To use a new font, first get the font files. Download these files from a trusted site. Common formats include .ttf, .otf, and .woff. Go to your WordPress dashboard. Find the Media section. Click on Add New. Upload your font files here. Make sure the files are safe. This keeps your site secure.
Open your WordPress dashboard. Navigate to Appearance and click on Editor. Find the style.css file. Add the following code:
@font-face {
    font-family: 'YourFontName';
    src: url('path-to-font-file');
}
Replace ‘YourFontName’ with your font’s name. Change ‘path-to-font-file’ to the file’s URL. Use the new font in your CSS like this:
body {
    font-family: 'YourFontName', sans-serif;
}
Save your changes. Now your site uses the new font. Refresh the page to see changes.
Modifying Theme Styles
Start by finding the theme stylesheet. It’s usually called style.css. Look in the theme folder for this file. You can access it through the WordPress dashboard. Go to Appearance > Theme Editor. Then, find the stylesheet on the right sidebar. Make sure you have a backup copy. This helps if you make a mistake.
Add the font-family property to your CSS. Choose a font you like. Use a safe font like Arial or Times. Type font-family: 'Your Font Choice'; in the stylesheet. Place it inside the body tag. This makes sure the whole page changes. Save your changes. Then, refresh your website to see the new font.
Using WordPress Plugins
Add a new font family to your WordPress theme with plugins effortlessly. Customize your website’s typography by installing a font plugin. Enhance your site’s design with a few simple clicks, improving readability and style.
Recommended Font Plugins
Choosing the right font plugin is crucial. Easy Google Fonts is popular. It lets you add Google Fonts easily. Another option is Font Awesome. It offers icons and fonts. WP Google Fonts is also useful. It provides multiple font options. These plugins are user-friendly. They help change fonts without coding.
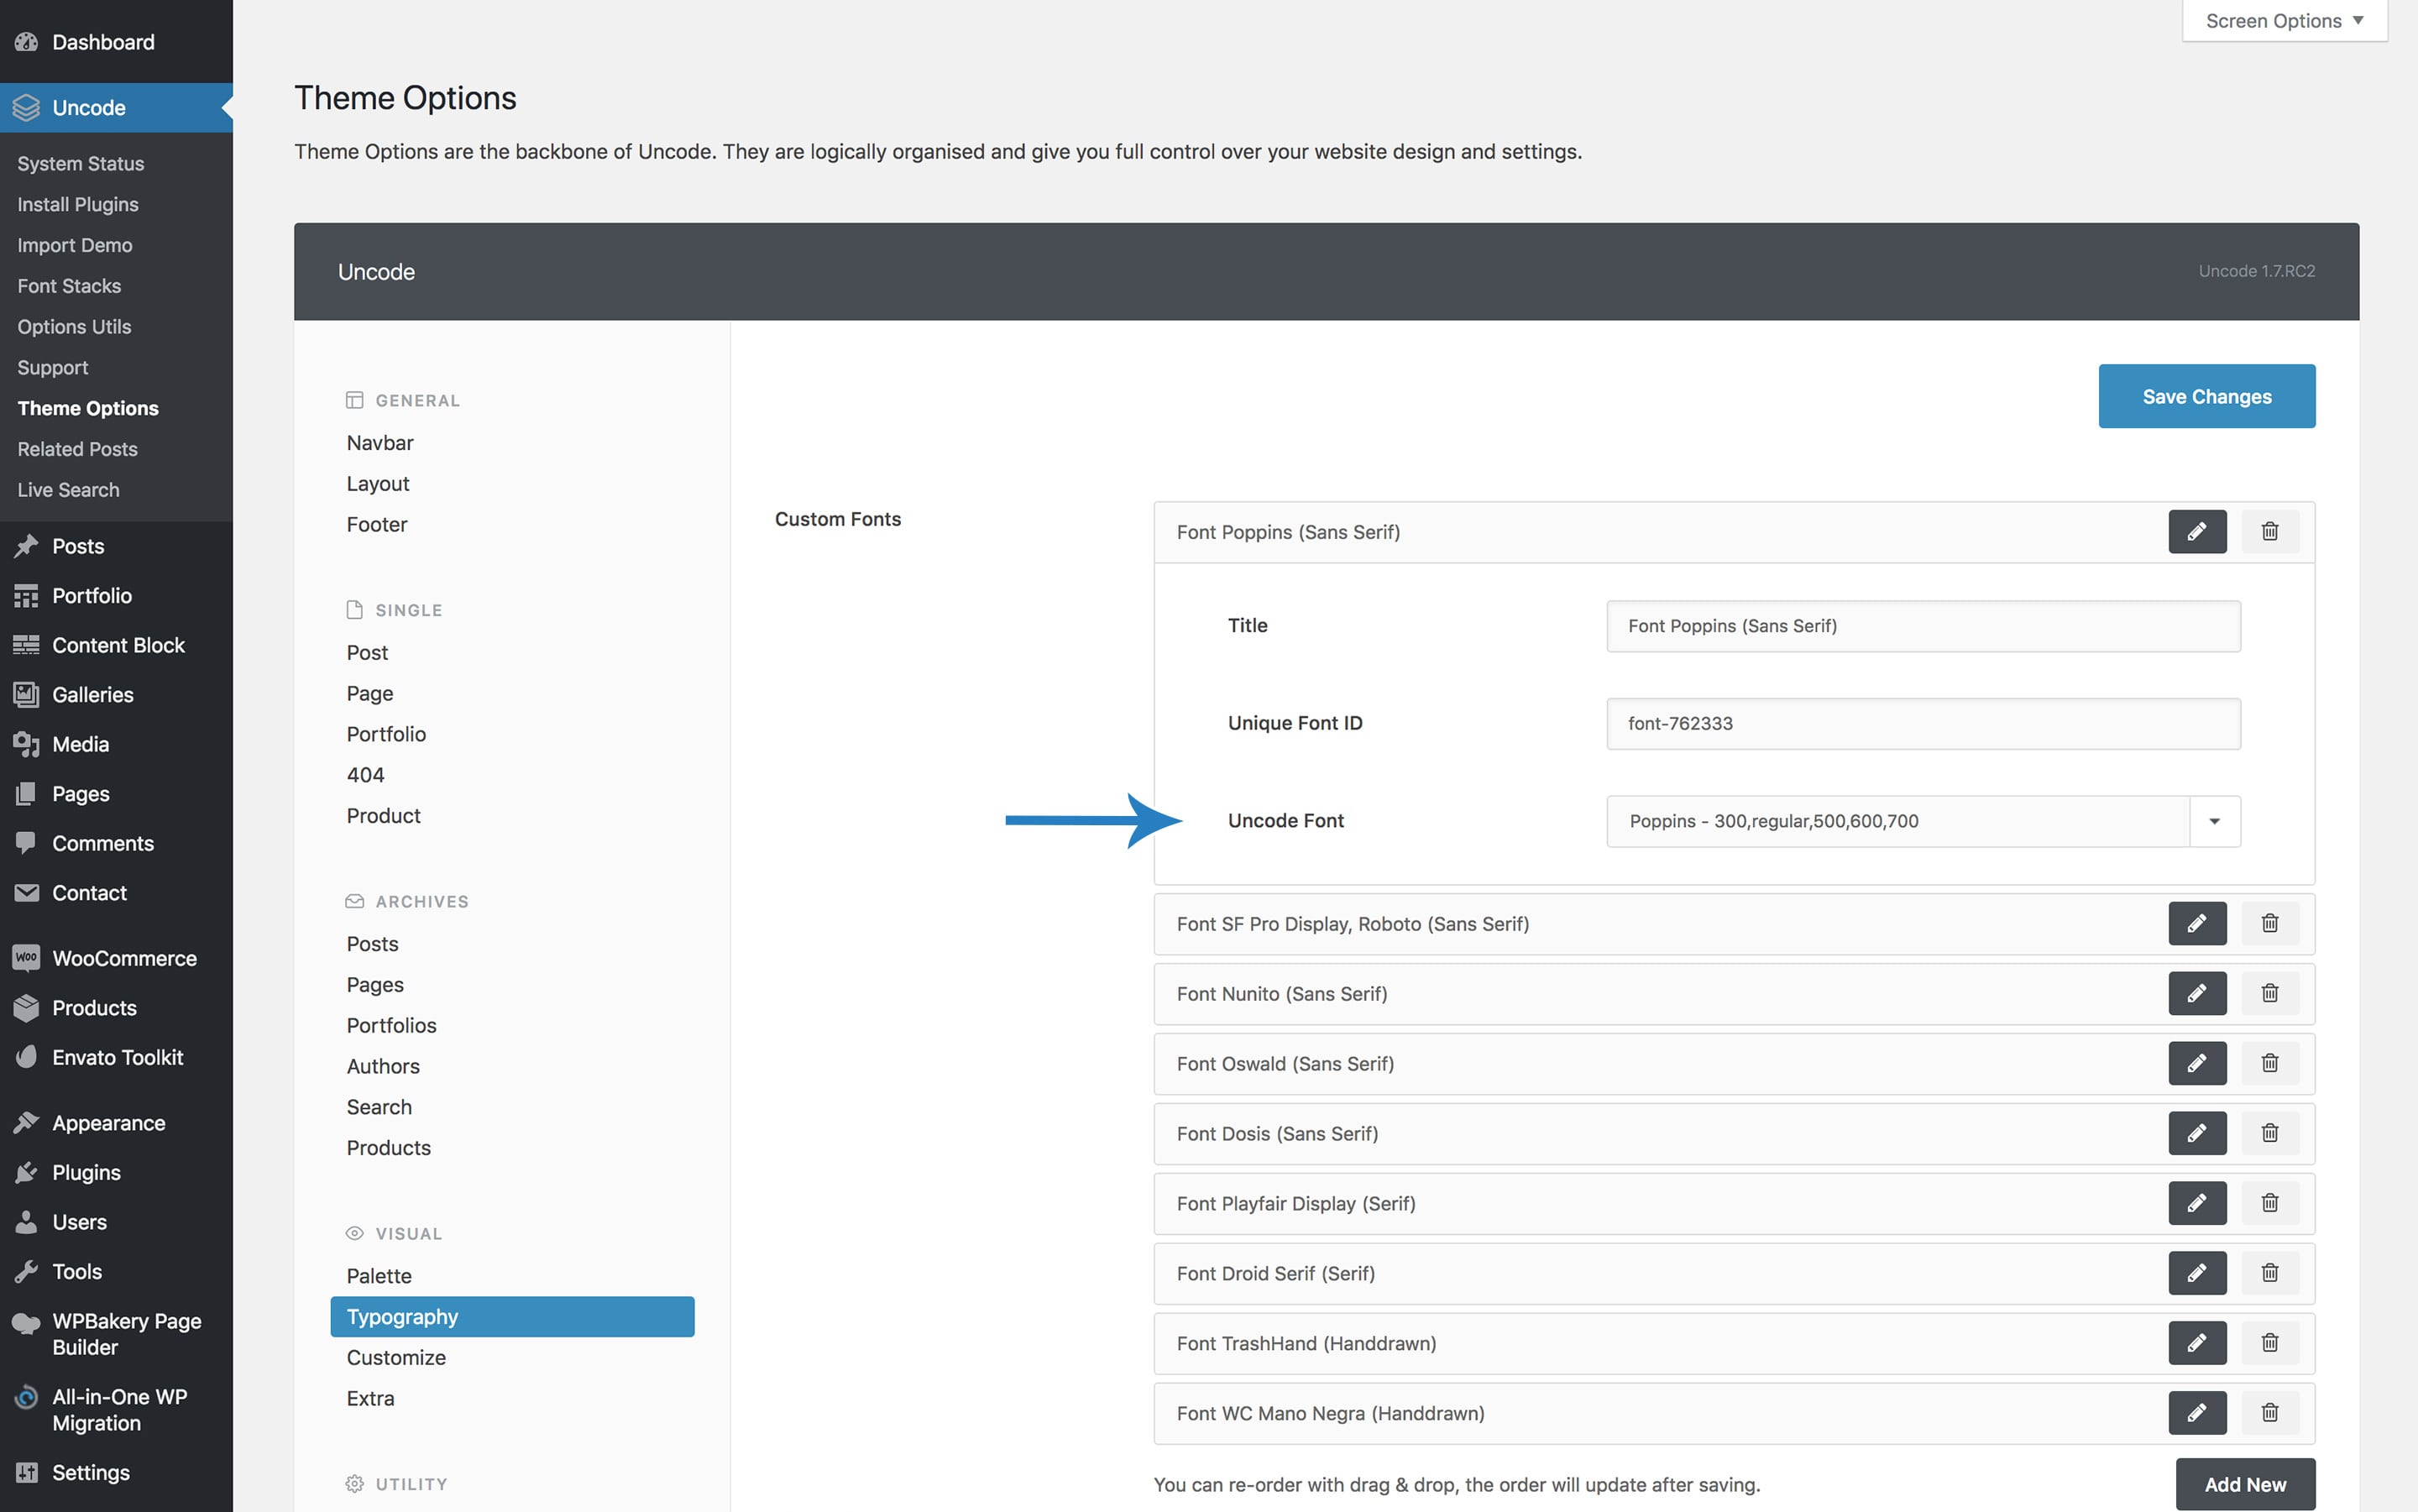
Configuring Plugin Settings
Open the plugin settings. Look for the font options. Select the desired font family. Choose font size and style. Save changes to apply them. Some plugins offer live previews. This helps see changes instantly. Adjust settings as needed. Ensure readability on all devices. Experiment with different fonts. Find what suits your theme best.
Credit: support.undsgn.com
Testing Font Integration
Checking Font Display is important after adding a new font. Open your website and look at different pages. Is the text clear? Is it easy to read? Check headings, paragraphs, and lists. Make sure the font looks good everywhere. Sometimes, a font might look different in a paragraph than in a heading. Keep an eye on such differences. They can affect how your site looks.
Ensuring Cross-Browser Compatibility is also crucial. A font can appear differently in various browsers. Open your site in Chrome, Firefox, and Safari. Does the font look the same in each one? Some fonts may not display correctly in older browsers. This can confuse your visitors. Always test in the most popular browsers to ensure everyone can read your content easily.
Maintaining Font Performance
Fonts can slow your site. Optimizing font loading helps. Use web-safe fonts. They load faster. Choose fonts wisely. Avoid too many fonts. Less is more. CSS rules can help. Use them to load fonts better.
Font subsets are smart. They save space. Only load needed characters. Use subsets for different languages. They help with faster loading. Save bandwidth. Better performance. Easy to set up in CSS. Choose subsets carefully.
Credit: www.wpxpo.com

Credit: www.elmastudio.de
Frequently Asked Questions
How Can I Change Font Family In WordPress?
To change the font family in WordPress, access your theme’s stylesheet via the WordPress Dashboard. Navigate to Appearance > Theme Editor, then modify the CSS code to specify the desired font family. Alternatively, use a customizer plugin like Elementor to easily adjust fonts without coding.
Which Plugin Helps With Font Customization?
Plugins like Easy Google Fonts or Elementor are ideal for font customization in WordPress. They allow you to effortlessly change font family, size, and color directly from the WordPress dashboard, enhancing your site’s typography without requiring CSS knowledge or editing theme files.
Can I Use Google Fonts In WordPress?
Yes, Google Fonts can be used in WordPress. Integrate them by adding the font link to your theme’s header file or using a plugin like Easy Google Fonts. This offers a wide range of typefaces to improve your site’s aesthetic and readability.
Do I Need Coding Skills To Change Fonts?
No, coding skills are not necessary to change fonts in WordPress. Utilize font customization plugins like Elementor or Easy Google Fonts to modify fonts easily. These tools provide a user-friendly interface for selecting and applying different font styles.
Conclusion
Adding a font family to your WordPress theme enhances your site’s look. Fonts express your brand’s style and personality. Customization options in WordPress make this process simple. Your site stands out with unique typography. Prioritize readability and aesthetics in your choices.
Test different fonts to see which fits best. Ensure your font matches your site’s theme. Keep your audience in mind. Easy-to-read fonts engage visitors. Consistent font usage builds a professional image. Remember, it’s not just about choosing a font. It’s about creating a cohesive visual experience.
Your theme’s fonts reflect your site’s identity. Happy designing!


