
Are you looking to add a splash of color to your WordPress site? Changing the category color in your WordPress Skin Theme is a simple yet effective way to make your content pop and capture your audience’s attention.
Imagine your readers navigating your site, instantly drawn to beautifully color-coded categories that make it easy to find what they’re looking for. Not only does this enhance the visual appeal of your site, but it also improves user experience by guiding your visitors seamlessly through your content.
We’ll guide you through the straightforward steps to customize category colors, ensuring that your site stands out in a crowded digital space. Ready to transform your website’s look and feel? Let’s dive in!
Credit: www.elegantthemes.com
Choosing The Right Color Scheme
Colors can change how we feel. Red is often seen as bold and exciting. Blue feels calm and safe. Choosing the right color for your WordPress theme is important. It helps visitors understand your site. A good choice can make people stay longer.
Your brand is your story. Colors should match this story. They should feel like you. If your brand is fun, use bright colors. For a serious brand, choose soft colors. Always pick colors that fit your brand’s voice.
Accessing WordPress Dashboard
Open your web browser. Type your website’s URL. Add “/wp-admin” at the end. Press enter. A login screen appears. Enter your username. Type your password. Click on the “Login” button. You will see the dashboard.
Find the menu on the left side. Look for “Appearance”. Click on it. A dropdown menu will open. Choose “Customize”. It takes you to the theme settings. Here, you can change colors. You can make your site look nice. Explore and see what you can do.
Editing Theme Files
First, log into your WordPress dashboard. Find the Appearance option on the left side. Click on it. Then, select the Theme Editor from the menu. This is where you can edit files directly. Remember, changes here affect your site.
In the theme editor, look for the style.css file. This file controls the look of your site. Use the search box to find category colors. Change the color codes you see. Save changes before leaving. This updates your category colors. Be careful not to delete anything important.
Utilizing Custom Css
Custom CSS offers a simple way to change category colors in your WordPress skin theme. Adjusting styles through CSS code helps create a unique look. Enhance your site’s appearance by customizing these elements easily.
Adding Custom Css Codes
Start by accessing the WordPress dashboard. Navigate to Appearance, then click on Customize. This opens the theme customizer. Look for the Additional CSS section. Here, you can add your own CSS codes. To change a category’s color, you’ll need to know the category’s class name. You can find this using the browser inspector tool. Once you have it, add the code like this: .category-class-name { color: #desiredcolor; }.
Testing Changes
After adding your CSS code, you should preview the changes. Click on the Preview button in the customizer. Check if the category color is correct. Sometimes, you might need to clear your browser cache to see the changes. If the color is not right, double-check your code. Ensure there are no typos.
Using WordPress Plugins
Many WordPress plugins help with color changes. Colorlib is a great choice. It is easy to use. Theme Customizer is another option. It offers many features. WordPress Color Palette is simple and effective. It is helpful for beginners.
First, go to your WordPress dashboard. Find the Plugins tab on the left side. Click on “Add New” to search for plugins. Type the plugin name in the search box. Click “Install Now” to install the plugin. Wait a few seconds. Once installed, click “Activate”. Now, the plugin is ready to use.
Implementing Changes Via Theme Customizer
Change category colors in a WordPress skin theme easily using the Theme Customizer. Navigate to Appearance, select Customize, and find the category color settings. Adjust the colors to match your desired aesthetic. Save changes to see the new look instantly.
Exploring Theme Customizer Options
The Theme Customizer in WordPress is very easy to use. Start by finding the “Appearance” menu. Then, click on “Customize”. This opens the Theme Customizer. Here, you can see many options. One important option is “Colors”. Look for it in the menu. This is where you can change colors.
Applying Category Color Changes
To change a category color, first click on “Colors”. Then find “Category Colors” or a similar option. Select the category you want to change. Pick a new color from the color picker. Make sure it looks good. Once happy, click “Save”. Now, your category has a new color. It will show on your site. Remember, this is easy and fun. Try different colors until it’s perfect.
Troubleshooting Common Issues
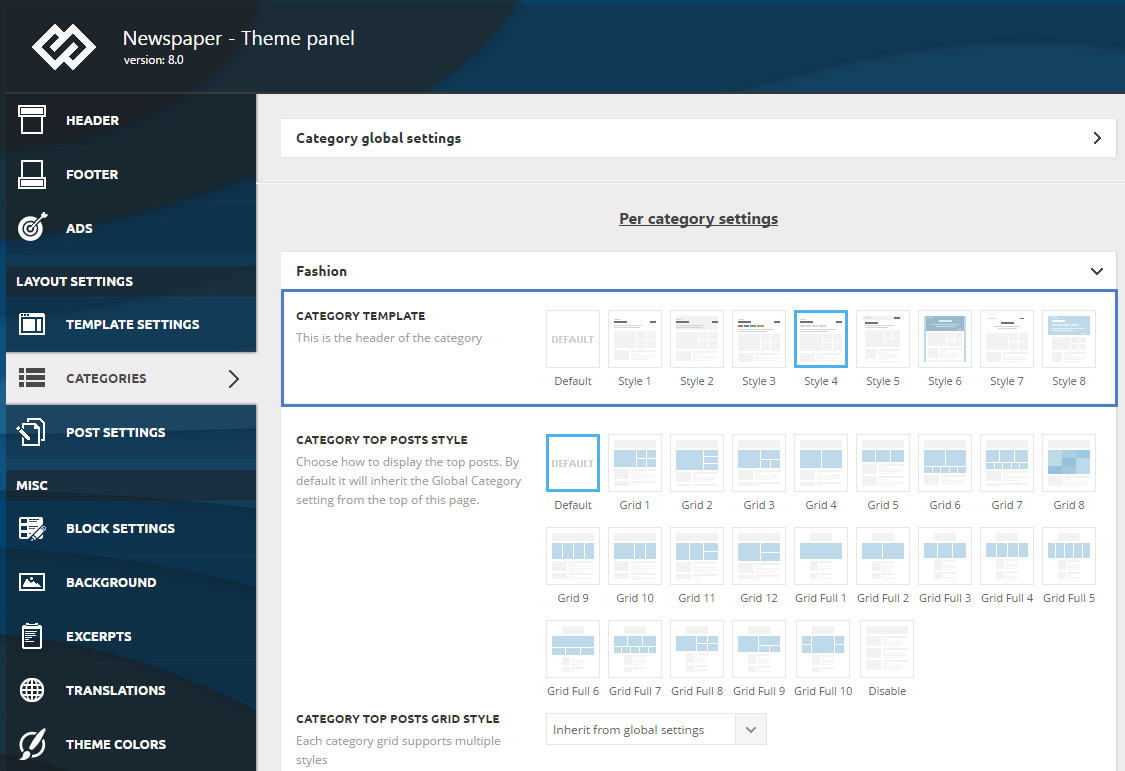
Changing category color in a WordPress skin theme often requires accessing the theme settings or custom CSS. Navigate to the appearance section, then customize to find color options. If unavailable, use the additional CSS feature to manually adjust colors for better visibility and style.
Dealing With Css Conflicts
CSS conflicts can cause problems with your WordPress skin theme. These conflicts happen when different styles fight each other. To fix this, check your style sheets. Look for any duplicate rules or unexpected styles. Remove or change them if needed. Use specific CSS selectors to avoid conflicts. This helps the right styles apply to the right elements. Try using inspect tools in your browser. They help you see which CSS rules are active. This way, you can find and fix conflicts easily.
Ensuring Cross-browser Compatibility
Different browsers can show colors in different ways. To make sure your category colors look the same everywhere, use standard CSS rules. Avoid using browser-specific styles. Test your site on different browsers like Chrome, Firefox, and Safari. Make sure everything looks the same. If you find differences, adjust your CSS. This ensures that all users see your site correctly. Use online tools to check compatibility. They help ensure your styles work on all browsers.
Credit: forum.tagdiv.com
Previewing And Publishing Changes
Changing the category color in WordPress Skin Theme can be fun. You can see the changes before making them live. This helps in making sure your design looks great. Use the preview feature to check the new colors. The preview lets you see how your site will look. You can switch colors easily and find the best match. The goal is to make your site look nice and organized.
Reviewing Visual Changes
After picking new colors, look at how they appear. Check if the colors match your site’s style. Make sure the colors are easy to see and read. The visual appeal is important for visitors. Look at the site from different devices. This helps ensure the design works everywhere. Colors should not clash with the text and images. Review carefully to avoid making any mistakes.
Finalizing And Saving Settings
Once you are happy with the colors, save the settings. Saving ensures your changes stay. Double-check your choices before clicking save. Saving makes the new colors visible to everyone. This step is very important. It locks in your design decisions. Make sure everything looks perfect before you finalize. Your site will now have a fresh look. Visitors will enjoy the new design.

Credit: www.youtube.com
Frequently Asked Questions
How Can I Change Category Color In WordPress?
To change category color in WordPress, access your theme’s settings. Navigate to Appearance > Customize. Locate the section for categories or colors. Adjust the color settings for specific categories. Save the changes. Refresh your site to see the new category colors applied.
Can I Customize Category Colors With Css?
Yes, you can customize category colors using CSS. In your WordPress dashboard, go to Appearance > Customize > Additional CSS. Add custom CSS code targeting the specific category classes. Save your changes. Refresh your website to see the updated category colors based on your CSS adjustments.
Is It Possible To Use Plugins For Color Changes?
Yes, you can use plugins to change category colors. Search for a plugin that offers category customization features. Install and activate the plugin. Follow the plugin’s instructions to modify category colors. Save your changes and check your site to ensure the new colors are applied.
Why Should I Change Category Colors?
Changing category colors improves user experience. It helps readers easily distinguish between different content types. It enhances your site’s visual appeal and organization. Consistent and distinct category colors make navigation more intuitive, encouraging users to explore more of your content.
Conclusion
Changing category colors in WordPress skin theme is simple. Follow the steps provided. Customize your site to match your vision. With these tips, you can add personal flair. Make your blog visually appealing. Stand out with unique design choices. It’s a straightforward process.
Enhance your site’s look without hassle. Even beginners can handle this task. Take control of your WordPress theme today. Enjoy the flexibility it offers. Tailor your blog to suit your style. Make your blog a reflection of you. Happy customizing!


