
Are you ready to give your website a fresh, unique look? Adding your theme to WordPress can transform your site, making it stand out and truly reflect your brand.
Whether you’re launching a personal blog, an online store, or a business site, choosing and installing the right theme is crucial. But don’t worry, you don’t need to be a tech wizard to do this. In this guide, you’ll discover simple steps to effortlessly add your theme to WordPress, making sure your site not only looks stunning but also functions seamlessly.
Stick around, and you’ll learn tips and tricks that can save you time and make your website shine. Let’s dive in and get your WordPress site looking exactly the way you want it!
Credit: www.hostpapa.com
Choosing A Theme
Free themes are good for beginners. They cost nothing and are easy to use. Premium themes have more features. They often have better support too. But, they cost money. Choose based on your needs and budget.
Not all themes work with every plugin. Check compatibility before installing. This saves time and trouble. Some themes update often. These are usually a safer choice. They keep up with WordPress changes.
Themes come with different designs. Some are simple. Others are more stylish. Pick a theme that fits your website. Features can include sliders, galleries, or custom fonts. Decide what your site needs. More features can mean more work. But they also offer more flexibility.
Preparing Your Theme Files
First, find the theme you like. Click the download link. Save the file to your computer. Ensure it is a ZIP file. Always check the file size. Large files take longer to download.
Locate the downloaded ZIP file. Right-click on the file. Choose “Extract Here” or “Extract All”. A new folder appears. This folder contains all the theme files. Keep the folder safe. You will need it later.
Inside the folder, find many files. The main file is often named style.css. It controls the look of your site. Another important file is index.php. This file shows your homepage. Always locate these files. They help in making changes later.
Adding A Theme Via WordPress Dashboard
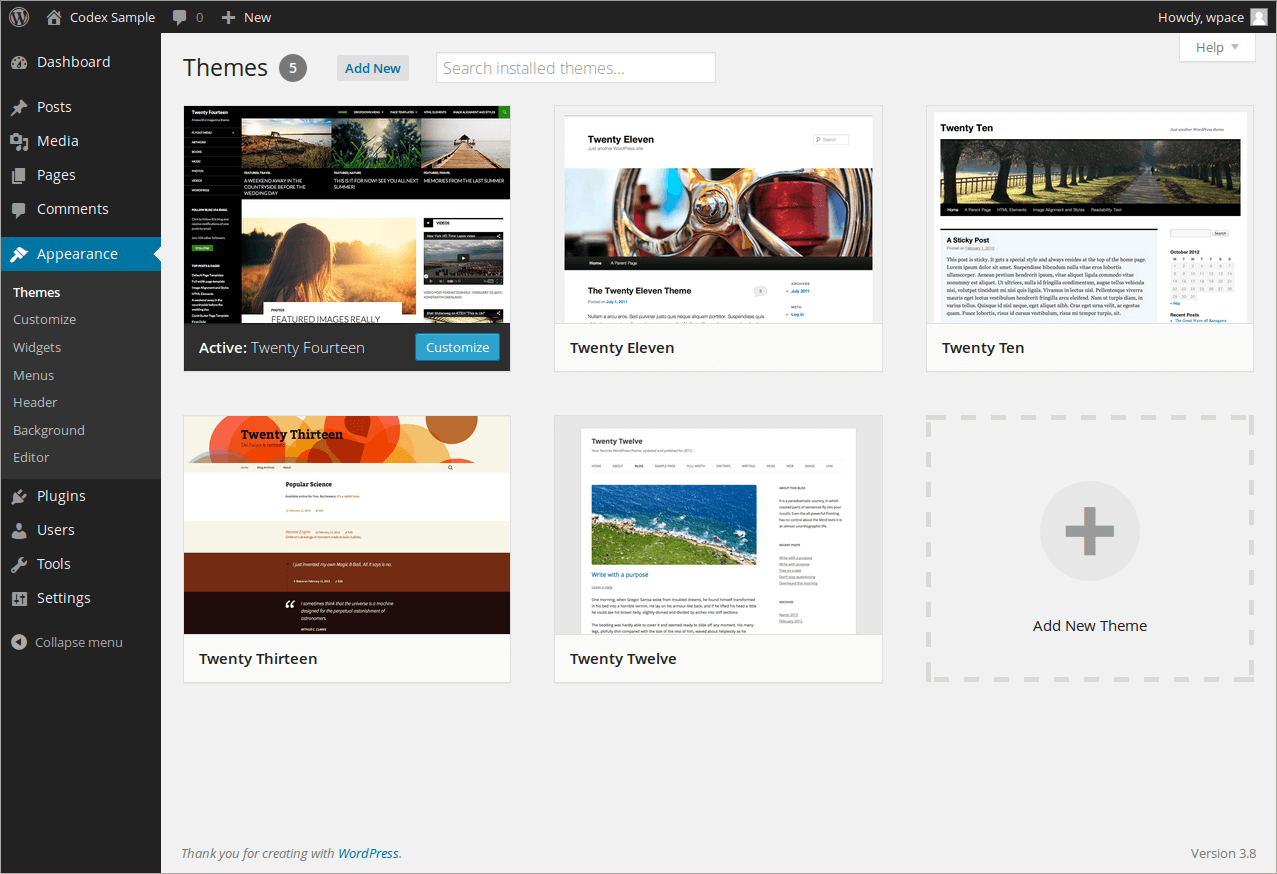
Begin by logging into your WordPress dashboard. Look for the Appearance tab on the left menu. Click it. You will see several options. Choose Themes.
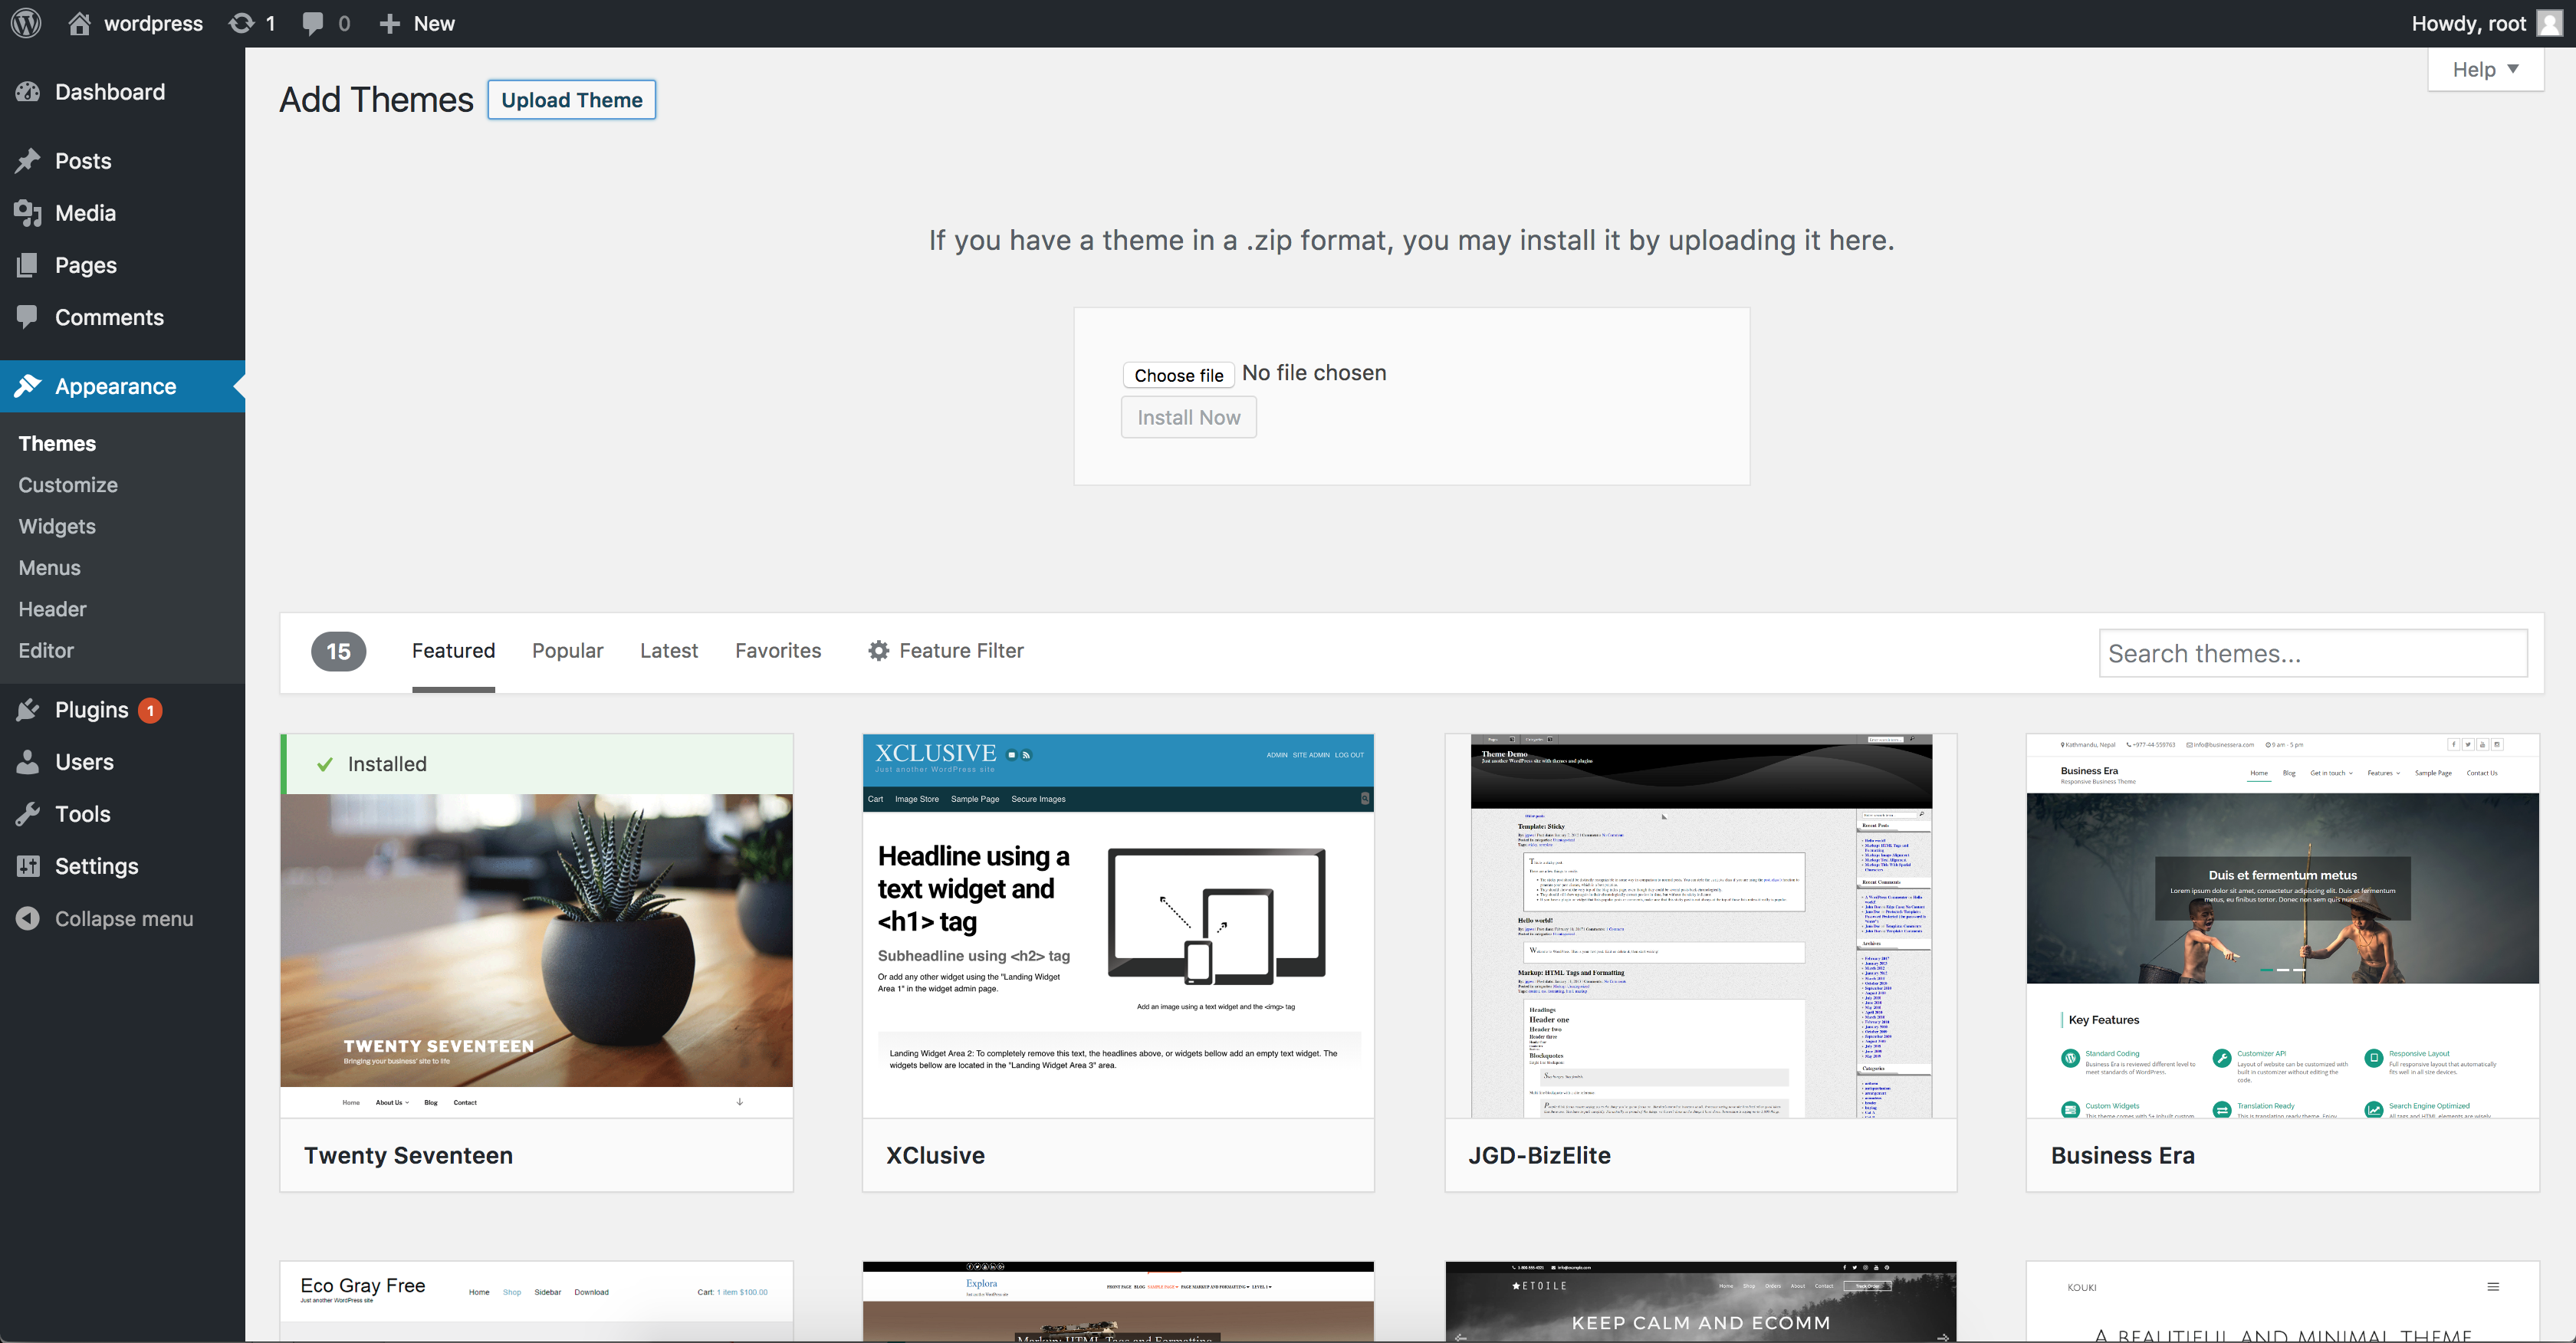
Locate the Add New button. Click on it. This opens a new page. You see many themes here. Want to upload your own? Click Upload Theme. Now, select your theme file. It must be in .zip format.
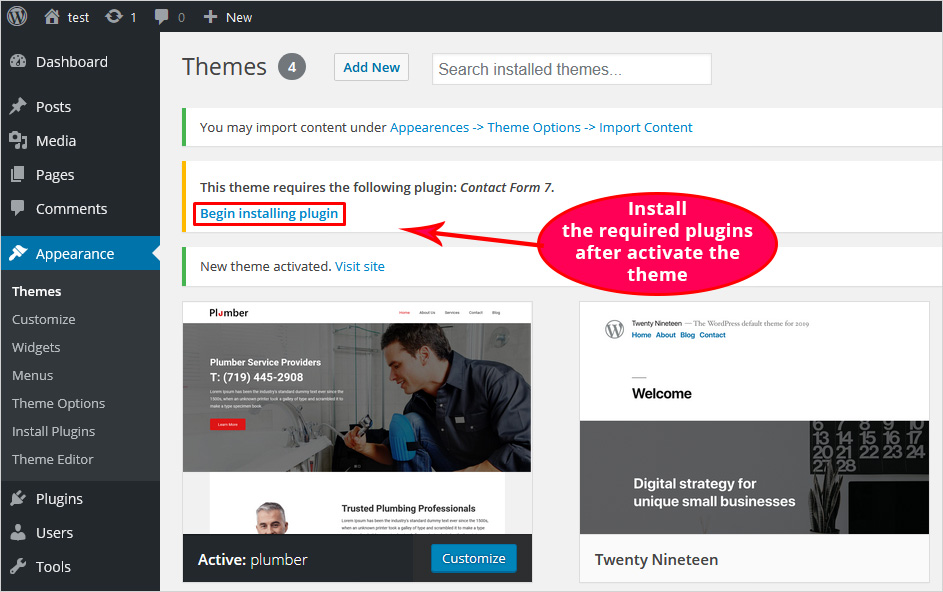
After uploading, you’ll see the new theme. Click Activate to use it. Your website will now display the new design. Check your site to make sure it looks good.
Adding A Theme Via Ftp
First, you need an FTP client like FileZilla. Install it on your computer. Get your FTP login details from your web host. These details usually include a username and password. Enter this information into the FTP client. Connect to your website’s server. You will see your website files now.
Download your theme from the WordPress site. Unzip the theme file on your computer. Open the FTP client again. Navigate to the wp-content/themes directory on your server. Drag and drop the unzipped theme folder into this directory. Wait for the upload to complete. Check if all files uploaded correctly.
Go to your WordPress dashboard. Find the Appearance menu on the left side. Click on Themes. You will see your uploaded theme there. Click Activate to use your new theme. Your website will now display the new look. Refresh your site to see the changes.
Customizing Your Theme
The WordPress Customizer is a powerful tool. It allows you to adjust your theme easily. You can change colors and fonts. Preview changes instantly. This is helpful for quick edits. Explore layout options too. Make your site look unique.
Theme settings are simple to find. Look in the WordPress dashboard. Locate the ‘Theme Options’ section. Here, adjust settings to fit your needs. Change header images or footer styles. Save changes with one click. Keep your site fresh and modern.
Widgets and menus enhance user experience. Add widgets from the ‘Widgets’ area. Drag and drop them into place. Create menus in the ‘Menus’ section. Organize pages and links easily. Customize navigation for better accessibility. Make your site user-friendly.
Credit: www.namecheap.com
Troubleshooting Common Issues
Themes might not upload due to file size limits. Ensure your theme is not too large. Check the WordPress upload size in settings. You can also try using an FTP client. This method bypasses file size restrictions. Ask for help if unsure.
Some themes may not work with your WordPress version. Always update WordPress first. Themes also need to be compatible with plugins. Check the theme’s documentation for details. If issues persist, contact the theme developer.
Errors often have simple solutions. Read the error message carefully. It might suggest what’s wrong. Common errors include missing stylesheet or syntax error. Fix these by reinstalling the theme or checking the code. Don’t hesitate to ask for help if needed.
Keeping Your Theme Updated
Updating your theme on WordPress keeps your site fresh and secure. First, download the theme file from a trusted source. Then, navigate to the WordPress dashboard, click on “Appearance,” and select “Themes. ” Finally, upload the downloaded file and activate it to complete the process.
Importance Of Updates
Updates make your theme run smoothly. They fix bugs and add new features. Without updates, your theme might break. It could cause problems on your website. Sometimes, updates improve security. This keeps your site safe from hackers. Regular updates ensure your theme stays fresh. They make your site look modern.
Manual Vs. Automatic Updates
Manual updates need your attention. You decide when to update. Automatic updates save time. They happen without your input. Both have pros and cons. Manual updates let you control changes. Automatic updates ensure you never miss one. Choose based on your needs. Some prefer control, others prefer ease.
Backup Before Updating
Backing up is crucial. It saves your site if an update goes wrong. A backup keeps your old data safe. You can restore your site easily. Backups prevent data loss. They protect your hard work. Always back up before any update. It’s a safety net for your website.
Credit: blog.templatetoaster.com
Frequently Asked Questions
How To Install A WordPress Theme?
To install a theme, go to your WordPress dashboard. Click on “Appearance,” then “Themes,” and “Add New. ” Use the search bar to find your desired theme or upload a. zip file. Click “Install” and activate the theme to apply it to your site.
Can I Upload A Custom Theme To WordPress?
Yes, you can upload a custom theme. In your dashboard, go to “Appearance,” then “Themes,” and click “Add New. ” Select “Upload Theme” and choose your theme’s. zip file. Click “Install Now” and activate the theme to use it on your site.
What Are The Steps To Change WordPress Theme?
To change your WordPress theme, navigate to your dashboard. Click “Appearance,” then “Themes,” and browse available themes. Preview themes before selecting one. Click “Activate” to apply the new theme, and customize settings to fit your site’s design preferences.
Is It Safe To Change WordPress Theme?
Changing your WordPress theme is generally safe. However, backup your site before making changes to avoid data loss. Some themes may affect site functionality or appearance. Ensure compatibility with plugins and test new themes thoroughly before activating them.
Conclusion
Adding a theme to WordPress can be simple. Follow the steps outlined. Choose a theme that fits your style and needs. Uploading a theme is quick and straightforward. Customize it to make your site stand out. Regularly update your theme for best performance.
Keep your design fresh and engaging. This ensures a pleasant experience for your visitors. A well-chosen theme enhances your website’s appeal. Start today and see how easy it is. Your WordPress site will look great in no time. Feel confident in creating a unique online presence.
Enjoy the process!


