
Ever found yourself wondering how to make your WordPress theme stand out with a captivating screenshot? You’re not alone.
Adding a screenshot to your WordPress theme can instantly grab your visitors’ attention, providing them with a visual preview of what your site has to offer. Think of it as the cover of a book—it’s the first thing people see, and it can make all the difference.
In this guide, you’ll discover simple and effective steps to add a screenshot to your WordPress theme, turning your site into a visual delight. By the end, you’ll not only have a more attractive website but also a more engaging one that keeps your audience coming back for more. Ready to take your WordPress theme to the next level? Let’s dive in!
Credit: themewinter.com
Importance Of A Theme Screenshot
A theme screenshot is like a preview picture for your website. It shows what your site looks like. This helps users decide if the theme is right for them. A good screenshot can attract more people. It gives a clear idea of the design and layout. People like to see what they will get. A nice image can make your site stand out. It should be clear and easy to understand.
Make sure the image is not blurry. A bright and colorful screenshot is better. It should match the theme’s style. The picture is the first thing people see. A great screenshot can make a big difference.
Credit: www.youtube.com
Preparing The Screenshot
Choosing the Right Dimensions is crucial for your screenshot. Make sure the width is 1200 pixels. Height should be 900 pixels. This size fits most screens. It shows your theme clearly. Bigger screenshots might not fit well.
Use the Right Format for your screenshot. PNG is best. It keeps the quality high. JPEG can lose details. Avoid blurry images. Make sure the file size is small. This helps your site load fast.
Creating The Screenshot
Design tools help make beautiful screenshots. Canva and Photoshop are popular choices. Start by opening the theme in your tool. Choose the right size for your screenshot. A common size is 1200×900 pixels. This size fits well in WordPress themes. Add any text or images you want. Keep it simple. Too much can make it messy. Save your work as a JPEG or PNG file. Now, you have a screenshot ready to use.
A live preview shows the theme in action. Open the theme in your browser. Use Print Screen on your keyboard to capture it. On a Mac, use Command + Shift + 4. This makes a screenshot. Open it in a simple editor. Crop the edges to fit the theme. Save it as JPEG or PNG. Now, you have a live preview screenshot.
Adding The Screenshot To Your Theme
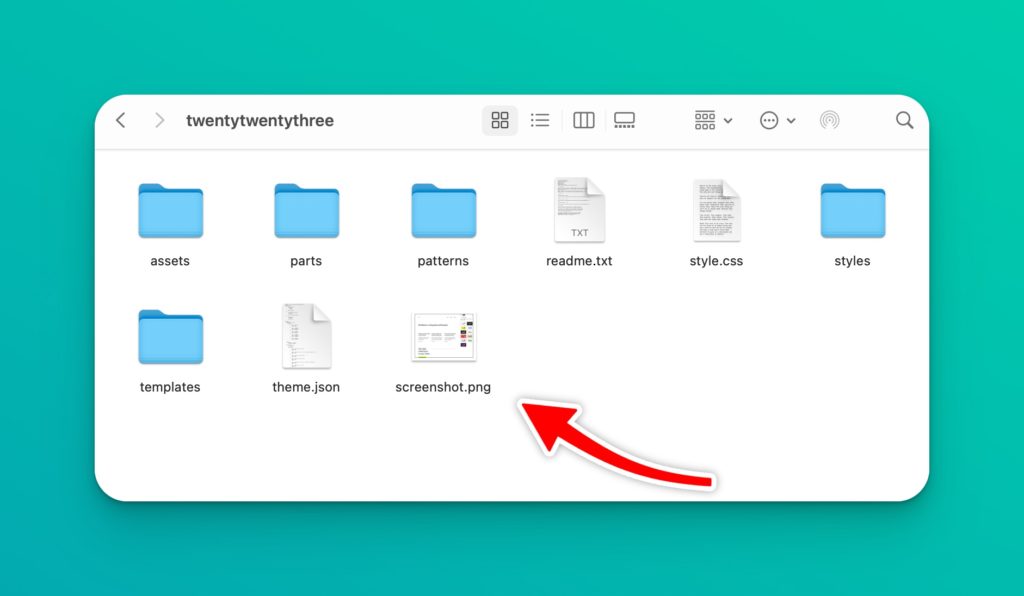
First, open your WordPress files. Find the wp-content folder. Inside, look for the themes folder. Choose your theme’s folder. This is where you will add the screenshot. Be careful not to change other files. This folder is important. It keeps your theme organized.
Your screenshot file should be named screenshot.png. Use this exact name. WordPress looks for this file name. Keep the image size small. Around 1200 pixels wide is good. Also, the image should be clear. It helps users see your theme. Remember to use a PNG file. This format is best for screenshots. It keeps the image quality high.
Verifying The Screenshot Display
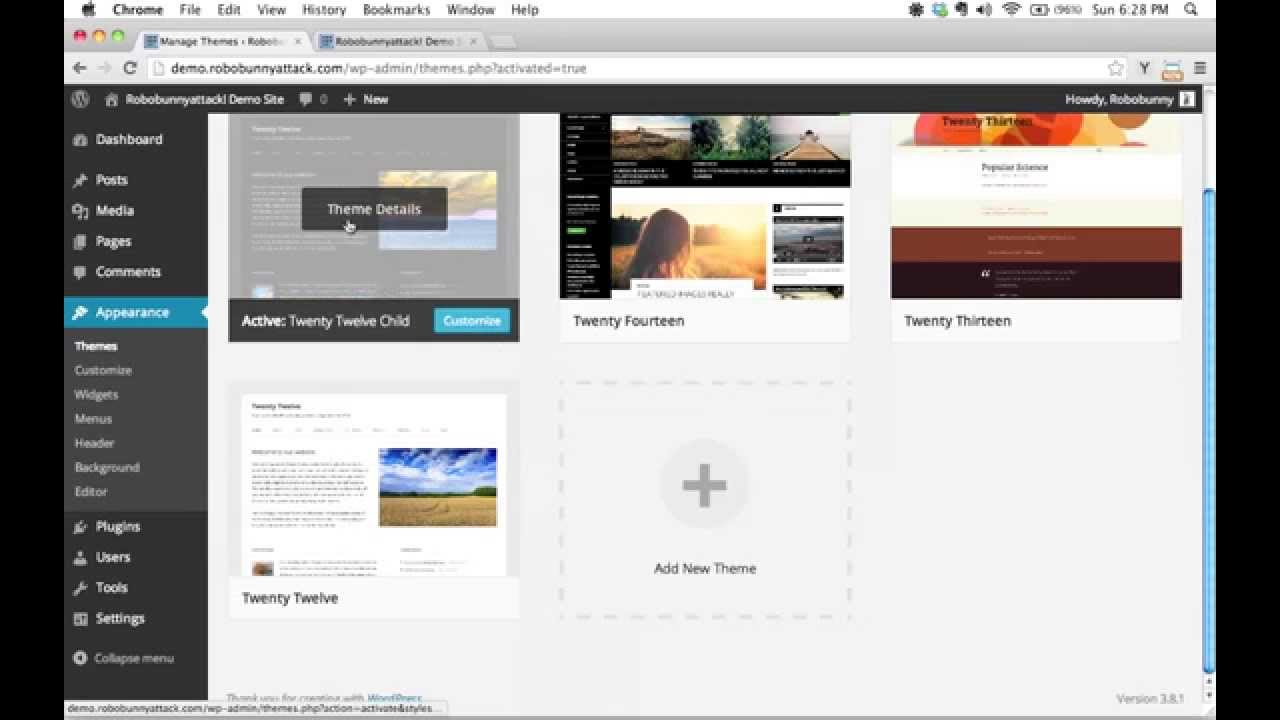
To see your screenshot, go to the WordPress Dashboard. Click on Appearance and choose Themes. Your theme should show the image you added. If it doesn’t, check the file name. It should be screenshot.png. Make sure the image size is correct. Usually, 1200×900 pixels works well. Keep the image clear and tidy. Avoid too much text on it. This makes it easy to understand.
Checking In WordPress Dashboard
Log into your WordPress account. Find the Appearance option. Click on it. Then, select Themes. Your added screenshot should appear here. If it’s not there, check again. Ensure the image is in the right folder. It should be in your theme folder. The file name must be screenshot.png. Double-check these steps to see the image.
Troubleshooting Common Issues
- Image not showing? Check file name.
- Wrong size? Resize to 1200×900 pixels.
- File in wrong place? Put it in the theme folder.
- Image blurry? Use a high-quality image.
- Too much text? Remove extra words from the screenshot.
Best Practices For Theme Screenshots
Consistency is key in theme screenshots. Stick to the same style. Use the same size for each image. This helps your theme look neat. It also keeps it easy to understand. Visitors will know what to expect. They won’t get confused.
Make sure to show the important features in your screenshots. Highlight the parts that stand out. This can be the layout or the colors. Bold designs catch the eye. They make your theme look good. This shows why your theme is special.
Credit: smartwp.com
Frequently Asked Questions
How Do I Upload A Screenshot In WordPress?
To upload a screenshot in WordPress, access the theme folder via FTP. Locate the ‘screenshot. png’ file and replace it with your image. Ensure the new screenshot matches the dimensions, typically 880×660 pixels. This image will appear in the theme selection area within WordPress.
Can I Change Theme Screenshot Easily?
Yes, changing a theme screenshot is simple. Use an FTP client to navigate to your theme’s directory. Replace the existing ‘screenshot. png’ file with your new image. Ensure your image follows the recommended dimensions for best display results. This update will refresh the screenshot displayed in the admin panel.
What Format Should My Screenshot Be?
Your screenshot should be in PNG format. This format ensures clarity and quality when displayed in WordPress. The standard dimensions are 880×660 pixels. PNG is preferred for its lossless compression, maintaining image quality without increasing file size excessively.
Why Is My Screenshot Not Showing?
If your screenshot isn’t showing, check the file name and format. Ensure it’s named ‘screenshot. png’ and correctly placed in your theme folder. Verify the file dimensions are correct. Refresh your WordPress admin panel to see if the issue resolves.
Conclusion
Adding screenshots to your WordPress theme enhances user experience. It’s simple and quick. Start by capturing the image. Next, upload it to your WordPress media library. Use the image editor if needed. Finally, insert the screenshot into your theme settings.
This visual aid helps users understand your content better. It also improves navigation and engagement. Always ensure the screenshot is clear and relevant. A well-placed screenshot guides visitors effectively. Try these steps today to make your WordPress theme visually appealing.


