
Are you tired of the same stock photos in your Nikkon WordPress theme? Changing them can give your website a fresh look and make it truly yours.
Imagine a website that reflects your unique style and captivates your audience right from the first glance. You don’t need to be a tech wizard to swap out those generic images. With just a few simple steps, you can transform your site into something that stands out.
Ready to learn how to make your website more personal and engaging? Let’s dive into the process of changing stock photos in the Nikkon theme, and unlock the potential to captivate your visitors like never before.
Understanding Nikkon Theme
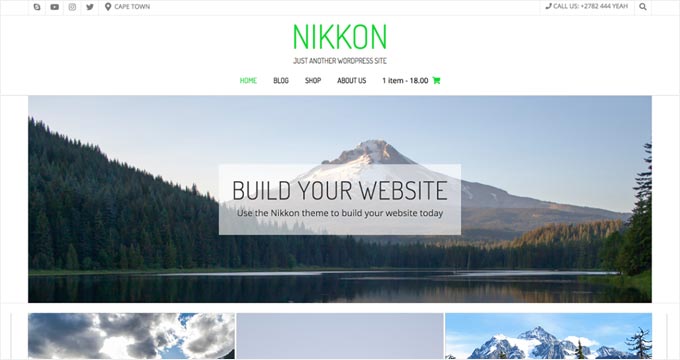
The Nikkon theme is popular for its clean look. It offers many design features. One key feature is its customizable stock photos. Users can easily change these photos. This flexibility makes Nikkon special. You can give your site a unique look. Nikkon theme is also easy to use. Beginners find it user-friendly. Even kids can learn it fast.
It provides many options. You can change colors, fonts, and layouts. The theme supports many plugins. These make your website more powerful. Users love its responsive design. It looks good on both computers and phones. Nikkon theme is a great choice for WordPress sites. It combines style with function.
Accessing WordPress Dashboard
Start by visiting your WordPress login page. Enter your username and password. Now, you are inside the dashboard. Look on the left side for the Appearance option. Click on it to find the Customize menu. This is where you can change the stock photo.
Find the Header Image section. Click to open it. You will see the current stock photo. Click the Change Image button. Choose a new photo from the library. You can also upload a new image. Make sure your image is clear and fits well.
After picking your photo, click Save. Your new photo will now appear on your site. Check your site to see the changes. If it looks good, you are done!
Navigating To Theme Settings
First, find the WordPress Dashboard. It’s like the control center. Look on the left for the Appearance option. Click it. A menu will drop down. Choose Customize. This is where you can make changes.
In the Customizer, see the Header Image or Background Image sections. These are for your photos. Click on either. Now, find the Change Image button. It’s important. Click it to select a new photo.
After selecting, remember to click Save or Publish. This makes your changes live. You can see your new photo on the website now. Easy and quick!
Credit: www.wpbeginner.com
Locating Stock Photo Options
First, open your WordPress dashboard. Look for the Appearance menu. Click it. Now, select Customize. This opens the theme options. Next, find the section named Header or Images. This is where stock photos are usually placed.
Not all themes place images in the same spot. Some themes might use a Slider or Gallery. If you see these options, click them. They might have the stock photos you want to change. Always look for a section labeled Media or Images. This could be another place to find the photos.
Selecting A New Stock Photo
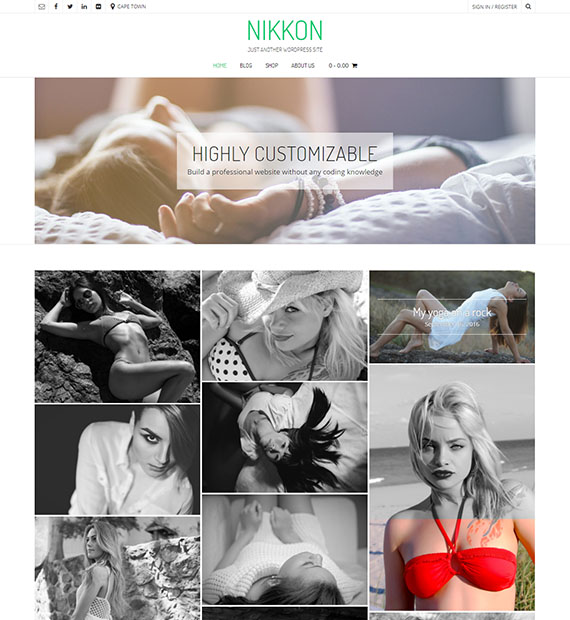
Choose a photo that fits your website’s look. Make sure it is high-quality and clear. Stock photos come in many styles and themes. Use a photo that matches your content. This helps in creating a better experience for visitors.
Images should not be too busy. Simple photos work best. They keep the focus on your main message. Pictures with good lighting look great on screens. Avoid photos that are too dark. Bright images grab attention.
Search for free stock photos online. Websites like Unsplash and Pexels offer free images. They are easy to download and use. Pick photos that are legal to use. Check the license before adding them to your site.
Credit: beautifulthemes.com
Uploading Custom Images
First, find the stock photo in your WordPress theme. It’s often in the media library. To change it, click on the photo. Look for the replace button. Click it. Now, upload your custom image. Make sure it’s the right size. This helps it fit well.
After uploading, check the preview. Does the new image look good? If not, resize it. Use an image editor for resizing. The right size makes your site look neat. Now, save your changes. The new photo should show on your site.
Remember, pick images that match your site’s theme. This keeps your site looking nice. Custom images make your site feel unique. So, choose wisely!
Adjusting Image Settings
Open your WordPress dashboard. Navigate to Appearance, then click on Customize. Find the Header Image section. Click to change your photo. Choose Upload to add a new image. Select a photo from your computer. Adjust the image size using the slider. Check the preview to see the changes. Click Save & Publish to apply the new image.
Try different images. Experiment with sizes. Make sure your photo fits the theme. Check mobile view for image clarity. Use high-quality images. This helps improve your site’s look. Avoid blurry photos. Choose images that match your content.
Saving Changes
Click the save button after editing the photo. This action will store your changes. Always double-check your edits. Ensure the photo looks good. This is important before saving. Use the preview feature to see it live. Check how the photo appears on your site. Make sure it fits well. Proper sizing is crucial. It should not look stretched or cut. A well-fitted photo enhances the site’s look. If satisfied, save your work.
Regularly update your site with new photos. Fresh images make your site engaging. This keeps visitors interested. They might return for more. A fresh look often attracts more views. So, keep your photos updated and relevant.
Troubleshooting Common Issues
Changing a stock photo in the Nikkon theme can be tricky. Sometimes, the photo won’t change. It might be a cache issue. Clear your browser cache first. Another common problem is incorrect file format. Ensure the photo is in a supported format like JPEG or PNG. Double-check the file size too. Large files may fail to upload. Resize if necessary. Check your WordPress version. Older versions might not support new themes. Update if needed. Permissions can also cause issues. Make sure you have the right permissions to change photos. If problems persist, seek help from the theme support. They offer guidance and solutions. Don’t forget to save changes after editing. Unsaved changes won’t appear. Follow these steps, and the issue should be resolved.
Tips For Choosing Stock Photos
Picking the right stock photo is important. Quality matters most. Choose high-resolution images. They look clear and sharp. Relevance is key too. Photos should match your topic. If you write about nature, pick nature photos. Diversity is good. Use different images. Avoid using the same style. Authenticity helps connect with readers. Real-life images work best.
Colors should fit your site’s theme. Bright colors grab attention. Composition is important. Make sure the photo is balanced. Avoid cluttered images. Licensing is vital. Always check photo rights. Use royalty-free images. You won’t face legal issues.
Credit: themeforest.net
Frequently Asked Questions
How Do I Change Stock Photos In Nikkon Theme?
To change stock photos in the Nikkon Theme, navigate to the WordPress dashboard. Select ‘Appearance’, then ‘Customize’. From there, choose ‘Header’, ‘Background’, or ‘Gallery’, depending on where the photo is located. Click ‘Change Image’ and upload your preferred photo. Save changes to update your site.
Can I Use Custom Images In Nikkon Theme?
Yes, you can use custom images in the Nikkon Theme. Simply upload your desired images through the WordPress media library. Access the customization options and replace stock photos with your own images. Ensure images are optimized for web use to maintain site speed and performance.
What Image Formats Are Supported By Nikkon Theme?
Nikkon Theme supports popular image formats like JPEG, PNG, and GIF. Ensure your images are of high quality and optimized for web use. This helps maintain fast loading times. If needed, use image editing software to convert your images into these supported formats before uploading them.
How Can I Optimize Images For Nikkon Theme?
To optimize images for Nikkon Theme, use image compression tools like TinyPNG or ImageOptim. Reduce file size without losing quality. Use the WordPress media library to edit and resize images. Optimized images improve site speed and user experience. Regularly update and review your site’s media for optimization.
Conclusion
Changing stock photos in the Nikkon theme is simple. Follow the steps to customize your website. This enhances your site’s appeal and matches your brand. Personalizing images can make a big difference. It attracts more visitors and keeps them engaged.
Remember to choose high-quality photos. This helps in maintaining a professional look. A well-chosen image speaks to your audience. Now, you’re ready to update your website’s visuals. Keep exploring and experimenting with new images. Your site reflects your creativity. Enjoy the process and watch your site transform!


