
Are you tired of the default hovering colors in your WordPress theme? You know, those colors that just don’t quite match the vibe you’re aiming for on your website?
They might seem like a small detail, but the hovering colors on your site can significantly impact your visitors’ experience. Imagine if changing them could enhance your website’s appeal, making it not only visually pleasing but also more engaging for your audience.
We’ll guide you step-by-step on how to customize those hovering colors to perfectly align with your brand’s personality. Whether you’re a beginner or a seasoned WordPress user, you’ll find this process straightforward and rewarding. So, if you’re ready to take control and make your website truly yours, keep reading.
Credit: www.ryrob.com
Choosing The Right Theme
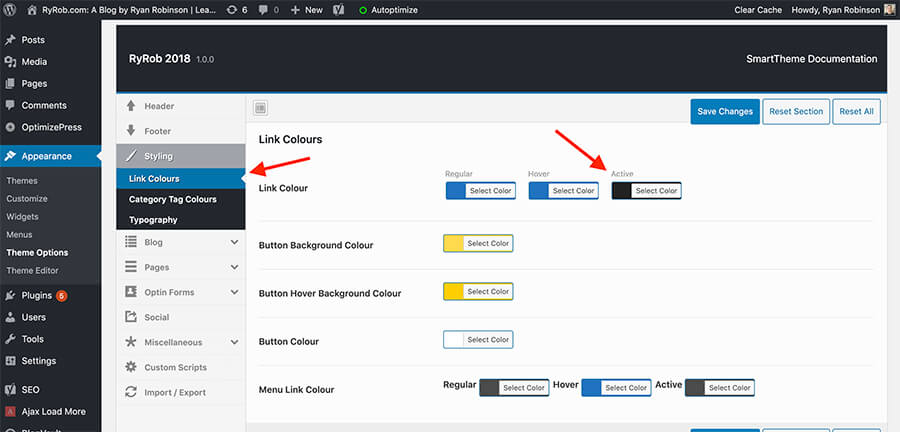
Selecting a theme is fun. It gives your site a unique look. Some themes allow easy color changes. Some do not. Check if your theme has this feature. Look for a customization option. This helps in changing colors easily.
Explore the theme options. Find the color settings. If not available, consider a theme change. Themes with flexible color settings are better. They save time and effort. Always pick a theme that meets your needs.
Identifying Hover Elements
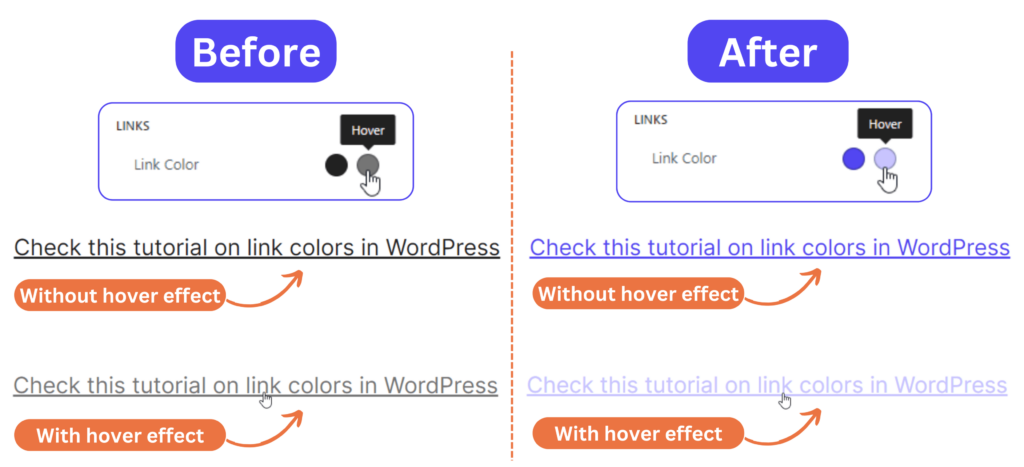
Hover elements change color when the mouse moves over them. These elements make a website interactive. Buttons, links, and images are common hover elements. In WordPress, hover styles are controlled by CSS. CSS stands for Cascading Style Sheets. It helps style web pages. To find hover elements, inspect the webpage in your browser. Right-click on the element and choose “Inspect”. This opens the developer tools. Look for styles that start with :hover. They show what changes on hover. You can modify these styles to change hover colors.
Not all themes have hover styles. Some themes might need custom CSS. Use WordPress customizer to add CSS. Go to your WordPress dashboard. Select “Appearance” and then “Customize”. Find “Additional CSS” and paste your code there. Save changes to see new hover colors.
Using Custom Css
Go to your WordPress dashboard. Find the Appearance option. Click it. Then select Customize. This will open the Theme Customizer. Look for an option called Additional CSS. Click on it to open a blank CSS editor. Here, you can add your own CSS code. Make sure to save changes after adding any code.
In the Additional CSS section, type your CSS code. Use the :hover selector. It changes the color when you hover over elements. For example, to change the color of links, use a:hover { color: red; }. This makes links red when you hover. Remember to save changes. Check your website to see the new colors.
Credit: kubiobuilder.com
Editing Theme Files
To change the hovering colors, you first need to find the CSS files. These files control the look of your website. Go to your WordPress dashboard. Click on Appearance and then Theme Editor. Here, you will see many files. Look for a file called style.css. This file is usually the one you need. It holds the design details for your theme.
Open the style.css file. Find the hover styles you want to change. Hover styles often start with :hover in the code. Change the color codes to your favorite colors. Use easy codes like #FF5733 for orange. Save your changes. Refresh your website to see the new hover colors. If you don’t see changes, clear the browser cache.
Utilizing WordPress Plugins
WordPress plugins help change theme colors. They are easy to use. Many plugins offer simple styling options. These tools make design changes quick.
Popular Plugins For Styling
Some plugins are popular for styling. YellowPencil is one of them. It lets users change colors easily. Another is CSS Hero. It provides many design options. These plugins are user-friendly. They are helpful for beginners.
Steps To Install And Use
| Step | Description |
|---|---|
| 1 | Go to the WordPress dashboard. |
| 2 | Find the ‘Plugins’ menu. Click on it. |
| 3 | Search for the plugin name. |
| 4 | Click ‘Install Now’. Then activate it. |
| 5 | Access plugin settings. Customize colors as needed. |
Credit: www.wpbeaverbuilder.com
Testing Changes
Cross-Browser Compatibility is very important. Different browsers show colors differently. Check your changes in various browsers. Try Chrome, Firefox, and Safari. See if the colors look the same. If they do not, adjust your code. Make sure the colors are consistent.
Ensuring Mobile Responsiveness is also crucial. Many people use phones. Colors should look good on small screens too. Resize your browser window. See if the colors change. If they do, fix the problem. Use media queries to help. Responsive design makes your site better.
Maintaining Theme Updates
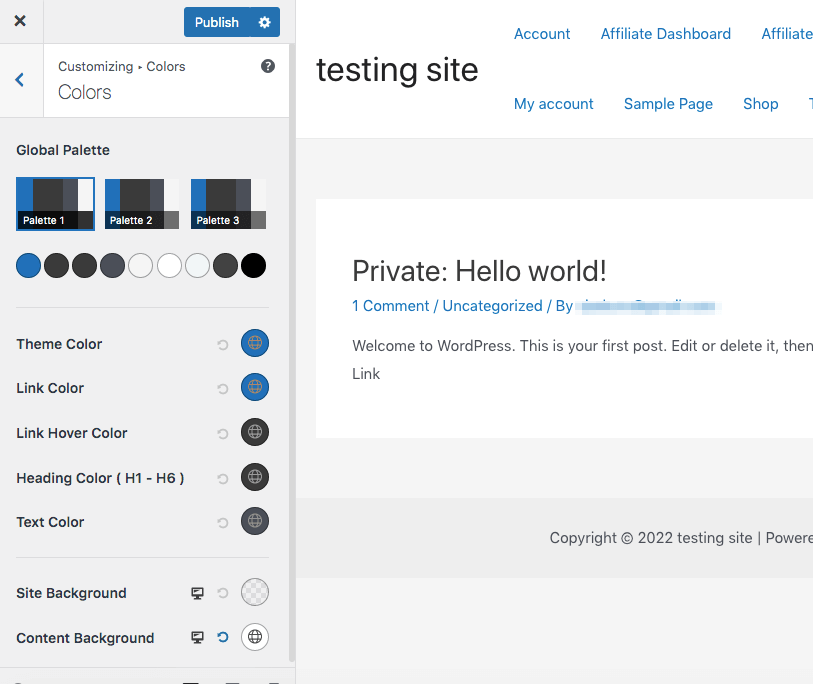
Changing the hovering colors in a WordPress theme enhances user experience and visual appeal. Access the WordPress customizer, navigate to the ‘Colors’ or ‘Additional CSS’ section, and adjust the hover color codes. This simple tweak personalizes your site while keeping it fresh and visually engaging.
Backing Up Customizations
Always make a copy of your changes. This is called a backup. Save your backup in a safe place. Backups help if something goes wrong. You can use plugins to help with this. Popular plugins are UpdraftPlus and Duplicator. They make backups easy. Follow the steps they give. This keeps your work safe.
Reapplying Changes Post-update
After updates, you may lose changes. Don’t worry, this is normal. Use your backup to bring them back. Look at your saved files. Find the code you changed. Copy it again. Paste it into your updated theme. Check if everything looks right. Some things may need fixing. Take your time to do this carefully.
Frequently Asked Questions
How To Customize Hover Colors In WordPress?
To customize hover colors, access your theme’s customizer. Navigate to “Additional CSS” and add custom CSS code for hover effects. This allows you to change colors for various elements like buttons and links. Make sure to preview changes before saving to ensure the desired look.
Can I Change Hover Colors Without Coding?
Yes, some themes offer options to change hover colors via the customizer. Check for a section named “Colors” or “Appearance”. If available, you can adjust hover colors using sliders or color pickers. This is user-friendly and requires no coding skills.
What Are The Best Tools For Color Changes?
Tools like Elementor and Beaver Builder can help modify hover colors. They provide visual editors with intuitive interfaces for easy customization. Additionally, plugins like “Custom CSS” offer straightforward ways to add CSS for hover effects, enhancing your WordPress theme’s design.
Why Are Hover Colors Important?
Hover colors enhance user experience by providing visual feedback. They indicate interactive elements, improving navigation and engagement. Consistent hover colors also contribute to a cohesive design. They guide users intuitively, making your website more accessible and aesthetically pleasing.
Conclusion
Changing the hover colors in your WordPress theme is simple. Follow the steps outlined to personalize your site. A consistent color scheme enhances user experience. It also makes your website look professional. Practice these changes to get comfortable with coding.
Experiment with different colors and styles. This will help you find the perfect match for your brand. Remember, small tweaks can make a big difference. Regular updates keep your site fresh and engaging. Now, it’s your turn to apply these insights.
Enjoy customizing your WordPress theme!


