
Ever find yourself scrolling through your WordPress site, only to feel like something’s missing? It might be the font.
A simple tweak to your font can transform your website’s look and feel, making it more engaging for your audience. Imagine your blog posts with a font that perfectly captures your brand’s personality, inviting readers to stay just a little longer.
Changing the font in your WordPress theme might seem daunting, but it’s easier than you think. Whether you’re looking to make a bold statement or create a serene reading experience, I’ll guide you through the steps to refresh your site with a new font. Curious to see how a small change can make a big impact? Let’s dive in and explore how you can effortlessly update your WordPress theme fonts.
Accessing WordPress Dashboard
First, log in to your WordPress Dashboard. This is your control center. Find the login page by adding “/wp-admin” to your site URL. Enter your username and password. Click the “Log In” button. Now, you are in the dashboard. Here, you can change settings and update your site.
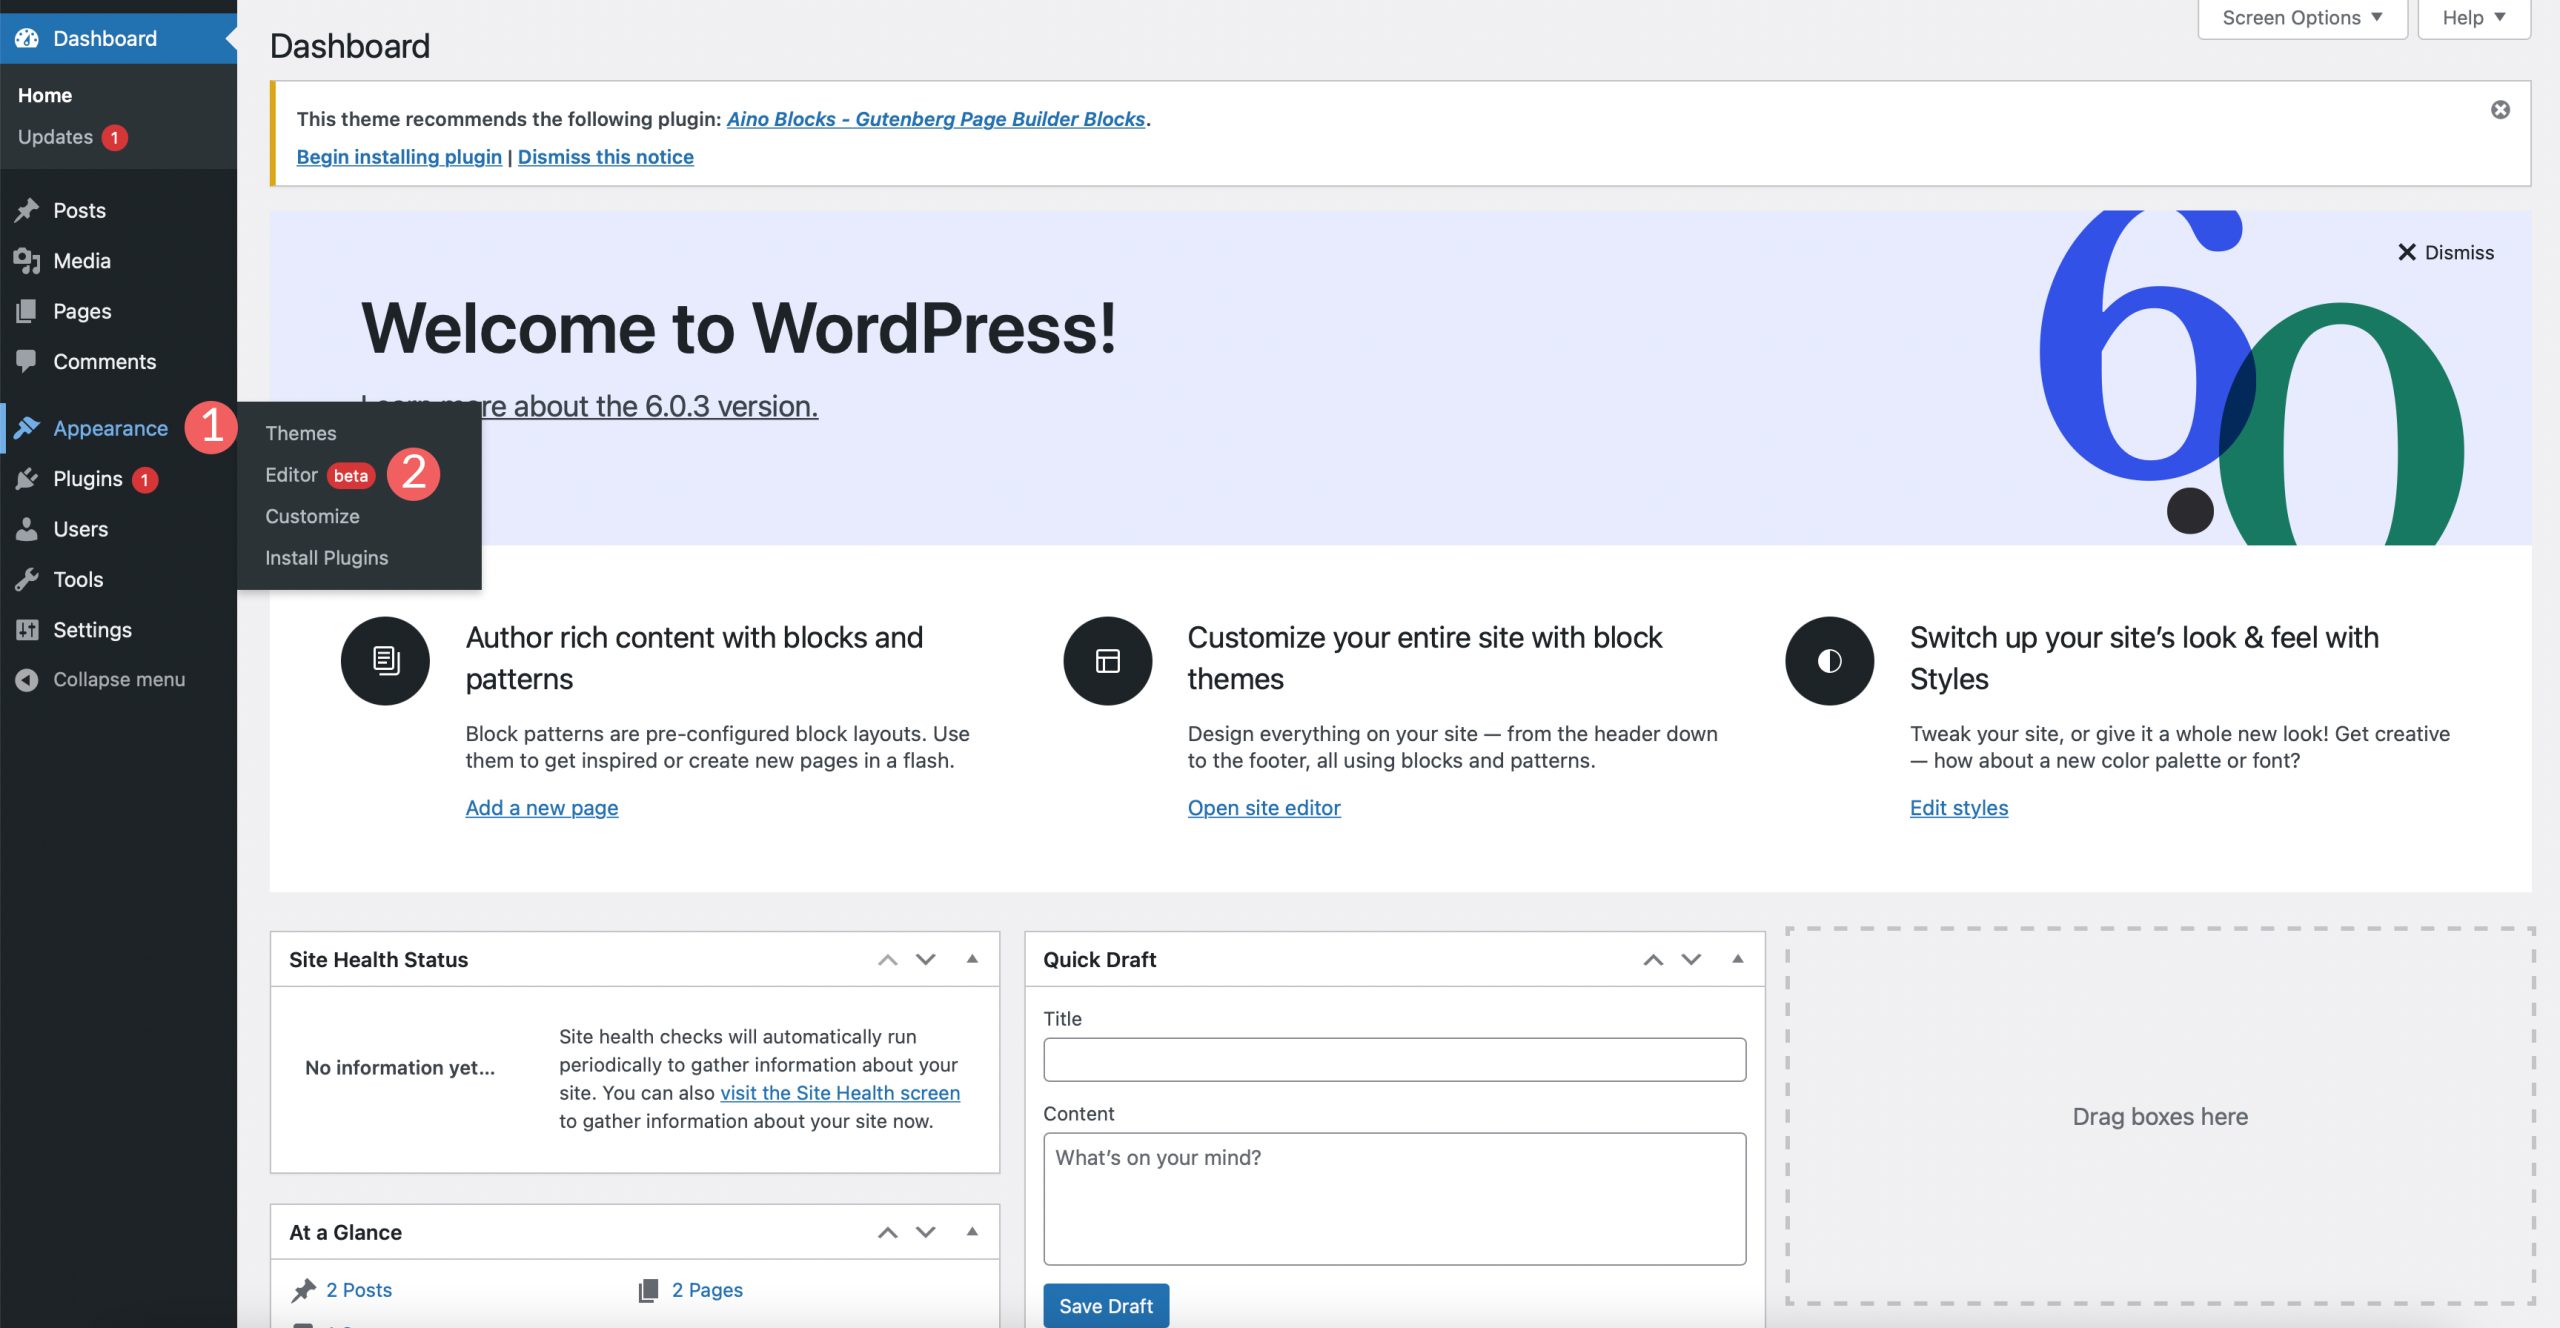
On the left side, you will see a menu. This menu has many options. Click on “Appearance”. A drop-down will appear. From here, you can access the theme settings. This is where you can change the font of your theme. Explore these options carefully.
Credit: www.inmotionhosting.com
Navigating To Theme Customizer
Start by opening your WordPress dashboard. Look for Appearance in the sidebar. Click on it. This opens a menu with options. Choose Customize. It leads you to the theme customizer. The theme customizer shows many settings. Here, find the Typography section. This is where fonts can be changed. Select the section to see available options. Each font choice shows a preview. Pick a font you like. Remember to save your changes. Saving ensures your new font appears on the site. A simple step, yet impactful. Fonts affect how visitors see your site. Make sure the font is readable. Your content should be easy to understand.
Using Theme Options
Open your WordPress dashboard. Click on Appearance and then select Customize. Look for the Theme Options or Typography menu. This is where you can change fonts. Every theme might have different options.
Find the Font Family section. Here, you can choose your desired font style. Some themes offer many choices. Others might have fewer options. Pick a font that looks good and is easy to read.
Go to the Font Size settings next. You can make text bigger or smaller. Adjust the size to fit your needs. Be sure the font size is legible for everyone.
Customizing With Additional Css
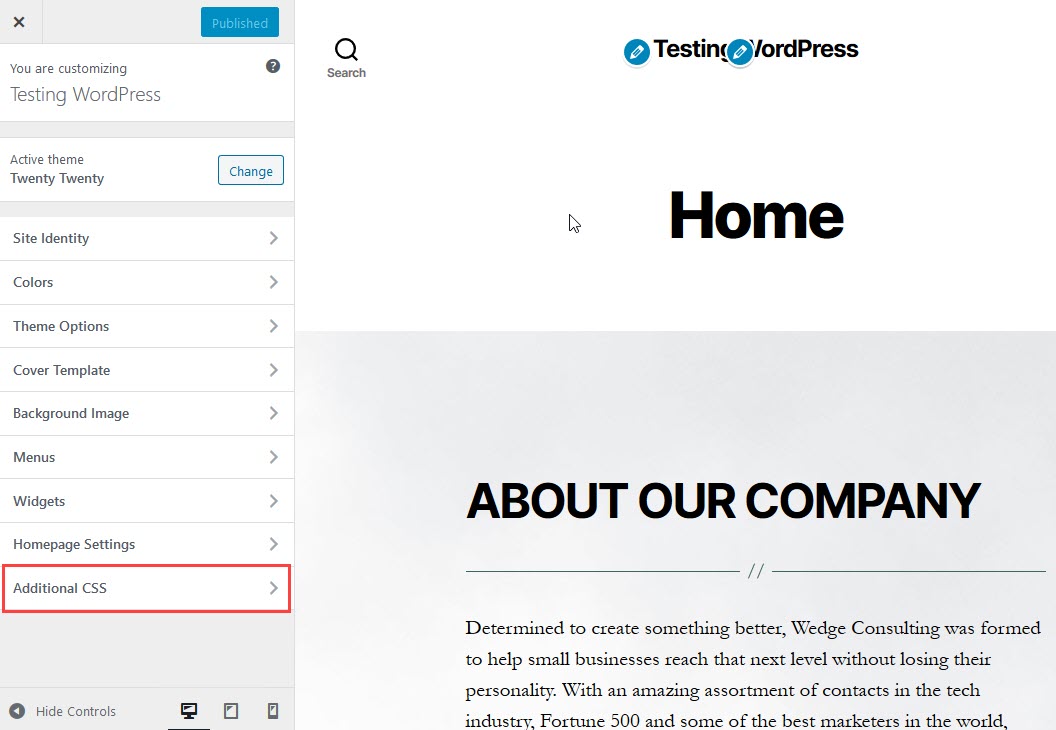
First, go to your WordPress dashboard. Find the Appearance option. Click it. Then, select Customize. Look for the Additional CSS panel. Click to open it. You can add your own CSS here. This will change your site’s look.
To change fonts, write CSS code. Use the font-family property. Choose the font you like. For example, font-family: 'Arial';. Add this code in the panel. Save your changes. Your site will have new fonts.
Before saving, preview your changes. Look at your site with new fonts. Make sure everything looks good. If not, adjust the CSS code. Preview again. Once happy, save changes. Your site is ready with a new font style.
Utilizing Page Builders
Changing fonts in WordPress themes is simple with page builders. Navigate to the font settings, select your preferred style, and apply changes. This enhances visual appeal and improves readability for visitors.
Installing Popular Page Builders
Page builders make design easy. They offer drag-and-drop features. Popular ones include Elementor, Divi, and Beaver Builder. Start by choosing a builder that fits your needs. Visit the WordPress plugin store to install it. Click “Add New” and search for your chosen builder. Once found, click “Install” and then “Activate”. This process is simple and quick. Now, you can create pages with ease.
Changing Fonts In Page Builders
Fonts can change the look of your site. Page builders offer many font choices. Open the page builder tool. Navigate to the text settings. You will see font options there. Choose a font that matches your theme. Adjust size and color for better readability. Save changes to apply them. This makes your site look professional. Always preview changes before publishing.

Credit: 10web.io
Installing Font Plugins
Picking a plugin is key. Some plugins offer many fonts. Others are easy to use. Check reviews for help. Popular plugins work well. They often have many users. Check compatibility with your theme. This ensures no errors. Free plugins are available. But paid ones offer more features. Test a plugin to see if it suits you.
Open the plugin settings page. Look for font options. Pick your favorite font. Adjust size and color. Save changes once done. Check your site to see the new look. Some plugins allow custom fonts. These need extra steps. Follow the plugin guide. Read instructions carefully.
Google Fonts Integration
Google Fonts provides many fonts for free. Choose a font that fits your theme. Visit the Google Fonts website. Browse through different styles. Once you find one, click on it. Copy the code they provide. This code helps you add the font to your site.
Selecting a font is easy. Look for the style you like. Check its readability. Some fonts look great but are hard to read. Pick a font that is clear. Your readers will thank you. They can read your content without strain.
Plugins make font changes simple. Go to your WordPress dashboard. Search for a Google Fonts plugin. Install and activate it. Follow the plugin instructions. Most plugins have easy steps. They guide you through the process. You can change fonts without coding. It’s user-friendly and quick.
Testing Font Changes
Fonts should look the same on all screens. Check them on phones, tablets, and computers. Use tools to see how they appear. All text should be clear and easy to read. If something looks off, adjust the font size or style. This keeps your website consistent and professional.
Different browsers may show fonts differently. Try opening your website in Chrome, Safari, and Firefox. Look for any changes in text size or style. Use standard fonts that work on most browsers. This ensures everyone sees your website the same way. If you find issues, update your code. This will help maintain a uniform look on all browsers.
Troubleshooting Common Issues
Changing the font in a WordPress theme can be tricky. Navigate to the Appearance section in your dashboard. Use the Customize option to access typography settings. Adjust the font style and size to suit your preference. Save changes to apply the new font across your site.
Fonts Not Displaying Correctly
Fonts might not show properly due to several reasons. Check if the font files are uploaded correctly. Sometimes, the theme might not support certain font types. Verify the font type and format. Make sure CSS styles are applied correctly. Sometimes, a browser’s settings can affect fonts. Clear the browser cache and reload the page. Ensure the theme’s settings are configured properly. Test the site on different browsers. This helps identify browser-specific issues. Check the theme’s documentation for guidance. Sometimes, the solution is found there.
Resolving Plugin Conflicts
Plugins can sometimes clash with theme fonts. Deactivate all plugins to find the culprit. Reactivate them one by one. Check if the font issue persists. Update all plugins to their latest versions. This can resolve compatibility issues. Ensure plugins are compatible with the theme. Visit plugin support forums for advice. Sometimes, other users have similar issues. Use a staging site to test changes. This prevents issues on the live site. Consider using a font manager plugin. It helps manage fonts easily.
Credit: www.elegantthemes.com
Frequently Asked Questions
How Can I Change Font In WordPress Theme?
To change the font in a WordPress theme, navigate to the WordPress dashboard. Go to Appearance > Customize. Look for Typography or Fonts section. Here, you can select a new font for your theme. Ensure to save changes after selecting your desired font style.
Is It Possible To Use Google Fonts In WordPress?
Yes, integrating Google Fonts into your WordPress theme is straightforward. Visit Google Fonts and select your preferred font. Copy the provided code snippet. Then, go to your theme’s settings or customizer, and paste the code into the Additional CSS section.
Save changes to apply the font.
Do I Need A Plugin To Change Fonts?
Using a plugin to change fonts in WordPress can simplify the process. Popular plugins like Easy Google Fonts allow users to select and customize fonts easily. They offer a user-friendly interface and extensive font options. However, it’s not mandatory, as themes may have built-in font settings.
Can I Change Fonts Without Coding?
Yes, you can change fonts without coding in WordPress. Use the WordPress Customizer accessible via the dashboard. Select Appearance > Customize, then navigate to Typography or Fonts section. Choose the desired font from available options. Save your changes to apply the new font across your site.
Conclusion
Changing fonts in WordPress themes is easy with clear steps. Follow the guide, and your site will look fresh. Fonts change the feel of your website. They can improve readability and style. Always check font compatibility with your theme. Some themes offer limited options.
Use plugins if needed for more choices. Experiment with different fonts. Find what fits your brand best. Remember, good fonts enhance user experience. Keep your site looking professional and engaging. Enjoy the freedom to personalize your website. Happy designing!


