
Imagine landing on a website that immediately captures your attention—clean, professional, and instantly recognizable. What’s one of the first things you notice?
The logo. Your logo is more than just a symbol; it’s the face of your brand, the first impression you make. So, if your WordPress site is missing that crucial element, it’s time to fix it. Adding a logo to your WordPress theme isn’t just a technical task; it’s a strategic move that enhances your brand’s identity and boosts your site’s credibility.
This guide will walk you through the simple steps to seamlessly incorporate your logo into your WordPress theme, empowering you to create a more engaging and memorable online presence. Ready to elevate your brand? Let’s dive in.
Choosing The Right Logo
Your logo should be simple and clear. People should know your brand. Colors are important. They should match your theme. Shapes in the logo need to be balanced. A good logo looks good small and big. Try different styles. See what fits your brand. Ask friends for opinions. Their feedback can help.
Save your logo in the right format. PNG is good for web use. JPEG is also common. Keep the file size small. This helps your website load fast. A size of 200 x 100 pixels works well for many themes. Always keep an original copy. You might need it later. Test your logo on different screens. Make sure it looks good everywhere.
Accessing WordPress Dashboard
First, open your browser. Type your website address. Add “/wp-admin” at the end. Press Enter. The login page appears. Enter your username. Type your password. Click the Log In button. You will see the dashboard. This is where you manage your site.
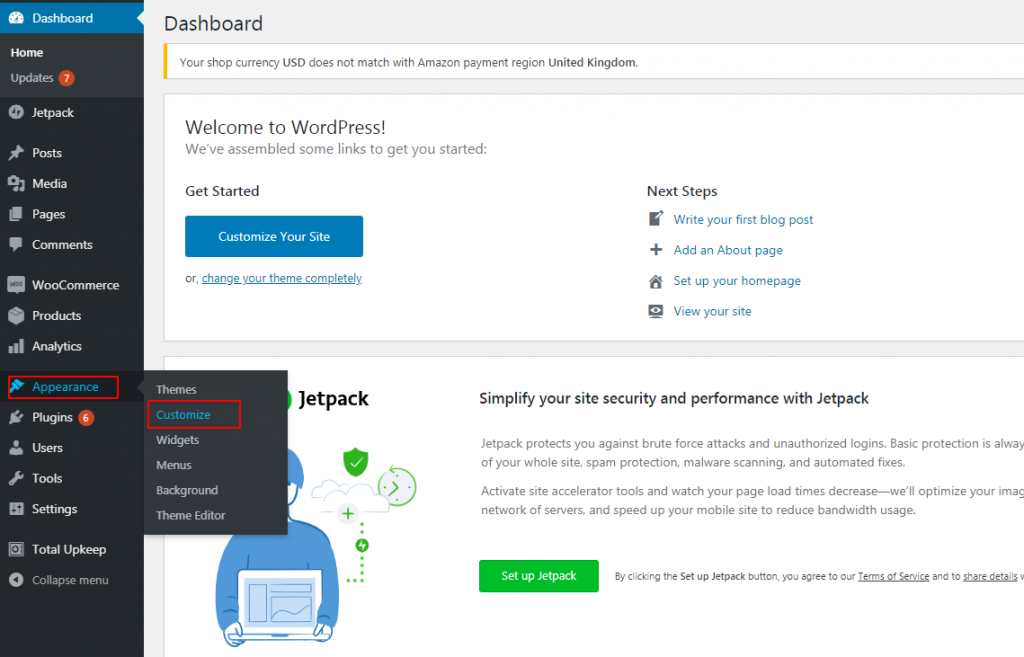
On the left side, find the menu. Look for “Appearance”. Click on it. A drop-down menu appears. Choose “Customize”. This opens a new screen. You can change many things here. Adding a logo is easy. Find the “Site Identity” option. Click on it. Upload your logo file. Save changes.
Using The Customizer Tool
First, open your WordPress dashboard. Find the Appearance tab on the left menu. Click on it. Then, select Customize. This will open the Customizer tool. Look for the Header section. It might also be called Site Identity or Logo.
Click on the Header section. You will see an option to Upload Logo. Click on it. Choose your logo file from your computer. Make sure it is a good size and looks clear. After uploading, you might see a Crop option. Use it to fit your logo just right.
Once done, click the Publish button. Now, your logo will show up on your site. Easy, right? Your site looks better with your logo. It makes your site unique.
Adjusting Logo Settings
Choose the right size for your logo. Too big can look odd. Too small may not be clear. Use the settings in your theme. You can drag the corners of the logo. This will help in resizing it. Make sure the logo is at the center. It should catch attention easily. A well-positioned logo builds trust with visitors.
Mobile users are many. A logo must look good on small screens. Check the mobile settings in your theme. This helps in adjusting the logo size. Make sure it does not take too much space. Keep it simple yet clear. This ensures a great user experience.
Adding Logo Via Theme Options
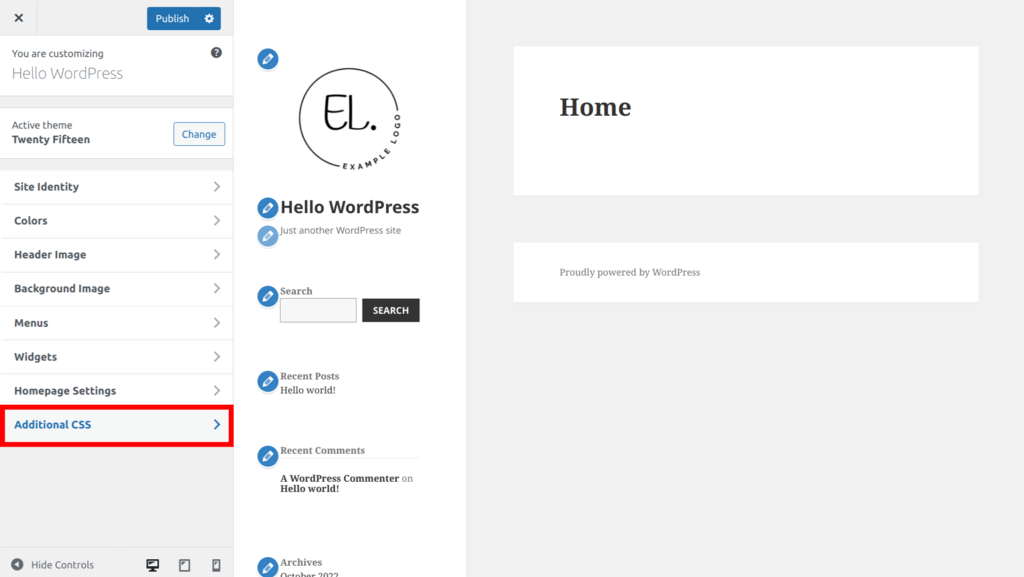
Most WordPress themes have a customization menu. Here, you can add your logo. Start by logging into your WordPress dashboard. Look for the Appearance tab. Then select Customize. A new page will open. It shows you various options. Find the Site Identity section. This is where you can upload your logo. Click the Select logo button. Choose your logo file from your computer. Ensure your logo file is clear and not too large.
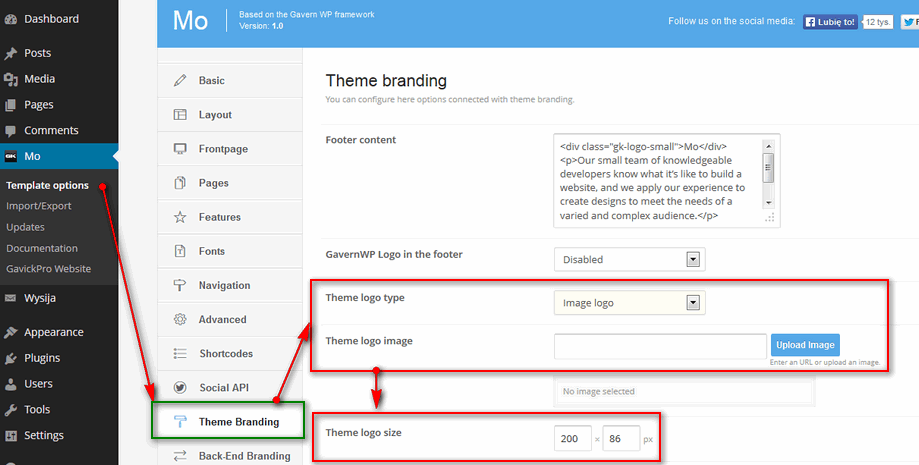
Some themes have different settings. Go to the Theme Options section. It might be under Appearance or a separate tab. Look for a section labeled Logo or Header. Click on the Upload button. Choose your logo file. Save your changes. Check your site to see the new logo. Make sure it looks good. Adjust if needed.
Editing Theme Code
WordPress themes have files. These files control how your site looks. The header.php file is important. It often contains the logo code. You need to edit this file to add your logo. Make a copy before you change anything. This way, you can fix mistakes easily.
Open the header.php file. Look for the code that shows the site title. Replace it with HTML code for your logo. Use the tag to add your logo. Example:

Verifying Logo Appearance
Test your logo on different devices. Use a computer, tablet, and phone. Make sure your logo looks good everywhere. It should be clear and not blurry. Check its size. Is it too big or too small? Use a responsive design. Your logo should adjust to screen sizes.
Checking Across Different Devices
Try various devices for testing. Use both Apple and Android. Ensure the logo looks good on all. Sometimes, logos appear differently on phones. Check both landscape and portrait modes. Make adjustments as needed. Use browser tools for testing.
Ensuring Browser Compatibility
Check your logo on different browsers. Use Chrome, Safari, and Firefox. Each browser may show logos differently. Ensure colors and shapes remain the same. Fix any problems that arise. Browser settings can affect logos. Regular checks are important.
Credit: www.inmotionhosting.com
Troubleshooting Common Issues
Adding a logo to your WordPress theme often faces issues. Common problems include incorrect file formats and size mismatches. Ensure your logo is optimized for web use, and check theme settings for proper placement.
Logo Not Displaying
Your logo might not show up due to various reasons. Check if the logo file is uploaded correctly. Make sure the image path is correct in your theme settings. Sometimes, theme conflicts can cause logo issues. Switching themes might help find the problem. Verify if the logo image is in the right format. Common formats include PNG or JPEG. Update your theme and WordPress to the latest version. This can solve many display problems. Clear your browser cache to see changes. Check if a plugin is blocking the logo display. Disabling plugins can help identify the issue.
Resolving Image Quality Problems
A blurry logo can affect your site’s look. Use high-resolution images for better quality. Ensure your image dimensions match your theme’s requirements. Resize images if needed before uploading. This keeps the logo sharp. Avoid stretching images as it causes pixelation. Always optimize images to reduce loading time. Too large files can slow down your site. Use image compression tools to maintain quality. Check your theme’s settings for image quality adjustments. Some themes offer settings to improve image clarity. Regularly update your logo file to maintain quality.
Best Practices For Logo Design
Maintaining brand consistency is very important. Your logo is your brand’s face. It should reflect your values. Use the same colors and fonts everywhere. This helps people remember you. A logo should be simple and unique. Avoid too many details. Simple logos are easy to recognize.
Ensuring readability and clarity is also key. A logo should be clear in all sizes. Check how it looks on a phone or a billboard. Text in the logo must be easy to read. Avoid fancy fonts. Choose clean and simple ones. Good logos work well in black and white too. Test your logo in different colors and backgrounds. This ensures it always looks good.
Credit: www.gavick.com
Credit: www.hostinger.com
Frequently Asked Questions
How Do I Upload A Logo In WordPress?
To upload a logo in WordPress, navigate to Appearance > Customize. Select the Header or Site Identity section, then click “Select Logo. ” Upload your logo file from your computer, adjust settings if needed, and save changes. Ensure your logo is the right size for your theme.
Can I Change My WordPress Logo Size?
Yes, you can change your WordPress logo size. Navigate to Appearance > Customize > Header or Site Identity. There, you can adjust logo dimensions. Some themes offer specific settings, while others may require custom CSS to resize the logo. Always check theme documentation for guidance.
Is A Logo Necessary For My WordPress Site?
A logo is important for branding your WordPress site. It helps visitors identify your site quickly and enhances credibility. While not mandatory, a logo provides a professional touch and can be a key part of your site’s identity. Ensure it aligns with your site’s theme and content.
How Can I Design A WordPress Logo?
Designing a WordPress logo can be done using tools like Canva or Adobe Illustrator. Choose a simple design that reflects your site’s purpose. Ensure it’s scalable and looks good on different devices. Incorporate colors and fonts consistent with your website’s style for brand consistency.
Conclusion
Adding a logo to your WordPress theme is simple. It enhances your website’s identity. Follow the steps outlined above for easy customization. A clear logo helps visitors recognize your brand quickly. Consistent branding makes your site look professional. Ensure your logo is high-quality and well-sized.
Test its appearance on different devices. A responsive design improves user experience. Regular updates keep your site fresh and relevant. This simple task boosts your site’s appeal. Personalize your theme with care. Your logo tells your story without words. Make it memorable.


