
Are you ready to showcase your website to the world, but unsure about the next steps? Uploading your website to a web host might seem daunting, but it’s simpler than you think.
Imagine your website being just a few clicks away from going live and reaching your audience. This guide will walk you through the process step-by-step, cutting through the tech jargon and making it accessible for anyone, regardless of your technical skills.
By the end of this article, you’ll have the confidence and knowledge to upload your website with ease. Let’s dive in and unlock the potential of your online presence.
Choosing The Right Web Host
Uploading your website to a web host involves selecting a reliable hosting service. Follow the host’s instructions to transfer files using an FTP client. Ensure all site files are properly organized before uploading.
Types Of Web Hosting
Web hosting comes in different types. Shared hosting is simple and cheap. VPS hosting is more powerful. Dedicated hosting gives you full control. Each type has its benefits. Pick what suits your needs.
Factors To Consider
Think about the cost. Can you afford it? Look at the speed. Is it fast enough? Check the support. Will they help when you need it? Look at the storage. Is there enough space for your files? Make sure to review the security features. Protect your data.
Popular Web Hosting Providers
| Provider | Features |
|---|---|
| Bluehost | Good for beginners, reliable support |
| HostGator | Affordable plans, easy to use |
| SiteGround | Great performance, strong security |
Preparing Your Website Files
Keep your website files tidy. Use clear names for folders. Group similar files together. HTML files in one folder. Images in another. This helps you find things fast. Makes website uploading easier. Websites need a simple structure. Avoid too many folders. Keep it neat. Messy folders confuse you.
Ensure files work with web hosts. Some hosts support only certain file types. Check if your images are in JPG or PNG. Avoid rare file types. Use common formats. Ensure your code works. No errors in HTML or CSS. Test your website first. Make sure it looks right.
Setting Up A Domain Name
Choose a domain name that fits your website. It should be easy to remember. Visit a domain registrar to buy your domain. Popular registrars include GoDaddy and Namecheap. Follow their steps to register. Make sure your name is available. Pay the fee to secure your domain. Now, the name is yours!
Log in to your hosting account. Find the section for domain settings. You will see nameservers there. Copy the nameservers provided by your host. Now, go to your domain registrar account. Paste the nameservers in the DNS settings. Save the changes to connect your domain. This can take a few hours.
Using A Control Panel
First, find the login page for your web host. Enter your username and password. Look for a button that says Login. Click it to open the control panel.
The control panel is where you manage your website. It’s like a home for all your website tools. You can find settings, files, and other important parts here.
Inside the control panel, you will see many options. Look for File Manager. This is where you upload your website files. Click on it to open it. You may also find a section for emails. This helps you create email addresses for your site.
There might be a tool called Database Manager. It’s for setting up databases. Some panels have a Security section. This is to protect your site from hackers.
Uploading Files Via Ftp
FTP clients help upload files to the web host. Popular options include FileZilla and Cyberduck. These tools are easy to use and free. Choose one that suits your needs. Install the client on your computer.
Open your FTP client. Enter the server address provided by your web host. Use your username and password to log in. Choose port 21 for FTP connections. Save settings for quick access.
Connect to your server with the FTP client. Locate your website files on your computer. Drag these files into the server window. Wait for the transfer to finish. Check your website online to ensure it works.

Credit: www.youtube.com
Using File Manager In Web Host
Uploading a website to a web host is simple with File Manager. First, access your hosting account’s File Manager tool. Then, upload your website files to the public_html directory. Your site will go live after the upload completes.
Accessing File Manager
First, log into your web host account. Look for the control panel option. Click on it. Find the File Manager. It helps you manage files. Open it by clicking the link. Now, you see all your files here.
Uploading And Managing Files
Use the upload button to add files. Click it. Choose files from your computer. Make sure your files are in the right format. Now click upload. Wait until it finishes. Check that all files are uploaded. Arrange them properly in folders. This makes it easy to find them.
Setting Up Databases
First, log in to your web host’s control panel. Find the section for databases. Click on “Create New Database”. Give your database a simple name. Next, create a username and password for the database. Write them down. You will need them later. Make sure the user has all permissions. This lets your website use the database.
Open the database you just made. Find the “Import” option. Click on it. Choose the file you want to import. This file often has a “.sql” extension. Click “Go” or “Import” to start. Your data will now load into the database. Check for any errors. If there are none, your data is ready.
Configuring Website Settings
Uploading your website to a web host involves several steps. First, choose a reliable web host that fits your needs. Then, access the control panel and use an FTP client to transfer your website files. Ensure all settings are correct for smooth operation.
Editing Configuration Files
Start by locating the configuration files in your website folder. These files often have names like config.php or settings.json. Open the file using a text editor. Check for database settings, site URL, and other important details. Make sure all information is correct. Save changes once you finish editing.
Adjusting Permissions And Settings
Set file permissions correctly. This ensures your website works safely. Use a file manager or command line tools. For most files, permissions like 644 are good. For folders, use 755. Check settings for things like error reporting and caching. Adjust these to improve website performance.
Testing Your Website
Uploading your website to a web host involves selecting a reliable hosting service, then transferring files using FTP. Ensure all files are organized correctly before upload. Double-check your site for functionality and design after transferring.
Checking For Errors
Find and fix all errors on your website. This step is very important. Use tools to check for broken links. Make sure all images and files load well. Your website should not have any missing pages. Check every page. Ensure there are no spelling mistakes or typos. These errors can confuse visitors.
Ensuring Functionality
Test all features on your site. Buttons should work when clicked. Forms must send user data correctly. Check if videos and animations play smoothly. Make sure your site looks good on different devices. A responsive design is key. Ensure your website is easy to use. This makes visitors happy and keeps them on your site.
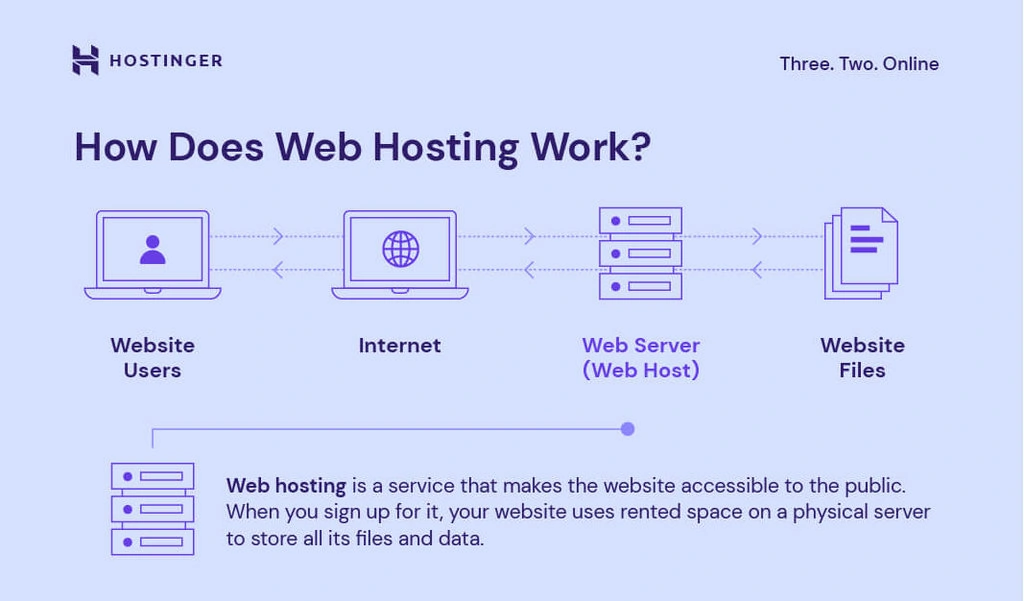
Credit: www.hostinger.com
Troubleshooting Common Issues
Uploading a website to a web host often involves navigating common issues like file permissions and domain settings. Ensure files are in the correct format and double-check DNS configurations to prevent downtime. Use FTP tools for seamless file transfers and verify compatibility with hosting requirements.
Addressing Upload Errors
Uploading files can sometimes lead to errors. Check file names for special characters. Ensure file formats are correct. Verify file sizes are within limits. Consider network stability during uploads. Refresh the connection if it drops. Use FTP tools for smoother uploads. Monitor error messages for clues. Consult host support if problems persist. Re-upload files if necessary. Back up files before starting. Organize files neatly for easier uploads. Maintain updated software for compatibility.
Resolving Dns Problems
DNS issues can disrupt website visibility. Check DNS settings in the host panel. Ensure domain names are correct. Update DNS records promptly. Verify server addresses. Confirm propagation status online. Use DNS tools for checks. Clear browser cache regularly. Consult host documentation for guidance. Ensure network stability for DNS checks. Check firewall settings for blocks. Contact ISP for DNS changes. Monitor updates on DNS status. Consider DNS service providers for smoother operation.

Credit: developer.mozilla.org
Frequently Asked Questions
How Do I Upload A Website To Host?
Upload your website files using an FTP client or your host’s file manager. Connect with your host’s server details. Drag and drop files into the public_html directory. Check permissions to ensure files are accessible. Verify your site loads correctly in a browser.
How Do I Host A Website On Webhost?
Sign up on Webhost, select a hosting plan, and register your domain. Upload your website files using the control panel or FTP. Configure DNS settings to point to Webhost servers. Monitor your site performance and security through the dashboard.
How Do I Upload My Website To Hostinger?
Log in to Hostinger’s dashboard. Go to the “Hosting” section. Select your domain. Use the “File Manager” or FTP to upload your website files. Ensure your files are in the “public_html” directory.
How Do I Publish My Website?
To publish your website, choose a hosting provider, upload your files via FTP, and connect your domain. Ensure your website is optimized for SEO and mobile-friendly for better visibility. Regularly update content to keep your audience engaged and improve search engine rankings.
Conclusion
Uploading your website to a web host is straightforward. Follow each step carefully. First, choose the right hosting service. Then, prepare your files. Use FTP to transfer them. Check settings to ensure everything works. Test your site after uploading. Fix any issues promptly.
Keep backups for safety. Regular updates help maintain security. Stay organized throughout the process. Hosting your website opens it to the world. You can now share your content widely. Enjoy your journey into web hosting. Your website is ready for visitors.


