
Are you looking to give your WordPress site a unique touch? Maybe you want to change a few colors, tweak the layout, or add some personal flair that isn’t available in the default theme options.
This is where adding a custom CSS file can make all the difference. Imagine the power of tailoring your website to perfectly match your vision, down to the smallest detail. In this guide, you’ll discover how to seamlessly integrate a custom CSS file into your WordPress theme.
Not only will this enhance your site’s appearance, but it will also elevate the user experience, keeping visitors engaged and coming back for more. Stick around, and by the end of this article, you’ll have the tools you need to transform your WordPress site into a reflection of your unique style.
Credit: www.hostinger.com
Benefits Of Custom Css
Custom CSS makes your website look special. It helps your site stand out. Custom styles can change colors, fonts, and layouts easily. This makes your site look unique and attractive. Custom CSS also helps improve site speed. It avoids extra plugins. Plugins can slow down your site. With custom styles, your site loads faster. A faster site is better for users. They stay longer. This means more visitors for you.
Custom CSS gives you control. You decide how your site looks. No limits. You can change small details or big ones. This makes your site reflect your brand. It shows your style. Your site becomes more professional. People trust sites that look good. They feel safe and happy.
Preparing Your WordPress Environment
Backing up is very important. It keeps your website safe. Always make a backup before changes. Use plugins like UpdraftPlus or BackupBuddy. These tools save your site data. You can restore it if something goes wrong. Backups protect your hard work. Never skip this step.
Child themes are useful. They help customize your site safely. Create a child theme to keep changes separate. This way, updates won’t affect your edits. To make a child theme, go to your theme folder. Then create a new folder. Add a style.css and functions.php file inside. Write a few lines in each file. This links the child theme with the parent theme. Now, your custom CSS can go in the child theme.
Creating A Custom Css File
Choose a simple name for your CSS file. It helps in easy identification. Use names like style.css or custom.css. Avoid spaces or special characters. Keep it short and clear. A good name makes it easy to remember. It will also help others understand it.
Start with simple CSS rules. Use selectors like body or h1. These selectors apply styles to your page. Write properties like color or font-size. You can set values like red or 16px. Each rule helps change the look of your website. Use comments to describe your styles. This helps you and others understand your code.
Uploading The Css File To WordPress
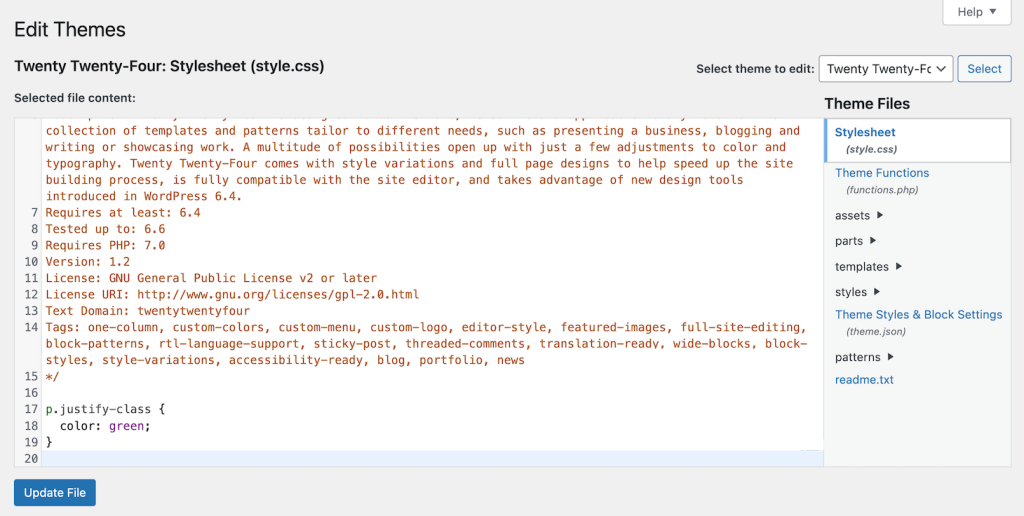
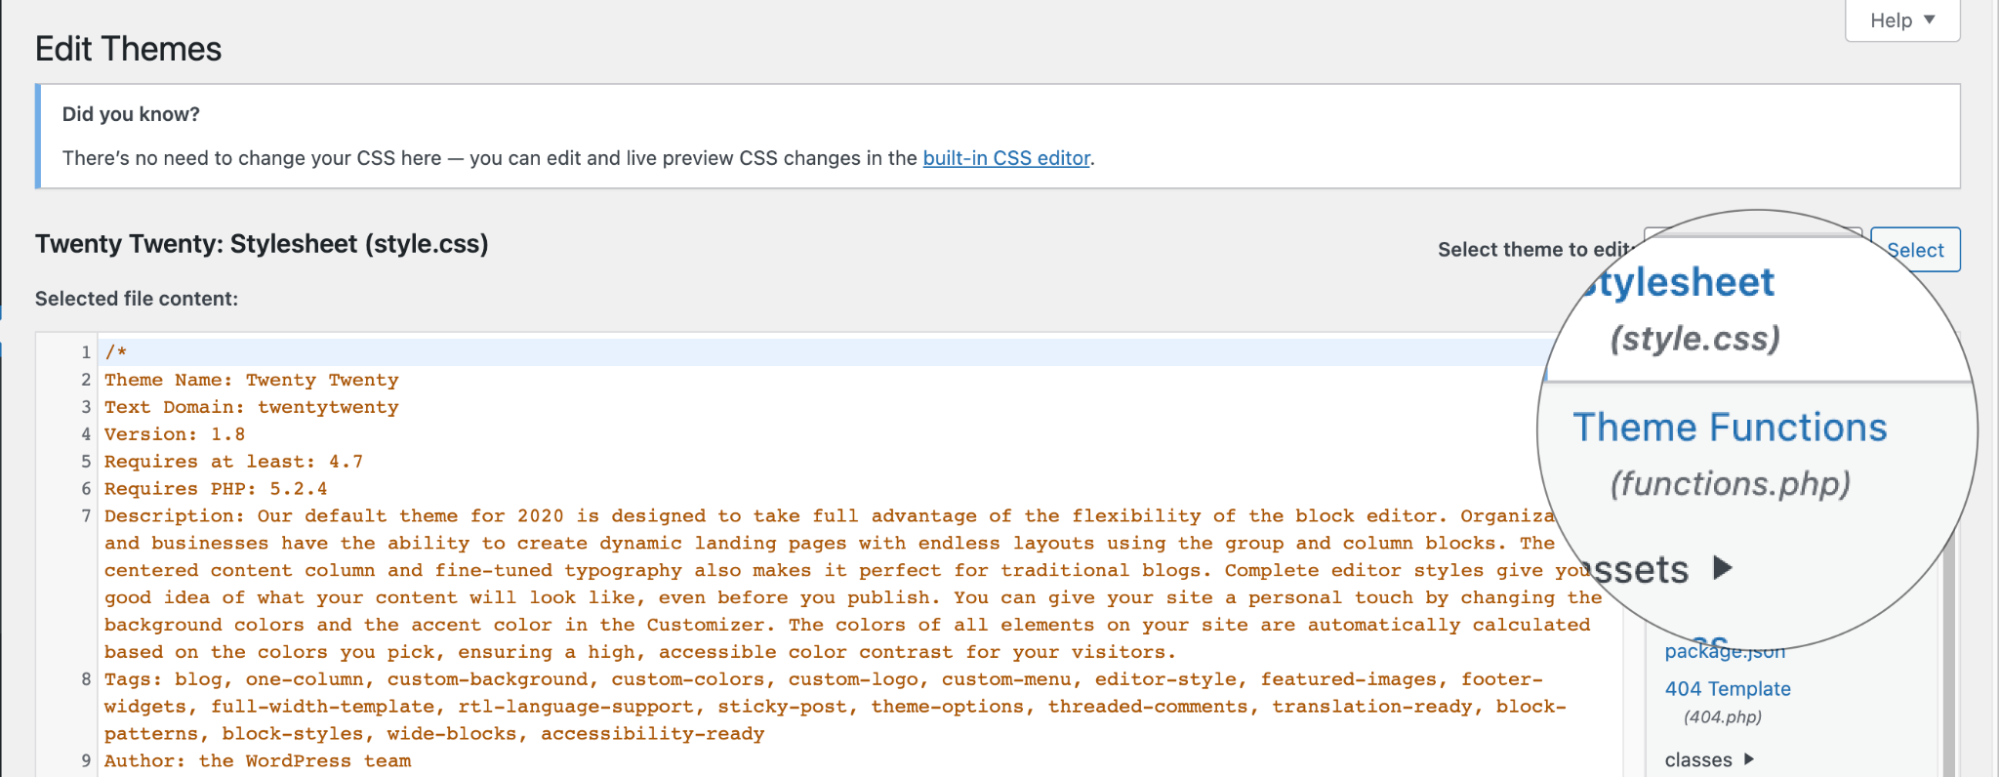
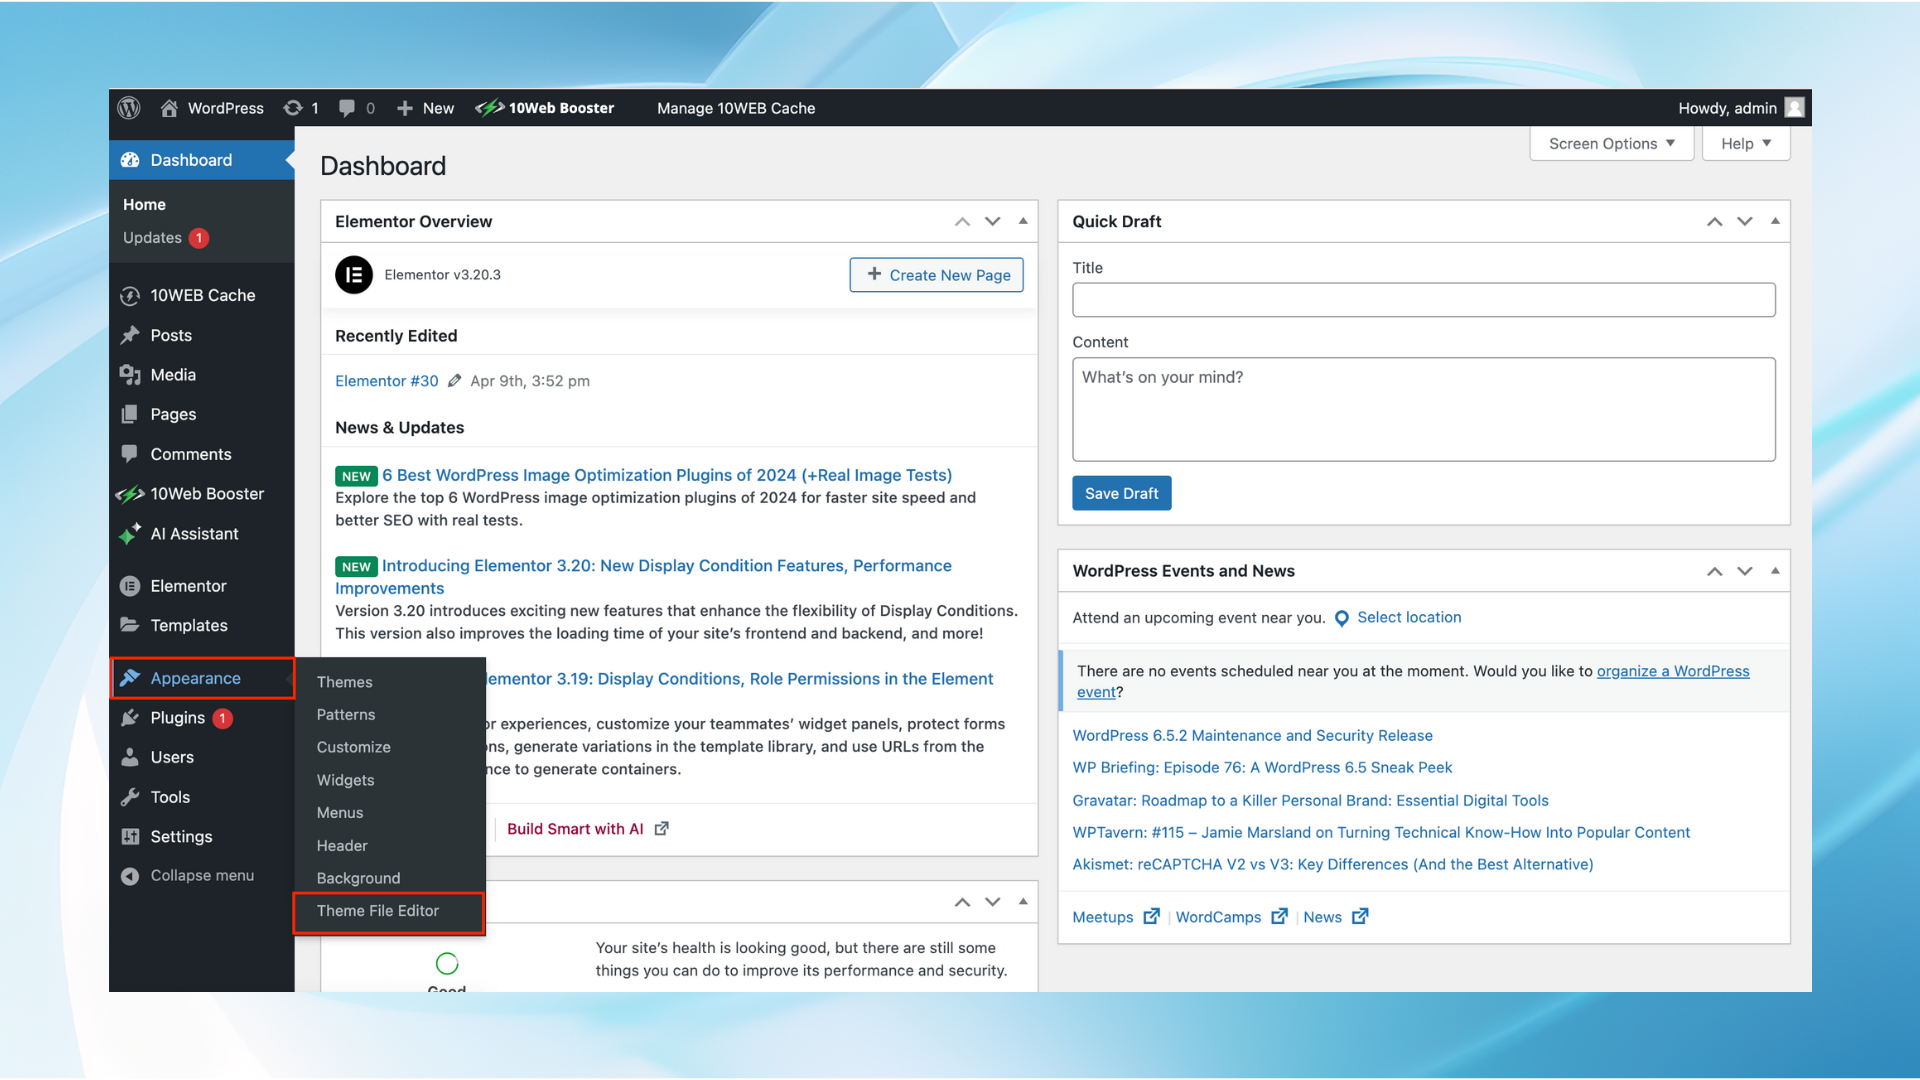
Open your WordPress dashboard. Click on Appearance. Then go to Theme Editor. A list of files appears. Look for the style.css file. Click on it. This file controls your theme’s look. Paste your custom CSS at the end. Remember to save changes. This way, the new styles apply to your site.
First, use an FTP client like FileZilla. Connect to your website. Navigate to /wp-content/themes/your-theme-name/. Here, upload your CSS file. Make sure it is named properly. Next, edit the functions.php file. Add code to link your CSS file. This ensures WordPress loads it.
Enqueuing The Css File
To add custom CSS, edit the functions.php file. This file is in your theme folder. Open it with a text editor. Add code to load your CSS file. Use the wp_enqueue_style function. This function helps to load styles correctly. Write the function name followed by parentheses. Inside the parentheses, add the style handle and file path. The style handle is a name for your CSS file. The file path is where your CSS file is located. Save changes to the functions.php file. Your custom CSS file is now ready to use.
Hooks in WordPress are powerful tools. They help in adding custom features. Use the add_action hook to load your CSS file. This hook connects your function to WordPress. Write add_action followed by parentheses. Inside, add ‘wp_enqueue_scripts’ and your function name. This tells WordPress when to load your CSS. Hooks make the process easy and organized. Your custom styles will load at the right time.
Credit: kb.hosting.com
Testing And Debugging
Sometimes, CSS conflicts happen in WordPress themes. They make the design look wrong. Testing helps find these problems. Change one thing at a time. See if it fixes the issue. Debugging is like solving a puzzle. It needs patience and focus.
Browser Developer Tools show how CSS affects a page. Right-click on a page and select “Inspect.” This opens a panel. It shows HTML and CSS. You can see styles applied to elements. Change CSS directly here. Test how it looks. Save changes if it works well. These tools help learn about CSS and solve problems.
Maintaining Custom Css
Integrating a custom CSS file in a WordPress theme enhances your site’s look. Utilize the WordPress customizer or child theme’s style. css file to add unique styles. Ensure proper file paths and clear syntax for seamless customization.
Regular Updates And Backups
Updating your custom CSS regularly is important. Themes and plugins change often. These updates can affect your CSS. Check your CSS with each update. This prevents problems and keeps your site looking good.
Always backup your CSS. Save your custom styles somewhere safe. If something breaks, you can restore it easily. Use a backup plugin for safety. This protects your work.
Documenting Your Changes
Write down all your CSS changes. This helps you remember what you did. Use a notebook or a digital file. It’s easy to forget changes. Documenting helps you fix problems fast.
Keep a record of styles and why you changed them. This helps when you update your theme. You can see if a change is needed. Good documentation saves time.
Credit: 10web.io
Frequently Asked Questions
How To Locate Css Files In WordPress?
To locate CSS files in WordPress, access your theme’s directory via FTP or the WordPress dashboard. Navigate to the “wp-content/themes” folder. Open your active theme folder, and you’ll find style. css, the main stylesheet. You can also explore subfolders for additional CSS files related to specific features or plugins.
Can I Add Css Without A Plugin?
Yes, you can add CSS without a plugin. Use the WordPress Customizer by navigating to Appearance > Customize. Select ‘Additional CSS’ to enter your custom styles directly. This method is straightforward and doesn’t require extra plugins, ensuring your site remains lightweight and efficient.
How To Edit WordPress Theme Css?
Edit your WordPress theme’s CSS by accessing the Theme Editor. Navigate to Appearance > Theme Editor in the dashboard. Locate the style. css file within your active theme. Make your desired changes directly in the editor, save, and refresh your site to view updates.
Do Changes In Css Affect Site Performance?
Changes in CSS can affect site performance, especially if poorly optimized. Large or complex stylesheets may slow down load times. Ensure your CSS is clean and concise. Minify CSS to reduce file size and improve loading speed, enhancing user experience and SEO performance.
Conclusion
Adding a custom CSS file enhances your WordPress theme’s appearance. Simple steps make it possible. Begin by creating your CSS file. Next, upload it to your theme directory. Use the functions. php file to link it. This improves your site’s design without altering the main theme files.
Customization offers flexibility. Try different styles. Experiment with colors and layouts. Your site becomes unique. These changes help your brand stand out. Visitors notice your site’s distinct look. They appreciate the effort. Follow these steps to achieve a professional website design.
Transform your WordPress theme with ease.


