
Ever felt the urge to give your WordPress site that extra personal touch, making it stand out from the crowd? Adding a custom CSS file to your WordPress theme might be the magic wand you need.
Imagine having the power to tweak every element of your site to perfectly reflect your unique style or brand identity. Sounds exciting, right? You’ll be thrilled to know that customizing your WordPress site is not as daunting as it seems.
With just a bit of guidance, you can transform your website’s appearance, enhancing not only its aesthetics but also the user experience. Ready to dive in and learn how you can effortlessly add a custom CSS file to your WordPress theme? Let’s unravel the steps together and unlock your website’s full potential.
Credit: www.hostinger.com
Basics Of Css In WordPress
WordPress themes often use CSS for design. CSS makes a website look nice. You can change colors, fonts, and layouts. Adding a custom CSS file lets you style your site. This file is like a special set of rules. These rules tell the website how to look.
Start by creating a new CSS file. Name it something easy. Save it in your theme folder. Then, link this file in your theme’s functions.php file. This tells WordPress to use your styles. Don’t forget to check how it looks on your site. Make sure everything appears as you planned.
Benefits Of Custom Css
Custom CSS lets you change your website’s look. You can make it unique. Your site stands out from others. You can tweak colors, fonts, and layouts. This helps in building a strong brand identity. Tailor your site as per your needs.
Custom CSS improves user experience. It makes your site easy to navigate. Users stay longer on a well-designed site. Better design means more visitors. This can lead to higher engagement. It boosts your site’s performance.
Custom CSS allows faster loading. It avoids unnecessary codes. A quick site is good for SEO. Search engines prefer fast websites. This helps in ranking better. Your site gets more visibility.
Preparing Your Custom Css File
Create a new file using a text editor. Save it with the .css extension. Name it something simple, like custom-style.css. Use lowercase letters for the file name. Avoid spaces or special characters. Keep it organized for easy access later.
Write styles to change how your site looks. Use comments to label sections. For example, write / Header Styles / above header styles. This makes the file easy to read. Group similar styles together. This keeps everything neat and tidy. It also helps others understand your work.
Credit: 10web.io
Locating The Theme Directory
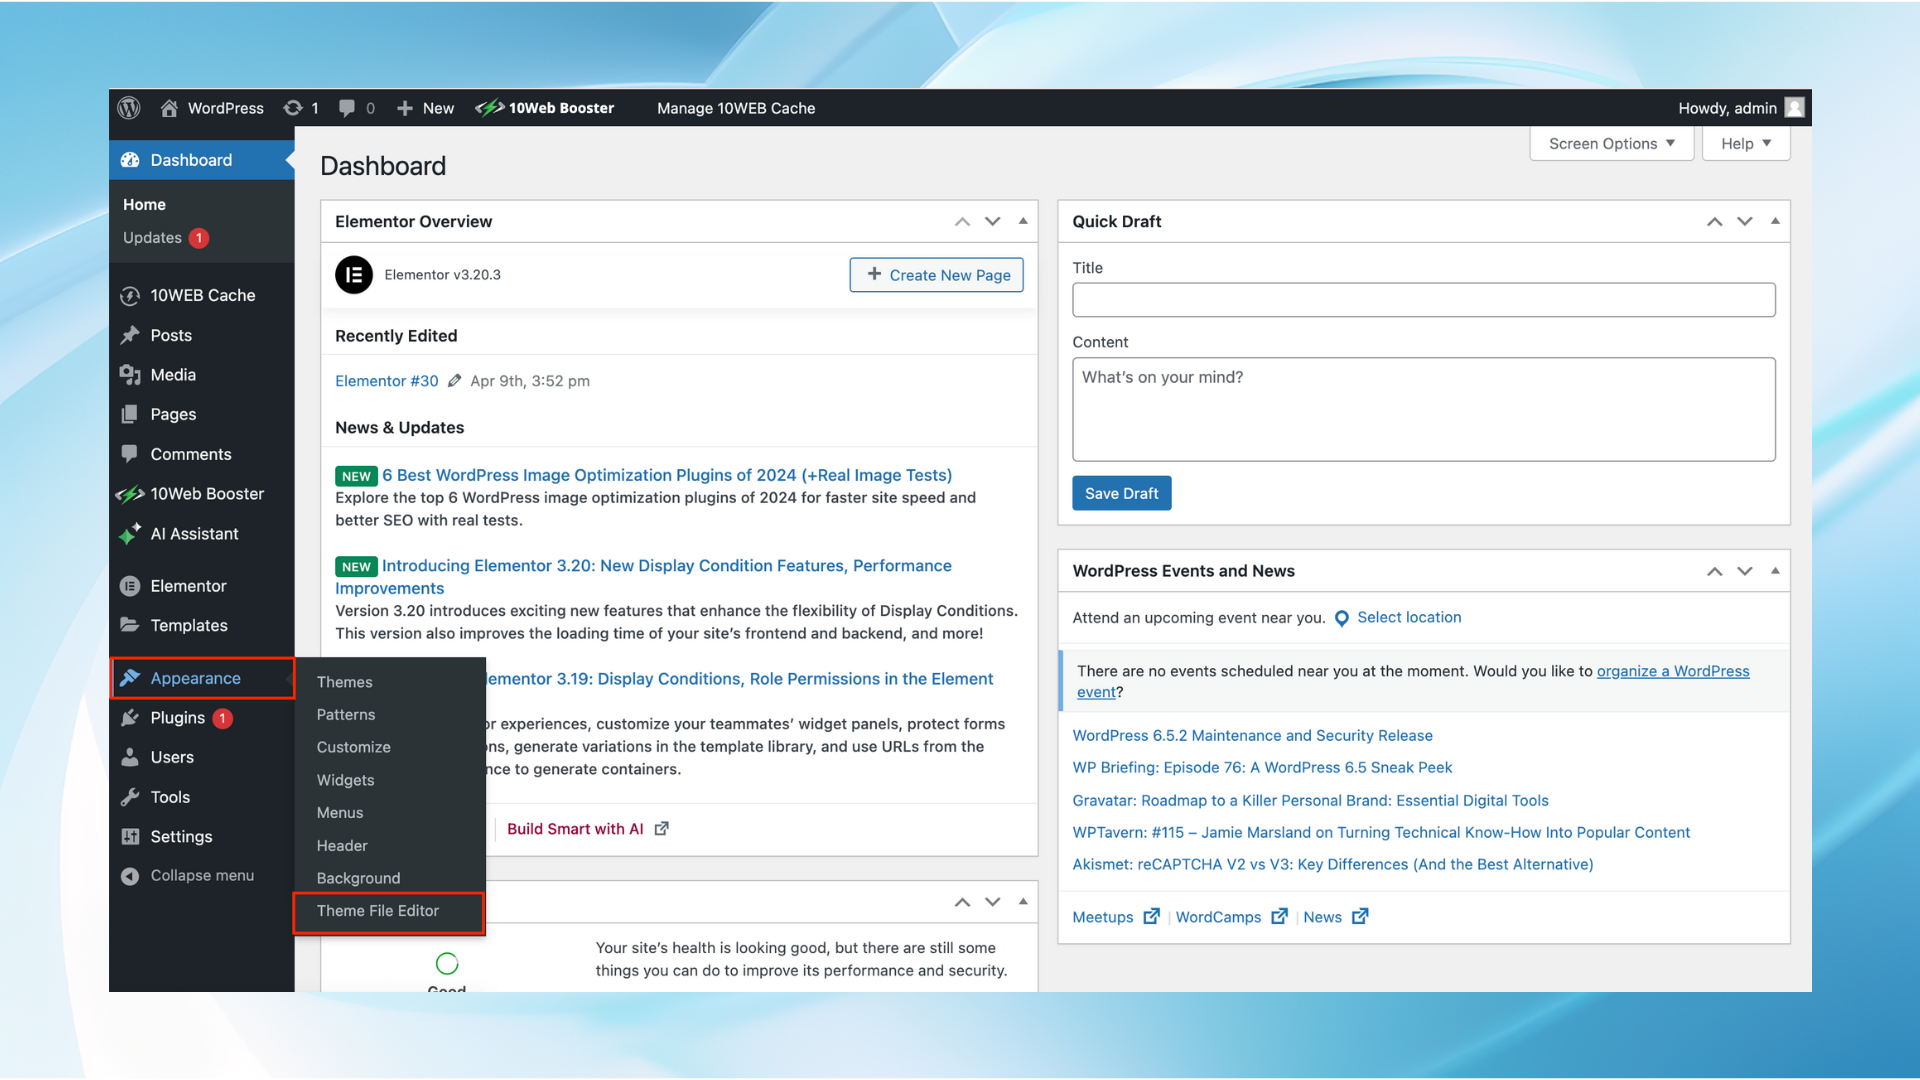
First, open your WordPress dashboard. Find the section called Appearance. Click on it. Next, click on Theme Editor. Here, you see many files. These are part of your theme. Be careful with them.
Look for a folder named wp-content. Inside, find themes. Click on it. You see folders with theme names. Choose your current theme’s folder. This is where you add the custom CSS file. Remember this path. It is important. It helps you find your files later.
Adding Css Via Theme Editor
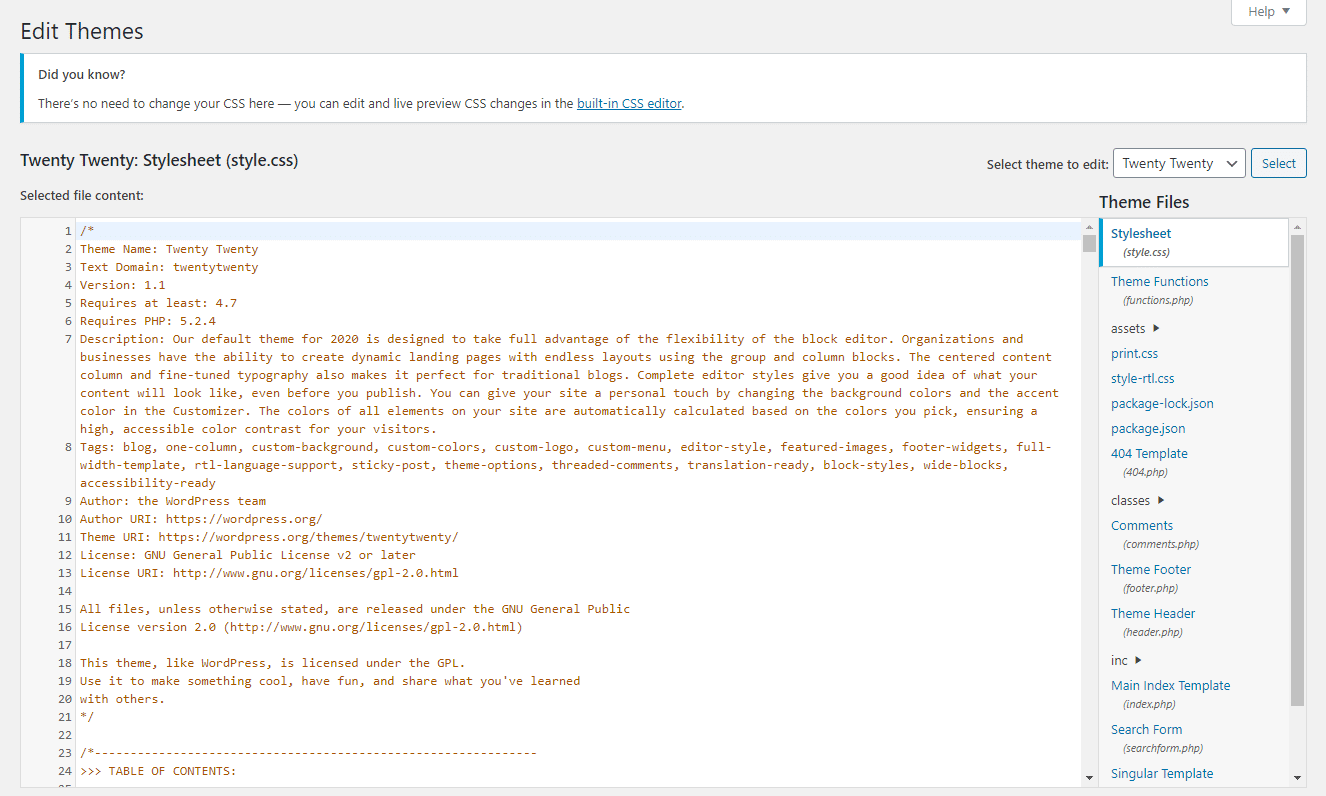
To add custom CSS to a WordPress theme, navigate to the Theme Editor. Locate the “style. css” file. Insert your CSS code for personalized design changes.
Navigating To Theme Editor
Start by logging into your WordPress dashboard. Look for the Appearance tab on the left side. Click on it. You will see Theme Editor under the menu. Click on Theme Editor. You might see a warning. Don’t worry. Just click “I understand” to proceed.
Inserting Css Code
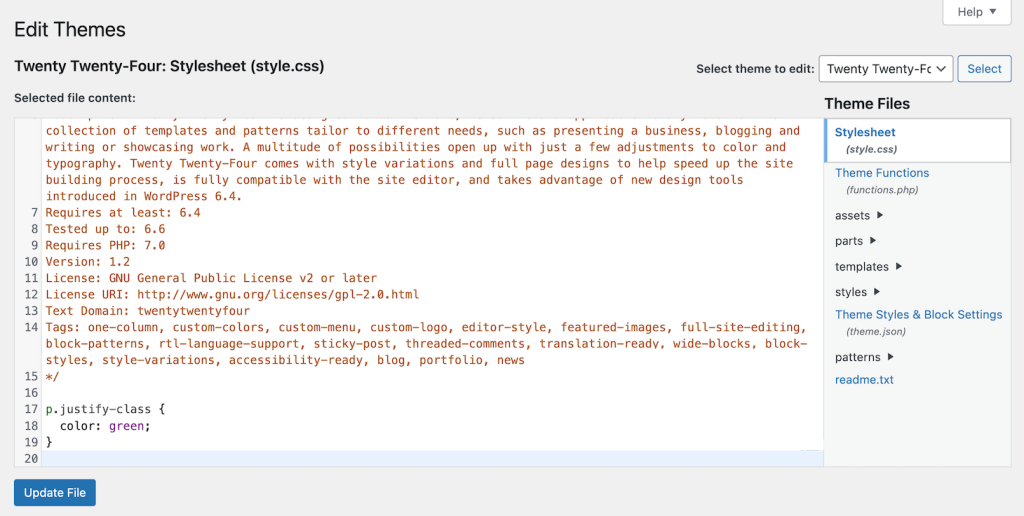
Once in the Theme Editor, find the style.css file. This is where you add your custom CSS. Scroll down to the bottom of the file. Type your CSS code there. Make sure to save changes. Your custom styles are now active. You can check your website to see the changes. If you need to update, just return to the same spot. Always remember to save any changes.
Using Functions.php To Enqueue Css
Add custom CSS to your WordPress theme by editing the functions. php file. Enqueue your stylesheet properly. This ensures your design changes load correctly without affecting site performance.
Understanding Enqueue Script
WordPress uses a special method to load styles. This method is called enqueue script. It tells WordPress to add your CSS file correctly. This prevents conflicts with other files.
Use the wp_enqueue_style function to add CSS. This function is easy to use. It needs a few simple details. You must provide the file’s name and path. Also, add the version number if available. This helps when updating the file.
Editing Functions.php
Find the functions.php file in your theme folder. Open it carefully. You will add code here. Type the wp_enqueue_style function inside a PHP function. Add the function to the wp_enqueue_scripts action hook. This makes sure your CSS loads at the right time.
Be careful when editing this file. A small mistake can break your site. Always make a backup first.
Implementing Css With Child Themes
To start, make a child theme folder. Name it after your main theme. Inside, create a style.css file. This file will store your custom CSS.
Creating A Child Theme
First, open the new style.css file. At the top, add a comment block. This block should include the theme name and template. The template is the main theme’s folder name. Now, your child theme is ready.
Linking Css In Child Theme
To link your CSS, edit the functions.php file. In your child theme folder, create this file if it doesn’t exist. Use wp_enqueue_style() to load your stylesheet. This links your CSS to the theme.
Testing And Troubleshooting
Easily enhance your WordPress theme by adding a custom CSS file. Begin by accessing the theme editor in your dashboard. Upload and link your CSS file to modify styles and tailor the appearance effortlessly.
Verifying Css Changes
Check the website after adding your custom CSS file. Ensure the changes appear as expected. Use the browser’s developer tools to inspect elements. Look for the new styles applied to the elements. Ensure the correct CSS file path is used. Refresh the page to see updates. Sometimes clearing the cache helps. Check different browsers for consistent styling.
Resolving Common Issues
Styles not showing? Confirm the CSS file is correctly linked. Check the file name and path. Ensure the CSS file is in the right folder. Look for conflicting styles from other files. Use the important tag to override styles. Verify permissions on the CSS file. Sometimes a typo in the CSS code causes issues. Double-check the code for errors. If needed, consult forums for solutions.
Best Practices For Custom Css
Integrating custom CSS into WordPress themes enhances design flexibility. First, create a new CSS file and upload it via the theme directory. Then, link this file using the functions. php file for seamless styling updates across your site.
Maintaining Clean Code
Write CSS that is neat and simple. Always use clear and short names for classes. This helps to know what each class does. Avoid too much nesting of rules. It makes the code hard to read. Use comments to explain tricky parts. This helps when you or others read the code later. Keep styles separate from the main CSS file. This way, it’s easier to find and fix problems.
Organizing Css For Future Updates
Create a plan for adding new styles. Group similar styles together. Use sections for different parts of the site. This helps find styles fast when changes are needed. Always test new styles. Make sure they work on all devices. Keep a backup of the original CSS file. This is useful if something goes wrong. Remember to update the CSS file name with changes. This helps with tracking versions.
Credit: kinsta.com
Frequently Asked Questions
How Can I Add A Css File To WordPress?
To add a CSS file to your WordPress theme, use the `wp_enqueue_style()` function in your theme’s `functions. php` file. This function helps you register and enqueue custom stylesheets effectively. Place your CSS file in the appropriate directory and update the file path within the function for proper loading.
Why Use Custom Css In WordPress Themes?
Custom CSS allows you to personalize your WordPress theme’s appearance without altering core theme files. It offers flexibility in design, enabling you to tailor fonts, colors, and layouts. By using custom CSS, you can create a unique look that aligns with your brand identity and enhances user experience.
Can I Add Css Without Editing Theme Files?
Yes, you can add CSS without editing theme files. Use the WordPress Customizer by navigating to Appearance > Customize > Additional CSS. This method lets you insert custom styles directly, ensuring your changes remain intact even after theme updates. It’s a straightforward approach for quick CSS modifications.
What Precautions Should I Take With Custom Css?
When adding custom CSS, ensure your code is well-organized and properly commented. Test your CSS on different devices and browsers to guarantee compatibility. Always back up your theme files before making changes, and consider using a child theme to prevent loss of customizations during theme updates.
Conclusion
Custom CSS can enhance your WordPress site’s design. It offers flexibility. Make changes without altering the theme’s core files. This method ensures updates don’t erase your custom styles. Adding CSS is simple and effective. It personalizes your site’s look. You can improve functionality and user experience.
Remember to check your changes. Testing ensures everything displays correctly. Use a child theme for more complex modifications. It’s a safe way to keep your customizations. With these steps, your WordPress site can reflect your unique style. Happy designing!


