
Are you looking to enhance the visual appeal of your WordPress website? Adding pictures to your WordPress theme can transform your site from mundane to mesmerizing.
Images don’t just capture attention; they evoke emotions, tell stories, and keep visitors engaged longer. Imagine your audience not just seeing but experiencing your content in a more vibrant way. Whether you’re a blogger, a small business owner, or a creative professional, integrating stunning visuals is essential.
In this guide, you’ll discover the simple steps to seamlessly add images to your WordPress theme, ensuring that your site looks professional and inviting. So, are you ready to captivate your audience and keep them scrolling? Let’s dive in and make your website truly stand out!
Credit: www.greengeeks.com
Choosing The Right Images
Choose images with high quality for your WordPress theme. Good images make your site look nice. Always check the resolution. High resolution means clear images. Blurry images make your site look bad. Keep your images sharp and clear.
Images should match your content. Choose pictures that explain your words. If your post is about cats, use cat photos. This helps readers understand better. Relevant images make your blog more interesting. Users stay longer on your page.
Use alt text for every picture. Alt text helps search engines understand your images. Describe the image in a few words. This boosts your site’s SEO. Also, compress your images. Smaller files load faster. Fast-loading sites rank better in search results.
Preparing Images For Upload
Make your pictures fit well. Resizing helps pictures look good. Big pictures take up space. Cropping removes unwanted parts. It makes the subject clear. Use simple tools to resize and crop. Keep important parts visible. Smaller images load faster. Faster sites make users happy.
Choose the best file format. JPEG and PNG are popular. JPEG is good for photos. PNG works for logos and text. Pick JPEG for colorful images. PNG is for clear and sharp pictures. Avoid heavy formats. They slow down your site. Pick wisely to keep your site fast.
Use compression to reduce image size. Smaller files load quickly. Many tools compress images well. Keep image quality high. Don’t make them blurry. Compressed images save space and speed up your site. Users like fast sites. Always check image quality before uploading. Quality matters.
Uploading Images To WordPress
The Media Library is your best friend for pictures. Click on Media in the dashboard. Choose Add New. Drag your picture or click to upload. It saves time and effort.
The dashboard makes uploads easy. Click on Posts or Pages. Choose Add New. Find the Add Media button. Select your picture. It appears in your content.
FTP is useful for bulk uploads. Connect via an FTP client. Navigate to the wp-content folder. Upload pictures to uploads directory. Check them in the Media Library later.
Inserting Images Into Posts And Pages
Click on the plus icon in the editor. Choose the image block from the menu. Upload an image from your computer. You can also select one from the media library. Drag and drop is another easy way. Make sure to save your changes.
Use the toolbar for aligning images. Align left, center, or right. Change the size if needed. Set the image to full-width for larger displays. Experiment with different formats. It makes your post look better.
Add a caption below the image. Describe what the image shows. Use alt text for better accessibility. It helps people who can’t see the image. Alt text also helps with search engines. Write a simple and clear description. Make sure it matches the image content.
Adding Images To Theme Headers And Footers
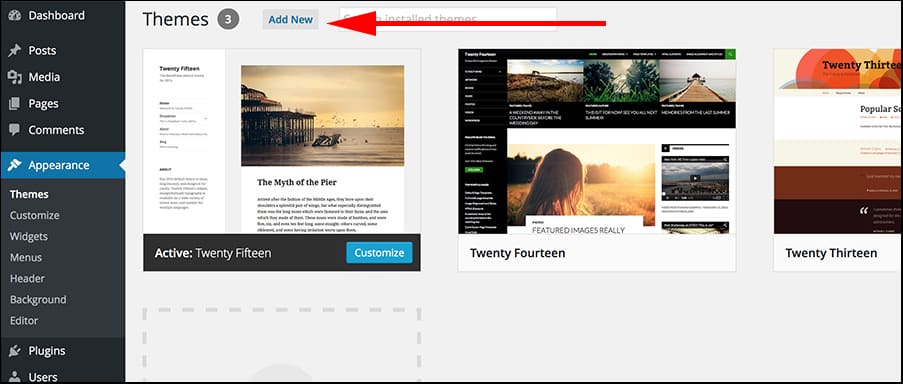
First, log in to your WordPress dashboard. Go to Appearance and click on Header. Here, you can upload or select an image. Choose a picture that fits well. It should not be too big or too small. Make sure it looks good on the website.
Scroll down the Appearance section and find Footer. Click on it. Now, add a picture to the footer area. This picture can be your logo or any other image. Keep it simple and clear.
Check if your images are responsive. This means they should look good on all devices. Use tools to test your website on phones and tablets. Adjust the image sizes if needed. Responsive images help your site look nice everywhere.
Using Image Galleries And Sliders
Enhance your WordPress theme by integrating image galleries and sliders. Simply access your media library, select images, and organize them into beautiful galleries. Utilize plugins or built-in options for seamless slider creation, adding a dynamic touch to your website’s appearance.
Creating An Image Gallery
Start by choosing your images. Collect them in a folder. Then go to your WordPress dashboard. Click on the “Media” option. Select “Add New” to upload your images. After uploading, create a new post or page. Click on “Add Media.” Choose “Create Gallery.” Select your images. Click “Create a new gallery.” Arrange them in your desired order. Set gallery settings. Finally, click “Insert gallery” to add it to your page.
Slider Plugin Options
Many plugins are available for image sliders. Some popular ones include Soliloquy, MetaSlider, and Smart Slider 3. They have user-friendly interfaces. Install one from the plugins section. Activate it once installed. Create a new slider. Upload your images to the slider. Customize the settings. Add effects and transitions. Finally, insert the slider into your page using a shortcode.
Enhancing User Experience
Use high-quality images. They should load quickly. Keep the design simple. Avoid cluttered layouts. Use captions for images. They give context. Add alt text for accessibility. This helps visually impaired users. Ensure the gallery or slider is responsive. It should look good on all devices. Test the gallery on mobile and tablets. This ensures a smooth user experience.
Troubleshooting Image Issues
Struggling with adding images to your WordPress theme? Ensure your images are properly sized and formatted. Use the WordPress media library to upload pictures, then insert them using the Gutenberg editor. Check your theme’s documentation for specific instructions on image placement.
Resolving Upload Errors
Sometimes, images fail to upload. This can be frustrating. First, check your file size. Large images may cause problems. Try resizing them. Next, inspect file types. WordPress supports JPEG, PNG, and GIF. Convert if needed. Also, review permissions. Lack of permissions can block uploads. Adjust them if necessary. Lastly, clear the cache. Old cache can hinder uploads. Refresh it for better results.
Image Not Displaying Correctly
Images may not show as expected. Check your theme settings. Some themes have specific image sizes. Adjust accordingly. Also, verify your links. Broken links lead to missing images. Update them if outdated. Additionally, test your plugins. Conflicting plugins can cause display issues. Disable them one by one to identify the culprit.
Speed Optimization Techniques
Large images can slow down your site. Optimize them for speed. Use tools like TinyPNG or ImageOptim. These tools reduce file size without losing quality. Enable lazy loading for images. This method loads images only when viewed. It improves speed and user experience. Lastly, consider a content delivery network (CDN). CDNs distribute images faster to users. This speeds up your site globally.

Credit: wpmarmite.com
Credit: www.elegantthemes.com
Frequently Asked Questions
How Do I Upload Images To WordPress Theme?
To upload images, go to your WordPress dashboard. Click on ‘Media’, then ‘Add New’. Drag and drop your images or use the ‘Select Files’ button. Once uploaded, you can insert them into your posts or pages using the WordPress editor.
Ensure images are optimized for better performance.
Can I Add Images Directly To WordPress Posts?
Yes, you can add images directly to WordPress posts. While editing a post, click the ‘Add Media’ button. Select an image from your library or upload a new one. After inserting, you can adjust the image alignment and size within the post editor.
Always preview to ensure proper placement.
What Image Formats Does WordPress Support?
WordPress supports various image formats including JPEG, PNG, GIF, and WebP. These formats are compatible with most web browsers. JPEG is ideal for photographs, PNG for graphics with transparency, and GIF for animations. WebP offers better compression. Always choose the format that best suits your image needs.
How To Optimize Images For WordPress?
To optimize images, use tools like TinyPNG or ImageOptim before uploading. These reduce file size without compromising quality. In WordPress, consider plugins like Smush or EWWW Image Optimizer. They automatically compress images. Optimized images improve page load speed and boost SEO performance significantly.
Conclusion
Adding pictures to your WordPress theme enhances visual appeal. Images make your site attractive and engaging. They help convey messages quickly and effectively. Following simple steps can help you add pictures easily. Start by choosing images that fit your theme.
Upload them using the WordPress dashboard. Use widgets or image blocks to place them on your pages. Optimize image size for quick loading. Quality images improve user experience and keep visitors on your site longer. Remember, images are powerful tools.
Utilize them wisely for better website interaction. Your WordPress site looks professional and inviting with well-placed pictures.


