
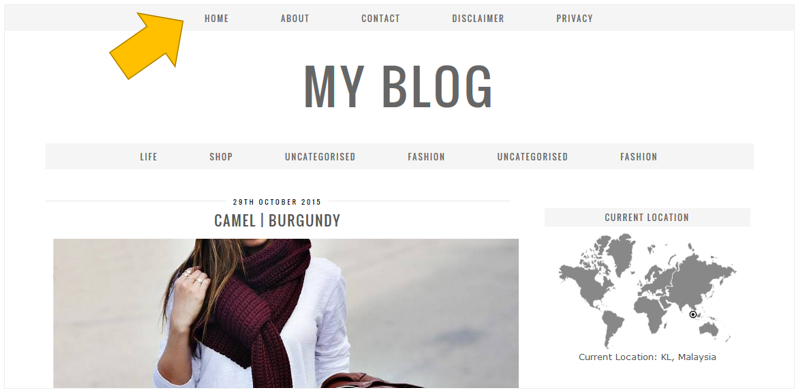
Looking to enhance your WordPress site’s navigation? Adding a menu bar can make all the difference.
A well-structured menu bar not only improves the user experience but also guides your visitors directly to the content they crave. Imagine a seamless browsing experience where your audience can effortlessly access every corner of your site. This is where you can shine, offering them a clear path to your best content.
In this guide, you’ll discover how easy it is to add a menu bar to your WordPress theme, making your website more organized and visually appealing. Let’s dive in and transform your site’s navigation together.
Credit: support.pipdig.co
Choosing The Right Theme
Choose a WordPress theme with menu support. Check the theme details. Find if it supports custom menus. Themes with this feature make it easy to add a menu bar.
Responsive themes are good. They adjust to any screen size. This helps your menu look good on phones and tablets.
Look for user-friendly themes. They help you customize menus without coding. Drag and drop options are very helpful.
Always check the theme reviews. Good reviews mean users are happy. Bad reviews might mean problems.
Try a demo if possible. Demos show how the menu will look. Choose a theme that fits your style.
Accessing The WordPress Dashboard
First, log into your WordPress account. The dashboard is the main screen you see. It has many options. Click on ‘Appearance’ in the left menu. This is where you can change how your site looks. You can add new themes, widgets, and menus here.
The menu bar is important. It helps visitors find things on your site. The menu option is under ‘Appearance’. Click on ‘Menus’ to start. You can create or edit menus from this screen. Add pages, posts, or links to your menu.
After adding items to your menu, save your changes. Check your site to see the new menu bar. It’s easy to make changes anytime. Use the dashboard to manage your WordPress site.
Navigating To Appearance Settings
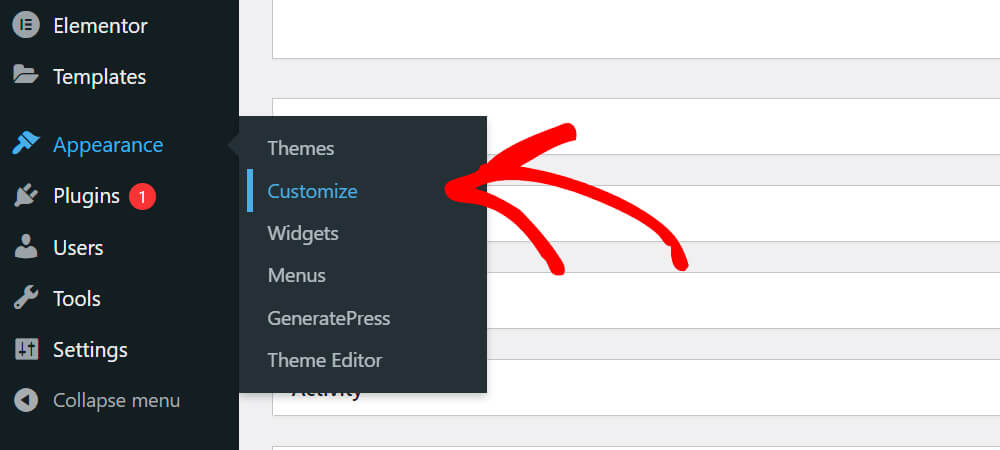
First, open your WordPress dashboard. Find the Appearance option on the left menu. Click on it to open the settings. This is where you can change themes and menus.
Look for the Menus option. It helps you manage your menu bar. Click on it to start creating a new menu. You can add, remove, or edit items here. Easy and simple.
Credit: searchwp.com
Creating A New Menu
Start by going to the WordPress Dashboard. Click on Appearance and then Menus. You will see a button called Create a New Menu. Click it. A box will appear. This is where you give your menu a name. Choose a name that is simple and clear. Once named, click the Create Menu button.
Next, you need to add items to your menu. On the left side, you will see a list of options. These include Pages, Posts, and Custom Links. Check the items you want in your menu. After checking, click the Add to Menu button. These items will appear under Menu Structure. You can rearrange them by dragging. Arrange them as you like. Don’t forget to click Save Menu when done.
Assigning The Menu Location
Select the menu you want to assign. Go to the WordPress dashboard. Find the Appearance tab. Click on Menus. Choose the menu from the list.
Locate the Menu Settings section. Check the box for theme location. Choose where the menu should appear. Save your changes. The menu will show up on your site.
If you have multiple menus, assign each one separately. Ensure each menu has its own place. This helps visitors find what they need quickly. A well-placed menu guides them better.
Customizing Menu Appearance
CSS can make your menu look nice. It helps in changing colors and fonts. Use CSS to adjust the spacing between items. This makes the menu easier to read. You can also add hover effects. This makes items change color when you move your mouse over them. Try not to use too many effects. Keep it simple and clean.
Plugins can help with advanced designs. They offer extra features that CSS cannot. Some plugins allow you to create mega menus. Mega menus are big and show lots of items. Plugins are easy to install and use. Always choose plugins that are popular and well-reviewed. This ensures they are safe and work well.
Saving And Publishing The Menu
Click the Save Menu button. This saves your menu changes. Your new menu design will be visible on your site. Make sure to check your site after saving. Look to see if the menu appears correctly.
Visit your site’s homepage. Check if the menu is in the right spot. Sometimes changes don’t show right away. Refresh the page if necessary.
You might need to adjust settings if the menu isn’t right. Go back to the menu settings to fix it. Double check your choices. Ensure each link goes to the right page.
Menus make navigation easy for users. They help visitors find content quickly. A well-organized menu improves user experience. Always make sure your menu works well.
Credit: www.wpbeginner.com
Testing The Menu Functionality
A responsive menu works on all devices. Check the menu on your phone and tablet. It should fit well on small screens. No part should be cut off. Tap the menu items. They should open easily. If it doesn’t work, fix it. Use CSS to make changes. Test different browsers too. Safari, Chrome, and Firefox are popular. Each browser may show the menu differently. Make sure it looks good on all.
Each menu link should lead to the correct page. Click every link to test it. If a link doesn’t work, check the URL. Fix broken links right away. Use the WordPress editor to update. Proper links help users find what they need. Double-check links after updates. This ensures the menu stays correct. A good menu improves site navigation.
Troubleshooting Common Issues
Adding a menu bar to a WordPress theme often involves navigating the WordPress dashboard. Access ‘Appearance’ and select ‘Menus’ to start. Ensure the correct theme location is chosen for your menu display.
Menu Not Showing
The menu might not show due to a missing menu assignment. Check if the menu is assigned to a location under Appearance > Menus. Sometimes, the theme might not support menu locations. You can fix this by adding menu support in the functions.php file. Use the code register_nav_menus() to add menu locations. Another reason could be CSS conflicts. Inspect the element to see if CSS hides it. Remove or fix conflicting CSS rules.
Incorrect Link Paths
Links might not work if the URL paths are incorrect. Check each link in the menu. Ensure they point to the right pages. Use absolute paths like https://yourwebsite.com/page instead of relative paths. Relative paths can cause issues if the base URL changes. Another issue might be permalinks. If permalinks are set wrong, links may break. Update permalinks under Settings > Permalinks. Choose a format that suits your site structure.
Frequently Asked Questions
How Do I Create A Menu In WordPress?
To create a menu, navigate to the WordPress dashboard. Go to Appearance > Menus. Click “Create a new menu. ” Add menu items from pages, posts, or custom links. Organize items by dragging them. Finally, click “Save Menu” to apply changes.
Can I Customize The WordPress Menu Appearance?
Yes, you can customize the menu appearance in WordPress. Use the Customizer tool found in Appearance > Customize. Select the “Menus” option, then modify fonts, colors, and styles. Theme-specific options might also be available to further enhance menu aesthetics.
How Do I Add A Menu To My Theme?
To add a menu, go to Appearance > Menus in the WordPress dashboard. Create or select a menu. Assign it to a theme location under “Menu Settings. ” Save changes. Your menu will now appear in the designated area of your theme.
What If My Theme Doesn’t Support Menus?
If your theme doesn’t support menus, consider using a plugin. Install a menu plugin like “Max Mega Menu. ” This provides additional options and flexibility. Alternatively, switch to a theme that supports menus for better customization and functionality.
Conclusion
Adding a menu bar in WordPress is simple. Follow the steps carefully. Customize your menu to fit your site’s style. A well-organized menu improves navigation. It helps visitors find information quickly. Enhance user experience with clear menu links. Check your menu settings regularly.
Ensure it displays correctly on all devices. Keep your menu concise and relevant. Avoid clutter with too many items. A clean menu boosts website appeal. Enjoy creating your unique WordPress menu. Make it functional and attractive. Your site’s menu is the key to smooth browsing.


