Have you ever built an exciting game on your local host and wished you could share it easily with friends or players around the world? Turning your local host game into a domain is the key to making that happen.
Imagine your game accessible anytime, anywhere, without complicated setups or sharing IP addresses. You’ll discover simple, clear steps to transform your local game into a fully hosted domain. Ready to take your game from your computer to the global stage?
Let’s dive in and make it happen.
Credit: zenduty.com
Setting Up Your Local Host Game
Setting up your local host game is the first step to making it accessible beyond your computer. This process ensures your game runs smoothly and is ready for domain connection. It involves preparing the game environment, adjusting network settings, and testing connectivity. Each step helps create a stable base for your game’s online presence.
Preparing The Game Environment
Start by installing all necessary software on your computer. This includes the game server and any required frameworks or libraries. Make sure your game files are complete and up to date. Organize your folders clearly to avoid confusion. Check your computer’s security settings to allow game hosting. Disable firewalls or antivirus programs that block game ports temporarily during setup.
Configuring Network Settings
Set a static IP address on your computer to avoid connection issues. Access your router’s settings and open the ports your game uses. This step is called port forwarding. Assign these ports to your computer’s IP address. This setup allows players outside your network to connect. Save the changes and restart your router to apply new settings.
Testing Local Host Connectivity
Check if your game server runs without errors on your local machine. Use the localhost IP address 127.0.0.1 to test the game connection locally. Next, test the connection using your internal IP address within your network. Ask a friend or use another device to connect using your public IP address. Confirm the game is reachable from outside your home network. Fix any errors or connection drops before moving forward.
Choosing A Domain Name
Choosing a domain name is the first step to turn your local host game into a domain. The name represents your game online. It should be easy to remember and type. A good domain name helps players find your game quickly. It also gives your game a professional look.
Pick a name that matches your game’s style and theme. Avoid long or complex words. Keep it short and clear. A strong domain name makes your game stand out.
Tips For Selecting A Domain
Use simple words that are easy to spell. Avoid numbers and special characters. Choose a name that is unique but related to your game. Think about your target players and what they might search for. Pick a name that is easy to say and share. Consider adding keywords linked to your game’s genre or features.
Checking Domain Availability
Check if the domain name is free to use. Use online tools like domain registrars or search engines. If the name is taken, try different variations. Add short words or change the order. Make sure the name is not trademarked by others. This avoids legal problems later.
Registering Your Domain
Choose a reliable domain registrar to register your name. Provide accurate contact information during registration. Pick a registration period that fits your needs. Protect your privacy by using domain privacy services. After registration, link your domain to your game server. This step makes your game accessible online through the domain name.
Linking Your Domain To Local Host
Linking your domain to a local host is a key step for sharing your game online. This process lets players access your game using a simple web address instead of an IP number. It makes the game easier to find and more professional.
The main parts of linking a domain involve setting up DNS records, using dynamic DNS if your IP changes, and opening your network for outside access. Each step is important to connect your domain smoothly to your local host.
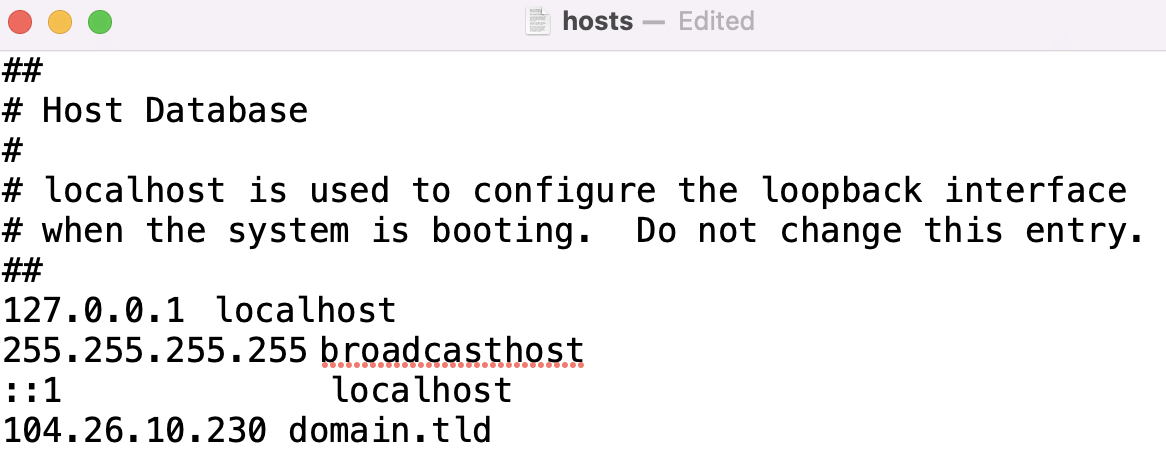
Configuring Dns Records
DNS records connect your domain name to your computer’s IP address. You must log into your domain provider’s control panel to change these settings. Add an “A” record that points to your public IP address. This tells the internet where to find your local host.
Set the “TTL” value low during setup. It helps changes happen faster. After this, your domain will direct traffic to your local machine.
Using Dynamic Dns Services
Dynamic DNS services help when your IP changes often. They update your domain automatically with your new IP. This keeps your domain pointing to the right place without manual work.
Choose a dynamic DNS provider and create an account. Link your domain to the service by following their setup guides. Install their update client on your computer. It sends your current IP to the service regularly.
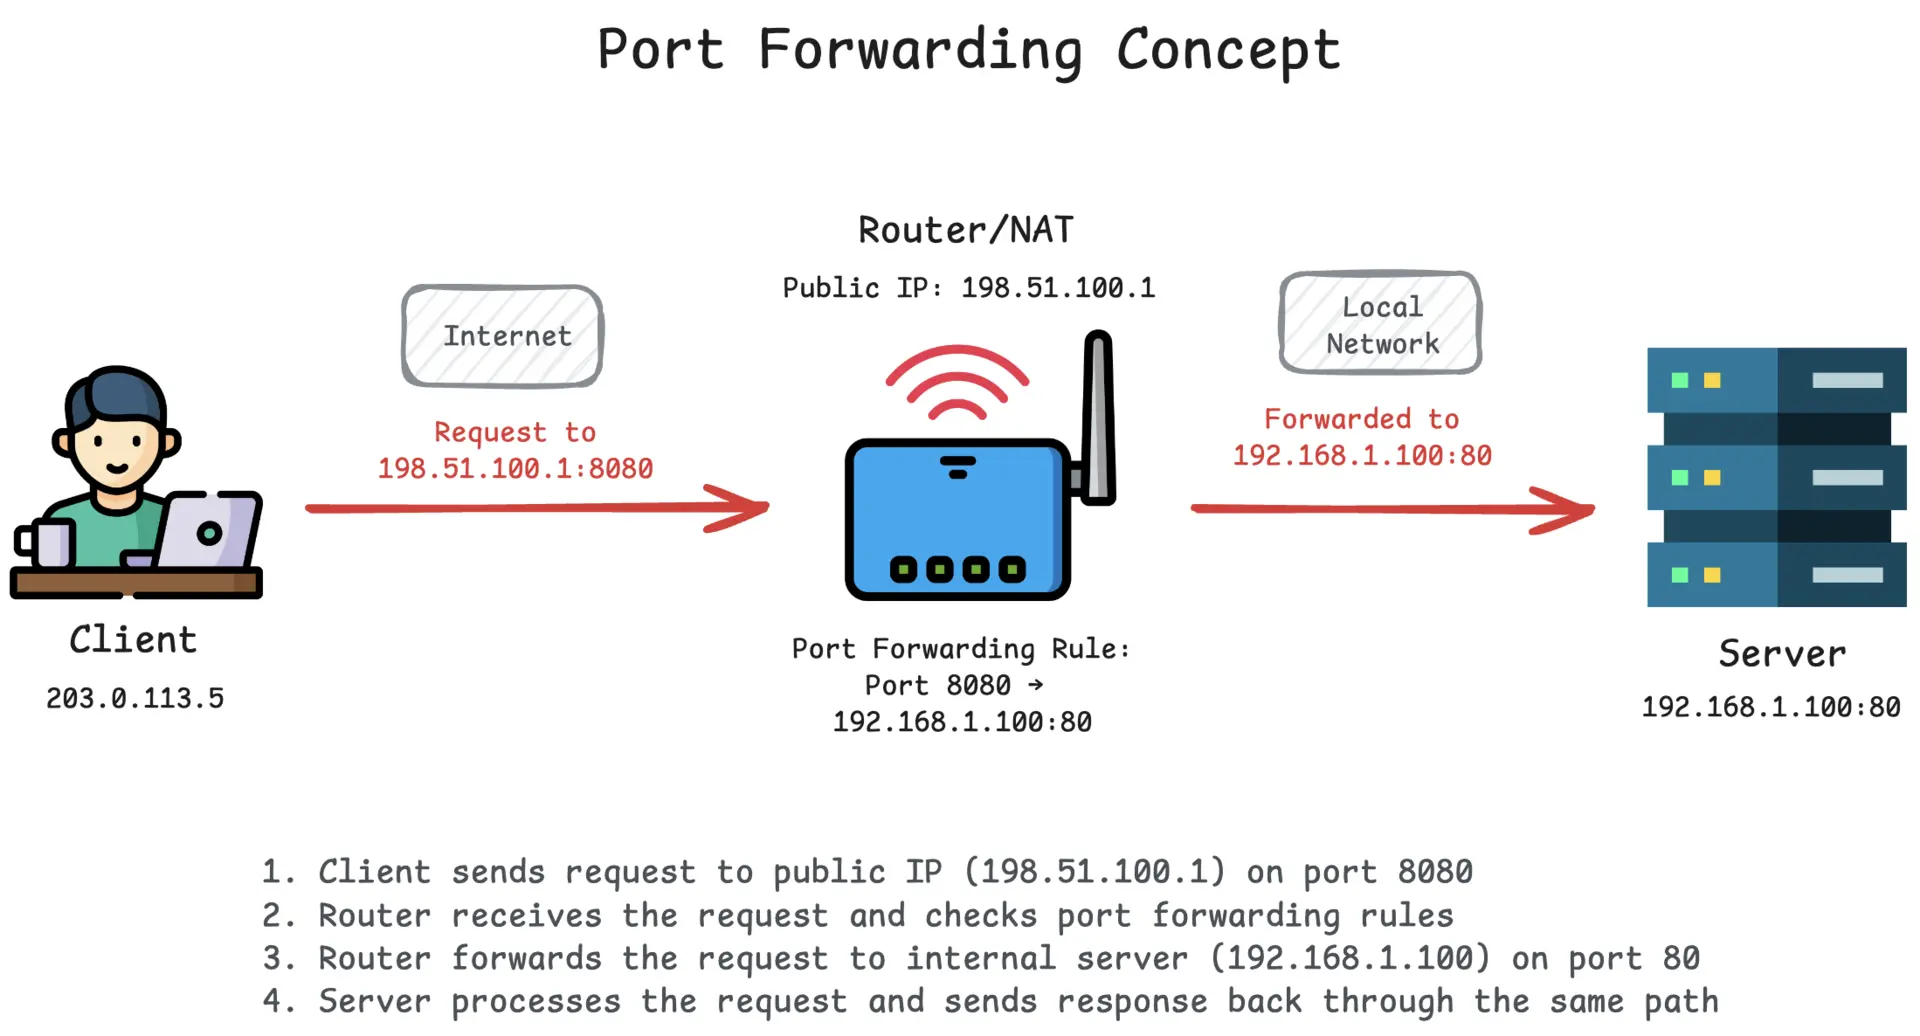
Setting Up Port Forwarding
Port forwarding opens your router to let game data reach your local host. Access your router’s settings page using its IP address. Find the port forwarding section.
Add a new rule using your game’s port number and your computer’s local IP. This lets outside players connect to your game server behind your router. Save the settings and test the connection using your domain.
Credit: pinggy.io
Securing Your Domain And Game Server
Securing your domain and game server is vital for smooth gameplay and protecting player data. A safe server builds trust and keeps hackers away. Simple steps can strengthen your security and keep your game online without interruptions.
Implementing Ssl Certificates
SSL certificates encrypt data between the server and players. This stops hackers from stealing sensitive info. Many hosting providers offer free SSL certificates. Installing one adds a green padlock to your domain. This shows players your site is safe.
Setting Up Firewalls
Firewalls act as a shield for your game server. They block unwanted traffic and stop attacks. Configure your firewall to allow only necessary game ports. Regularly update firewall rules to handle new threats. This keeps your server protected from hackers and bots.
Regular Backup Strategies
Backups save your game data in case of crashes or hacks. Schedule backups daily or weekly depending on your game activity. Store backups on a separate server or cloud service. Test backups often to ensure they work correctly. This helps you restore your game quickly after any problem.
Testing And Troubleshooting
Testing and troubleshooting are key steps after turning your local host game into a domain. These steps ensure the domain works correctly and players can join without issues. Careful testing helps find and fix problems early. This makes the game experience smooth and enjoyable for everyone.
Verifying Domain Connection
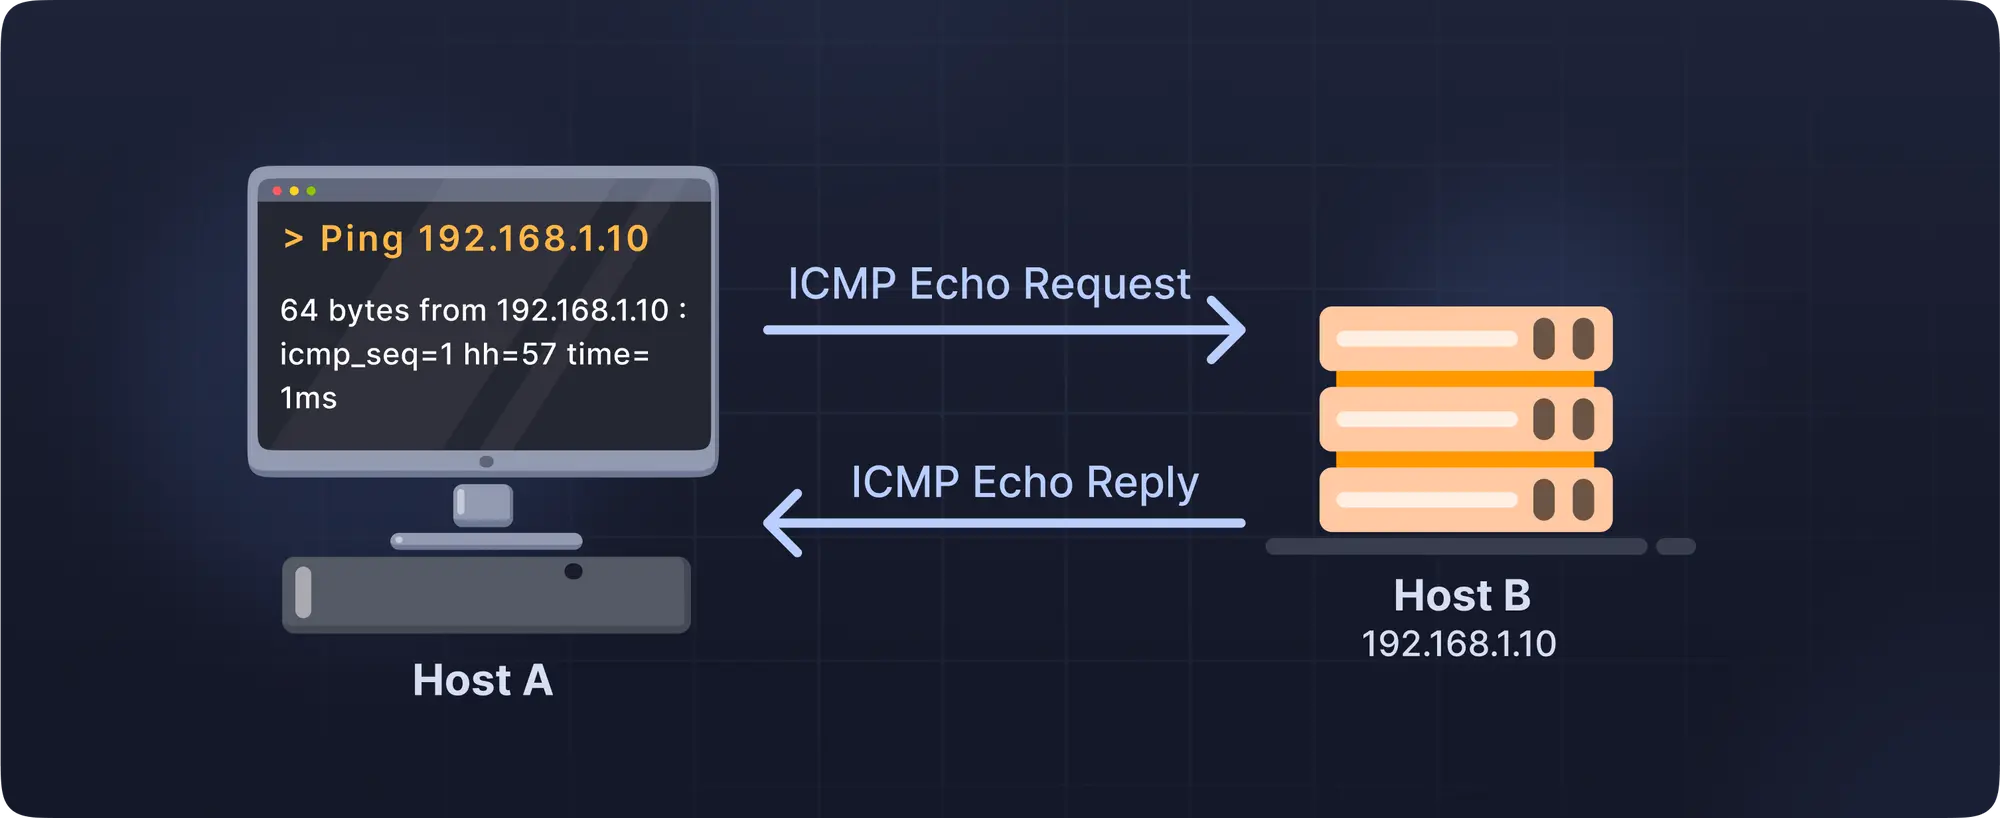
Start by checking if the domain points to your game server. Use a browser to enter your domain name. The game should load without errors. You can also use online tools to check the domain’s DNS settings. Confirm the IP address matches your server. Ping the domain from your computer to see if it responds. These checks confirm the domain connects properly to your game.
Common Issues And Fixes
Sometimes the domain does not connect to the game server. This may happen due to wrong DNS settings or server firewall blocks. Check your DNS records for any typos or missing entries. Make sure ports needed by the game are open on the server. Clear your browser cache and try again. Restart your server if needed. These steps solve most connection problems quickly.
Optimizing Performance
Slow loading times can frustrate players. Reduce server load by limiting background processes. Use a fast, reliable hosting service. Compress game files to speed up downloads. Monitor server performance regularly. Adjust settings like cache and bandwidth for better speed. A smooth, fast game keeps players happy and engaged.
Credit: www.hostinger.com
Frequently Asked Questions
What Is The Benefit Of Turning A Localhost Game Into A Domain?
Turning a localhost game into a domain allows players to access it online. It improves accessibility, enables multiplayer features, and simplifies sharing. Hosting on a domain also enhances security and scalability for your game.
How Do I Map My Localhost Game To A Domain?
To map your localhost game to a domain, configure DNS settings with your domain provider. Point the domain to your server’s IP address. Update your web server configuration to serve the game from the domain.
Can I Use Free Domains For Hosting My Game?
Yes, free domains can be used to host your game. However, they may have limitations like ads or restricted features. Paid domains provide better reliability, branding, and control for serious projects.
What Web Hosting Options Support Domain Mapping?
Popular web hosting options include shared hosting, VPS, and cloud servers. Providers like Bluehost, DigitalOcean, and AWS support domain mapping. Choose based on your game’s resource needs and scalability.
Conclusion
Turning your local host game into a domain opens new possibilities. You can share your game easily with friends or the world. Setting up a domain helps your game become accessible anytime. It also adds a professional touch to your project.
Follow the steps carefully and test your setup well. Enjoy seeing your game reach more players online. Small efforts lead to bigger opportunities in game sharing. Start today and watch your game grow beyond your computer.