
Transferring a domain from one Namecheap account to another might seem like a complex task, but with the right guidance, you can do it seamlessly. If you’ve ever wondered how to move your domain to a different account without losing any data, you’re in the right place.
This article will walk you through the process step-by-step, ensuring you feel confident and secure while making the transfer. Picture this: having control over your digital assets with just a few clicks. You’ll discover how easy it is to manage your domains and keep them organized within Namecheap.
By the time you finish reading, you’ll be equipped with the knowledge to make the transfer quickly and effortlessly. Ready to take control of your domain management? Let’s dive in!

Credit: www.youtube.com
Preparing For Domain Transfer
Transferring a Namecheap domain to another account is simple. Preparing correctly ensures a smooth process. This section explains the preparation steps. Follow these steps to avoid issues. Each step is crucial for a successful transfer.
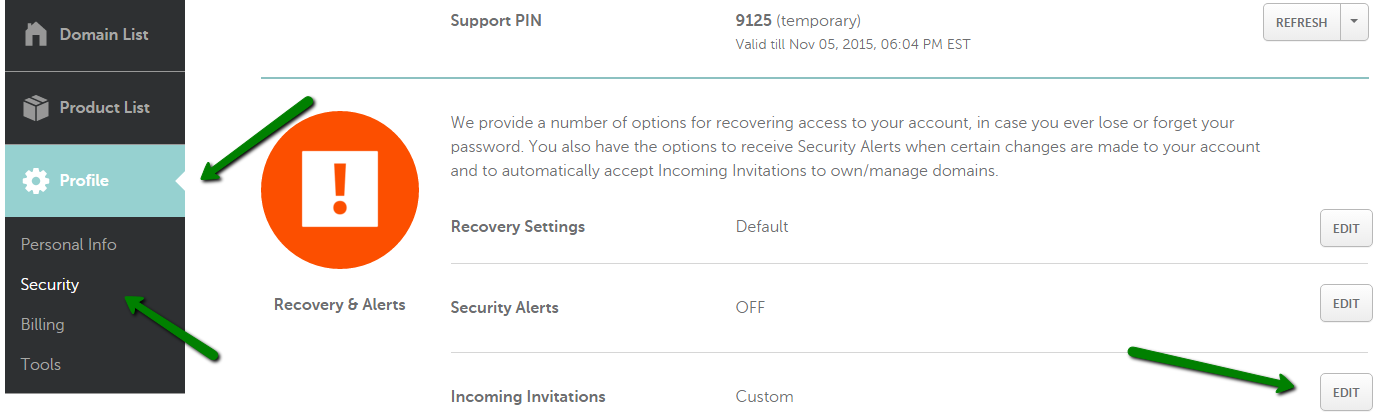
Unlocking Your Domain
Start by unlocking your domain. Log into your Namecheap account. Go to the domain list. Select the domain you want to transfer. Click on “Manage”. Find the “Domain Lock” section. Set it to “Unlock”. This allows the transfer to proceed.
Updating Contact Information
Check your contact information. It needs to be current and correct. Go to the “Contact Information” section. Update any old or wrong details. Ensure your email is active. You will receive important notifications. Accurate information prevents transfer delays.
Obtaining Epp Code
Get the EPP code for your domain. It’s necessary for the transfer. Go to the “Sharing & Transfer” tab. Look for the “EPP Code” section. Click “Show EPP Code”. Copy the code securely. Share it with the new account holder. They need it to complete the transfer.
Choosing A New Registrar
Transferring a domain between Namecheap accounts is straightforward. Start by logging into your Namecheap account and selecting the domain to transfer. Follow the prompts to initiate the transfer, ensuring both accounts are verified for a smooth process.
Choosing a new registrar for your domain transfer is like choosing a new home for your website. It’s a decision that requires careful thought and consideration. You don’t just want a registrar that fits your current needs but one that can support your future aspirations as well.Researching Registrars
Start your journey by exploring different registrars. Look beyond the big names and consider lesser-known options that might offer unique benefits. Make a list of potential registrars and dig into their reputations. Check online reviews and user feedback. Are there recurring complaints or praises? Make sure to visit forums and communities where real users discuss their experiences.Comparing Features And Pricing
Once you have a shortlist, it’s time to compare what each registrar offers. Look at the features that matter most to you. Do they offer good customer support? How easy is their interface to use? Pricing is crucial too. Make a detailed table of their pricing plans. Include any hidden fees, renewal costs, or discounts for multiple domains. Sometimes, the cheapest option upfront can be costly in the long run. Have you considered the tools they provide? Some registrars offer free WHOIS privacy protection, email forwarding, or even website builders. These added features can save you money and enhance your online presence.Initiating The Transfer Process
Transferring a domain within Namecheap is straightforward. It requires a few steps. You must be meticulous to ensure a smooth transfer. This guide will walk you through. From starting the request to providing the EPP code, each step is crucial.
Starting The Transfer Request
First, log into your Namecheap account. Navigate to the “Domain List” section. Find the domain you want to transfer. Click on “Manage” next to it. Look for the “Sharing & Transfer” tab. Click on it. Here, you’ll see the option to transfer. Click “Transfer to another Namecheap account.” Follow the prompts. You’ll need the recipient’s email address. Ensure it’s correct. Double-check all information before proceeding.
Providing Epp Code
For a successful transfer, you need the EPP code. This code is essential. It acts as a security measure. To get it, go back to the “Domain List.” Click “Manage” on the domain again. Find the “Advanced DNS” tab. Locate the “Auth Code” or “EPP Code” section. Generate the code if needed. Copy the EPP code carefully. Share it with the recipient. This code completes the transfer process. Ensure the recipient enters it correctly. This step finalizes the transfer.
Credit: www.namecheap.com
Monitoring The Transfer
Transferring a Namecheap domain to another account involves a few simple steps. Access your dashboard and initiate the transfer process. Ensure the recipient’s account details are correct for a smooth transition.
Transferring a domain within Namecheap is straightforward, but keeping an eye on the process is essential to ensure everything goes smoothly. Monitoring the Transfer allows you to stay updated on each step and quickly address any issues that might arise. By being proactive, you can ensure that your domain lands safely in the new account without any hiccups.Tracking Transfer Status
Once you initiate the transfer, Namecheap provides a way to track its progress. You can view the status through your dashboard, which displays a timeline of the transfer. Are you wondering why this matters? It’s all about peace of mind. Knowing exactly where your transfer stands keeps you informed and ready to act if necessary. You might find yourself refreshing the page repeatedly. That’s perfectly normal! Each update brings you closer to successfully completing the transfer.Handling Potential Delays
Not every transfer is seamless. Sometimes, delays occur due to verification issues or system lags. If you spot any stalls, don’t panic. Check your email for any alerts or requests for additional information. It’s crucial to respond promptly to any requests from Namecheap. A quick response can make all the difference in moving your transfer forward. Have you ever found yourself stuck waiting, with no idea what’s next? Engaging with support can be your lifesaver. They can provide insights and help resolve issues promptly. Monitoring your domain transfer doesn’t have to be a stressful task. With the right approach, it can be an engaging process that ensures everything goes as planned. Are you ready to keep a watchful eye and make your transfer a success?Completing The Transfer
Transferring a Namecheap domain to another account is simple. Start by unlocking your domain and obtaining the transfer code. Next, provide the recipient with the code to complete the domain transfer process securely.
Completing the transfer of your Namecheap domain to another account is the final step in ensuring that your domain is set up just the way you want it. This process may seem daunting, but with a few straightforward actions, you can effortlessly shift your domain to its new home. Ensuring that all settings are properly configured is crucial to avoid any disruptions to your website’s functionality.Verifying Successful Transfer
Once you’ve initiated the transfer, it’s essential to confirm that the domain has moved successfully. Check your email for a confirmation message from Namecheap. This email usually includes all necessary details about the transfer process. Log into your Namecheap account and verify that the domain appears under your “Account Domain List.” If you encounter any issues, don’t hesitate to reach out to Namecheap’s support team for assistance.Updating Dns Settings
After confirming the transfer, updating your DNS settings is vital to ensure your website remains accessible. Navigate to the “Domain List” in your Namecheap account, and select your transferred domain. Access the DNS settings to verify that they align with your hosting provider’s requirements. This step is crucial for maintaining your site’s functionality and avoiding downtime. Reflect on your past experiences with DNS settings—did you ever overlook this step and face unexpected downtime? These settings act as the backbone for your website’s online presence, so ensuring they’re correct is a priority. Completing the transfer can be a rewarding experience. You gain control and clarity over your domain management. What insights have you discovered during your domain management journey that could help others? Sharing your experiences can make the process smoother for others embarking on this journey.
Credit: www.youtube.com
Troubleshooting Common Issues
Transferring a Namecheap domain can sometimes face challenges. These issues can delay the transfer process. Understanding common problems helps you solve them quickly.
Here, we focus on two common issues. Expired domain problems and incorrect EPP codes.
Expired Domain Problem
An expired domain cannot be transferred. Check your domain’s expiration date. Renew the domain if it has expired. Ensure it is active before starting the transfer.
Log into your Namecheap account. Go to the Dashboard. Check the status of your domain. If expired, renew it immediately. An active domain ensures a smooth transfer.
Incorrect Epp Code
The EPP code is essential for domain transfer. An incorrect code will halt the process. Double-check the EPP code provided by Namecheap. Ensure you enter it correctly.
Access your Namecheap account to find the EPP code. Navigate to the Domain List. Select the domain you want to transfer. Click on “Manage” and find the EPP code. Copy it carefully. Enter it in the transfer form with accuracy.
Recheck the code if you encounter issues. An accurate EPP code is crucial for a successful transfer.
Best Practices For Smooth Transfers
Transferring a Namecheap domain to another account is easy with proper steps. Begin by unlocking the domain and obtaining the transfer code. Next, initiate the transfer in the recipient’s account, ensuring all information matches. Follow instructions promptly to ensure a smooth and successful domain migration.
Transferring a Namecheap domain to another Namecheap account can seem daunting, but with the right approach, it can be a straightforward process. Whether you’re consolidating your domains or gifting one to a friend, ensuring a smooth transition is crucial. Here, we’ll explore the best practices to follow for a seamless transfer experience.Timing Your Transfer
Choosing the right time to transfer your domain can make all the difference. It’s best to avoid initiating a transfer close to the domain’s expiration date. Transfer processes can take a few days, and if your domain expires during this time, it might lead to complications. Consider starting the transfer when you have at least a week before expiration. This cushion allows you to address any unexpected issues without the stress of a looming deadline. Remember, patience during this period can prevent many headaches.Avoiding Downtime
Downtime can be a significant concern during domain transfers, especially if your domain is linked to a live website. To prevent this, ensure your DNS settings are correctly configured before initiating the transfer. Double-check all records, including A, CNAME, and MX records, to ensure they’re pointing to the right servers. Think about what would happen if your site went offline unexpectedly. Would it affect your business, or could it cause confusion among your visitors? By maintaining the correct DNS settings, you can keep your site live and accessible throughout the transfer process. Have you ever faced downtime during a transfer? It’s frustrating, isn’t it? Avoid this by setting up a temporary email notification to alert you of any issues, ensuring you’re always in the loop and ready to act quickly. By following these steps, you can make the domain transfer process as smooth as possible. Wouldn’t you rather spend your time focusing on growing your online presence instead of troubleshooting transfer issues?Frequently Asked Questions
Can I Transfer A Domain From One Namecheap Account To Another?
Yes, you can transfer a domain between Namecheap accounts. Ensure both accounts have domain settings enabled. Follow Namecheap’s transfer process for a smooth transition. This includes unlocking the domain and obtaining the transfer code. Check Namecheap’s guidelines for any specific requirements or limitations.
How Do I Transfer A Domain From One Account To Another?
To transfer a domain, unlock it first. Obtain the transfer authorization code. Enter this code in the recipient account. Approve the transfer when notified. Ensure your contact information is current.
Is Namecheap Domain Transfer Free?
Transferring a domain to Namecheap costs a fee, which varies based on the domain extension. It includes a year extension.
How Can I Transfer Ownership Of A Domain?
To transfer domain ownership, unlock the domain and obtain an authorization code from the registrar. Initiate the transfer with the new registrar using this code. Follow any additional steps provided by both registrars to complete the transfer process. Ensure all contact information is updated and accurate.
Conclusion
Transferring a Namecheap domain is simple with the right steps. Start by logging into your account. Ensure you have the recipient’s email ready. Follow the transfer instructions carefully. Keep an eye on confirmation emails. It’s important to verify each step.
This ensures a smooth process without hitches. Remember, patience is key during transfers. Avoid skipping steps to prevent errors. Now you know how to transfer your domain easily. Enjoy managing your domain without stress. Your online presence is in good hands.
Stay informed for any updates from Namecheap.


