
Setting up your Namecheap email doesn’t have to be a daunting task. Imagine seamlessly managing your professional communications without a hitch.
You deserve an email service that’s not only reliable but also easy to configure. Whether you’re a small business owner or someone just getting started, having a personalized email can elevate your brand’s credibility and keep your communications organized. In this guide, you’ll discover simple steps that will have you up and running in no time.
We’ll walk you through each stage, ensuring you feel confident and in control. Ready to unlock the potential of your Namecheap email? Let’s dive in and make this process as smooth as possible.
Credit: www.namecheap.com
Choosing Namecheap Email Plan
Setting up Namecheap Email is straightforward. Choose a suitable plan that fits your needs. Follow simple instructions to configure your email, ensuring seamless communication for personal or business use.
Choosing the right Namecheap email plan can seem daunting, especially if you’re new to the world of domain hosting and email services. But it doesn’t have to be! With a variety of options tailored to different needs, Namecheap makes it easy to find the perfect plan that fits your requirements. Whether you’re a small business owner, a freelancer, or someone simply looking for a professional email setup, Namecheap has got you covered. Every choice you make regarding your email plan is crucial. It can impact your business communication and brand image significantly. So, how do you make the right choice? Let’s dive into the specifics. ###Understanding Namecheap Email Features
Namecheap offers a range of features designed to enhance your email experience. You can expect reliable email delivery, robust spam protection, and a user-friendly interface. But that’s just the beginning. Consider the storage capacity, the number of email accounts you can create, and the integration options with other services. Think about your needs. Do you require advanced collaboration tools or just basic email functionalities? The plan you choose should match your expectations without overwhelming you with unnecessary features. ###Comparing Plans: What Works For You?
Namecheap provides several email plans, each catering to different user needs. From basic packages for personal use to comprehensive plans for businesses, there’s something for everyone. Assess your needs: Are you managing a team that needs multiple email accounts? Or are you a solo entrepreneur looking for a professional touch? Analyze each plan’s benefits and limitations. Keep an eye out for additional perks like custom domain support or enhanced security features. ###Budgeting For Your Email Plan
Budget is often a decisive factor when choosing an email plan. Namecheap’s pricing structure is straightforward and competitive, making it accessible for various budgets. Consider what you’re willing to invest in your email service. A more expensive plan might offer additional features that save time and improve productivity. Weigh the cost against the benefits. Is a higher-priced plan likely to enhance your communication efficiency or brand image? ###Making The Decision: Your Next Steps
After evaluating the options, it’s time to make a decision. Reflect on your priorities and align them with the features offered by Namecheap. Choose the plan that balances your budget and requirements. Don’t rush the decision; ensure it complements your business goals. Once you select the ideal plan, you’ll be on your way to setting up a professional email that enhances your communication. Would you consider how your email choice impacts your business image? Remember, the right email plan is a step towards building a credible and trusted brand.
Credit: www.youtube.com
Creating An Account
Setting up a Namecheap email account is a straightforward process. This guide helps you create an account effortlessly. Understanding these steps ensures your email is ready and functional. Let’s dive into creating your Namecheap email account.
Creating An Account: Step-by-step
The first step is to visit Namecheap’s website. On the homepage, locate the “Sign Up” button. It’s usually at the top right corner. Click it to begin the process.
Entering Personal Information
You’ll need to fill in personal details. This includes your name and email address. Choose a strong password for security. Make sure your information is correct.
Choosing A Payment Method
Next, select a payment method. Namecheap accepts various options. Credit cards and PayPal are popular choices. Enter your payment details accurately.
Confirming Your Email
After signing up, check your email for confirmation. Namecheap sends a verification link. Click the link to verify your email address. This step is crucial to activate your account.
Accessing Your Account
Once verified, return to the Namecheap website. Log in using your email and password. You now have access to your new Namecheap account.
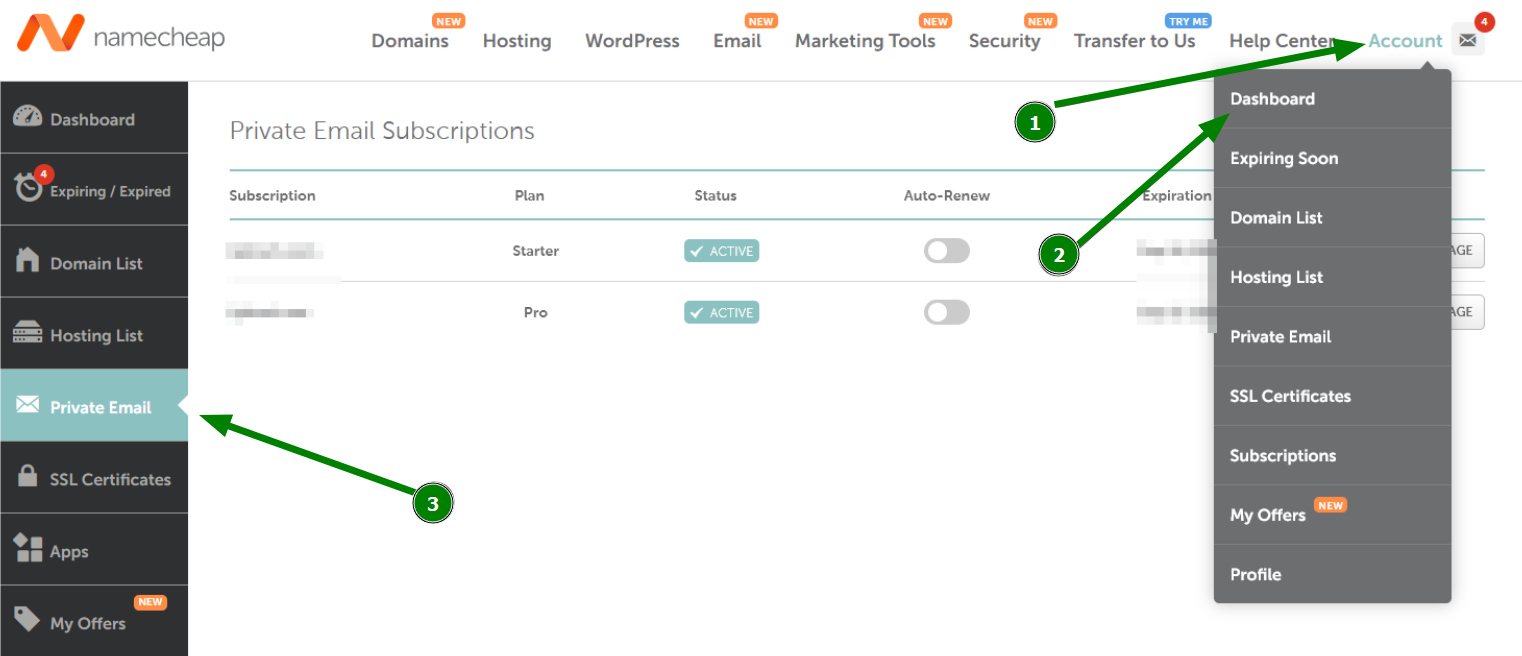
Accessing The Dashboard
Begin by logging into your Namecheap account. Navigate to the dashboard to access email setup options. Follow the prompts to configure your email settings effortlessly.
Accessing the dashboard is a crucial step in setting up your Namecheap Email. This step allows you to manage all your email settings, from creating new email addresses to adjusting your security settings. If you’re new to this, don’t worry—it’s simpler than you might think. ###Step 1: Log Into Your Namecheap Account
Start by logging into your Namecheap account. You’ll find the login button at the top right corner of the homepage. Use your credentials to gain access. If you can’t remember your password, use the “Forgot Password” option to reset it. ###Step 2: Navigate To The Dashboard
Once logged in, locate the “Dashboard” option in the main menu. It’s usually on the left side of your screen. Click on it, and you’ll be directed to a page with all your domains and services. ###Step 3: Select Your Domain
From the dashboard, find the domain linked to your email service. If you manage multiple domains, ensure you select the correct one. Clicking on the wrong domain could lead to unnecessary confusion. ###Step 4: Access Email Settings
After selecting your domain, look for the “Email” option. This is where you can manage your email accounts. Click on it to proceed to the email settings page. ###Step 5: Explore Additional Features
Take a moment to explore other features available on the dashboard. This might include spam filters, auto-responders, and email forwarding options. Familiarize yourself with these tools to optimize your email setup. Navigating the dashboard is more intuitive than it seems. Have you ever found yourself overwhelmed by complex interfaces? Namecheap’s dashboard is designed to be user-friendly, making it easy for you to manage your emails effectively. What features have you found most helpful in your setup? Let us know in the comments!Configuring Domain Settings
Setting up Namecheap Email involves configuring your domain settings. Access the dashboard, then update DNS records. Ensure mail servers point to Namecheap. This helps direct email traffic properly. Following these steps will ensure smooth email setup and delivery.
Configuring domain settings is a crucial step for setting up Namecheap email. This process connects your domain with the email service. It ensures smooth email delivery. By configuring these settings, you manage where your emails get sent. Let’s explore how to link your domain to your email service and update DNS records.Linking Domain To Email Service
First, access your Namecheap account. Go to the “Domain List” section. Click “Manage” next to your domain. Locate the “Advanced DNS” tab. Here, you add records needed for your email service. You’ll often need MX records. These direct emails to the right server. Adding them correctly is essential for email functionality.Updating Dns Records
DNS records guide internet traffic. To update them, stay in the “Advanced DNS” tab. Add the necessary MX records provided by your email service. Ensure the records match exactly. Any error can disrupt email flow. Some services need additional records like SPF or DKIM. These improve email security and deliverability. Save changes after updating. DNS updates can take some time to propagate globally.Setting Up Email Accounts
Setting up email accounts with Namecheap is essential for any business. It helps in maintaining professional communication. This guide will take you through the process step-by-step. You’ll learn how to create email addresses and manage user permissions effectively.
Creating Email Addresses
Start by logging into your Namecheap account. Navigate to the Email Management section. Click on ‘Add Email Account’ to begin. You’ll need to choose a unique email address. Use your domain name for a professional touch. Enter a strong password for security. Confirm the details and save your new email address.
Managing User Permissions
It’s important to manage who has access to what. Go to the User Permissions section. Here, you can assign roles to different users. Decide who can send emails and who can only read them. Set permissions based on roles within your team. This ensures smooth communication and data security. Regularly review permissions to keep them up-to-date.
Customizing Email Preferences
Setting up Namecheap email involves tailoring your preferences for a personalized experience. Adjust settings to fit your communication style. Efficiently manage emails by organizing folders, filters, and notifications.
Customizing your email preferences is like setting up the blueprint for your communication style. Whether you’re a neat freak or someone who loves a splash of organized chaos, tweaking your email settings can make a world of difference. With Namecheap Email, you have the flexibility to tailor your inbox to suit your needs, ensuring that your email experience is both efficient and enjoyable. ###Setting Up Email Forwarding
Email forwarding can be a game-changer. Imagine having all your emails funnel into one main inbox, saving you the hassle of checking multiple accounts. To set this up in Namecheap Email, navigate to the “Email Forwarding” section in your dashboard. Enter the email address you want to forward your emails to, and activate the setting. It’s as simple as that. You’ll never have to worry about missing important messages again. ###Organizing Inbox Folders
A cluttered inbox is like a messy desk—it can stifle productivity. By organizing your inbox folders, you can keep your emails neat and easy to navigate. Head over to your Namecheap Email settings and look for the “Folders” option. Create folders for different categories like work, personal, or projects. This way, you can quickly find the email you need without sifting through chaos. Plus, it feels incredibly satisfying to drag and drop emails into their respective homes. Think about the time you’ll save by setting these preferences. How will you use those extra minutes in your day? Customizing your email is more than a task; it’s an investment in your digital wellness.Integrating With Email Clients
Setting up Namecheap email with your client can be simple. Begin by accessing your Namecheap account and selecting the email service. Follow the prompts to configure your desired settings, ensuring compatibility with your email client.
Integrating your Namecheap email with popular email clients can elevate your communication experience. It allows you to manage emails seamlessly across devices, ensuring you never miss a beat. Whether you’re using Outlook or Gmail, setting up your Namecheap email is straightforward and enhances your productivity.Connecting To Outlook
To start, open Outlook on your device. Head to the “File” menu and select “Add Account”. You’ll be prompted to enter your Namecheap email address. Make sure it’s typed correctly to avoid any errors. Next, choose the “Manual Setup” option. This lets you input your server details manually. You’ll need the incoming and outgoing server settings, typically found in your Namecheap account dashboard or support documentation. Finally, test your settings by sending a test email. If everything is correct, you should see the email in your inbox. If not, double-check your server settings and try again.Connecting To Gmail
Start by opening your Gmail account in a web browser. Click on the gear icon in the top-right corner, then select “See all settings”. Navigate to the “Accounts and Import” tab. Look for the “Check mail from other accounts” section and click “Add a mail account”. Enter your Namecheap email address in the pop-up window and select “Next”. You’ll need to input the POP server settings provided by Namecheap. Once done, Gmail will ask if you want to send emails using your Namecheap address. This step is crucial if you want to manage all your emails from Gmail. Complete the setup by entering the SMTP settings. After saving, try sending an email to ensure everything works smoothly. Integrating Namecheap email with Outlook or Gmail is not just about convenience. It’s about making sure your communication stays organized and accessible. Have you ever thought about how much time you could save by streamlining your email process? Give it a try and see the difference it makes in your daily routine.
Credit: www.youtube.com
Troubleshooting Common Issues
Setting up Namecheap email can lead to common issues. Ensure server settings match the given instructions. Double-check login credentials for accuracy.
Setting up Namecheap email can be a straightforward process, but occasionally, you might encounter some hiccups. Whether you’re struggling with login issues or facing email delivery errors, knowing how to troubleshoot these common problems can save you time and frustration. Let’s dive into some solutions that can help you get your email up and running smoothly.Resolving Login Problems
Login issues are often due to incorrect credentials or configuration settings. Double-check that you are using the right username and password. If you keep seeing the dreaded “login failed” message, try resetting your password. Namecheap offers a simple password recovery process that can get you back on track quickly. Sometimes, browser settings or extensions can interfere with logging in. Consider clearing your browser cache or trying a different browser. This simple change can often resolve unexpected login issues. And remember, if you’re using a password manager, ensure it’s updated with your current credentials. Have you ever changed your password in a hurry, only to forget to update your password manager? It’s a common oversight that can lead to login headaches.Fixing Email Delivery Errors
Email delivery errors can be frustrating, especially when important messages fail to reach your inbox. Start by checking your spam folder; sometimes emails end up there unexpectedly. Verify your email settings, ensuring your incoming and outgoing server details are correctly configured. Incorrect server settings can lead to emails bouncing back or not being sent at all. If you notice consistent delivery failures, it might be worthwhile to check your email quotas. Are you sending more emails than your account allows? Hitting a quota limit can stop emails from being delivered. Additionally, consider if any recent changes to your DNS settings could be impacting delivery. Ensure your MX records are correctly set; these are crucial for proper email routing. By addressing these common issues, you can maintain a smooth email experience with Namecheap. Remember, the key to troubleshooting is patience and methodical checking. Have you ever solved a tech problem by simply taking a break and coming back with fresh eyes? It’s amazing how often that works.Frequently Asked Questions
How To Set Up Email From Namecheap?
Log into your Namecheap account. Navigate to “Email” settings. Click “Add Email Account. ” Enter details and select preferences. Save changes. Access email via webmail or configure on email clients using provided settings. Ensure DNS records match Namecheap’s instructions for proper functionality.
Is Namecheap Email Pop Or Imap?
Namecheap email supports both POP and IMAP protocols. POP downloads emails to your device, while IMAP syncs emails across multiple devices. Choose IMAP for flexibility in accessing emails from anywhere. Namecheap offers easy setup for both options, ensuring seamless email management tailored to your needs.
Does Namecheap Domain Come With Email?
Namecheap domains include free email forwarding, but not a complete email service. For full email hosting, purchase their private email service separately.
How Much Is Namecheap Private Email?
Namecheap’s private email starts at $0. 99 per month. Plans offer features like secure storage and collaboration tools. Prices vary based on storage and users. Visit Namecheap’s website for detailed pricing information and additional features.
Conclusion
Setting up Namecheap email is straightforward and efficient. Follow the steps, and your email will be ready. You can manage your domain and email easily. Great for personal and business use. Enjoy seamless communication. Secure and reliable service. Perfect for beginners and experts alike.
Troubleshooting is simple with Namecheap support. Start communicating with your new email today. Remember, practice makes perfect. A few tries, and you’ll master it. Your digital communication is now in your hands. Keep exploring and learning. It’s empowering to control your online presence.
Stay connected and organized.


