
Are you ready to give your WordPress site a fresh new look? Installing a theme is the perfect way to transform your website and captivate your audience.
But where do you start? Don’t worry—you’re not alone. Many WordPress users feel overwhelmed when faced with the task of installing a theme. The good news is, it’s easier than you think. In this guide, you’ll discover simple, step-by-step instructions on how to install a theme on WordPress 2017.
Imagine the possibilities: a stunning design, enhanced functionality, and a website that truly reflects your vision. Keep reading to unlock the secrets to a seamless theme installation and take your WordPress site to the next level.

Credit: www.youtube.com
Choosing A WordPress Theme
Many themes are free. They are good for beginners. Free themes have basic features. They are easy to use. Premium themes cost money. They offer more features. Design is better in premium themes. Support is often included. Free themes may have limited support. Premium themes can be customized. Free themes are less flexible. Updates are frequent in premium themes. Free themes may not update often. Security is better in premium themes. Free themes might have vulnerabilities.
Design matters. Choose a theme that fits your style. Responsive themes look good on phones. Check theme reviews. Look at ratings. Features should match your needs. Don’t choose a theme with too many options. It might slow down your site. Support is important. Make sure help is available. Updates keep your site safe. Themes should update regularly.
Locating The Theme In WordPress
Start by logging into your WordPress Dashboard. On the left side, find the Appearance tab. Click on it. A drop-down menu will appear. Choose Themes from this list. This will take you to the theme page. Here, you can see all the installed themes. To add a new theme, click the Add New button. This button is at the top of the page.
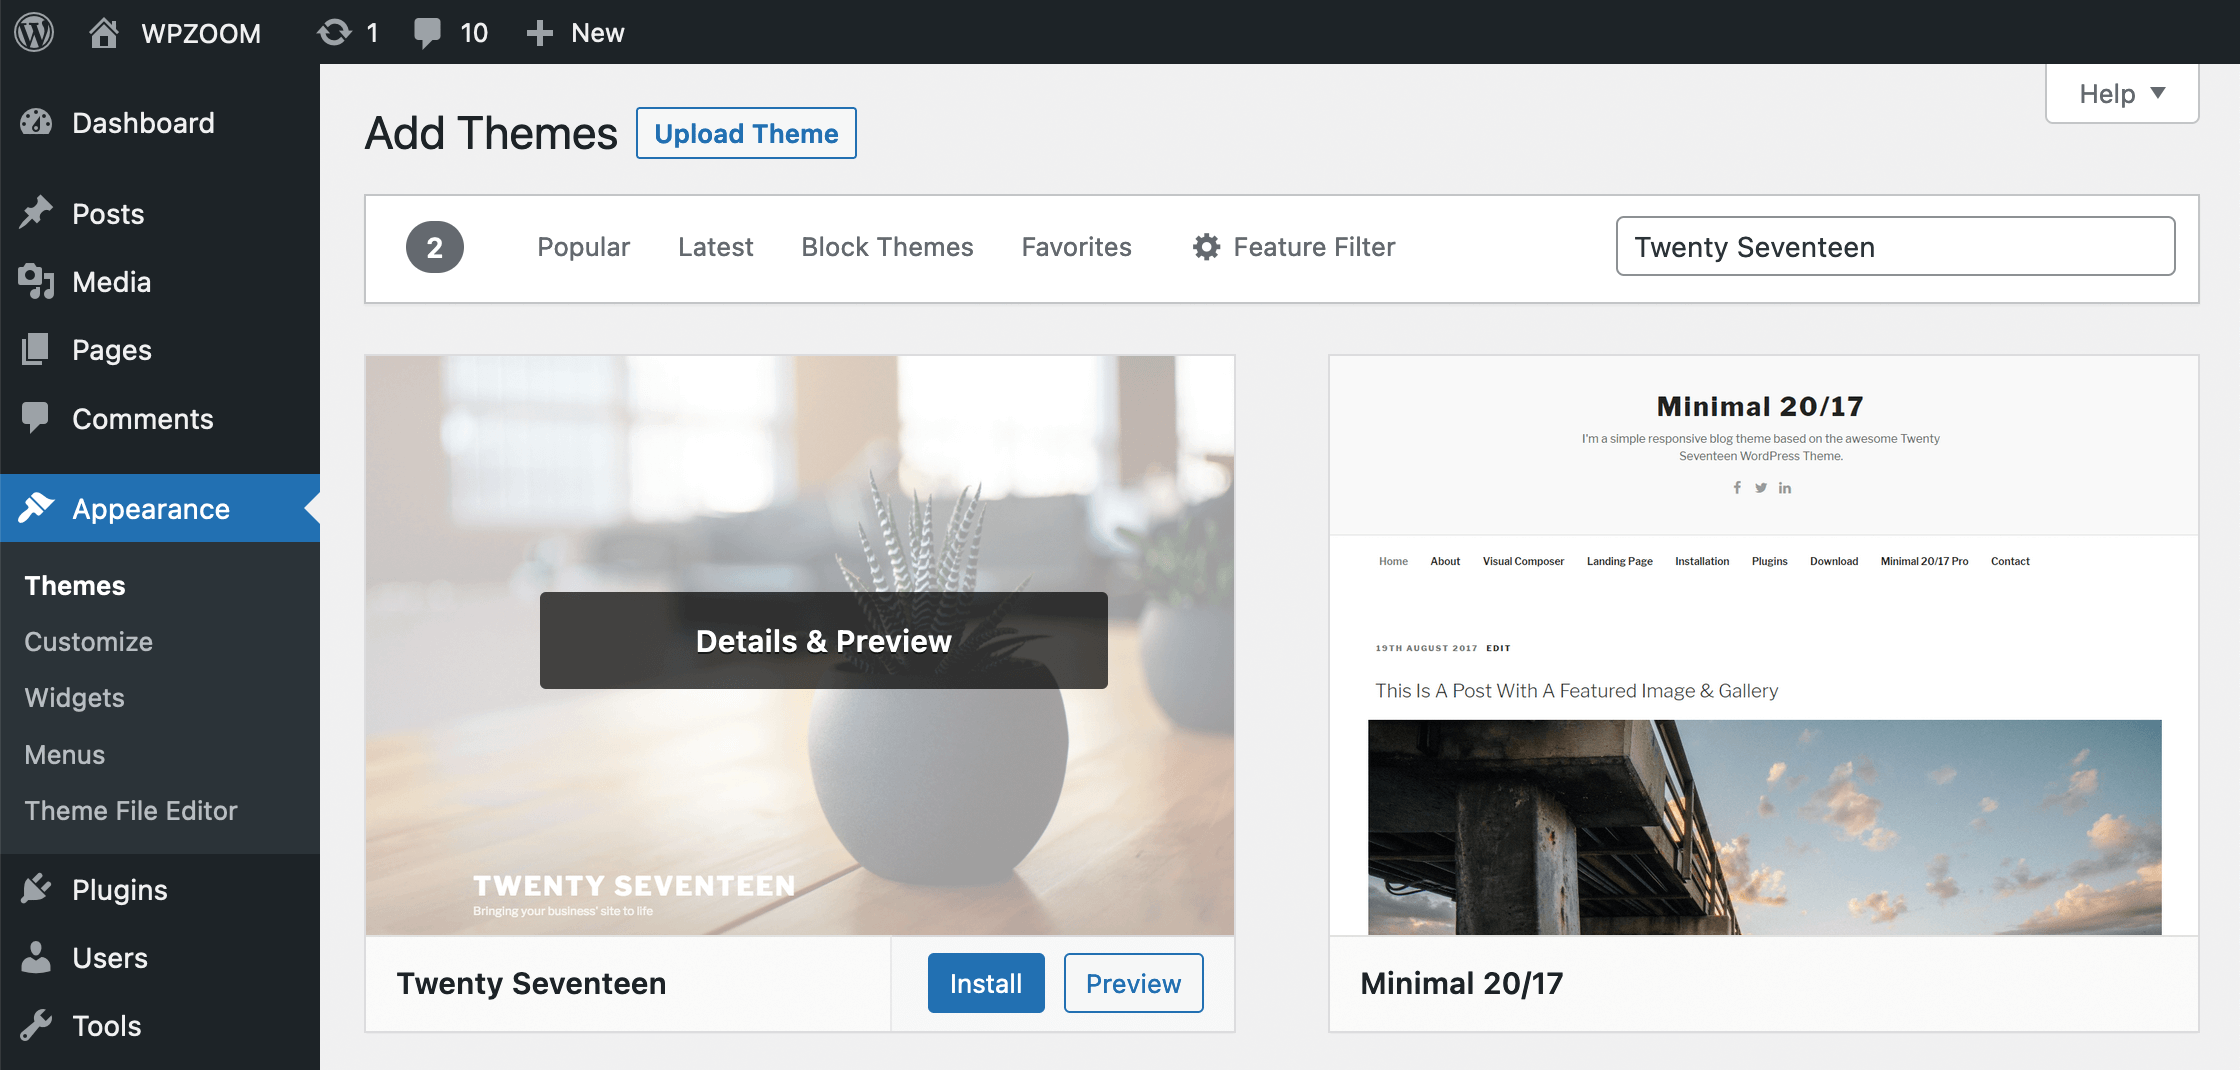
Once you click it, a search bar will appear. Type the name of the theme you want. You can also browse through featured or popular themes. After finding your desired theme, hover over it. Then, click the Install button. Once installed, click Activate to use the theme. Your new theme is now live.
Installing A Theme From The WordPress Repository
Go to your WordPress dashboard. Click on Appearance then Themes. Choose Add New at the top. Search for a theme in the box. Pick a theme you like. Click Install to begin. Wait for the theme to download.
Once downloaded, click Activate to use the theme. Check your site to see the changes. You can customize the theme. Click on Customize under Appearance. Make your site look good. Add your colors and fonts. Save your changes.
Uploading A Theme Via WordPress Dashboard
To install a theme in WordPress 2017, access the dashboard and navigate to Appearance, then Themes. Select “Add New” and upload your desired theme file. Once uploaded, activate the theme to apply it to your site.
Downloading Theme Files
First, find a theme you like. Visit a trusted website to download. Themes come in .zip files. Save the file on your computer. Check the folder where you saved it. Ensure it is ready for upload.
Uploading And Installing
Open your WordPress dashboard. Click on Appearance. Then, click on Themes. Find the button that says Add New. Click Upload Theme. Choose the .zip file you saved. Click on Install Now. Wait for the process to finish.
After installing, you can activate the theme. Look for the Activate button. Click it to use your new theme. Your site will change its look. Check if everything appears right. If not, try again.
Installing A Theme Via Ftp
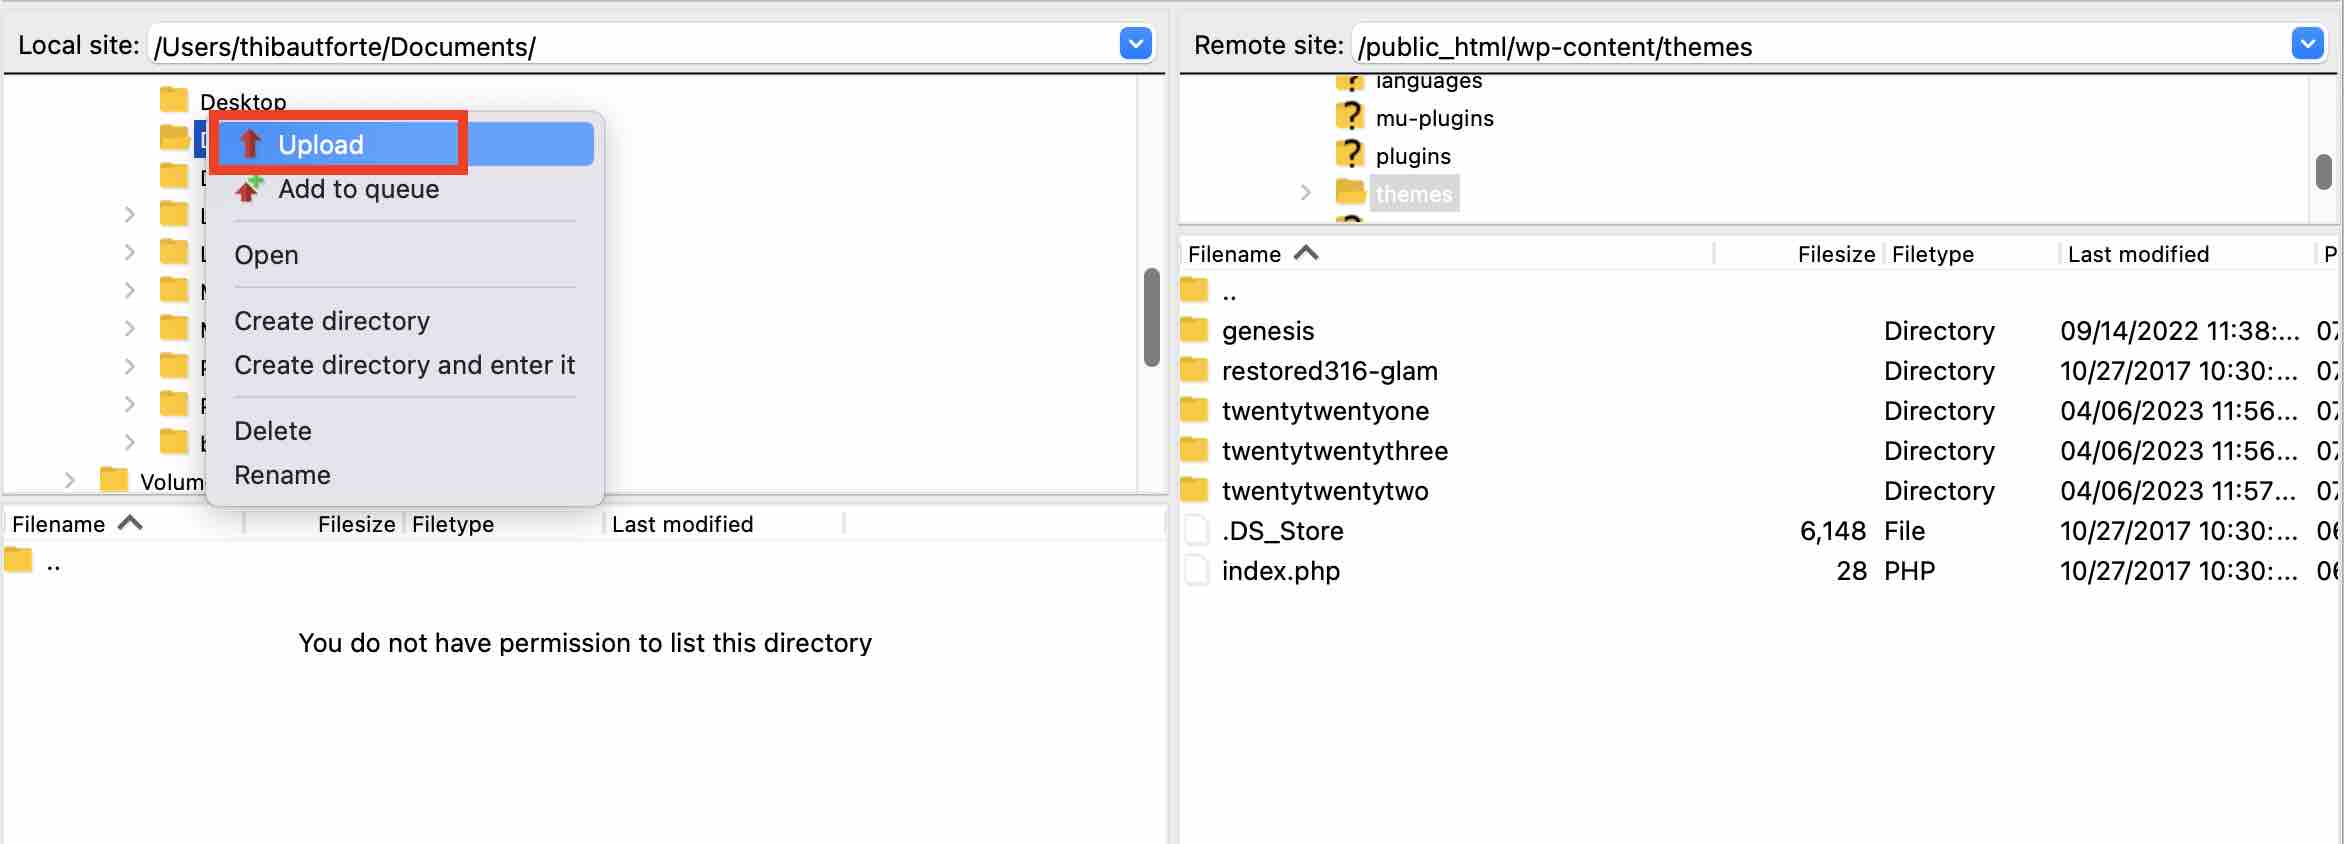
First, download an FTP client. FileZilla is popular. It is free. Install the software on your computer. Open the FTP client. Enter your WordPress site details. You need a host address. You need a username and password. Find these in your hosting account.
Locate the theme zip file. Extract it. Open your FTP client. Connect to your server. Navigate to wp-content/themes. Drag and drop the extracted theme folder. Wait for the upload to finish. Check your WordPress dashboard. Activate your new theme. Ensure it works well. Check your site appearance.
Credit: www.wpzoom.com
Customizing The Installed Theme
The WordPress Customizer lets you change your theme. It is easy and fun. Find the Customizer in the menu. Click on it. Now, you can see many options. Change colors, fonts, and more. Try out different settings. See the changes live. This helps you pick what you like. Save your changes when you are happy.
Each theme has its own settings. Explore these options. You can change the layout. Maybe you want a sidebar. Or no sidebar at all. Look for header settings. Add a logo if you have one. Or change the title. Sometimes, themes allow for background images. Pick a nice one for your site. Always remember to save. Your work is important.
Troubleshooting Common Issues
Installing a theme on WordPress 2017 might sometimes be tricky. Issues like upload errors or compatibility can arise. Follow a simple guide to ensure seamless installation and avoid common pitfalls.
Theme Installation Errors
Sometimes, theme installation might fail. This can be frustrating. Make sure you have a stable internet connection. Check if the theme file is complete and not corrupted. You can do this by downloading it again. Also, ensure your theme is compatible with your current WordPress version.
Compatibility Issues
Some themes may not work well with certain plugins. This can cause your site to break or not function properly. Disable all plugins and check if the theme works. Gradually re-enable plugins to find the conflicting one. Updating both theme and plugins can resolve many issues. Always backup your site before making any changes.
Credit: wpmarmite.com
Frequently Asked Questions
How Do I Upload A Theme In WordPress 2017?
To upload a theme, log in to your WordPress dashboard. Navigate to ‘Appearance’ and click ‘Themes’. Then, click ‘Add New’ and ‘Upload Theme’. Choose your theme file, click ‘Install Now’, and then ‘Activate’ to apply it.
Can I Install Themes From The WordPress Repository?
Yes, you can install themes directly from the WordPress repository. Go to your WordPress dashboard, click ‘Appearance’, then ‘Themes’. Click ‘Add New’ and browse through the available themes. Once you find one you like, click ‘Install’ and then ‘Activate’.
How Do I Install A Theme Via Ftp In WordPress?
To install via FTP, connect to your server using an FTP client. Navigate to ‘wp-content/themes/’ directory. Upload the theme folder to this directory. Once uploaded, go to your WordPress dashboard, click ‘Appearance’, then ‘Themes’, and activate your new theme.
What Should I Do If Theme Installation Fails?
If theme installation fails, check for file permission issues or conflicts. Ensure you’re using a compatible theme version. Try reinstalling the theme or contact your hosting provider for help. Always back up your website before making changes to avoid data loss.
Conclusion
Now you know how to install a theme on WordPress 2017. It’s simple and quick. Choose a theme that fits your style. Follow the steps mentioned. Customize to make it yours. Enjoy a fresh look for your site. Remember to update themes regularly.
This keeps your site secure and functional. Explore different themes and find what works best. Happy blogging with your new WordPress theme!



