
Are you looking to secure your website with an SSL certificate but feel overwhelmed by the technical steps involved? You’re not alone.
Generating a Certificate Signing Request (CSR) might sound like a daunting task, especially if you’re using Namecheap. But don’t worry—it’s actually simpler than it seems. In this guide, you’ll discover how to generate a CSR for SSL in Namecheap without unnecessary stress.
Imagine the peace of mind you’ll have knowing your website is protected and your customers’ data is safe. This step-by-step approach will empower you to enhance your site’s security effortlessly. Keep reading to transform what might seem like a complex process into an easy and rewarding experience.

Credit: www.youtube.com
Understanding Ssl Certificates
SSL certificates are like digital passports for websites, ensuring a safe passage for data between your browser and the server. If you’ve ever wondered why some websites have a padlock icon in the URL bar, that’s SSL at work, encrypting information and fostering trust. As you embark on the journey to generate a CSR for SSL in Namecheap, it’s crucial to first grasp what SSL certificates are and why they’re indispensable.
Importance Of Ssl
SSL certificates aren’t just technical jargon; they are essential tools for website security. They encrypt sensitive data, protecting it from hackers. Imagine entering your credit card information on a website without SSL. Scary, right? SSL certificates instill confidence in your visitors, making them more likely to engage and transact.
Not only do they safeguard data, but they also boost your site’s credibility. Google favors sites with SSL, which can improve your search rankings. If you’re serious about your online presence, SSL is non-negotiable.
Types Of Ssl Certificates
There are several types of SSL certificates, each serving different needs. Domain Validated (DV) SSL certificates are the most basic, verifying that you own the domain. They’re quick to issue and perfect for personal websites or blogs.
Organization Validated (OV) SSL certificates offer a higher level of security. They verify the organization behind the website, making them suitable for business websites. Then there are Extended Validation (EV) SSL certificates, the gold standard for e-commerce sites. They provide the highest level of trust and display a green address bar in browsers, showcasing your legitimacy.
Choosing the right SSL certificate depends on your website’s purpose and audience. Have you ever considered what message your site sends with its security features? Your choice of SSL certificate could be pivotal.
Understanding SSL certificates is foundational to enhancing your website’s security and reputation. As you prepare to generate a CSR in Namecheap, this knowledge will guide you in selecting the right SSL for your needs, ensuring your site remains a trusted and secure destination for all visitors.
Preparing For Csr Generation
Generating a Certificate Signing Request (CSR) is a crucial step. This process ensures that your SSL certificate is properly linked to your domain. Before diving into the technicalities, you need to prepare. Proper preparation simplifies the CSR generation and avoids common mistakes.
Requirements For Csr
First, you need an active Namecheap account. Ensure your domain is verified and accessible. You’ll also need access to your server’s control panel. Knowing your server type is important. It affects the CSR generation process. Familiarize yourself with server specifications beforehand.
Gathering Domain Information
Gather accurate domain details. This includes the domain name and subdomains. You’ll need to know the exact spelling of your domain. Confirm the email address associated with the domain. It’s used for SSL certificate notifications. Double-check the contact details. They must be current and valid.
Accessing Namecheap Account
Generate a CSR for SSL on Namecheap by logging into your account. Navigate to the SSL certificates section. Follow the instructions to create your CSR for securing your website.
Accessing your Namecheap account is the first step in generating a CSR for your SSL certificate. It’s like opening the door to a world of digital security. Whether you’re new to Namecheap or a seasoned user, navigating through your account can be straightforward. Let’s dive into the specifics of logging in and finding the SSL settings.Logging Into Namecheap
To access your Namecheap account, start by visiting the Namecheap website. If you’re like me, you might have your login credentials saved—makes life easier, doesn’t it? Once there, click on the “Sign In” button located at the top right corner. Enter your username and password. It’s as simple as logging into your favorite social media account. If you’ve forgotten your password, don’t panic. Use the “Forgot Password” link to reset it and gain access again.Navigating To Ssl Settings
After logging in, you’ll find yourself on your Namecheap dashboard. This is your control center where you manage everything. Look for the “Products” tab in the menu. Click on it and you’ll see a list of all your active products. Find your SSL certificate among them and click on it. This is where the magic happens! You’ll land on the SSL settings page. Here, you can generate your CSR by following the prompts provided. Isn’t it satisfying to know exactly where to go and what to click? Generating a CSR might sound technical, but with Namecheap’s intuitive platform, it’s a breeze. What’s the most confusing part for you when dealing with SSL certificates? Understanding the process can save you time and effort, leaving you more secure.Generating Csr In Namecheap
Creating a Certificate Signing Request (CSR) for SSL in Namecheap involves a straightforward process. Access your account dashboard, navigate to the SSL section, and follow the guided steps to generate your CSR. This ensures secure communication between your website and its users.
Generating a Certificate Signing Request (CSR) is essential for securing your website with SSL. Namecheap simplifies this process, making it accessible even for non-tech savvy users. A CSR is vital as it contains information that your SSL certificate will use. Let’s explore how to generate a CSR in Namecheap, ensuring your site’s security is top-notch.Initiating Csr Process
To start, log into your Namecheap account. Navigate to the SSL section in your dashboard. Here, you will find an option to create a new CSR. Click on this to begin. The system will prompt you to select your domain. Ensure you select the correct domain for the SSL certificate.Filling Csr Details
After selecting your domain, proceed to enter the CSR details. You’ll need to fill in fields like your organization name, locality, and email address. Ensure all information is accurate and complete. This data is crucial for the SSL certificate. Namecheap’s interface is user-friendly, guiding you through each step. Double-check each entry before submitting. Generating a CSR with Namecheap is straightforward. Follow these steps to secure your website efficiently. Proper SSL configuration ensures visitor trust and data protection.Validating Csr Information
Validating CSR information is a crucial step in securing your SSL certificate. It ensures the accuracy of the details provided during the CSR generation process. This validation step is vital for maintaining the integrity of your website’s security. It also helps in preventing future issues with your SSL installation.
Reviewing Input Data
Start by reviewing the input data for your CSR. Check each field carefully. Ensure that the common name matches your website’s domain. Verify that your organization name is spelled correctly. Cross-check the locality information for your business location.
Look over the email address entered in the CSR. This must be a valid contact point. Double-check the country code for accuracy. Small mistakes here can lead to big problems later. They can even cause delays in your SSL certificate issuance.
Ensuring Accuracy
Ensuring accuracy in your CSR information is essential. Make sure every detail is correct before submission. Review the spelling and format of each entry. Verify that the organizational unit is correct.
Confirm that the state or province details are accurate. A minor error can invalidate your CSR. Confirm that the domain listed matches your business site. Once you validate all data, proceed with confidence.
Downloading And Saving Csr
Generate a CSR for SSL in Namecheap by accessing your hosting account’s SSL/TLS section. Follow the instructions to create your CSR. Download and save the CSR file securely for certificate installation.
When you’re setting up an SSL certificate on Namecheap, generating and managing your Certificate Signing Request (CSR) is a crucial step. After creating your CSR, downloading and securely storing it is important for a seamless setup. But do you know the best way to handle this process? Let’s break it down, step by step, so you can ensure your SSL installation goes without a hitch.Exporting Csr File
Once you generate your CSR on Namecheap, exporting it is your next task. Typically, you’ll find a downloadable link provided by Namecheap after CSR generation. Clicking this link will allow you to download the file directly to your computer. Ensure your downloaded CSR file is in a safe location. It’s a good idea to name the file something easy to recognize, like “MyDomain_CSR” to avoid confusion later. Misplacing this file can cause delays in your SSL setup.Secure Storage Tips
Keeping your CSR file secure is essential. Store it in a location that only authorized personnel can access. Consider using a secure cloud storage service or an encrypted folder on your computer. Think about how you would feel if you misplaced this vital file. You’d have to restart the entire process, wasting valuable time. Ensuring your CSR is securely stored from the outset saves you from this hassle. Regularly back up your CSR file to prevent accidental loss. You never know when a hardware failure might occur. A backup can be a lifesaver, letting you retrieve your CSR without stress. Downloading and saving your CSR isn’t just a technical step—it’s part of safeguarding your digital assets. How do you plan to store your CSR securely? Taking these steps ensures your SSL setup is smooth, secure, and efficient.Troubleshooting Common Issues
Generating a CSR for SSL in Namecheap involves a few straightforward steps. Access the Namecheap SSL section, select your certificate, and follow the prompts to create a CSR. Ensure correct details to avoid errors in validation.
Generating a CSR (Certificate Signing Request) for SSL can sometimes feel like navigating a maze. Even with Namecheap’s user-friendly interface, you might stumble upon a few hurdles. Don’t worry, you’re not alone. Many users face common issues during this process. Let’s dive into some typical errors and how you can quickly solve them.Error Messages
During the CSR generation, error messages can be frustrating. You might see messages like “Invalid CSR” or “Key Mismatch.” These usually mean there’s a mistake in the information you’ve entered. Another common error is a “Signature Algorithm Mismatch.” This happens when the algorithm specified does not align with Namecheap’s requirements. If you see a “Common Name Mismatch” error, it typically means the domain name in the CSR doesn’t match the one you’re trying to secure.Resolution Steps
Facing an “Invalid CSR” error? Double-check the details you entered, like the domain name and organization. Ensure there are no typos. For a “Key Mismatch,” ensure that the private key matches the CSR. You might have to regenerate the CSR with the correct private key. If you encounter a “Signature Algorithm Mismatch,” adjust the algorithm settings. Namecheap usually requires SHA-256, so make sure that’s what you’re using. To resolve a “Common Name Mismatch,” verify that the domain name in your CSR is correct. It should be the exact domain you’re securing, without any extra spaces or typos. When I first generated a CSR, I overlooked a small typo in the domain name. It was a tiny error, but it led to hours of troubleshooting. So, take your time and review each detail carefully. Isn’t it surprising how such small details can lead to big issues? By staying vigilant, you can easily tackle these common problems. Now, are you ready to create a flawless CSR?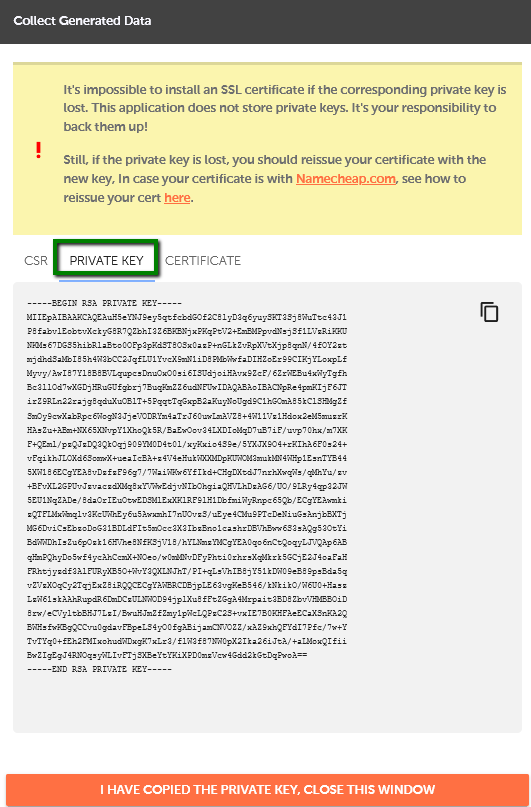
Credit: www.namecheap.com
Next Steps After Generating Csr
After generating a CSR for SSL in Namecheap, proceed to submit it to your certificate authority. Ensure you provide accurate details to avoid delays. Once approved, install the SSL certificate on your server following Namecheap’s guidelines for enhanced security.
After generating your CSR (Certificate Signing Request) for SSL on Namecheap, you’re one step closer to securing your website. The CSR is crucial as it contains your public key and other information that will form the basis of your SSL certificate. But what happens next? Let’s dive into the subsequent steps that will complete your SSL setup process. ###Submitting Csr For Ssl
Once your CSR is ready, it’s time to submit it to Namecheap for your SSL certificate. Log into your Namecheap account and navigate to the SSL management section. Here, you’ll find an option to upload your CSR. Ensure that the CSR matches exactly with the domain you intend to secure. It’s easy to make mistakes, especially if you’re handling multiple domains. Double-check your entries to avoid any delays. After submission, Namecheap will process your request. Have you ever waited eagerly for something, checking every few minutes? That’s the anticipation you’ll feel here. But rest assured, Namecheap is known for its swift processing. ###Awaiting Ssl Certificate Approval
With your CSR submitted, the next phase is a waiting game. Namecheap will verify the details you’ve provided. This can take anywhere from a few minutes to a couple of days, depending on the validation level of your SSL certificate. During this time, think about any improvements you can make to your website’s security posture. Is everything up to date? Are there other vulnerabilities you should address? Once approved, you’ll receive your SSL certificate. It’s like getting the key to a new house – a secure, trusted environment for you and your visitors. Have you considered how this security will impact your site’s trustworthiness and SEO ranking? That’s food for thought. Navigating the SSL certification process can seem daunting, but each step is a move towards a more secure web presence. Are you ready to see your site flourish in its new, secure environment?
Credit: www.youtube.com
Frequently Asked Questions
How To Generate Csr Code For Ssl?
To generate a CSR code for SSL, use your server’s admin panel or terminal. Enter details like domain name, organization, and location. Save the CSR file. This code is essential for SSL certificate requests. Follow your server’s specific instructions for accurate generation.
How To Generate Csr Certificate Signing Request Code Namecheap?
To generate a CSR on Namecheap, log in, navigate to the SSL Certificates section, select your certificate, and follow the CSR generation steps. Use accurate domain details, choose your server type, and submit. Ensure all fields are completed correctly for successful SSL installation.
How To Generate An Ssl Certificate In Namecheap?
Log in to Namecheap account, navigate to the SSL certificates section, choose your certificate, and click “Activate. ” Fill in the necessary details, complete validation, and download the certificate. Ensure you install it correctly on your server for secure connections.
How To Generate Csr For Ssl Certificate Renewal?
Open your server terminal and navigate to the directory where you want the CSR stored. Use the command `openssl req -new -newkey rsa:2048 -nodes -keyout yourdomain. key -out yourdomain. csr`. Follow the prompts to enter your details. Your CSR is generated.
Conclusion
Generating a CSR for SSL in Namecheap is simple. Follow the steps carefully. Each step matters for security. Double-check your details. Accuracy ensures a smooth process. SSL certificates protect your data. They build trust with visitors. Namecheap makes it easy to manage SSL.
Understanding CSR boosts your confidence. You now have the knowledge. Implement it with care. Secure your website effectively. A safe site attracts more users. Keep learning about SSL. Stay informed and stay secure. Your efforts will pay off. Happy website securing!


