
Is your WordPress site not quite reflecting your brand as you’d like? The footer, often overlooked, is a crucial part of your website’s identity.
It’s the spot where visitors expect to find essential information like contact details, copyright notices, or even a few personalized touches that make your website unique. Editing the footer in a WordPress child theme might sound daunting, but it’s simpler than you think.
Imagine the satisfaction of having a fully customized site that feels just right for you and your audience. In this guide, you’ll discover how to easily tweak your footer to better fit your needs and leave a lasting impression on your visitors. Ready to transform your site from good to great? Let’s dive in and give your WordPress footer the attention it deserves.
Credit: www.wpzoom.com
Understanding Child Themes
Child themes are a special type of WordPress theme. They allow users to make changes safely without losing the original theme’s updates. This makes it easy to tweak styles, layouts, and functionalities. The main theme remains untouched, reducing errors.
Purpose Of Child Themes
Child themes serve an important role. They help users customize their site. Changes do not affect the main theme. Users can update the main theme without worries. This ensures site stability and security. Customization becomes easy and safe.
Benefits Of Using Child Themes
- Preserve changes after updates.
- Reduce the risk of errors.
- Enhance site security.
- Easy to revert changes.
- Boost creativity with custom designs.
Locating The Footer Code
Start by logging into your WordPress dashboard. Click on Appearance in the sidebar. Then select Theme Editor. This opens the theme files. Look for the footer.php file. It contains the footer code. Be careful when editing these files. Changes affect your website’s look.
Inside the footer.php file, find the code. This code builds the footer. Look for sections like copyright, social media links, and credits. These are common in footers. Each section might have its own code block. Identify what you want to change. Make small changes to avoid errors. Always back up your files.
Creating A Child Theme
To create a child theme, start by making a new folder. This folder should be inside the themes directory. Name it after your theme with “-child” at the end. Inside this folder, make two files. One file is style.css. The other is functions.php. These files are important. They help your child theme work with the parent theme.
The style.css file needs a special code at the top. This code tells WordPress about your child theme. It should include the name of the parent theme. You can copy the style.css from the parent theme. Add a line that links to the parent theme’s style. In functions.php, use a function to load the parent theme’s styles. This helps keep your site looking good.
Link your child theme to the parent theme. Use the enqueue function in functions.php. This tells WordPress to use the parent theme’s styles. Your new theme will now match the old one. This setup is easy to do. Anyone can make a child theme with these steps.
Credit: mekshq.com
Editing The Footer
Editing the footer in a child theme is simple. First, find the footer.php file. This file is in your theme folder. Copy it to the child theme folder. Next, open the file in a text editor. Make changes to the HTML or text. Save the file and check your site. Your changes should show in the footer. Remember, always back up your site first!
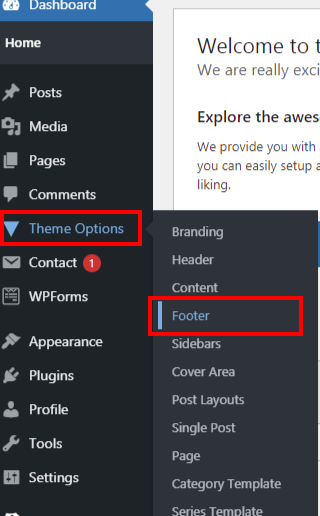
Adding new elements can make your footer unique. Use the WordPress widgets for this. Go to the Appearance section in your dashboard. Click on Widgets. Find the footer area and add new widgets. You can add text, images, or links. Save the changes. Refresh your site to see the new elements in the footer.
Applying Css Styles
Editing the footer in a WordPress child theme involves applying CSS styles to customize its appearance. Access the child theme’s stylesheet and add your desired CSS code to change the footer’s look. This method ensures your customizations remain safe during theme updates.
Styling Footer Elements
Start by accessing your child theme in WordPress. Open the style.css file. Add specific CSS rules to style your footer elements. Use selectors like .footer or #footer to target the footer area. Adjust margin and padding for spacing. Change background-color to give it a new look.
Use font-size and font-weight to make text bold or bigger. Apply border for outlines. Make sure to save changes after editing. Refresh your site to view updates. Inspect with browser tools if issues arise. Tweak styles until satisfied.
Using Custom Fonts And Colors
Select custom fonts from Google Fonts or similar sites. Import them into your style.css file. Use @import or link tag to add fonts. Assign fonts to footer text using font-family property. Choose colors that match your site’s theme. Apply color property to change text color. Test different combinations for a unique look. Keep readability in mind when choosing fonts and colors.
Testing Changes
Previewing the Footer is an essential step. It helps you see the changes. Save your edits first. Then go to the website. Look at the footer. Ensure it appears correctly. Check every detail. Verify links are working. Confirm text is readable. Review the design. It should match the theme. Make sure everything looks good. Refresh the page to see updates. Sometimes, the changes take a moment. Patience is key here.
Resolving Common Issues is part of the process. Sometimes things go wrong. The footer might not update. Check your code again. Ensure all tags are closed. Look for typos. They can cause errors. Sometimes plugins interfere. Disable them one by one. This helps find the problem. Clear your browser cache. It might show old data. Ask for help if needed. Online forums are helpful. Many people share solutions there.
Deploying Updates
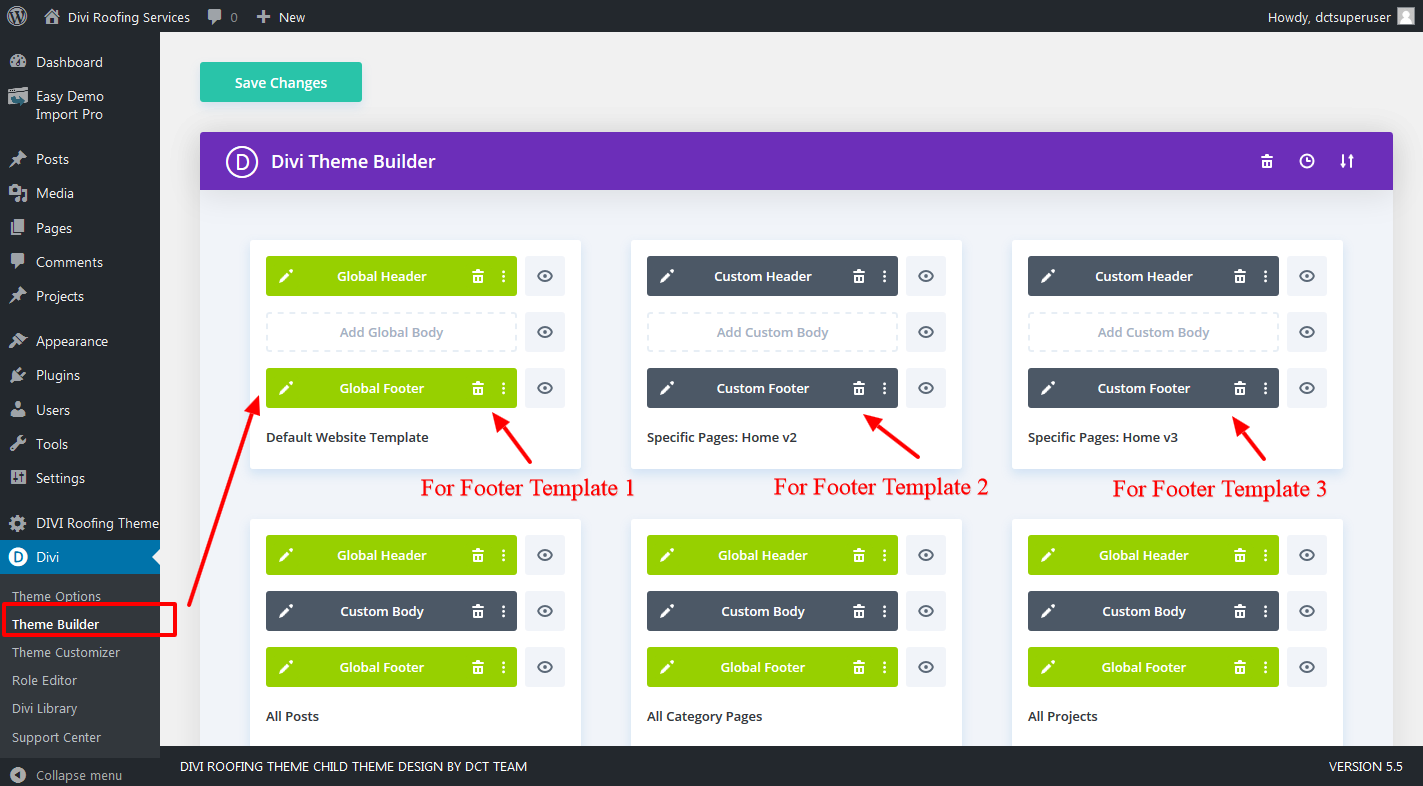
First, make sure to save your changes in the child theme. This is important. Click the save button. Double-check the settings. Always ensure your edits are correct. Mistakes can cause issues later.
After saving, update the live site. This lets others see your changes. Navigate to the site settings. Click on update. Wait for it to load. Check the footer on your site. Ensure everything looks right.
Credit: divi-childthemes.com
Frequently Asked Questions
How Do I Access The Footer In WordPress?
To access the footer in WordPress, navigate to the Appearance menu in your dashboard. Then, click on the Theme Editor. Find the footer. php file under the Theme Files section. Make sure to select your child theme to avoid changes to the parent theme.
Can I Edit Footer Text In A Child Theme?
Yes, you can edit footer text in a child theme. Navigate to Appearance > Theme Editor in your WordPress dashboard. Ensure you’re editing the child theme. Locate the footer. php file. Make your desired text changes there and save. This ensures your edits are safe from theme updates.
What Precautions Should I Take Before Editing?
Before editing, always back up your website. This helps prevent data loss. Use a child theme to ensure updates don’t overwrite changes. Test changes on a staging site first. These steps help maintain your website’s integrity and functionality.
Why Use A Child Theme For Footer Edits?
Using a child theme ensures that any changes you make are safe from updates. Parent theme updates can overwrite modifications. A child theme isolates your customizations, keeping them intact. It’s a best practice for making sustainable edits.
Conclusion
Editing the footer in a child theme is simple. Follow these steps carefully. Access your WordPress dashboard. Navigate to Appearance, then Editor. Select your child theme. Open the footer. php file. Make the necessary changes. Save your work. Refresh your site to see updates.
This process keeps your site unique. Also, it ensures your design remains intact after updates. Practice makes perfect, so don’t hesitate. Experiment with different styles. Your website’s footer is now customized. Enjoy the personal touch on your site!



