
Have you ever wondered how you can consume a RESTful web service using .NET self-hosting? Whether you’re a seasoned developer or just getting started, this guide will simplify the process for you.
By the end, you’ll feel empowered to easily integrate RESTful services into your applications. Imagine the flexibility and control at your fingertips when you can effortlessly connect your software to web services. This blog post will guide you through every step, ensuring you understand the essentials without any unnecessary jargon.
Ready to take your development skills to the next level? Let’s dive in.
Understanding Restful Web Services
REST stands for Representational State Transfer. It’s a way to build web services. REST uses simple HTTP. It treats everything as a resource. Each resource has a unique URL. REST is stateless. Each request from client contains all information to service the request. This makes REST scalable and efficient. REST uses different HTTP methods. GET, POST, PUT, DELETE. These methods perform actions on resources.
RESTful services are easy to use and understand. They work well with the web. REST is flexible. It can handle different types of data. JSON, XML, and more. RESTful services are lightweight. They use less bandwidth. This makes them fast. REST is also scalable. It can grow with your needs. Many big companies use REST. It is popular in the tech world.
Setting Up A Self-hosted Environment
Picking the right tools is very important. Start with a reliable computer. It should have enough memory and storage. Get a stable internet connection. It helps in smooth operation. Choose a good software for development. Many use Visual Studio. It is popular and easy to use. Ensure you have a code editor. It makes writing code easier. Install a web server. It will host your service. Apache and Nginx are common choices.
First, set up the server software. It should be done correctly. Use clear instructions. Check the firewall settings. Make sure the server is safe. Set up port forwarding. This allows outside access. Ensure the web service is running. Use simple tests to check. Adjust the settings for better performance. Check the logs for errors. This helps find problems.
Creating A Restful Client
Choosing the right programming language is key. Some popular choices are Python, Java, and JavaScript. Each language has its own strengths. Python is simple and easy. Java is powerful and fast. JavaScript is great for web tasks. Think about your needs. Then pick the best one for you.
Libraries and frameworks make coding easier. They have ready-made tools. For Python, use Requests or Flask. Java developers can try Spring or Jersey. In JavaScript, Axios and Express are popular. These tools save time. They help you build faster and cleaner code.

Credit: devblogs.microsoft.com
Making Http Requests
Use GET requests to fetch data from a web service. This method is simple. Type the URL in a browser or use tools like Postman. The server sends back data. This method is safe and does not change the server.
POST requests send data to a server. This can update or add new data. Unlike GET, it can change the server’s state. Use it for forms or login. Always ensure data is accurate and secure.
Responses tell if a request was successful. They come with a status code. A code of 200 means success. A 404 means not found. Always check these codes to know what happened. Read the response body for detailed info.
Handling Data Formats
JSON is a simple format. It uses key-value pairs. Keys must be strings. Values can be numbers, strings, or other data types. JSON is easy to read. Many web services use JSON. JSON helps in data exchange. It works well with JavaScript. JSON is popular because it is lightweight and fast.
XML stands for eXtensible Markup Language. It is used for data sharing. XML uses tags to store data. Tags are like labels. They help organize data. XML is more complex than JSON. It is flexible and powerful. XML works well with many systems. XML is good for structured data. It helps in storing large amounts of data.
Authentication And Security
Use API keys to secure web services. Keys are like secret passwords. They help verify requests. Developers can generate unique keys. These keys are used in every request. Ensure keys are kept safe. Never share your key publicly. Rotate keys often. This improves security. Keys are simple but effective. They are easy to use. Protect your service with strong keys.
OAuth is another way to secure web services. It allows users to grant access. Users do not share passwords directly. Instead, they use tokens. Tokens are temporary. They expire after a set time. OAuth is more complex than keys. It is very secure. Many big services use OAuth. Facebook and Google use it. OAuth protects user data. It is trusted by many companies.
Error Handling And Logging
Many errors occur during web service consumption. Connection errors are frequent. They happen when the server is unreachable. Data format errors arise when data is wrongly formatted. Authentication errors occur when access is denied. Timeout errors show when the server takes too long. Understanding these errors helps in fixing them. Always check the error message. It often gives clues. Learn what each error means. Resolve them quickly to ensure smooth operation.
Logging helps track problems. Keep logs simple and clear. Error logs record issues. Access logs track who uses the service. Transaction logs show what is done. Use a consistent format for logs. Make sure logs are secure. Protect sensitive data. Logs must be easy to read. They help identify issues quickly. Review logs regularly. This helps maintain a healthy system. Good logging saves time and effort.
Testing And Debugging
Tools help find errors in web services. They make testing easy. Postman is a popular tool. It sends requests to test services. Another tool is SoapUI. It checks web services too. Fiddler is a tool for tracking requests. It sees all web traffic. Tools save time. They help find bugs fast. Choose a tool that fits your needs. Free tools work well for beginners. Paid tools offer extra features. Testing tools are easy to learn. You can find many tutorials online.
Debugging is like solving a puzzle. Start small. Check one part at a time. Logs are your best friends. They show what happens in code. Use logs to track errors. Breakpoints stop code at a spot. Check values at breakpoints. They help find mistakes. Step through code to see each part. This shows how code works. Error messages give clues. Read them carefully. Fix one error before moving on. Debugging takes patience. Keep trying. You’ll solve the puzzle.
Performance Optimization
Caching can make web services faster. It stores data for future use. Servers can send data quickly from the cache. This reduces waiting time for users. Memory caching is a good option. It keeps data in RAM. This is faster than fetching from disk. Database caching helps reduce load. It stores frequently used queries. Browser caching is also useful. It stores web pages locally. This helps users load pages faster.
Latency slows down web services. Reducing it makes services faster. Use CDNs to store data close to users. This cuts down travel time. Load balancers distribute requests evenly. This prevents overload on one server. Optimizing code can also help. Simple code runs faster. Monitoring tools can find slow parts. Fixing these parts reduces latency.
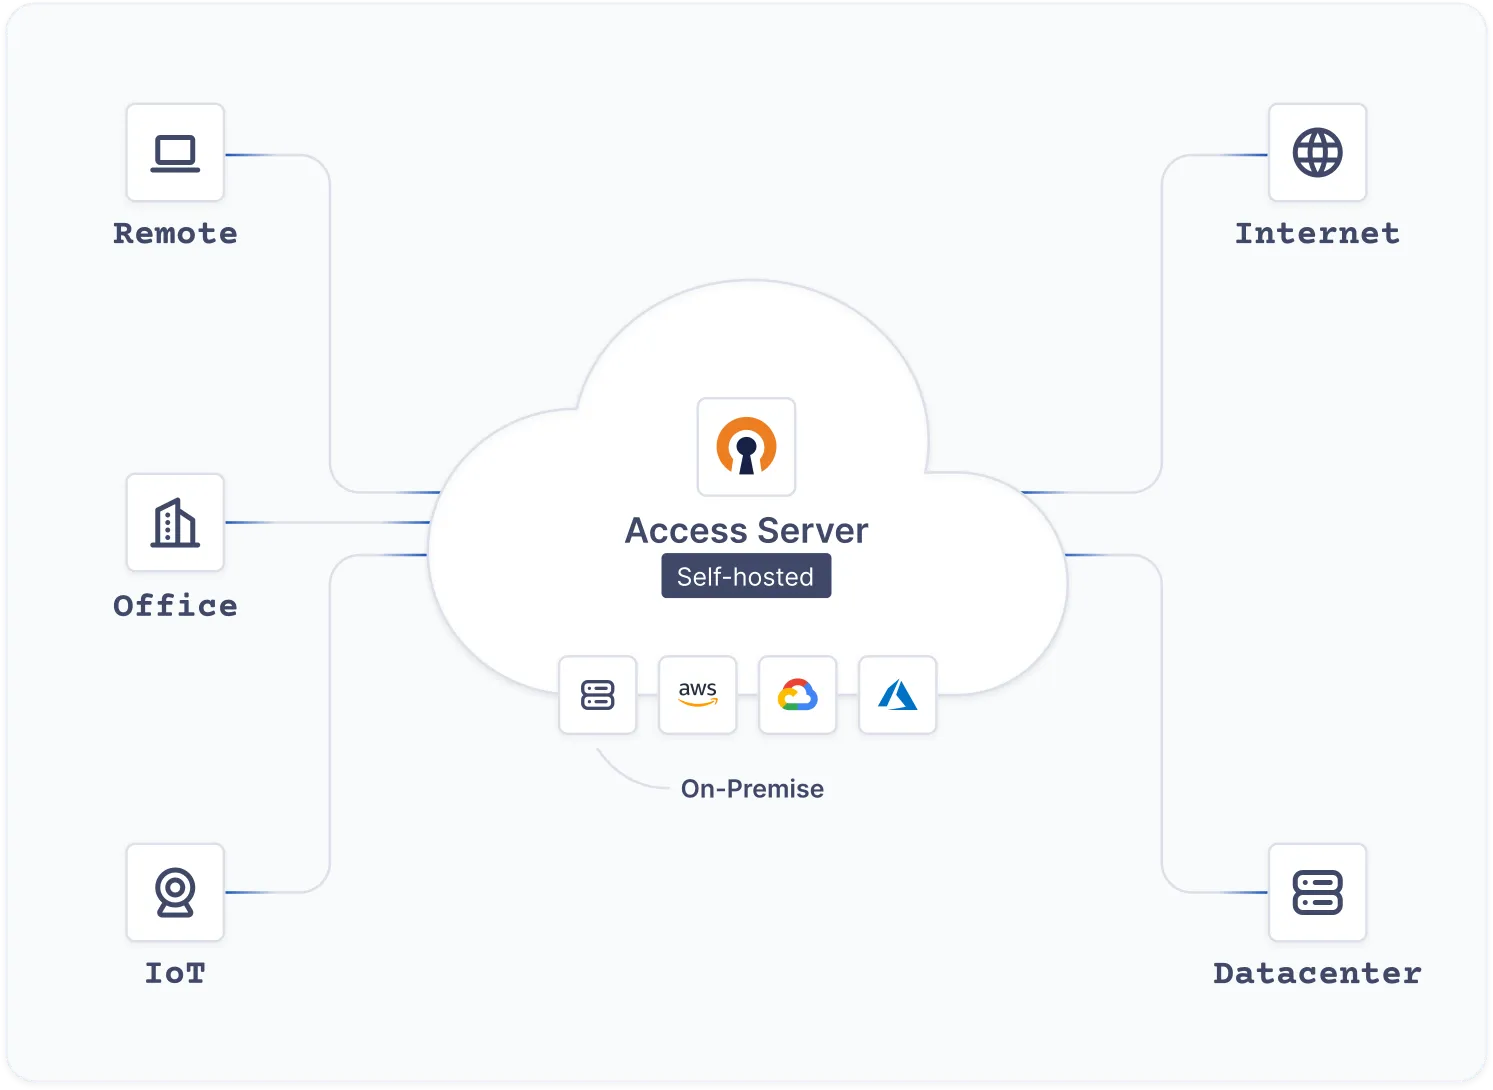
Credit: openvpn.net
Best Practices
Keep your code neat. Use comments wisely. They help others understand. Always check for errors. Test your code often. Refactor old code. Make it better and cleaner. Follow coding standards. Use a style guide. It keeps code consistent. Write descriptive function names. They should say what they do. Keep functions short. Long functions are hard to read.
Plan for growth. Your service should handle more users. Use efficient code. It saves resources. Avoid complex operations. They slow things down. Cache data. It speeds up response time. Use load balancers. They distribute requests evenly. Monitor performance regularly. Find and fix bottlenecks. Ensure your service can handle peak times.
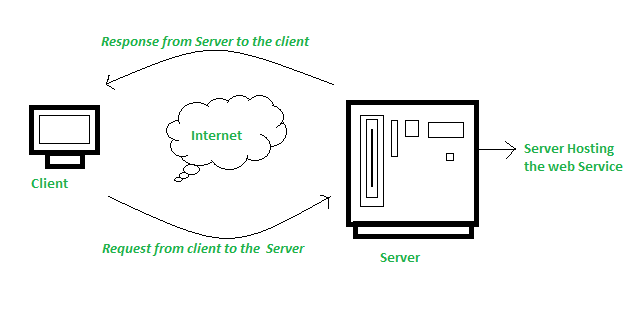
Credit: www.geeksforgeeks.org
Frequently Asked Questions
Can Web Api Be Self-hosted?
Yes, you can self-host a Web API. Use. NET Core, Node. js, or similar frameworks for this purpose. Self-hosting offers more control over the environment and settings. Ensure your infrastructure supports the API’s requirements.
How To Consume A Web Service In .net Core?
Use HttpClient in. NET Core to consume web services. Create an instance, configure headers, and call API endpoints. Deserialize the response using JSON or XML serializers. Integrate it into your application code for efficient data handling.
How To Consume Api In .net Maui?
Use HttpClient to consume APIs in. NET Maui. Initialize HttpClient, send HTTP requests, and handle responses. Utilize async methods for efficiency and ensure error handling. Serialize and deserialize JSON data using System. Text. Json. Configure necessary headers for authentication and other requirements.
What Is The Difference Between Self-hosted And Api?
Self-hosted software runs on your own servers, giving full control and customization. An API provides access to external services, enabling integration without hosting. Self-hosting requires technical management, while APIs offer ease of use and scalability. Choose based on control needs and technical expertise.
Conclusion
Consuming a Restful Web Service Net Self Host can be simple. Start by understanding the basics. Use tools and libraries to ease the process. Remember to keep your code clean and organized. Test the service to ensure it works correctly.
Troubleshoot any issues quickly. Learning through practice is key. Stay updated with new trends and techniques. A solid grasp of these concepts aids your journey. Your ability to connect to web services will improve. Soon, you’ll handle these tasks with confidence.
Keep exploring and learning more. Enjoy the process.


