
Are you struggling to connect to your ESX host using the Web Client? You’re not alone.
Many find it tricky at first, but with the right guidance, it becomes a breeze. Imagine managing your virtual environment effortlessly, with just a few clicks. No more fumbling with complex commands or lengthy manuals. This guide is designed for you, making it simple and straightforward to connect to your ESX host.
By the end, you’ll have the confidence to navigate your virtual infrastructure like a pro. Ready to transform your experience? Let’s dive in and make the connection process easy and stress-free.

Credit: www.youtube.com
Prerequisites For Connection
Computers need the right tools to connect. Use a modern browser like Chrome or Firefox. These browsers work best with the web client. Keep your browser updated for smooth connections. You also need a stable internet connection. This helps the web client work fast and well. A computer with at least 2GB RAM is good. This ensures the web client runs smoothly.
The network must be set up right. Use a static IP address for the ESX host. This makes it easy to find on the network. Make sure firewalls allow the connection. This keeps the path clear for data. Check your DNS settings too. They must point to the ESX host. This helps in locating the host quickly.
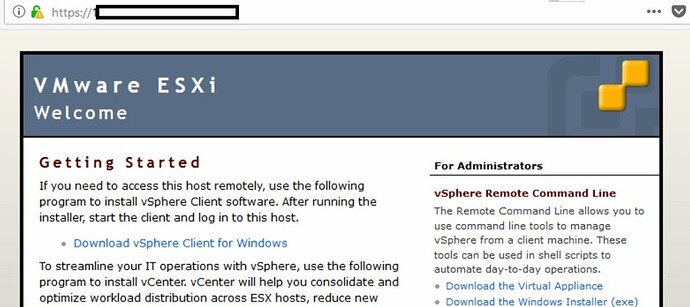
Credit: community.spiceworks.com
Accessing The Web Client
First, open your computer’s web browser. Type the vSphere Client URL in the address bar. You will see a login page. Enter your username and password. Click on the login button. You are now in the vSphere Client.
Look for the Home menu on the main screen. Click on it. Then, find and click on Hosts and Clusters. A list of hosts and clusters will appear. Choose the host you need. This is how you navigate to your host.
Connecting To Esx Host
First, open your web browser. Enter the ESX host’s IP address in the address bar. Wait for the page to load. You will see a login screen. This screen is important. It helps you connect to the right host. Make sure the IP is correct.
Type your username in the first box. Check for spelling mistakes. Now, enter your password in the second box. Be careful not to share your password. Click the “Login” button. Wait as the system checks your details. If correct, you will see the host’s dashboard. This means you are connected now.
Managing Host Resources
Keeping an eye on host performance is crucial. Check CPU usage and memory stats regularly. This helps to see how busy the host is. Use charts and graphs for clear understanding. Pay attention to any spikes or drops. These may indicate problems. Look at network activity too. High traffic can slow things down. Regular monitoring helps keep things running smoothly.
Sometimes, resources need shifting. This means adjusting CPU shares or memory limits. First, see which virtual machines need more resources. Some tasks use more power. Allocate extra resources to them. Reduce resources for less important tasks. This keeps everything balanced. Always check after changes. Make sure performance improves. Proper allocation helps all tasks run better.
Troubleshooting Connection Issues
Connecting to an ESX host using a web client involves verifying network settings and ensuring the host’s IP is accessible. Check firewall settings to prevent any blocked connections. Confirm browser compatibility and update plugins for seamless integration.
Common Error Messages
Connection refused means the server is not available. Try again later. If you see authentication failed, check your username and password. Timeout error shows slow network. Restart your router. An SSL error might need a certificate update. Check for server not found messages. Confirm server address.
Network Connectivity Solutions
Check if your internet connection is stable. Restart your device. Make sure the firewall isn’t blocking access. Disable it temporarily. Ensure the network cable is plugged in. Use a different cable if needed. Check your network settings. Reset them if there are issues.

Credit: community.spiceworks.com
Best Practices For Security
Strong passwords keep your data safe. Use at least 12 characters. Mix letters, numbers, and symbols. Avoid using common words. Change passwords every three months. Never share passwords with others. Store passwords in secure places. Use password managers for extra safety. They help you remember complex passwords. Always check for password leaks.
Access control protects your system. Assign roles based on job functions. Limit access to essential tasks. Regularly review and update roles. Remove access when someone leaves. This keeps your system secure. Use roles to track user activity. Ensure only the right people have access. This prevents unauthorized actions. Always monitor role changes.
Frequently Asked Questions
How To Access Esxi Host Through Web Client?
Access the ESXi host through the web client by entering “https://[ESXi-host-IP-address]/ui” in a browser. Log in using your credentials. Ensure the ESXi host is powered on and network connectivity is established for successful access.
How Do I Connect Directly To Esxi Host?
To connect directly to an ESXi host, use the VMware vSphere Client. Enter the host’s IP address, username, and password. Ensure network connectivity and appropriate permissions are set. This allows direct management of the host’s resources and virtual machines efficiently.
How Do I Access My Esx Host?
Access your ESX host via vSphere Client or web interface. Enter the host’s IP address in your browser. Log in using your credentials. Ensure your account has administrative privileges for full access. Keep your software updated for security and compatibility.
Always monitor permissions and access logs to maintain security.
How Do I Access Esxi Shell From Web Browser?
To access the ESXi shell via a web browser, open the ESXi host’s IP in the browser. Log in using your credentials. Navigate to “Manage” and select “Services. ” Start the “TSM-SSH” service. Use an SSH client like PuTTY to connect with the host’s IP address.
Conclusion
Connecting to an ESX host using the web client is straightforward. Follow the steps carefully for a seamless experience. Always ensure your network settings are correct. This helps prevent connection issues. Familiarize yourself with the web client interface. Practice makes it easier to manage tasks efficiently.
Regular updates are important. They improve security and performance. Troubleshooting is part of the process. Don’t hesitate to seek help when needed. It’s essential for maintaining system stability. With time, connecting becomes second nature. Keep learning and exploring. Your skills will grow with each connection made.


