
You’ve decided it’s time to cancel your Namecheap domain. Whether you’re streamlining your online presence or moving to a new registrar, you might feel a bit overwhelmed by the process.
Don’t worry; you’re not alone, and this guide is here to help. Imagine the relief of ticking this task off your list, freeing up mental space, and focusing on what truly matters to you. We’ll walk you through the steps, ensuring you have all the information needed to make this transition smooth and stress-free.
Dive in, and discover how simple it can be to reclaim your time and peace of mind.

Credit: www.youtube.com
Accessing Your Namecheap Account
Canceling a Namecheap domain involves logging into your account. Navigate to the ‘Domain List’ section. Select the domain you wish to cancel and follow the instructions.
Accessing your Namecheap account is the first step toward managing your domain settings, including cancellation. Imagine having a clutter-free online portfolio, knowing precisely where each domain stands. Accessing your account is straightforward, and once you’re in, you’re ready to make informed decisions about your domain’s future. Let’s dive into how you can efficiently navigate this process. ###Logging Into Your Namecheap Account
To access your account, head over to the Namecheap website. Look for the “Sign In” button, usually located at the top right corner of the homepage. Enter your username and password; those details you created when you first set up your account. If you’ve forgotten your password, simply click on “Forgot Password?” and follow the prompts to reset it. What if you don’t use the same device all the time? Ensure you have your login credentials stored securely, perhaps in a password manager, to avoid unnecessary delays. ###Navigating To The Domain List
Once logged in, navigate to your dashboard. Here, you’ll see an overview of your account activity. Look for the “Domain List” tab; this is where all your domains are listed. The interface is user-friendly, so finding your domain should be a breeze. Have you ever wondered how many domains you own? This is a perfect time to take stock. ###Finding Your Domain
In the “Domain List,” locate the domain you wish to cancel. Domains are typically listed alphabetically, making it easy to scan through. Click on the domain name to access its settings. Do you see any domains that are no longer relevant to your projects? It’s time to consider letting them go. ###Evaluating Your Domain Needs
Before proceeding with cancellation, take a moment to evaluate your domain needs. Is the domain serving its purpose, or has it become redundant? Consider the cost versus benefit—sometimes, holding onto a domain can be more of a burden than a boon. Are there any future plans that might require the domain? If not, you’re ready for the next steps. ###Initiating The Cancellation Process
With your domain selected, look for the cancellation option within its settings. Follow the instructions provided by Namecheap to complete the process. It usually involves a few clicks and confirmation steps. How does it feel to declutter and streamline your digital assets? You’re now one step closer to a simplified domain portfolio. Accessing your Namecheap account is not just about cancellation; it’s about understanding your digital space. What other aspects of your online presence might need a refresh?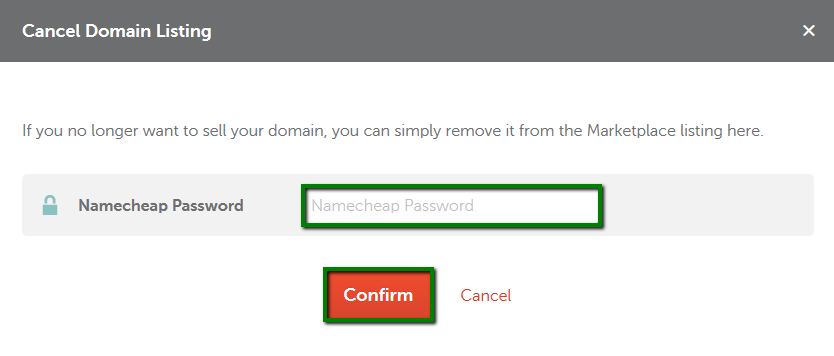
Credit: www.namecheap.com
Navigating To Domain Management
Accessing domain settings on Namecheap is straightforward. Log into your account, locate the domain list, and select the domain you wish to cancel. Follow the steps to initiate the cancellation process.
Navigating to Domain Management is a crucial step when you’re ready to cancel your Namecheap domain. Whether you’re simplifying your portfolio or switching providers, understanding how to get to the Domain Management section is essential. This process is straightforward, but it can feel a bit daunting if you’re not familiar with Namecheap’s interface. First, log into your Namecheap account. You’ll need your username and password handy. If you’ve forgotten your credentials, use the “Forgot Password” option to reset it. Once logged in, you’ll see your dashboard, which is the main hub for managing your domains.Finding The Domain List
On your dashboard, look for the “Domain List” tab. It’s usually located on the left side of the interface. This section lists all the domains you currently own. Clicking this tab will show you all your domains, which can be a bit like finding the right book on a crowded shelf if you own multiple domains.Selecting The Domain To Manage
Now, locate the domain you wish to cancel. Each domain will have a “Manage” button next to it. Clicking this button will take you to the domain’s settings. It’s a bit like opening a door to a room full of options tailored specifically for that domain.Exploring Domain Management Options
In the Domain Management section, you’ll find various options related to your domain. These include DNS settings, WhoisGuard, and renewal settings. If you’ve ever tweaked settings on your smartphone, this should feel somewhat familiar. Take a moment to explore these options to understand what you might need to adjust before cancellation.Why Domain Management Matters
Navigating to Domain Management is not just about cancellation; it’s about control. Knowing how to manage your domains can save you time and prevent mistakes. Have you ever found yourself wishing you’d been more organized with digital assets? This is your chance to streamline your domain management process. Navigating Namecheap’s Domain Management is simple once you know where to look. It’s about taking control of your online assets, ensuring you’re not holding onto domains you no longer need. What steps will you take today to optimize your domain management?Initiating Domain Cancellation
Canceling a Namecheap domain involves logging into your account and navigating to the domain management section. Select the domain to cancel, then follow the provided instructions to initiate the cancellation process. Always ensure you back up any essential data before proceeding with the cancellation.
Initiating the cancellation of your Namecheap domain might seem daunting, but it’s a straightforward process if you know the steps. Whether you’re consolidating your domains or simply letting go of one, understanding how to start the cancellation process is crucial. Let’s walk through the essentials, making it simple and stress-free for you. ###Log In To Your Namecheap Account
First, access your Namecheap account. Use your login credentials to enter the dashboard. This is your control center where you manage all domain-related activities. ###Navigate To The Domain List
Once logged in, head to the ‘Domain List’ section. This is where all your registered domains are displayed. Look for the domain you wish to cancel from this list. ###Select The Domain To Cancel
Identify the domain you want to cancel. Click on it to access the management options. This step is crucial, so make sure you select the right domain. ###Access The Domain Settings
In the domain management page, locate the ‘Domain Settings’ option. This is where you can modify or cancel your domain. It’s your one-stop hub for domain management. ###Initiate Cancellation Request
Within the settings, find the option to cancel the domain. Click on the cancellation request button. Be sure of your decision, as this action will set the cancellation process in motion. ###Confirm Your Cancellation
You may be prompted to confirm your cancellation. Double-check everything before you proceed. This is your last chance to change your mind. ###Follow Up On Confirmation Email
After initiating the cancellation, Namecheap may send a confirmation email. Check your inbox and confirm the cancellation through the email link. This final step ensures that your cancellation is processed correctly. These steps might seem simple, but the key is to pay close attention to detail. Have you ever wondered why you need to be meticulous? It’s because a small oversight could lead to unexpected renewals and charges. By following these steps, you can confidently cancel your Namecheap domain with ease.
Credit: www.youtube.com
Frequently Asked Questions
How Do I Cancel My Domain Subscription On Namecheap?
Log into your Namecheap account. Go to “Domain List” and locate your domain. Click “Manage” and then “Auto-Renew”. Toggle the switch to off to cancel. Confirm the cancellation to finalize.
How Do I Cancel My Domain Subscription?
Log in to your domain provider’s account. Navigate to the subscriptions section. Select the domain subscription you wish to cancel. Follow the prompts to confirm the cancellation. Contact customer support if you encounter issues.
How Do I Delete An Existing Domain?
Log into your domain registrar account. Locate the domain you want to delete. Follow the instructions to cancel or delete it. Confirm your decision if prompted. Always back up important data before deleting.
Can You Delete A Namecheap Account?
You can’t delete a Namecheap account directly. Contact their support team for assistance. They may offer to deactivate your account instead.
Conclusion
Canceling a Namecheap domain doesn’t have to be difficult. Follow the steps provided, and you’ll navigate the process with ease. Remember to back up any necessary data before proceeding. Double-check your domain details to avoid mistakes. If needed, reach out to Namecheap support for assistance.
Acting promptly can prevent unwanted renewals. Stay organized and keep track of your domain dates. It’s essential to manage your online resources effectively. With the right approach, you can handle domain cancellations smoothly. Keep this guide handy for future reference.
Your online journey should be seamless and stress-free.


