
Your website’s header is the first thing visitors see, and it sets the tone for their entire experience. If your header looks cluttered, too big, or doesn’t match your brand, visitors might leave before exploring more.
But don’t worry—you have full control over it. Learning how to adjust your header in WordPress can instantly make your site look cleaner, more professional, and easier to navigate. You’ll discover simple, step-by-step tips to customize your header exactly how you want it.
Keep reading to unlock the power of a perfect header that grabs attention and keeps people hooked.

Credit: hostarmada.com
Choosing The Right Header Style
Choosing the right header style sets the tone for your WordPress site. It helps visitors know what your site is about. A good header makes your site easy to navigate. It also improves user experience. This guide helps you pick a header style that fits your needs. Consider your site’s purpose and audience first. Then, explore different layouts and how they match your theme.
Exploring Popular Header Layouts
Headers come in many styles. Some have a simple logo and menu. Others include search bars or social icons. A centered logo with a menu on each side is common. A sticky header stays visible when users scroll. A full-width header covers the entire top area. Choose a layout that shows your brand clearly. Also, think about how visitors will use your menu.
Matching Headers With Site Themes
Headers must fit your site’s design. Light themes often use dark text in headers. Dark themes use light-colored headers. The header style should blend with your colors and fonts. Some themes offer built-in header options. Use these to keep the design consistent. Avoid headers that clash with your site’s look. A well-matched header makes your site look professional and clean.
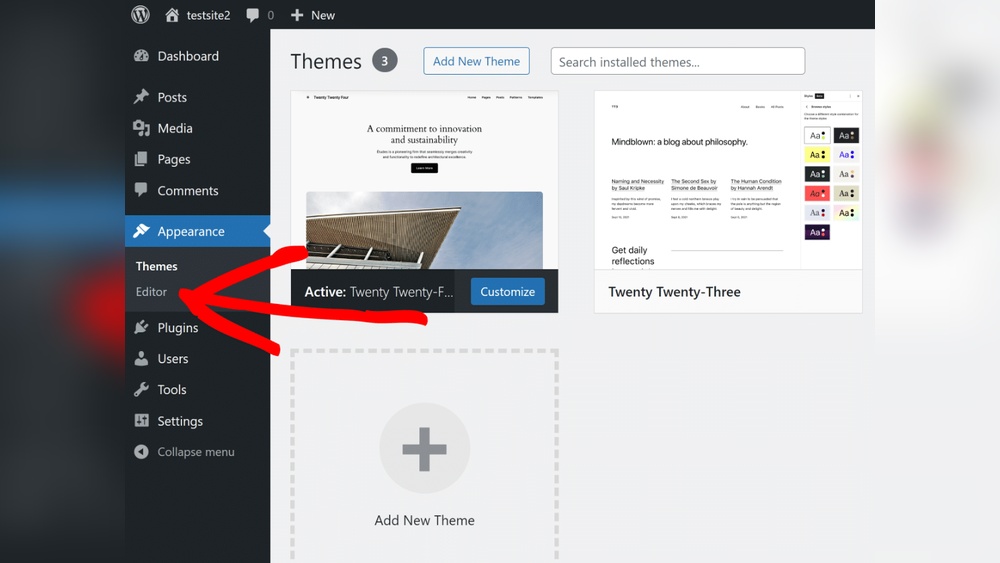
Accessing Header Settings
Adjusting the header in WordPress starts with accessing the right settings. The header controls what visitors first see on your site. Changing its look or content can improve your site’s appeal. WordPress offers easy ways to access and edit header settings.
Two common methods are using the WordPress Customizer and navigating your theme options. Both ways give control over header elements like logos, menus, and colors. Each method suits different user preferences and theme designs.
Using The WordPress Customizer
The WordPress Customizer is a built-in tool for editing your site’s appearance. You can open it from the WordPress dashboard under “Appearance.” Then click “Customize” to enter the live preview mode.
Inside the Customizer, look for the “Header” section or similar. This area lets you change header layout, logo, and text. You can see changes in real time before saving them.
This tool is user-friendly and good for simple header edits. It does not require technical skills. Just click, change, and preview your header easily.
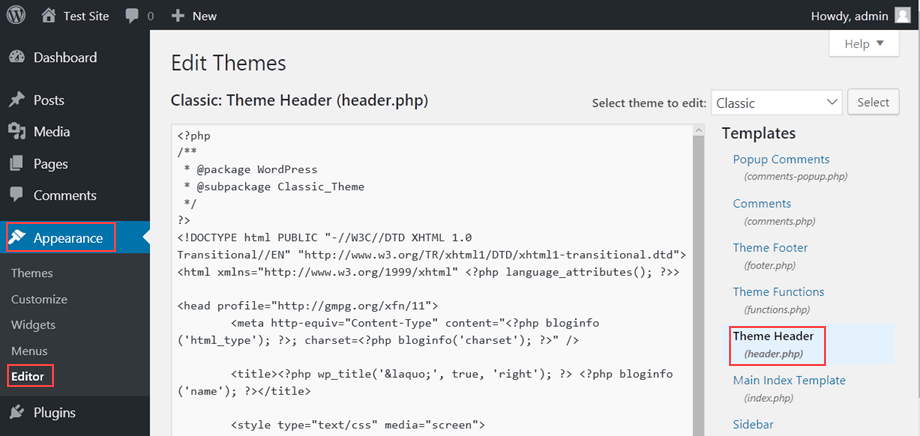
Navigating Theme Options
Some themes offer a separate options panel for header settings. This panel is often found under “Appearance” or its own menu in the dashboard. Theme options vary by theme developer.
In the theme options, you may find controls for header size, background, and menu style. These settings can be more detailed than the Customizer. You may also upload logos or add custom code here.
This method suits users who want more control and customization. It requires exploring your theme’s documentation to find exact header settings.
Customizing Header Elements
Customizing header elements in WordPress allows you to create a unique look for your website. The header is the first thing visitors see. It sets the tone and guides users through your site. Simple changes can make your site look professional and inviting. Focus on the logo, site title, menu placement, and widgets. These parts work together to enhance user experience and brand identity.
Editing Logo And Site Title
The logo represents your brand visually. Replace the default logo with your own image. Use clear, high-quality files for the best results. The site title appears next to or below the logo. Edit the title text to match your website’s name. You can also change the font size, style, and color. These small tweaks improve readability and branding. WordPress themes often provide easy options to update these elements in the Customizer.
Adjusting Menu Placement
Your menu helps visitors navigate your site. Adjusting its placement changes how users find content. Menus usually sit above or below the header. Some themes allow side or sticky menus for better access. Move the menu to a spot that fits your design and user needs. Use the WordPress menu editor to add or remove pages. Clear, simple menus reduce confusion and improve site flow.
Adding Header Widgets
Widgets add extra features to your header area. You can include search bars, social icons, or contact info. These elements make your site more interactive and useful. Check if your theme supports header widgets. Drag and drop the widgets into the header widget area via the WordPress dashboard. Keep the header clean and not too crowded. Well-placed widgets improve user engagement without distraction.
Tweaking Header Design
Tweaking the header design in WordPress lets you create a unique look for your site. It makes your website more attractive and easier to navigate. Small changes can improve user experience and keep visitors interested.
Adjusting colors, fonts, size, and spacing helps your header match your brand. These tweaks also make the header fit well on different devices. You can do these changes without coding by using WordPress tools.
Changing Colors And Fonts
Start by choosing colors that match your brand and style. Use the WordPress Customizer to pick header background and text colors. Make sure the colors are easy on the eyes and provide good contrast.
Select fonts that are clear and readable. WordPress offers many font options in the Customizer or theme settings. Use simple fonts for a clean look. Avoid too many font styles in one header.
Modifying Header Size And Spacing
Change the header size to balance space and visibility. Larger headers grab attention but can take up too much screen space. Smaller headers save space but must remain easy to read.
Adjust spacing between header elements like logo, menu, and text. Proper spacing avoids clutter and improves design flow. Use padding and margin settings in your theme or page builder.
Making Headers Responsive
Making headers responsive means your website looks good on all devices. A responsive header adjusts its size and layout based on screen width. This improves user experience and keeps visitors engaged. Responsive design helps your site work well on phones, tablets, and desktops.
Optimizing For Mobile Devices
Mobile users need headers that fit small screens. Use flexible widths and avoid fixed sizes in your header design. Choose readable fonts that scale well on mobile. Make buttons and menus easy to tap. Use CSS media queries to change header styles for smaller screens. This ensures your header stays clear and functional on any device.
Testing Across Screen Sizes
Test your header on different screen sizes often. Check how it looks on phones, tablets, and large monitors. Use browser tools or online simulators to view your header in various resolutions. Fix any overlap, cut-offs, or unreadable text you find. Regular testing helps keep your header responsive and user-friendly.
Using Plugins For Advanced Header Control
Using plugins for advanced header control gives you more power to customize your WordPress site. Plugins let you design headers without coding. They offer features like drag-and-drop builders, custom layouts, and mobile responsiveness. This makes your site look unique and professional.
Plugins also allow you to change headers for different pages or devices. You can add logos, menus, and buttons easily. This flexibility improves user experience and keeps visitors engaged. Let’s explore some top plugins and their benefits.
Top Header Builder Plugins
Elementor is a popular plugin with a simple drag-and-drop header builder. It allows you to create headers from scratch or use templates. You can add images, menus, and buttons quickly.
Beaver Builder offers a flexible header builder with many customization options. It supports responsive design and works well with many themes.
Header Footer Code Manager helps you add custom code to headers. It is great for adding scripts or tracking codes without editing theme files.
Benefits Of Plugin Integration
Plugins save time by simplifying header customization. No need to write code or hire developers. You can update headers anytime from the WordPress dashboard.
They improve site design and functionality. Custom headers can match your brand style perfectly. Plugins also ensure headers work well on all devices.
Using plugins reduces errors and conflicts with themes. Most plugins receive regular updates and support. This keeps your site secure and running smoothly.
Troubleshooting Common Issues
Troubleshooting common header issues in WordPress can save time and improve your site’s look. Many users face simple problems that block a clean header display. Fixing these quickly helps keep visitors happy and engaged.
This section covers two frequent header problems: overlaps and menu display errors. Each has easy solutions you can try without coding skills.
Fixing Header Overlaps
Header overlap happens when header elements cover each other. It looks messy and confuses visitors. This often occurs due to theme settings or custom CSS conflicts.
Start by checking your theme’s header height settings. Adjust values to give enough space for each element. If you added custom CSS, remove or change any position or margin rules causing overlap.
Clear your browser cache after changes. This shows the latest header layout. Use a different browser or device to confirm the problem is fixed.
Resolving Menu Display Problems
Menu display issues include missing items, broken links, or wrong alignment. These errors reduce site usability and trust.
Open the WordPress menu editor to check your menu structure. Make sure all pages and links are added properly. Save changes after any update.
Some themes have specific menu locations. Assign your menu to the correct spot under “Manage Locations.” This ensures it appears where expected.
If menus still look off, disable plugins one by one. Some plugins may conflict with menu functions. Testing helps find and fix the cause.
Credit: www.hostpapa.com

Credit: www.interserver.net
Frequently Asked Questions
How Can I Change The Header Size In WordPress?
To change the header size, go to Appearance > Customize > Header. Adjust the height or font size settings as needed. Save changes to update your header’s appearance instantly.
Where Do I Find Header Settings In WordPress?
Header settings are located under Appearance > Customize in your WordPress dashboard. Here, you can modify header layout, logo, colors, and more to personalize your site.
How Do I Add A Logo To My WordPress Header?
Navigate to Appearance > Customize > Header or Site Identity. Upload your logo file and set its size. Save changes to display your logo in the header area.
Can I Make My WordPress Header Sticky?
Yes, many themes include a sticky header option. Enable it via Appearance > Customize > Header or use a plugin for sticky header functionality.
Conclusion
Adjusting your WordPress header improves your site’s look and user experience. Small changes can make a big difference. Try different settings to see what fits best. Keep your header clear and easy to read. Check how it looks on phones and tablets too.
With these tips, your site will look neat and professional. Take your time and enjoy customizing your WordPress header.


