
Are you looking to make your WordPress site more dynamic and user-friendly? Adding a widget area is one of the easiest ways to do just that.
Imagine having the power to customize your site’s sidebar, footer, or any section with useful features like search bars, recent posts, or social media links—without any coding skills. In this guide, you’ll discover simple, step-by-step methods to create and add widget areas that fit your needs perfectly.
Keep reading, and by the end, you’ll have the tools to make your website more engaging and professional.

Credit: wordpress.org
Choosing The Right Theme
Choosing the right theme is a key step in adding a widget area in WordPress. The theme controls the look and feel of your site. It also decides where you can place widgets. A theme with good widget support makes your site flexible and easy to customize.
Many themes offer built-in widget areas. These areas let you add content blocks like menus, images, or text. Selecting a theme with multiple widget areas gives you more design options. You can place widgets in sidebars, footers, or headers. This helps make your website more useful and user-friendly.
Themes With Widget Support
Not all themes support widgets well. Check the theme details before choosing. Look for themes labeled as “widget-ready” or “widget-friendly.” These themes have predefined spots for widgets. Popular free and premium themes usually have good widget support. You can also test the theme by adding widgets to see if it works.
Some themes include special widget areas for specific functions. For example, a theme might have a widget area for social media links or advertisements. These features help you organize your site content effectively. Make sure the theme you pick fits your website’s needs.
Customizing Theme Widgets
Most themes allow you to customize widgets easily. You can change the order, style, and content of widgets. WordPress has a built-in widget editor in the dashboard. It helps you drag and drop widgets to different areas. You can also add new widgets or remove old ones.
Some themes offer extra settings to style widgets. These settings might include colors, fonts, and spacing. Customizing widgets makes your site look unique and matches your brand. Always preview changes before saving to avoid layout problems.
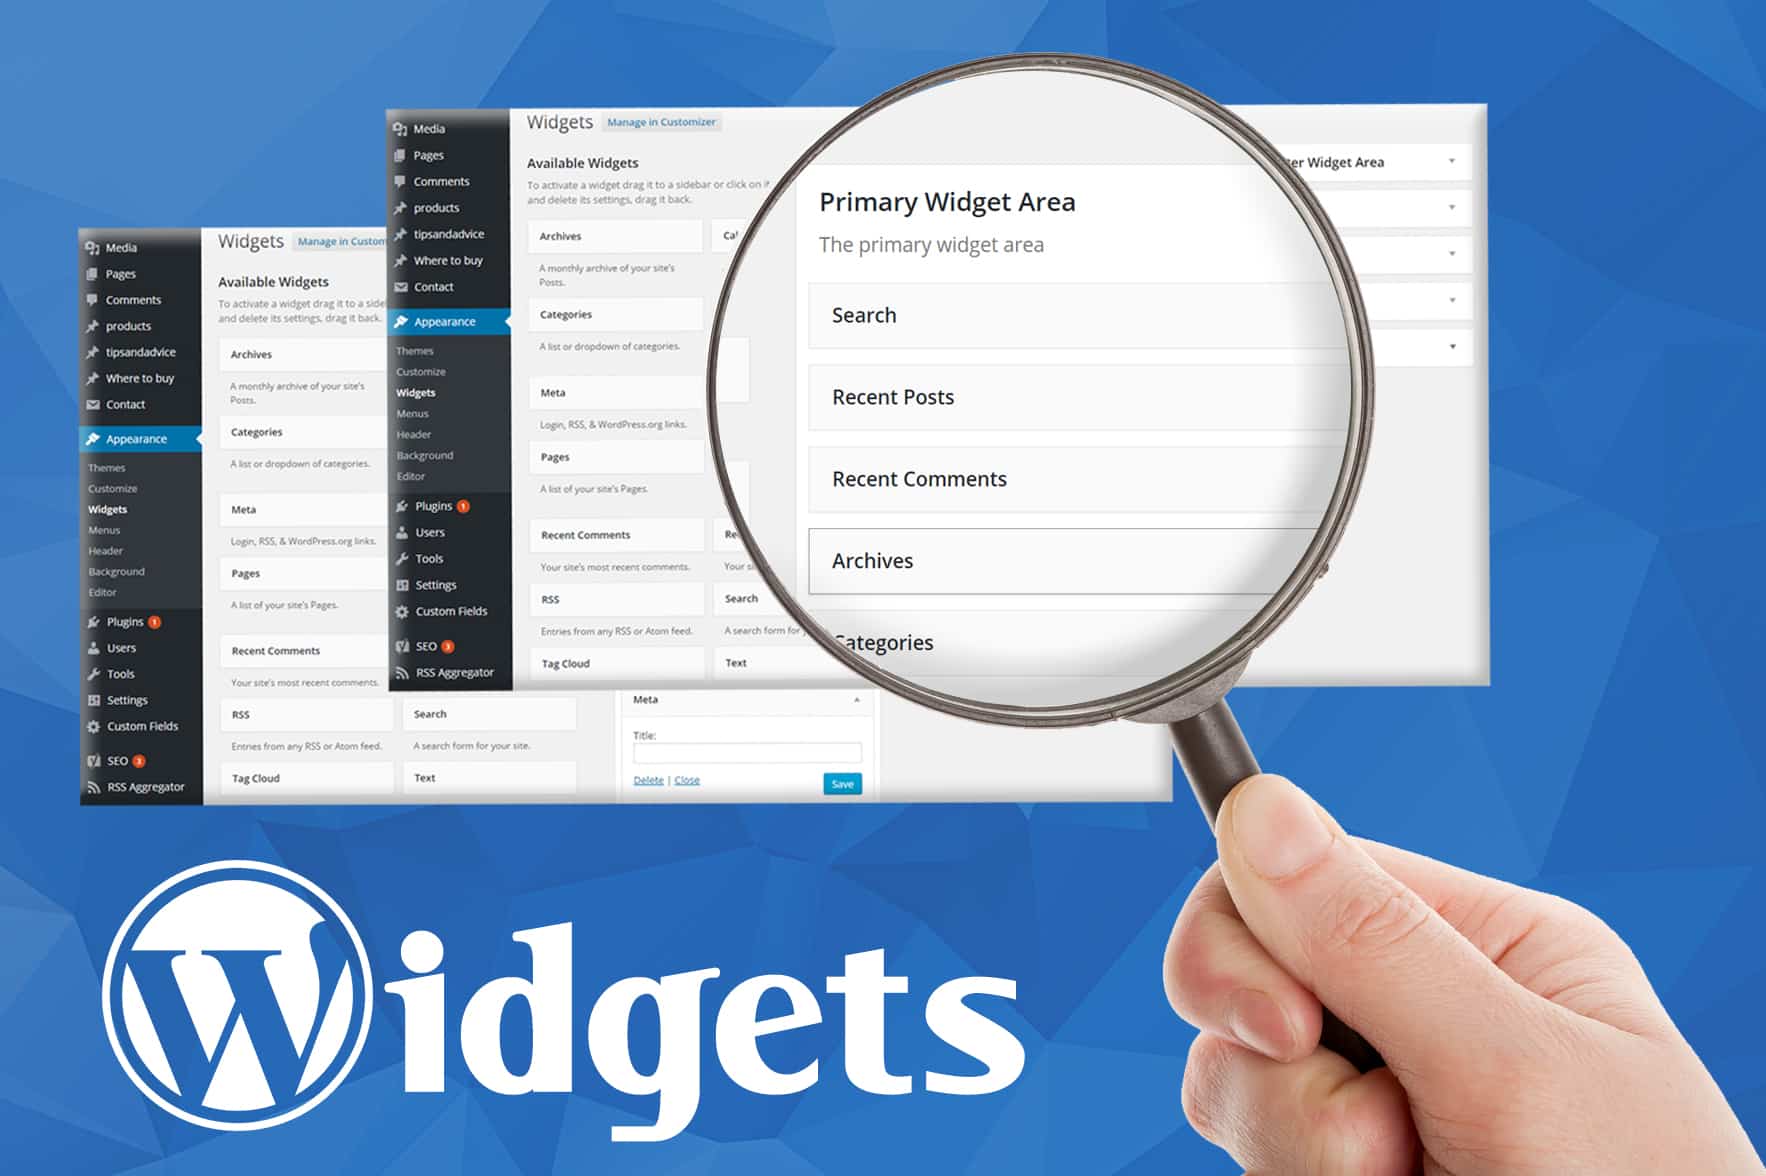
Accessing The Widget Section
Accessing the widget section in WordPress is the first step to customize your site’s sidebar, footer, or other widget areas. Widgets help add features like menus, search bars, and recent posts without coding. Understanding how to reach this section makes managing your site easier.
This guide shows how to find the widget section quickly using the WordPress dashboard. Follow these simple steps to start adding or editing widgets on your site.
Using The WordPress Dashboard
Start by logging into your WordPress admin area. This is where you control your website settings.
Once logged in, you will see the WordPress dashboard. It is the main control panel with menus on the left side.
The dashboard gives you access to all your site’s tools and settings. Widgets are part of the appearance options.
Navigating To Appearance Widgets
Look for the “Appearance” menu on the left side of the dashboard. Click on it to open a dropdown list.
In this list, find and click on “Widgets.” This will open the widget section.
Here, you will see all available widget areas and the widgets you can add. It is easy to drag and drop widgets into these areas.
Creating A New Widget Area
Creating a new widget area in WordPress allows you to place custom content in different parts of your site. This helps you organize information and improve user experience. It involves editing theme files and registering the widget area in your theme’s code. The process is simple and requires basic coding knowledge.
Below are clear steps to create a widget area safely and effectively.
Editing Functions.php File
Start by accessing your theme’s functions.php file. This file controls many features of your theme. Use a code editor or the WordPress theme editor to open it.
Insert code to define your new widget area. Be careful to place it inside PHP tags and avoid breaking existing code. Save the file after editing.
Registering Widget Areas
Register the widget area by adding a function in the functions.php file. Use register_sidebar() to create the new area. Give it a name, ID, and description for easy identification.
After registration, WordPress will recognize your widget area. You can then add widgets to this area via the WordPress admin dashboard under Appearance > Widgets.

Credit: qodeinteractive.com
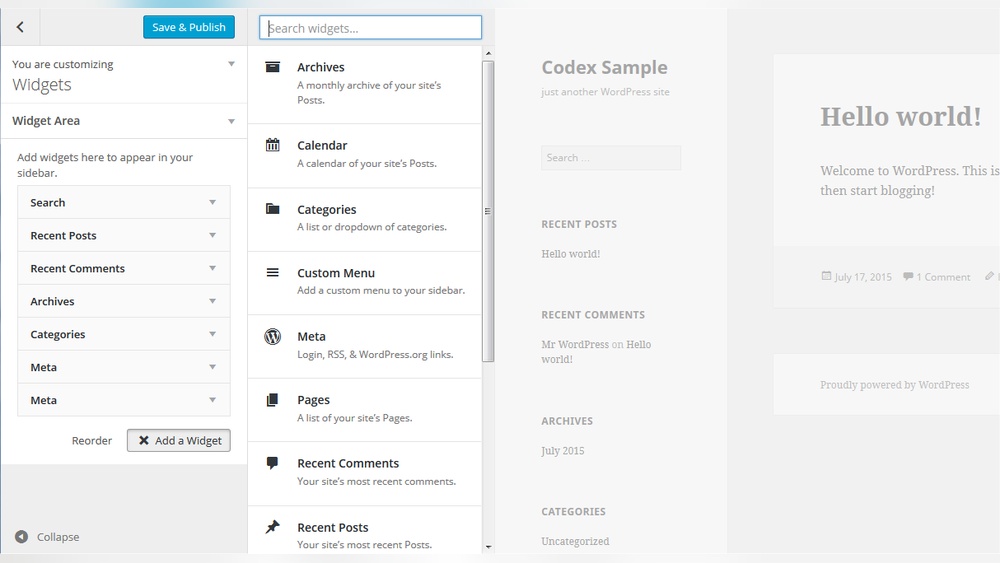
Adding Widgets To Your Area
Adding widgets to your WordPress widget area helps customize your site’s look and function. Widgets let you place content blocks in sidebars, footers, and other areas. This process is simple and does not need coding skills.
Each widget offers specific features, like recent posts, search bars, or calendars. You can choose and place these widgets to improve user experience and site navigation. The following steps explain how to add and set up widgets easily.
Dragging And Dropping Widgets
Go to your WordPress dashboard and open the Appearance menu. Click on Widgets to see available widget areas and widgets. To add a widget, click, hold, and drag it to the desired widget area. Drop it there to place it.
This method is quick and visual. You can move widgets between areas or remove them by dragging back. It helps you organize your site layout without any hassle.
Configuring Widget Settings
After placing a widget, click the down arrow on the widget box. This opens the widget settings panel. Each widget has different options to customize its content and display style.
Fill in the required fields or select options that fit your site’s needs. Save your changes by clicking the Save button. Check your website to see how the widget looks and works.
Using Plugins For Widget Areas
Using plugins to create widget areas in WordPress makes the process simple and flexible. Plugins offer tools that help you add custom widget spaces without coding. These tools let you place widgets in new areas on your site, improving layout and user experience.
Popular Widget Plugins
Several plugins stand out for adding widget areas easily. “Widget Options” lets you control where widgets appear. “Custom Sidebars” helps create multiple sidebars for different pages. “Content Aware Sidebars” adapts widgets based on page content. These plugins work well with most themes and require little setup.
Benefits Of Using Plugins
Plugins save time and avoid coding errors. They provide user-friendly interfaces for managing widget areas. You can customize widgets for specific pages or posts. Plugins ensure compatibility with theme updates. They also offer support and regular updates to keep your site secure.
Credit: www.greengeeks.com
Testing And Troubleshooting
Testing and troubleshooting are important after adding a widget area in WordPress. This step ensures everything works properly and looks good on your site. It helps find small errors before visitors see your site. Fixing these issues early keeps your site professional and user-friendly.
Previewing Widget Area
Preview the widget area inside your WordPress dashboard. Use the Appearance > Widgets section to see how widgets appear. Some themes also offer a live preview feature. This shows changes before you publish them. Check the widget area’s position and content. Make sure all widgets display correctly. Test on different screen sizes to confirm responsiveness. Adjust settings or widget choices if needed.
Common Issues And Fixes
Widgets not showing is a frequent problem. Clear your browser cache and refresh the page. If that fails, check if the widget area is registered properly in your theme’s functions.php file. Conflicts with plugins can block widgets. Deactivate plugins one by one to find the cause. Sometimes widgets appear but look broken. This often comes from CSS conflicts. Use browser developer tools to inspect and fix styles. Empty widget areas may mean no widgets are assigned. Drag and drop widgets into the area again to fix this. Keep WordPress and themes updated to avoid bugs.
Frequently Asked Questions
How Do I Create A New Widget Area In WordPress?
To create a widget area, add code to your theme’s functions. php file. Register the sidebar using register_sidebar() with unique ID and name. This makes the widget area available in the WordPress admin for adding widgets easily.
Where Can I Add Widgets After Creating A Widget Area?
After creating a widget area, go to Appearance > Widgets in the WordPress dashboard. Your new widget area will appear there. You can drag and drop widgets into this area to display them on your site.
Can I Add Multiple Widget Areas In One Theme?
Yes, you can add multiple widget areas. Register each widget area with a unique ID in functions. php. This allows more flexible widget placement in different parts of your WordPress site.
Is Coding Necessary To Add Widget Areas In WordPress?
Yes, adding widget areas requires basic PHP coding in functions. php. However, some themes and plugins offer built-in options to add widget areas without code.
Conclusion
Adding a widget area in WordPress helps customize your site easily. It lets you place useful tools where visitors can see them. You control what appears and where it goes. This makes your website more interactive and user-friendly. Try adding different widgets to find what fits best.
Keep your site simple and clear for all visitors. Small changes can improve your website a lot. Start today and see the difference yourself.


