
Are you looking to make your WordPress posts stand out? Adding a thumbnail image is one of the easiest ways to grab attention and boost your blog’s appeal.
Thumbnails give your content a professional look and help readers quickly identify what your post is about. If you want to learn how to add thumbnails to your WordPress posts in just a few simple steps, you’re in the right place.
Keep reading, and you’ll have eye-catching images on your posts in no time!

Credit: wordpress.org
Choosing The Right Thumbnail
Choosing the right thumbnail is key to attracting readers to your WordPress post. A good thumbnail shows what your post is about. It invites clicks and helps your site look professional.
Thumbnails need to be clear and sharp. They should match the style of your website and the content of your post. Picking the right image takes thought but pays off in more views.
Image Size And Dimensions
Thumbnails must fit well on your site. Too big, and they slow down your page. Too small, and they lose detail. The ideal size is usually 1200 by 628 pixels. This size works well on most screens and social media.
Keep the same aspect ratio for all thumbnails. This keeps your site neat and uniform. Check your WordPress theme for recommended sizes.
File Formats To Use
Use JPEG for photos. It balances quality and file size well. PNG works best for images with text or logos. It keeps edges sharp without blurring.
Avoid large files. Optimize images before uploading. This helps your site load faster and improves user experience.
Design Tips For Impact
Use bright colors and contrast to catch the eye. Clear images stand out more than cluttered ones. Add simple text if it helps explain the post.
Keep the design clean. Avoid too many elements. A focused thumbnail tells a story quickly and draws attention.
Preparing Your Image
Preparing your image is a key step before adding a thumbnail to your WordPress post. A well-prepared image looks clear and loads fast. This helps keep visitors interested and improves your site’s performance.
Focus on making your image the right size and quality. Edit it to suit your post style. Adding text or simple graphics can also make it stand out. These small steps make a big difference in how your post appears.
Optimizing For Web
Reduce the image file size without losing quality. Use formats like JPEG or PNG for better results. Smaller files load faster and improve user experience. Aim for a balance between clarity and speed. Resize images to match the thumbnail dimensions set by your theme.
Using Editing Tools
Use free tools like Canva, GIMP, or Paint.NET to edit images. Crop the picture to focus on the main subject. Adjust brightness and contrast for clearer visuals. Keep the image simple and clean. Avoid clutter to ensure the thumbnail looks good on all devices.
Adding Text Or Graphics
Add short text or simple graphics to highlight the post topic. Use large, readable fonts with contrasting colors. Place text where it does not block important parts of the image. Graphics can include logos or icons related to your content. These elements attract attention and improve click rates.
Adding A Thumbnail In WordPress
Adding a thumbnail to your WordPress post gives your content a professional look. Thumbnails help readers see what your post is about quickly. They also improve your website’s appearance and attract more clicks.
WordPress calls these thumbnails “featured images.” Setting a featured image is simple. It takes only a few steps to add one to your post.
Accessing The Featured Image Section
Open the WordPress editor for your post. On the right side, find the “Featured Image” box. If you do not see it, click on “Settings” or “Document” to reveal it. This is where you add your thumbnail.
Uploading Your Image
Click the “Set featured image” button in the box. A window will open showing your media library. Choose an image from your library or upload a new one. To upload, click “Upload Files” and select the image from your computer.
Setting The Thumbnail
Once the image uploads, select it by clicking on it. Then, click the “Set featured image” button at the bottom right. The image will now appear in the Featured Image box. Save or update your post to keep the thumbnail.

Credit: wpmudev.com
Customizing Thumbnail Appearance
Customizing thumbnail appearance helps make your WordPress posts more attractive. Thumbnails catch readers’ eyes and improve site design. You can change how thumbnails look to better fit your blog style.
Simple tweaks can improve the visual appeal of your posts. You do not need complex coding. WordPress offers easy ways to enhance thumbnails and make your posts stand out.
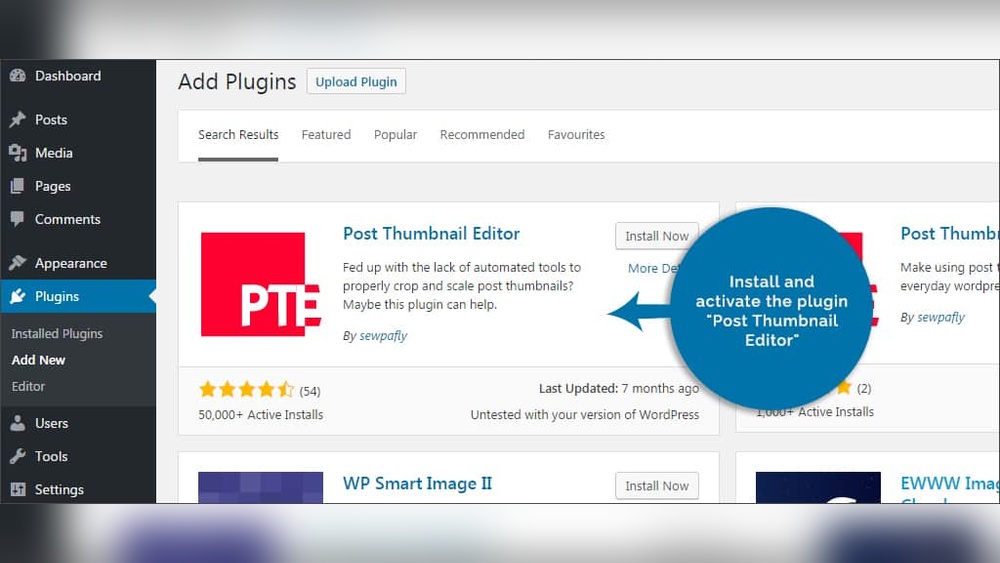
Using Plugins For Enhancement
Plugins add extra features to thumbnails. Some plugins let you add borders or shadows. Others offer hover effects or animation. These tools help thumbnails look unique without coding skills.
Popular plugins include “Regenerate Thumbnails” and “Simple Image Sizes.” They let you control thumbnail style and size. Install plugins from the WordPress library for quick setup.
Adjusting Thumbnail Sizes
Thumbnail size affects page load speed and design. Choose the right size for your theme and content. Too large images slow down your site.
Go to Settings > Media in WordPress to change sizes. Set width and height for thumbnails, medium, and large images. Resize images before uploading for better control.
Replacing Default Thumbnails
Default thumbnails may not fit your post style. Replace them with custom images for better impact. Use the “Featured Image” option in the post editor to upload a new thumbnail.
Custom thumbnails show your post topic clearly. They invite readers to click and explore your content. Regularly update thumbnails for fresh and relevant visuals.
Troubleshooting Common Issues
Adding thumbnails to WordPress posts is simple but can face common problems. These issues can stop your thumbnails from showing or make them look bad. Fixing these problems helps your site look professional and attractive. Below are solutions to common thumbnail troubles.
Thumbnail Not Showing
Check if the thumbnail is set in the post editor. Sometimes, it is not assigned, so it won’t appear.
Clear your site cache. Old files can stop new thumbnails from showing.
Make sure your theme supports post thumbnails. Some themes do not show featured images by default.
Blurry Or Pixelated Images
Upload images with high resolution. Small images stretch and look blurry.
Check your WordPress media settings. Ensure image sizes are large enough for thumbnails.
Use images in common formats like JPEG or PNG for better quality.
Plugin Conflicts
Deactivate plugins one by one to find conflicts affecting thumbnails.
Update all plugins and themes to their latest versions to avoid bugs.
Use only trusted plugins from official sources to reduce errors.

Credit: www.greengeeks.com
Boosting Engagement With Thumbnails
Thumbnails catch the eye and encourage clicks on WordPress posts. They give readers a quick idea of the post’s content. Good thumbnails can increase engagement and keep visitors on your site longer. Using thumbnails effectively helps posts stand out in busy feeds and search results.
Thumbnail Best Practices
Choose clear and relevant images that match your post topic. Use bright colors or high contrast to make thumbnails pop. Keep text on thumbnails short and easy to read. Maintain consistent style and size for thumbnails across your site. Use images that look good on both desktop and mobile screens.
A/b Testing Visuals
Test different thumbnails to see which one performs better. Create two versions of a thumbnail for the same post. Show each version to a part of your audience. Track which thumbnail gets more clicks or shares. Use these results to select the best thumbnail for future posts.
Analyzing Performance Metrics
Check your WordPress analytics or plugin data regularly. Focus on click-through rates and time spent on posts with thumbnails. Compare posts with and without thumbnails to find differences. Use this data to improve your thumbnail choices. Adjust images based on what your audience prefers.
Frequently Asked Questions
How Do I Add A Thumbnail To A WordPress Post?
To add a thumbnail, open your post editor. Locate the “Featured Image” box on the right. Click “Set featured image,” upload or select an image, then click “Set featured image. ” Save or update your post to apply the thumbnail.
Why Is My WordPress Post Thumbnail Not Showing?
Your thumbnail might not show due to theme limitations or caching issues. Ensure your theme supports featured images. Clear your site and browser cache. Also, check if the image size meets theme requirements.
Can I Change The Thumbnail Image After Publishing?
Yes, you can change the thumbnail anytime. Go to the post editor, click the existing featured image, select a new image, and save your changes. The updated thumbnail will replace the old one instantly.
What Size Should WordPress Post Thumbnails Be?
Ideal thumbnail size depends on your theme. Common sizes are 150×150 to 1200×628 pixels. Use high-quality images with correct dimensions to ensure clear and fast-loading thumbnails.
Conclusion
Adding a thumbnail to your WordPress post makes it look more attractive. It helps readers know what your post is about quickly. The process is simple and takes just a few steps. Always choose clear and relevant images for the best effect.
Thumbnails improve your site’s appearance and can increase clicks. Start adding thumbnails today to make your posts stand out. Keep practicing, and it will become second nature. Your blog will look more professional and inviting.


