If you run a WordPress website, adding Terms and Conditions to your footer is a smart move. It protects your site, builds trust with your visitors, and keeps you clear of legal troubles.
But how do you do it quickly and without hassle? In this guide, you’ll discover simple steps to add your Terms and Conditions right where everyone can find them — at the bottom of your site. Keep reading, and you’ll have this important page set up in no time, making your website safer and more professional.
Credit: www.privacypolicies.com
Prepare Your Terms And Conditions
Preparing your Terms and Conditions is an important step before adding them to your WordPress footer. Clear and well-organized terms protect your website and inform visitors about rules and policies. Take time to create content that is easy to read and understand. Proper formatting helps make your terms look professional and user-friendly on the web.
Write Clear Terms Content
Write your terms in simple language. Avoid complex legal words that confuse readers. Break information into short sentences and paragraphs. Cover key points like user responsibilities, privacy, payment, and refunds. Make sure every rule is easy to follow. Clear terms reduce misunderstandings and build trust with visitors.
Format For Web Use
Use headings and bullet points to organize your content. This helps users scan and find important sections quickly. Keep paragraphs short for better readability on screens. Use consistent fonts and sizes for a neat appearance. Add links only if necessary, to avoid clutter. Proper formatting improves user experience and keeps visitors on your site.
Create A Terms And Conditions Page
Creating a Terms and Conditions page is a key step for your WordPress site. It sets clear rules for visitors and protects your business. This page explains what users can and cannot do on your site.
Follow these simple steps to create your own Terms and Conditions page in WordPress. The process is quick and easy, even for beginners.
Add New Page In WordPress
Log in to your WordPress dashboard. On the left menu, click Pages and then Add New. This opens a blank page where you will write your terms.
Insert Terms Text
Write or paste your Terms and Conditions text in the editor. Use clear and simple words. Break the text into small sections for easy reading. You can also use bullet points or numbered lists.
Publish The Page
After adding the text, look for the Publish button on the right side. Click it to make the page live. Your Terms and Conditions page is now ready for visitors.
Add Terms Link To Footer Menu
Adding a Terms and Conditions link to your WordPress footer menu helps users find important site rules. This link builds trust and keeps your site clear. The footer menu is a perfect spot for such legal links. It stays visible on every page without cluttering the main navigation.
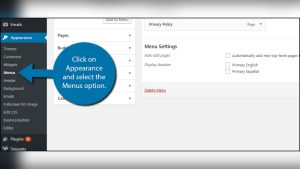
Access WordPress Menus
Start by logging into your WordPress dashboard. Look for the “Appearance” section in the left menu. Click on “Menus” to open the menu editor. Here, you can manage all your site’s menus. Choose the footer menu from the dropdown list if you have multiple menus. This opens the footer menu for editing.
Add Terms Page To Footer Menu
Find the list of pages on the left side. Locate your Terms and Conditions page from this list. Check the box next to that page. Click “Add to Menu” to include it in the footer menu structure. Drag the new item to the desired position in the footer menu. This sets where the link will appear on your site.
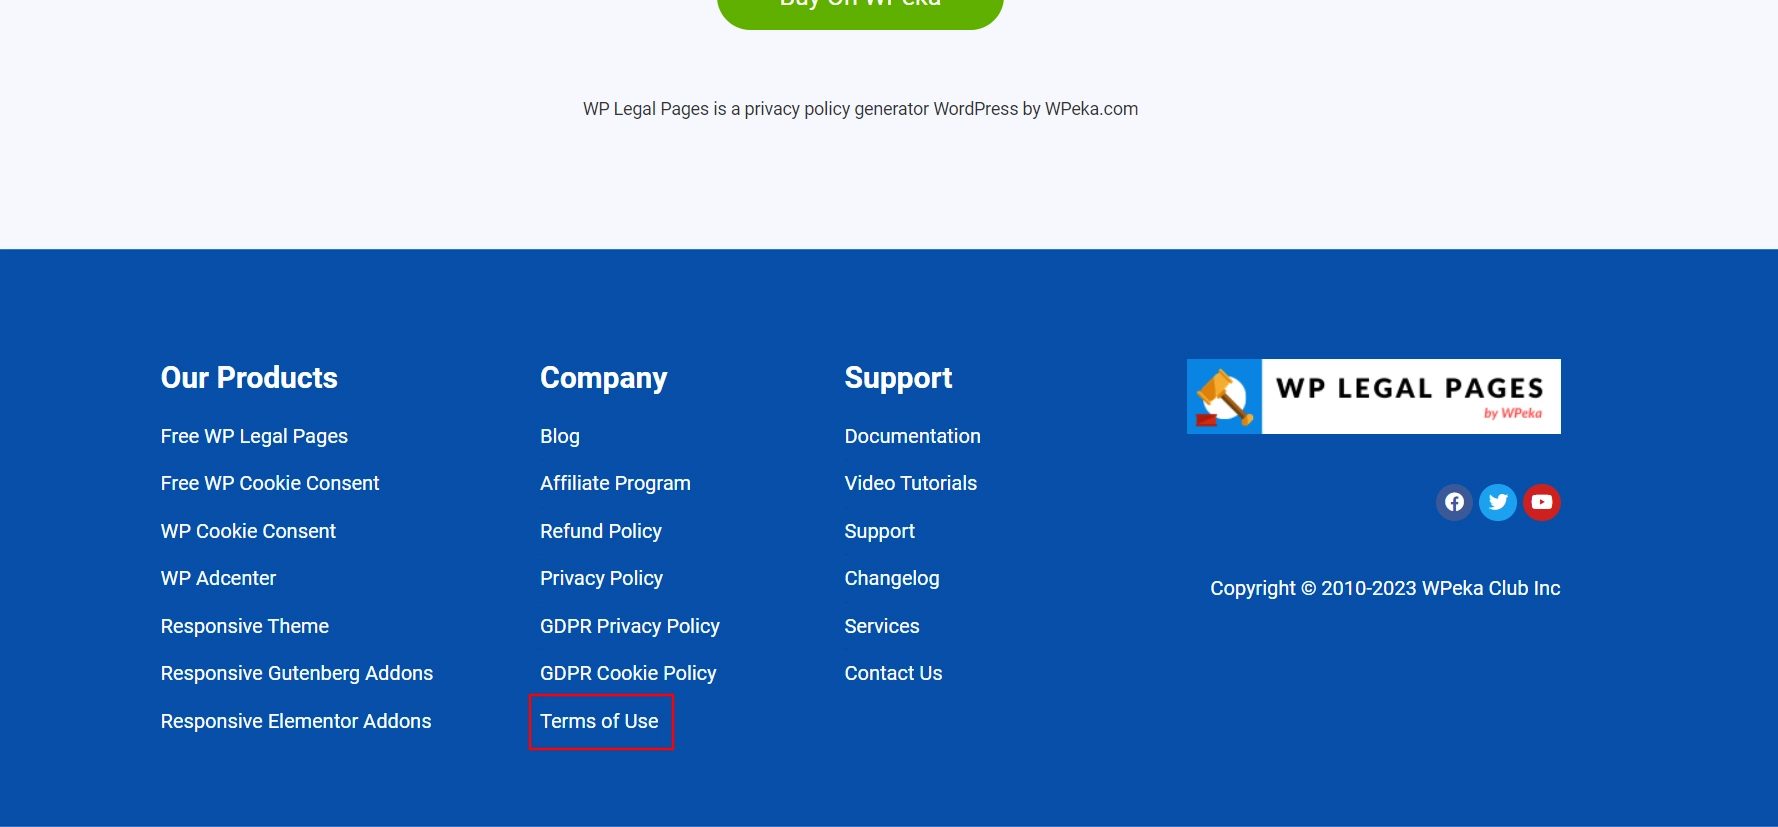
Save And Review Changes
Click the “Save Menu” button to store your updates. Visit your website and scroll down to the footer. Check if the Terms and Conditions link shows up correctly. Click the link to ensure it leads to the right page. This confirms your footer menu update works well for visitors.
Credit: wplegalpages.com
Use Widgets To Display Terms
Using widgets to display your Terms and Conditions in the WordPress footer is simple. Widgets let you add content blocks without coding. This method keeps your site clean and easy to update. Visitors can always find your Terms and Conditions at the bottom of your pages.
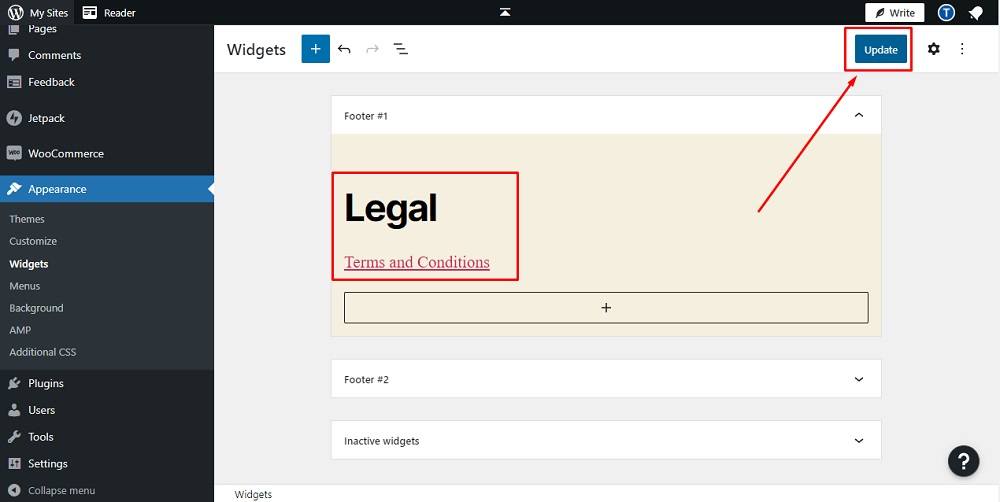
Navigate To Widget Settings
Go to your WordPress dashboard. Find the Appearance menu and click Widgets. This area shows all widget-ready spaces on your site. Look for the Footer section. This is where you will add your Terms and Conditions widget.
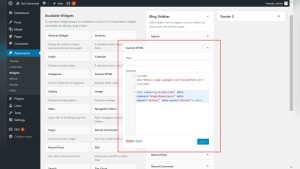
Add Custom Html Or Text Widget
Click the Add Widget button in the Footer area. Choose the Custom HTML or Text widget. Both let you add text or links. The Custom HTML widget lets you add simple code. The Text widget is easier if you want plain text.
Insert Terms Link Or Summary
Type a short summary or the full Terms and Conditions text. Or, add a link to your full Terms page. Use clear words like “Terms and Conditions” or “Terms of Service.” Save the widget. Check your website footer to see it live.
Customize Footer With Code
Customizing your WordPress footer with code lets you add important links like Terms and Conditions directly. This method gives you full control over the footer’s appearance and content. You can create a professional look that matches your site’s style. Editing the footer code requires care to avoid breaking your site. Follow safe steps to make the process smooth and easy.
Edit Footer Php File Safely
Locate the footer.php file in your theme folder. Use a code editor or the WordPress theme editor to open it. Back up the file before making changes. This protects your site if something goes wrong. Insert the Terms and Conditions link in the desired spot inside the footer code. Save your changes and check the site’s footer to see the new link.
Insert Terms Link Manually
Use simple HTML to add the Terms link manually. For example, write Terms and Conditions inside the footer.php file. Place it between existing footer content or create a new line. This method ensures the link shows clearly and works correctly. Test the link to make sure it leads to the right page.
Use Child Theme For Changes
Make code changes inside a child theme to keep your edits safe. A child theme keeps your custom code separate from the main theme. This way, updates to the main theme don’t erase your changes. Create a child theme folder, copy footer.php to it, then edit the copy. Activate the child theme to see your customized footer live on your site.
Test Footer Terms Visibility
Testing the visibility of your terms and conditions in the footer is essential. It ensures your visitors can see and use the information easily. This step helps avoid confusion and builds trust with your site users.
Check On Different Devices
View your website on phones, tablets, and computers. Make sure the footer looks good on all screen sizes. The text should be readable and the layout neat. A clear footer means visitors find your terms without trouble.
Verify Link Functionality
Click the terms and conditions link in the footer. Confirm it leads to the correct page. The page should load quickly and show the full terms. Working links keep your website professional and user-friendly.
Keep Terms Updated
Keeping your terms and conditions updated is very important. Laws and rules change. Your business might change too. Updated terms protect your site and users.
Check your terms often. Make sure they match your current policies. Clear, accurate terms build trust and avoid problems.
Review Regularly
Set a schedule to review your terms. Every few months works well. Check for new laws or business changes. Fix any unclear or outdated points. Ask a legal expert if needed. Regular reviews keep your terms strong and relevant.
Update Page And Footer Links
When you change your terms, update all links. Your footer must point to the latest page. Check menu links and any buttons too. Broken or wrong links confuse visitors. Use clear text like “Terms and Conditions.” This helps users find your rules quickly.
Credit: www.termsfeed.com
Frequently Asked Questions
How Do I Add Terms And Conditions To WordPress Footer?
To add terms and conditions, create a new page with your content. Then, edit your footer. php or use a widget to link the page in the footer. This method ensures easy access and keeps your site compliant.
Can I Add Terms And Conditions Without Coding?
Yes, use WordPress widgets or plugins like “Footer Putter” to add terms and conditions links. These tools require no coding and are user-friendly for beginners.
Where Should Terms And Conditions Link Appear In The Footer?
Place the terms and conditions link in the footer menu or widget area for visibility. It should be easily accessible on every page to comply with legal requirements.
Is It Necessary To Update Terms And Conditions Regularly?
Yes, regularly updating terms and conditions protects your site legally. Review and revise your terms to reflect changes in laws or business policies.
Conclusion
Adding terms and conditions to your WordPress footer keeps your site clear and safe. It helps visitors understand your rules and policies easily. You can do this by using plugins or editing your theme’s footer file. Keep the text simple and update it when needed.
This small step builds trust and protects your website. Try it today and make your site more professional and user-friendly.