
Are you looking to track your website visitors and boost your marketing efforts? Adding a Pixel to your WordPress site is the key.
It helps you understand your audience better and improves your ad targeting, making every dollar you spend count. In this guide, you’ll discover simple, step-by-step instructions to add a Pixel to your WordPress site quickly—no tech skills needed. By the end, you’ll have a powerful tool working behind the scenes to grow your business.
Keep reading, and let’s get started!
Credit: wp-rocket.me
Why Add A Pixel To WordPress
Adding a pixel to WordPress helps you track user actions on your website. It collects data on how visitors interact with your pages. This information helps improve marketing strategies and website performance.
Pixels work by sending data back to platforms like Facebook or Google. This data shows which ads bring visitors and what actions they take. Tracking these actions helps measure success and optimize campaigns.
Benefits Of Pixel Tracking
Pixel tracking provides clear insights into visitor behavior. It helps identify which ads lead to sales or sign-ups. You can see which pages users visit most often. This data helps you improve your website content and user experience.
Tracking pixels also allow retargeting ads. You can show ads to visitors who left without buying. This increases chances of converting visitors into customers. Pixels help save advertising budget by focusing on interested users.
Common Use Cases
Many businesses use pixels for online advertising. E-commerce sites track purchases and add-to-cart actions. Blogs track newsletter sign-ups and content engagement. Pixels help measure the return on ad spend accurately.
Pixels also support conversion tracking for campaigns. They help optimize ads by focusing on high-value users. Event tracking, like downloads or video views, is another common use. Pixels provide valuable data for smarter marketing decisions.
Credit: www.monsterinsights.com
Choosing The Right Pixel
Choosing the right pixel for your WordPress site is important. Pixels help track visitor behavior. They give you data to improve your marketing and website performance. Picking the right one depends on your goals. Different pixels serve different purposes. Let’s explore the most common options.
Facebook Pixel
The Facebook Pixel tracks actions on your site from Facebook ads. It helps measure ad results and optimize campaigns. This pixel is useful if you run Facebook or Instagram ads. It collects data on page views, purchases, and leads. You can create custom audiences for better targeting. Easy to set up and offers detailed insights.
Google Analytics Pixel
Google Analytics Pixel tracks visitor behavior on your site. It records how users find your site and what they do. This pixel is good for general website traffic analysis. It helps understand visitor demographics, pages visited, and session duration. Use it to improve site design and content. Free to use and widely supported.
Other Popular Pixels
Other pixels include LinkedIn Insight Tag and Twitter Pixel. LinkedIn’s pixel helps with B2B ad campaigns. Twitter Pixel tracks conversions from Twitter ads. Pinterest Tag tracks actions from Pinterest ads. Choose these if you advertise on those platforms. Each pixel offers unique tracking features. Pick one that matches your marketing channels.
Preparing Your WordPress Site
Preparing your WordPress site is an important first step before adding a pixel. It ensures your site stays safe and runs smoothly. Taking time to prepare helps avoid problems later.
Start by backing up your website. This keeps your data safe in case something goes wrong. Then, check if your theme and plugins work well with the pixel. Compatibility is key to prevent errors or conflicts.
Backup Your Website
Backing up your website means saving a copy of all your files and data. This copy lets you restore your site if any issue happens. Use a reliable backup plugin or your hosting service’s backup tool.
Make sure the backup is complete. It should include your WordPress database and all files. Store the backup in a safe place outside your website server.
Check Theme And Plugin Compatibility
Not all themes and plugins work well with every pixel. Check if your theme supports adding custom code. Some themes have built-in options for this.
Review your active plugins. Look for any known conflicts with pixels. Test the pixel on a staging site if possible. Fix any issues before adding the pixel to your live site.
Credit: www.reliablesoft.net
Adding Pixel Using Plugins
Adding a pixel to your WordPress site helps track visitors and improve marketing. Using plugins makes this process simple and fast. Plugins handle all the coding for you. Just install, activate, and set up the pixel with a few clicks.
Plugins also offer extra features like easy updates and management. They save time and reduce errors. No need to touch the theme files or code.
Top Plugins For Pixel Integration
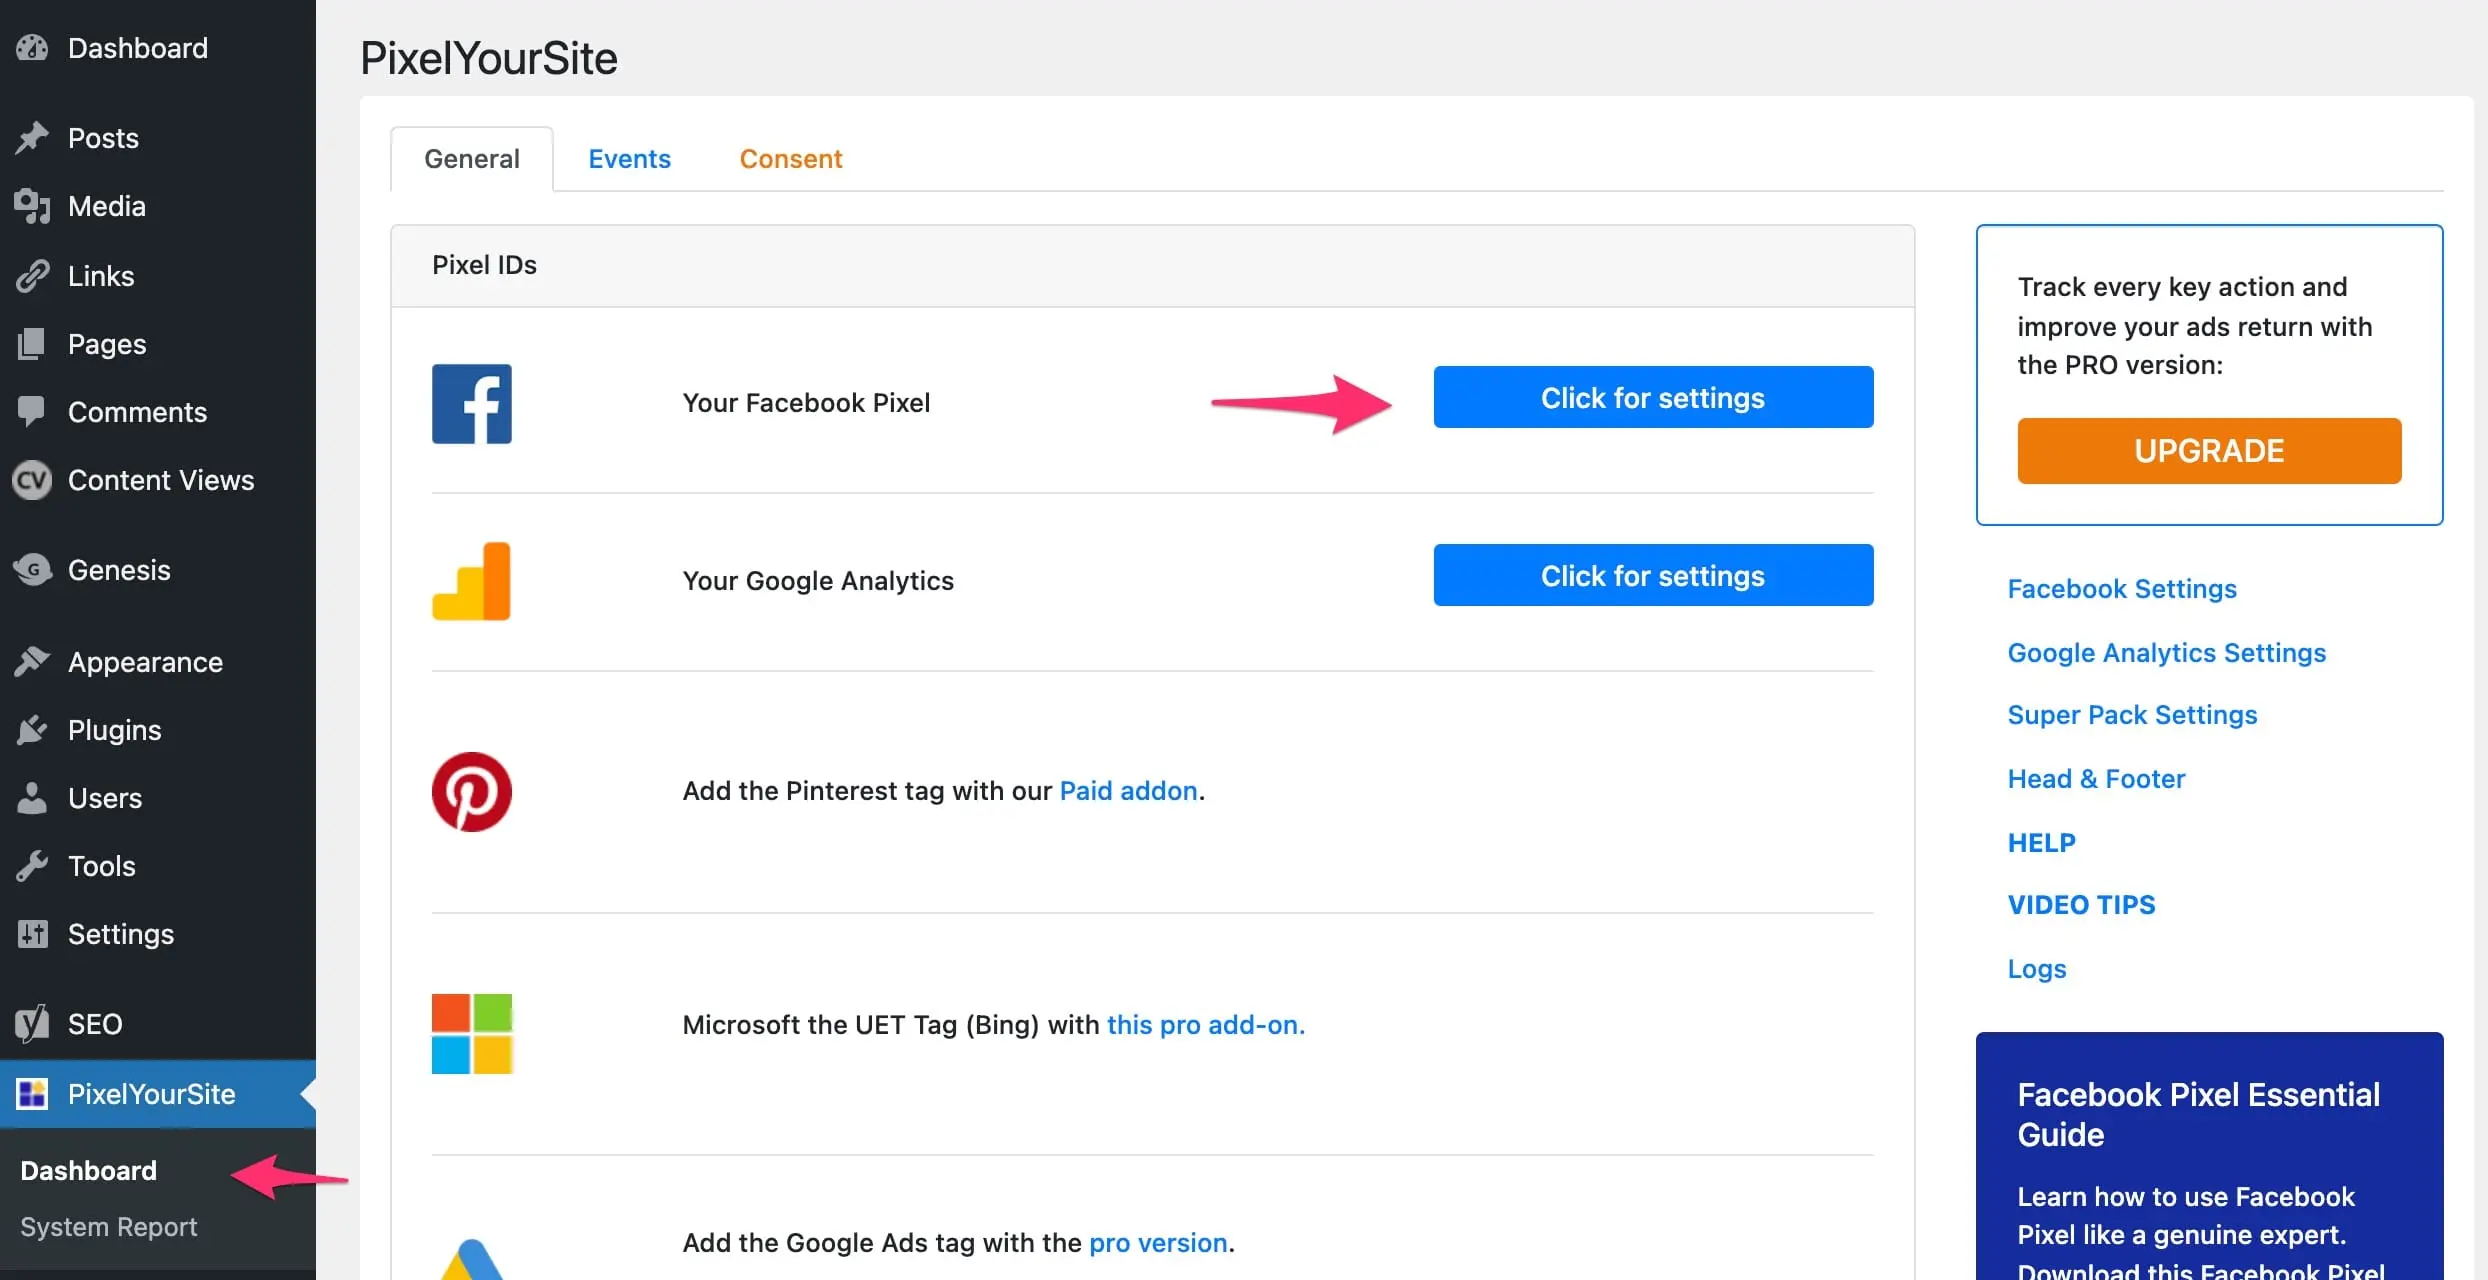
Several plugins work well for adding pixels. “PixelYourSite” is popular for Facebook pixel setup. It supports multiple pixels and custom events. “Insert Headers and Footers” is a simple plugin to add code snippets in the header or footer. “Facebook for WordPress” plugin directly connects your site to Facebook tools. These plugins make pixel setup quick and reliable.
Step-by-step Plugin Setup
First, go to your WordPress dashboard. Click on Plugins > Add New. Search for your chosen pixel plugin. Click “Install Now” and then “Activate.”
Next, open the plugin settings. Paste your pixel ID or code in the required field. Save the changes. The pixel will start tracking visitors automatically.
Test your pixel using Facebook Pixel Helper or similar tools. This ensures the pixel works correctly on your site.
Manual Pixel Installation
Manual pixel installation lets you control where the pixel code goes. You place the code directly into your WordPress theme files. This method is best for those who want precise tracking and avoid extra plugins. It also helps the pixel load faster on your site.
Follow careful steps to avoid errors. Even a small mistake in the code can stop the pixel from working.
Accessing Theme Files
First, log in to your WordPress dashboard. Go to Appearance, then select Theme Editor. You will see a list of theme files on the right side. Look for the header.php file. This file controls the header section of your site. The pixel code must go inside this file for proper tracking.
Always make a backup of your theme files before editing. This keeps your site safe if something goes wrong. Use a child theme to keep changes safe during updates.
Inserting Pixel Code Correctly
Copy the pixel code from your tracking platform. Paste it right before the closing tag in header.php. This placement ensures the pixel loads on every page.
Double-check the code for any missing parts. Save the changes and clear your site cache. Test the pixel with a browser extension or tracking tool to confirm it works.
Verifying Pixel Installation
After adding a pixel to your WordPress site, checking its setup is important. Proper verification ensures the pixel tracks visitors correctly. This helps you collect accurate data for your campaigns. Use tools and simple methods to confirm the pixel works well.
Using Pixel Helper Tools
Pixel helper tools check your pixel installation quickly. They show if the pixel is active on your site. These tools highlight errors or missing pixels. Google Tag Assistant and Facebook Pixel Helper are popular choices. Install the extension in your browser, then visit your site. The tool will display pixel status and any issues found.
Troubleshooting Common Issues
Sometimes pixels do not work as expected. Clear your browser cache to avoid old data. Check if the pixel code is placed in the correct spot. Ensure no extra spaces or missing characters exist in the code. Disable plugins that may block scripts. Use incognito mode to test the pixel again. Fixing these issues helps your pixel run smoothly.
Optimizing Pixel For Better Tracking
Optimizing your pixel improves how well it tracks user actions on your WordPress site. Better tracking helps you understand visitor behavior. It also boosts your marketing efforts by giving precise data. Focus on setting up events and custom conversions to get the most from your pixel.
Setting Up Events
Events track specific actions users take on your website. Examples include clicking a button, adding items to a cart, or completing a purchase. Set these events in your pixel to capture useful data. Use simple names for each event to keep things clear. Test your events after setup to ensure they work properly.
Custom Conversions
Custom conversions let you track unique goals beyond standard events. For instance, signing up for a newsletter or visiting a key page. Create custom conversions by defining rules based on URL visits or event parameters. This helps you measure important actions that match your business goals. Keep your custom conversions focused to avoid clutter.
Frequently Asked Questions
What Is A Facebook Pixel And Why Use It?
A Facebook Pixel tracks user actions on your WordPress site. It helps optimize ads, measure conversions, and retarget visitors effectively.
How Do I Add A Pixel To WordPress Without Plugins?
You can add Pixel code manually by inserting it into your theme’s header. php file or using the WordPress Customizer’s header section.
Can I Use Pixel With WordPress Page Builders?
Yes, most page builders like Elementor or Divi allow adding Pixel code via custom HTML or integration settings easily.
How To Verify If Pixel Is Working On WordPress?
Use Facebook’s Pixel Helper browser extension to check if the Pixel fires correctly on your WordPress site pages.
Conclusion
Adding a pixel to your WordPress site helps track visitor actions easily. It gives clear data to improve your marketing efforts. The process is simple and quick to follow. Just copy the pixel code and paste it in the right place on your site.
Regularly check your pixel to ensure it works correctly. This small step can make a big difference in understanding your audience. Start now to see better results from your website traffic.


