
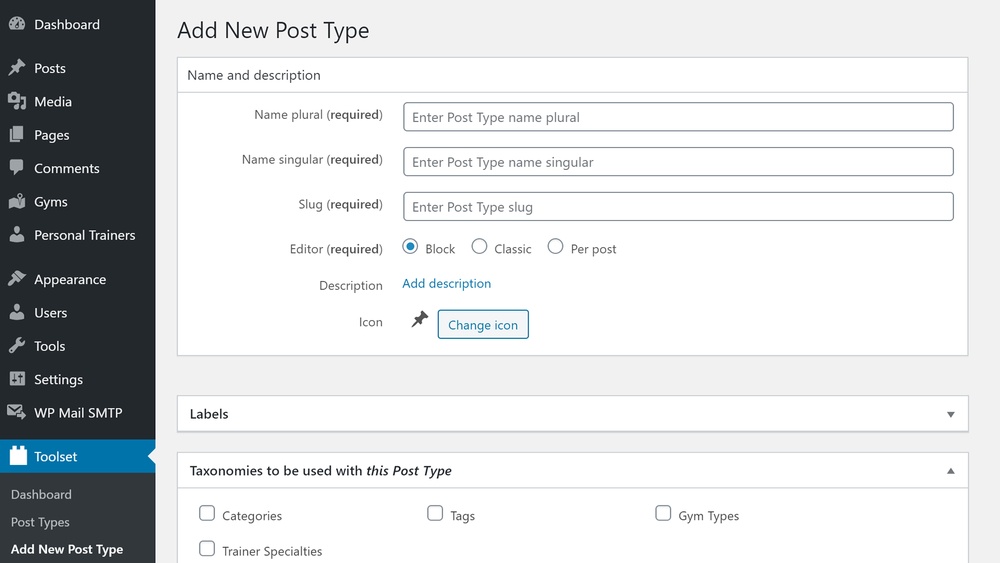
Are you ready to take your WordPress site to the next level? Adding a new post type can help you organize your content better and make your website stand out.
Whether you want to create a portfolio, testimonials, or product listings, knowing how to add a custom post type is a game-changer. In this guide, you’ll discover simple, step-by-step instructions that anyone can follow. By the end, you’ll have the power to create exactly the content you need—without confusion or frustration.
Let’s dive in and unlock new possibilities for your website!
Why Use Custom Post Types
Custom post types let you create different content types beyond posts and pages. They help you organize your website better. Using them makes your site easier to manage and more professional. You can separate content clearly, which improves user experience and editing.
Benefits For Website Organization
Custom post types keep content neat and tidy. You can group similar items together. This helps visitors find what they want quickly. It also makes your admin panel less cluttered. Editors can focus on one content type at a time. This saves time and reduces mistakes.
Common Use Cases
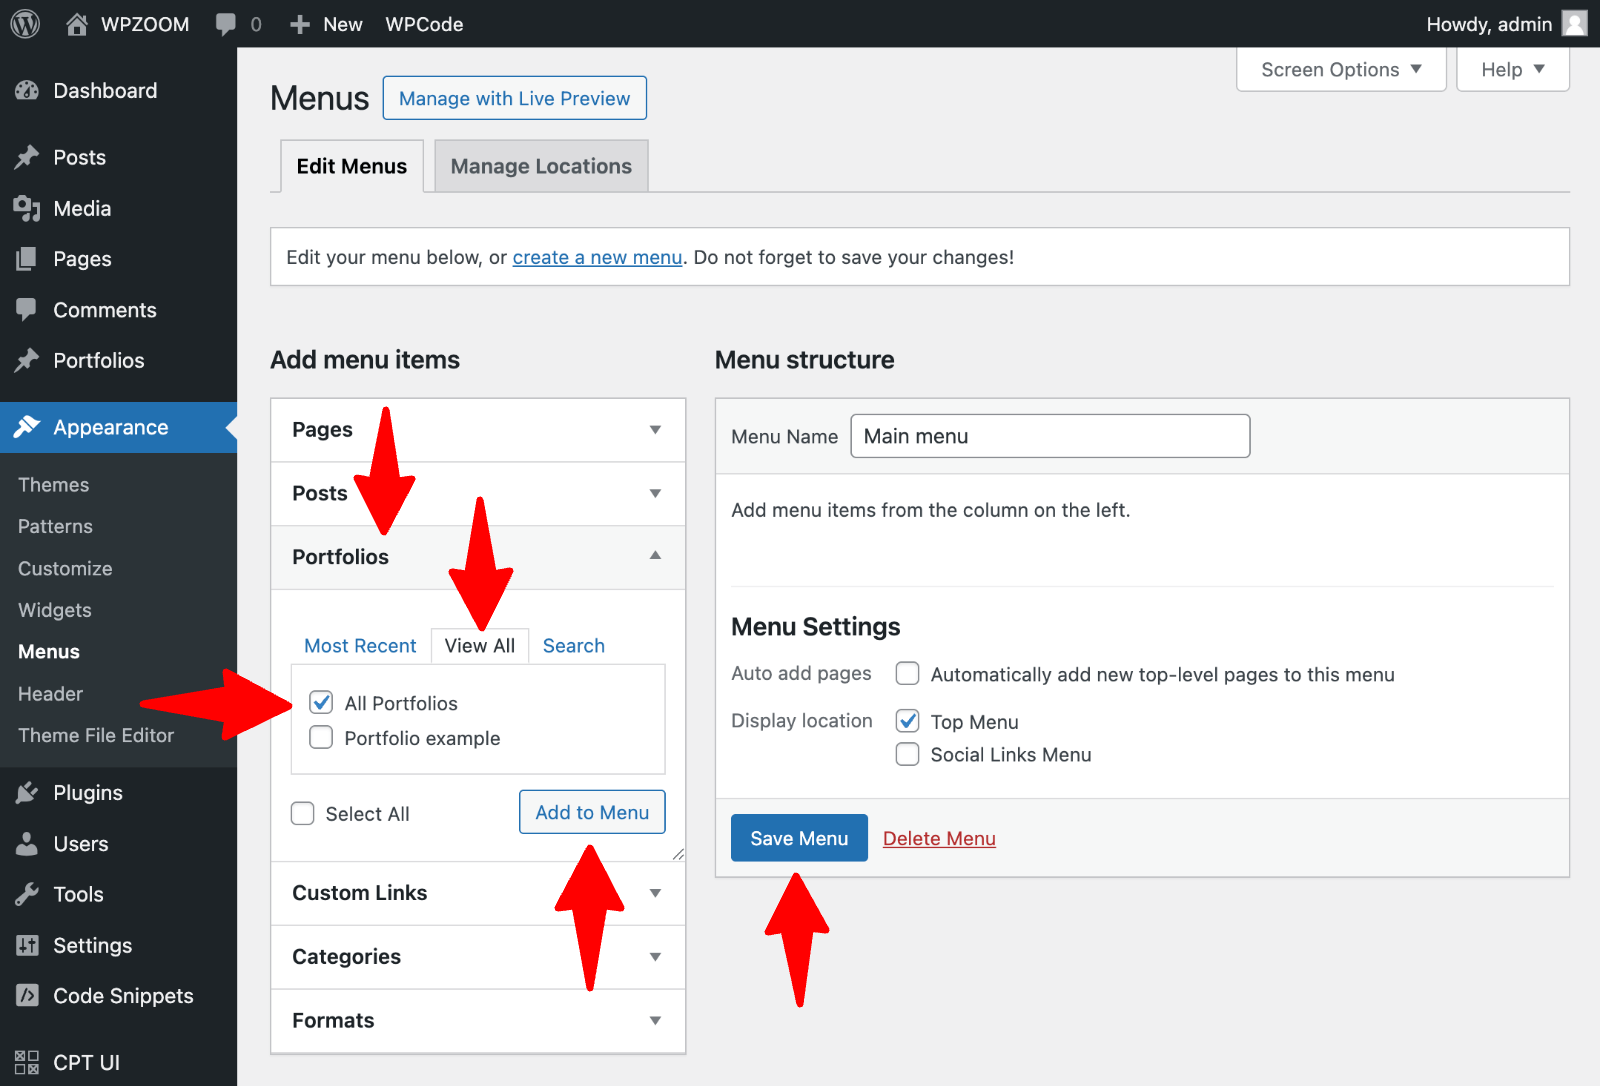
Many websites need more than just posts and pages. For example, a portfolio site needs a project post type. A restaurant site can use a menu post type. Event sites create events as a custom post type. Each type has unique fields and settings. This makes managing different content easier and clearer.
Credit: www.wpzoom.com
Preparing Your WordPress Site
Preparing your WordPress site is key before adding a new post type. It helps keep your site safe and organized. Taking simple steps now saves time and trouble later.
Start by securing your website and setting up a child theme. These actions protect your data and allow safe customization without affecting the main theme.
Backup Your Website
Backing up your website keeps your data safe. It creates a copy of your files and database. This copy can restore your site if something goes wrong. Use a reliable backup plugin or your hosting provider’s backup tool. Schedule regular backups to avoid losing recent changes.
Set Up A Child Theme
A child theme lets you modify your site safely. It keeps changes separate from the main theme. This means your customizations stay intact during theme updates. Create a child theme folder and add a style.css file. Activate the child theme in your WordPress dashboard. Now, you can add custom code for your new post type without worries.
Registering A New Post Type
Registering a new post type in WordPress lets you create custom content beyond posts and pages. This helps organize content better and display it in unique ways. WordPress offers a simple way to register new post types by adding code to your theme’s functions.php file. It is a powerful tool to control how your content works and looks.
Using Code In Functions.php
To register a new post type, open your theme’s functions.php file. Add a function that uses register_post_type(). This function tells WordPress about your new post type and its features.
Start by giving your post type a unique name, like ‘book’ or ‘movie’. The name should be lowercase and without spaces. Then, set up the labels and options inside the function. Finally, hook your function to the init action to make it run when WordPress loads.
Essential Parameters Explained
The register_post_type() function needs an array of parameters. These control how the post type behaves and appears in WordPress.
‘labels’ define the names seen in the admin area. Use clear, simple words for menu and button names. ‘public’ controls if the post type is visible on the site. Set it to true to show the content.
‘supports’ lists features like title, editor, and thumbnail. Pick only what your post type needs. ‘has_archive’ enables archive pages for your content. This helps list all posts of this type automatically.
Using the right parameters makes your post type easy to use and manage. It also improves how visitors find and interact with your content.
Credit: www.wpbeginner.com
Using Plugins To Add Post Types
Using plugins to add new post types in WordPress is a simple method. It avoids coding and saves time. Plugins offer user-friendly tools to create custom post types. These tools fit well for beginners and those who want quick results.
Plugins also help manage post type settings easily. You can control labels, features, and visibility. This way, your site stays organized and easy to use.
Popular Plugins For Beginners
Many plugins exist for adding custom post types. “Custom Post Type UI” is one of the most popular. It has a clear interface and many options. Another good choice is “Pods.” It allows more customization and works well with fields. “Toolset Types” is also common. It offers a complete solution for custom content without coding.
Step-by-step Plugin Setup
First, go to your WordPress dashboard. Click on “Plugins” and then “Add New.” Search for your chosen plugin, like “Custom Post Type UI.” Click “Install” and then “Activate.”
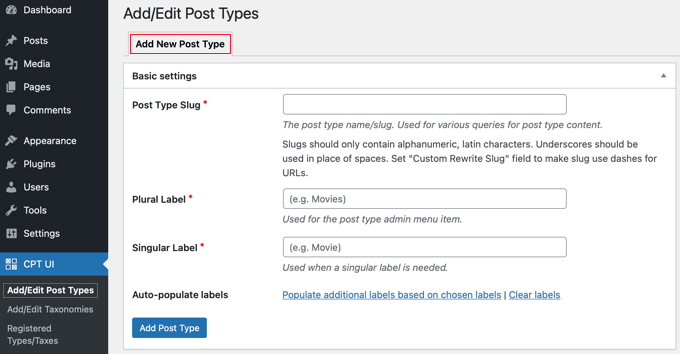
Next, find the plugin menu in your dashboard. Choose “Add/Edit Post Types.” Fill in the required fields: post type name, label, and description. Save the new post type.
Finally, check your WordPress admin menu. The new post type should appear. Start adding content to your custom post type. Adjust settings anytime from the plugin menu.
Customizing Post Type Features
Customizing post type features helps tailor your WordPress site to fit your needs. It lets you control what content appears and how it looks. Simple changes can improve user experience and site management. You can enable features like images and summaries to make posts more engaging. Setting taxonomies organizes your content better. These tweaks make your custom post type more useful and easy to manage.
Adding Support For Thumbnails And Excerpts
Thumbnails add visual appeal to your posts. They show a small image that represents the content. To enable thumbnails, add ‘thumbnail’ support in your post type registration. Excerpts provide short summaries of your posts. They help readers understand the post quickly. Enable excerpts by adding ‘excerpt’ support. Both features improve how your posts appear on your site and in search results.
Setting Custom Taxonomies
Taxonomies group your content by categories or tags. Custom taxonomies allow more specific organization. For example, you can create a ‘Genre’ taxonomy for book posts. Register custom taxonomies with your post type for better filtering. This makes it easier for visitors to find related content. Proper taxonomy setup also helps search engines understand your site better.

Credit: learn.wordpress.org
Displaying Custom Posts On Your Site
Displaying custom posts on your WordPress site helps showcase your unique content. Custom posts differ from regular blog posts. They allow you to present content in new ways. This section explains how to show custom posts on your website. It covers creating templates and using shortcodes or widgets. These methods help visitors find your content easily.
Creating Custom Templates
Custom templates control how your posts appear on the site. WordPress uses PHP files to display content. You can create a template for your new post type. Start by copying a default template file. Rename it to match your custom post type. Change the layout to suit your content style. This lets you add special features or designs. Upload the template to your theme folder. WordPress will use it automatically for those posts.
Using Shortcodes And Widgets
Shortcodes let you insert custom posts anywhere on your site. You add a small code snippet in pages or posts. The shortcode pulls and shows your custom posts. Widgets are blocks that appear in sidebars or footers. Some themes support widgets for custom posts. You can add a widget to display recent or featured posts. Both shortcodes and widgets make content easy to find. They improve user experience by showing relevant posts.
Troubleshooting Common Issues
Adding a new post type in WordPress is simple but can bring some common issues. These problems can stop your post type from working properly. Knowing how to fix them saves time and stress. This section helps you solve two frequent problems fast.
Post Type Not Showing In Admin Menu
Sometimes, your new post type does not appear in the WordPress admin menu. This happens often if the code has small errors. Check if you set the ‘show_in_menu’ parameter to true in your registration code. Without this, WordPress hides the post type from the menu.
Also, verify user permissions. The current user role must have rights to see the post type. Clear caches or refresh the admin dashboard to update the menu. These steps usually fix the issue quickly.
Permalink Problems
Permalink errors often occur after adding a new post type. Your links may show 404 errors or not work at all. To fix this, go to the WordPress dashboard, then Settings > Permalinks. Click the “Save Changes” button without changing anything. This action refreshes the permalink structure.
Check the ‘rewrite’ rules in your post type code. Make sure they are correctly set. Incorrect rewrite rules can cause URL problems. Resetting permalinks and correcting rewrite settings will solve most permalink issues.
Best Practices For Managing Custom Posts
Managing custom post types well keeps your WordPress site clean and easy to use. It helps you find content fast and makes your site run smoothly. Follow some simple rules for naming and organizing custom posts. This keeps everything clear and works well with other parts of WordPress.
Naming Conventions
Choose clear and simple names for your custom post types. Use lowercase letters and underscores to separate words. Avoid spaces or special characters. Names should describe the content clearly, such as “book_reviews” or “event_listings”. Keep names short but meaningful. This helps avoid conflicts with themes or plugins. Consistent naming makes your site easier to manage over time.
Keeping Your Site Organized
Group related custom posts together in menus or categories. Use custom taxonomies to sort posts by topics or types. Create admin menus that match the post types for quick access. Regularly review and clean unused post types to reduce clutter. Proper organization improves site speed and user experience. A tidy backend saves time and helps you focus on content.
Frequently Asked Questions
What Is A Custom Post Type In WordPress?
A custom post type allows you to create content types beyond posts and pages. It organizes unique content like portfolios or testimonials. Custom post types enhance website functionality and user experience. They are registered via code or plugins in WordPress.
How Do I Register A New Post Type In WordPress?
You register a new post type by using the register_post_type() function. This function is added to your theme’s functions. php file or a custom plugin. It requires a unique name and an array of arguments defining the post type’s behavior and features.
Can I Add Custom Post Types Without Coding?
Yes, you can add custom post types without coding by using plugins like “Custom Post Type UI. ” These plugins provide easy interfaces to create and manage post types. This method is ideal for beginners or those avoiding direct code editing.
What Are The Benefits Of Using Custom Post Types?
Custom post types improve content organization and site structure. They allow tailored content management and display options. Using them can boost SEO by targeting specific content niches. They make your WordPress site more flexible and user-friendly.
Conclusion
Adding a new post type in WordPress is simple and useful. It helps organize your content better. You can create posts that fit your site’s needs. Follow the steps carefully, and you will succeed. Test your new post type to make sure it works well.
Keep your site fresh and easy to use. This small change can improve your website a lot. Try it today and see the difference.



