
Are you ready to share your ideas, stories, or updates with the world? Adding a new post in WordPress is the first step to making that happen.
Whether you’re starting a blog, promoting your business, or just want to express yourself, knowing how to create a post quickly and easily can save you time and frustration. In this guide, you’ll discover simple, clear steps to add your new post like a pro—even if you’ve never used WordPress before.
Keep reading, and you’ll be publishing your first post in no time!
Accessing The WordPress Dashboard
Start by logging into your WordPress account to reach the dashboard. From there, click on “Posts” and select “Add New” to create a new post. This area lets you write, edit, and publish your content easily.
What Is The WordPress Dashboard?
The WordPress Dashboard is the control center of your website. It lets you manage posts, pages, and settings. You can see site stats and recent activity here. This is where you start to add a new post.
Think of it as the main panel where all tools come together. Easy access to everything helps save time. It also keeps your site organized and simple to manage.
How To Log In To Your WordPress Dashboard
Open your web browser and type your website address. Add /wp-admin at the end of the URL. For example, www.yoursite.com/wp-admin.
Enter your username and password on the login page. Click the “Log In” button. You will now see the WordPress Dashboard home screen.
Dashboard Layout And Key Sections
The left menu shows options like Posts, Pages, and Media. The center area displays widgets with quick info. The top bar gives access to your profile and site view.
Each section helps you manage different parts of your website. Spend time exploring these areas. It will make adding posts easier and faster.
Credit: www.inmotionhosting.com
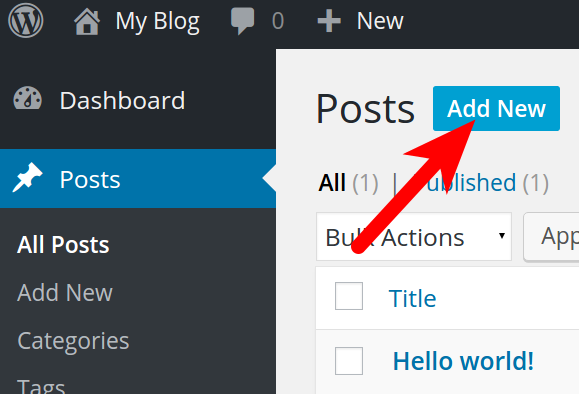
Navigating To The Posts Section
Navigating to the Posts section in WordPress is the first step to creating a new blog post. The WordPress dashboard is simple and easy to use. It helps you manage your website content quickly.
Finding the Posts area lets you see all existing posts. You can also add new ones from here. The process is straightforward, even for beginners.
Start by logging into your WordPress account. The dashboard appears right after login. It shows all tools and options you need.
Locating The Posts Menu
Look at the left sidebar on the dashboard. Find the “Posts” label. It usually appears near the top of the menu.
Opening The Posts Section
Click the “Posts” link to open the Posts section. You will see a list of all your blog posts here. This area also has the button to add new posts.
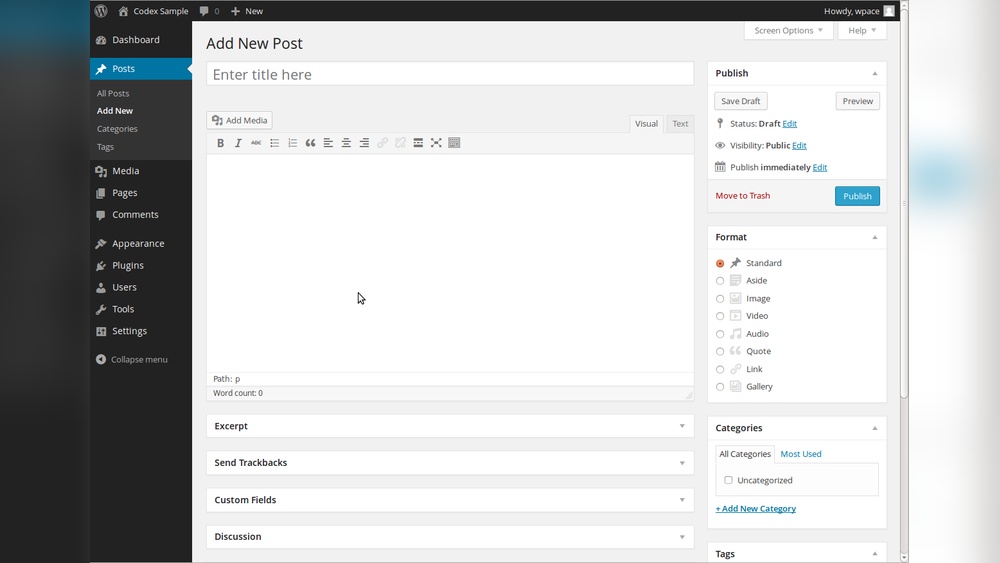
Creating A New Post
Creating a new post in WordPress is simple and quick. This step is essential for sharing your ideas with readers. The process involves setting a title, writing content, and using the block editor for design. Each part helps your post look great and attract visitors.
Choosing A Post Title
Pick a clear and catchy title. It should tell readers what the post is about. Keep it short and use important words. A strong title helps your post show up in search results. Avoid long or confusing titles.
Writing The Post Content
Write your message in short sentences. Use simple words that everyone understands. Break your text into small paragraphs. Add facts and examples to explain your points. Check spelling and grammar before publishing. Good content keeps readers interested.
Using The Block Editor
The block editor lets you build posts block by block. Each block can be text, image, video, or other media. Click the plus sign to add a new block. Drag blocks to change their order easily. Use headings, lists, and quotes for better layout. This editor helps your post look clean and organized.
Adding Images And Media
Adding images and media makes your WordPress posts more interesting. Pictures catch readers’ eyes and explain ideas better. Videos, audio, and other media also add value to your content.
WordPress has simple tools to upload and insert images and media. You do not need any special skills or software. Follow a few easy steps to enhance your posts with visuals and sounds.
Uploading Images
To upload images, open the WordPress editor. Click the “Add Media” button above the text area. This opens the media library and upload options.
Select “Upload Files” and choose images from your computer. You can upload one or many files at once. Wait a moment for the upload to finish.
The images appear in your media library. WordPress keeps all uploaded media organized for easy use later. You can also add titles and descriptions to each file.
Inserting Media Into The Post
Insert media by clicking on the desired image or file in the media library. Press the “Insert into post” button below the selection. The file then appears in your post editor.
You can move the image or media block anywhere in the post. Resize images by dragging corners or using toolbar options. Add captions or alt text to improve accessibility.
For videos or audio, WordPress supports direct upload or embedding from other sites. Paste the link or upload the file to add it to your post. Preview your post to check how the media looks and works.
Setting Categories And Tags
Configuring post settings helps you control how your content appears and behaves. These settings improve your post’s visibility and reader experience. Adjusting them correctly is important before publishing.
Setting Featured Image
The featured image represents your post visually on your site. Click on “Set featured image” in the post editor. Choose an image from your media library or upload a new one. This image will appear on your blog homepage and social media shares.
Adjusting Publish Date
You can set when your post goes live. Click the “Publish” or “Status & visibility” panel. Choose “Immediately” or pick a future date and time. Scheduling posts helps you plan content ahead and keep your blog active.
Managing Comments
Control if readers can comment on your post. Find the “Discussion” section in post settings. Check or uncheck “Allow comments” to enable or disable them. Managing comments helps keep your site clean and friendly.

Credit: www.youtube.com
Configuring Post Settings
Previewing and publishing are the final steps before your post goes live. They let you check your content and decide how it appears to readers. Previewing ensures your post looks right on different devices. Publishing options help you control when and how the post becomes visible.
Previewing The Post
Previewing shows your post as it will appear on the website. Use the preview button to open a new tab. Check the text, images, and formatting carefully. Make sure everything fits well and reads clearly. Preview on both desktop and mobile views. Fix any errors or awkward layouts before publishing.
Publishing Options
Publishing lets you choose when to share your post. You can publish immediately or schedule it for later. Set the date and time if scheduling. You can also save the post as a draft to edit later. Choose visibility settings: public, private, or password-protected. Confirm your choices before clicking the publish button.
Previewing And Publishing
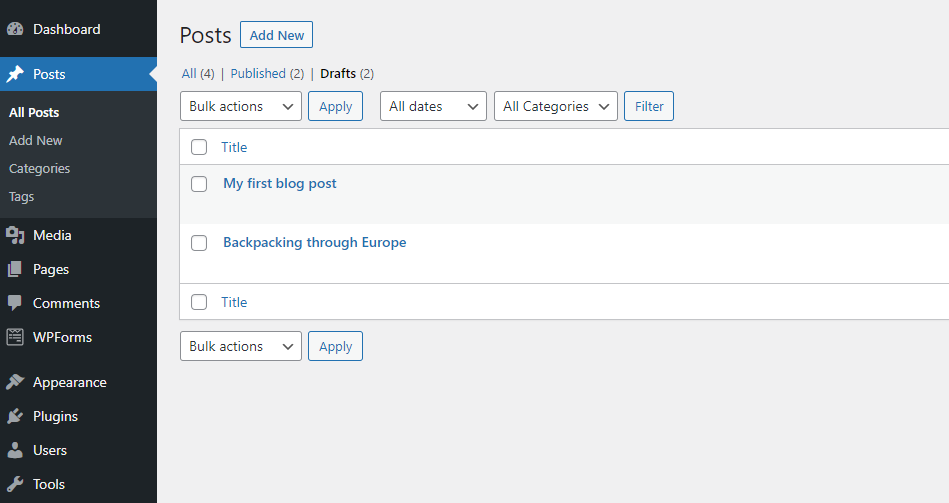
Editing and updating posts in WordPress is simple and important. It keeps your content fresh and accurate. You can change text, images, or settings anytime.
Regular updates help your site stay relevant and interesting. They also improve your search engine rankings. WordPress makes editing easy with its user-friendly tools.
Edit Your Post Content
Go to the WordPress dashboard and click “Posts.” Find the post you want to edit. Click the post title or the “Edit” link below it. Make changes to the text or add new information. Use the editor to format your content. You can add headings, lists, or links.
Update Images And Media
Click on any image to replace or edit it. Use the “Add Media” button to upload new pictures. Make sure images are clear and relevant. Proper images catch readers’ attention and support your text.
Change Post Settings
Adjust categories and tags to organize your post. This helps visitors find related content. You can also change the post’s publish date or author. These settings are in the sidebar of the editor.
Save And Publish Updates
After editing, click “Update” to save changes. The post updates instantly on your site. Check your post live to confirm the edits look good. Editing often ensures your website stays up to date.
Credit: www.hostinger.com
Frequently Asked Questions
How Do I Create A New Post In WordPress?
To create a new post, log in to your WordPress dashboard. Click “Posts” then “Add New. ” Enter your title and content, then publish or schedule your post.
Can I Add Images To My WordPress Post?
Yes, WordPress lets you add images easily. Use the “Add Media” button above the editor to upload or select images from your media library.
How Do I Schedule A Post For Later In WordPress?
After writing your post, click “Publish” and choose “Schedule. ” Pick your desired date and time, then confirm to publish your post automatically.
What Is The Difference Between Posts And Pages In WordPress?
Posts are timely content shown in reverse chronological order. Pages are static, like “About” or “Contact,” and don’t appear in blog feeds.
Conclusion
Adding a new post in WordPress is simple and quick. Just follow the steps carefully. Choose a clear title and write your content. Use categories and tags to organize your posts. Preview your work before publishing. Regular posting helps keep your site fresh and visitors interested.
Practice makes perfect, so don’t worry about mistakes. Keep your posts clear and focused. Soon, adding content will feel natural and easy. Start sharing your ideas with the world today!


