
Are you struggling to add a menu to your WordPress page? You’re not alone.
A clear, easy-to-navigate menu can make all the difference in keeping visitors on your site longer and helping them find what they need quickly. In this guide, you’ll discover simple steps to create and add a menu that fits your site perfectly—no tech skills required.
Keep reading, and by the end, you’ll have a professional-looking menu ready to boost your website’s user experience.
Choose The Right Menu Location
Choosing the right menu location is key to a clear and easy website. The menu guides visitors to important pages. Picking the correct spot helps users find information fast. It also improves your site’s look and navigation flow. WordPress offers different menu locations. Each fits a specific style and purpose. Knowing the difference helps you place menus smartly.
Primary Vs Secondary Menus
The primary menu is the main navigation bar. It usually sits at the top of your site. This menu holds the most important links. Visitors expect to see key pages here. The secondary menu is smaller and less noticeable. It often appears above or below the primary menu. You can use it for extra links like social media or contact info. Choose the primary menu for your core pages. Use the secondary menu for less critical items.
Custom Menu Areas
Some WordPress themes allow custom menu spots. These are special places like footer or sidebar menus. Custom menus let you add links in unique ways. You can create menus for specific user needs. For example, a footer menu can show privacy policies or FAQs. Sidebar menus work well for blog categories or archives. Custom areas help organize content better. Pick custom menu spots based on your site’s design and goals.

Credit: wou.edu
Create A New Menu
Creating a new menu in WordPress is the first step to organizing your site’s navigation. Menus help visitors find important pages quickly. Setting up a menu is simple and takes only a few clicks. Let’s explore how to create one from scratch.
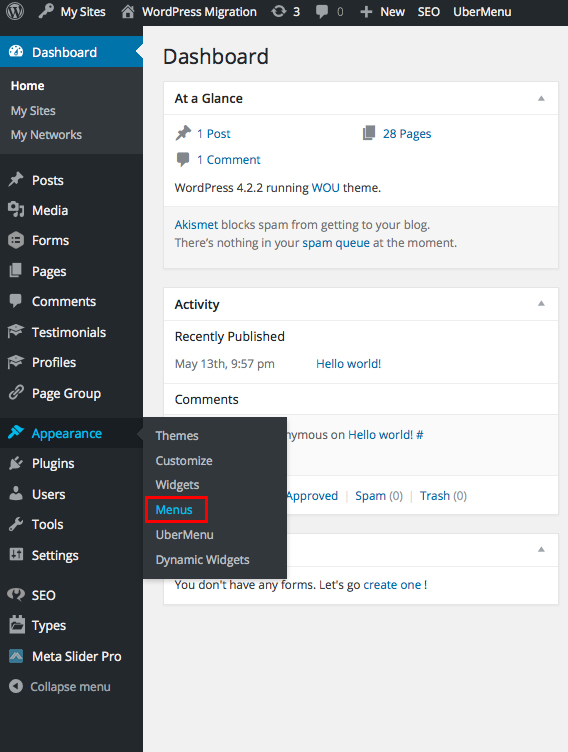
Accessing The Menu Settings
Start by logging into your WordPress dashboard. Look for the “Appearance” option in the left sidebar. Click on “Menus” under Appearance. This opens the menu settings page. Here, you can create, edit, or delete menus. It is the central place to manage your site’s navigation.
Naming Your Menu
Next, find the field labeled “Menu Name.” Choose a name that describes your menu clearly. For example, use “Main Menu” or “Footer Menu.” A clear name helps you identify the menu later. After typing the name, click the “Create Menu” button. Your new menu is ready to add pages, links, or categories.
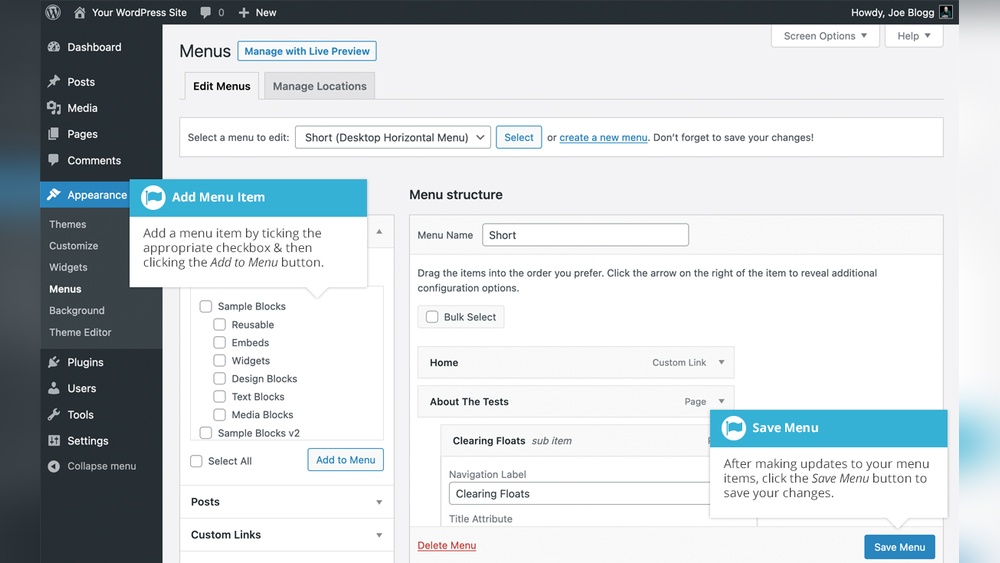
Add Items To Your Menu
Adding items to your WordPress menu helps visitors navigate your site easily. You can choose from pages, posts, custom links, categories, and tags. Each option lets you organize your menu based on your needs.
Adding Pages And Posts
Start by selecting the pages or posts you want in the menu. WordPress shows a list of your published content. Check the boxes next to the items you want. Click “Add to Menu” to include them. Drag and drop menu items to reorder them. This way, visitors find important pages quickly.
Including Custom Links
Custom links let you add any URL to your menu. Enter the web address and link text. This option is useful for linking to external websites. Or connect to a specific page within your site. Add the link by clicking “Add to Menu.” Custom links give you flexibility in menu design.
Using Categories And Tags
Categories and tags group your posts by topic. Add them to the menu to help visitors find related content. Select the categories or tags in the menu editor. Add them to the menu with the “Add to Menu” button. This method helps organize content better. Visitors can explore topics that interest them.
Credit: wou.edu
Organize Menu Structure
Organizing your menu structure helps visitors find pages quickly. A clear menu improves user experience and site navigation. WordPress makes it easy to arrange your menu items in the order you want. You can also group related pages under submenus. This keeps your menu clean and simple.
Drag And Drop Items
WordPress allows you to drag and drop menu items to reorder them. Click and hold the item you want to move. Then, drag it to the new position in the list. Drop it where it fits best. This method is quick and lets you see the menu layout instantly.
Use this feature to place your most important pages at the top. Less important pages can go lower. Rearranging your menu this way guides visitors to key content.
Create Submenus
Submenus group related pages under a main menu item. To create one, drag a menu item slightly to the right under another item. This nests the item below the main page. Visitors will see a dropdown when they hover over the main menu.
Submenus keep your menu clean and organized. Use them for categories or sections with multiple pages. They make your site easier to explore without overwhelming visitors.
Assign Menu To A Page
Assigning a menu to a page in WordPress helps visitors navigate your site easily. Menus show links to important pages and sections. You can place menus in different areas depending on your theme and layout. This section explains how to assign a menu to a page clearly and simply.
Set Menu Location In Theme
Go to the WordPress dashboard. Select Appearance, then Menus. Choose the menu you want to assign. Look for the Menu Settings area below the menu structure. You will see theme locations listed there. Check the box for the location where you want the menu to appear. Common locations include Primary, Footer, or Social menus. Click Save Menu to confirm. Your chosen menu will now show on your site in that location.
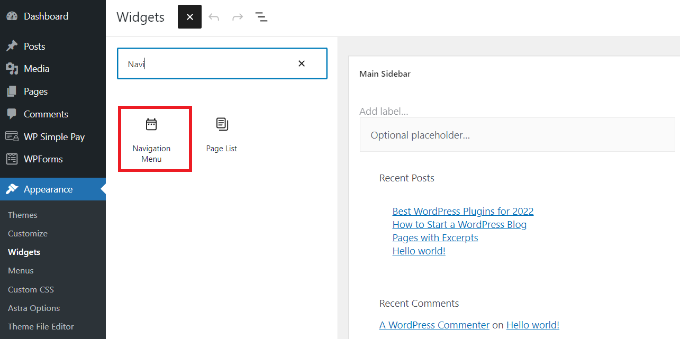
Use Menu Widgets
Widgets allow placing menus in sidebars or other widget-ready areas. Go to Appearance, then Widgets in the dashboard. Find the Navigation Menu widget. Drag it to your desired widget area. Select the menu you want from the dropdown list inside the widget. Give the widget a title if needed. Click Save. The menu will appear in the widget area on your page, helping visitors find important links easily.
Customize Menu Appearance
Customizing the menu appearance helps match your website’s style. A well-styled menu improves user experience and site navigation. WordPress offers easy ways to change menu looks without complex coding.
You can tweak colors, fonts, and layout to fit your brand. Small changes make your menu clear and attractive. Two common methods include using the Theme Customizer and applying CSS styles.
Using Theme Customizer
The Theme Customizer lets you change menu styles visually. Access it from the WordPress dashboard under Appearance > Customize. Here, you find options like menu colors, font size, and spacing.
Adjust these settings and see changes in real time. Some themes offer extra menu design tools inside the customizer. Save your work once you are happy with the look.
Apply Css For Styling
CSS gives more control over the menu’s design. Use custom CSS to change colors, borders, or hover effects. Add CSS in the Customizer under Additional CSS or in a child theme.
Simple code can change menu background or text style. For example, you can set font size or highlight active menu items. This method needs basic CSS knowledge but offers great results.
Test Your Menu
Testing your menu is an important step after adding it to your WordPress page. It helps you see how your visitors will interact with it. Checking your menu ensures it works well on different devices and looks good. This step prevents problems that could confuse users or make navigation hard.
Check On Different Devices
Menus can look different on phones, tablets, and computers. Test your menu on each device type. See if all links are easy to tap on small screens. Check if the menu appears in the right place. Make sure dropdowns open smoothly on touch devices. This way, everyone can use your menu without trouble.
Fix Common Issues
Look for broken links or missing menu items. Check if the menu text is readable with your chosen colors. Make sure the menu does not cover important content. Fix any alignment or spacing problems. Clear your browser cache if changes don’t show. These fixes improve user experience and keep visitors happy.
Credit: www.wpbeginner.com
Frequently Asked Questions
How Do I Create A Menu In WordPress?
To create a menu, go to Appearance > Menus in your WordPress dashboard. Click “Create New Menu,” name it, and add pages or links. Save the menu to apply changes.
How Can I Add A Menu To A WordPress Page?
Use the WordPress menu settings or a page builder plugin. Assign the menu location in Appearance > Menus or insert a menu shortcode on the page.
Can I Customize WordPress Menus Without Coding?
Yes, WordPress lets you customize menus using the Appearance > Menus section. You can reorder, rename, and add links without any coding knowledge.
What Is The Best Menu Plugin For WordPress?
Popular menu plugins include Max Mega Menu, WP Mega Menu, and Responsive Menu. They offer advanced features and easy customization for WordPress menus.
Conclusion
Adding a menu to your WordPress page is simple and quick. You can organize your site’s content clearly for visitors. Menus help people find pages easily and improve site navigation. Use the WordPress menu settings to create and place menus where you want.
Practice a few times to get comfortable with the steps. A clear menu makes your website look professional and user-friendly. Keep it simple to avoid confusing your visitors. Now, your site is ready with an easy-to-use menu.


