
Are you looking to make your WordPress site easier to navigate? Adding a menu in the Appearance section is one of the best ways to guide your visitors exactly where you want them to go.
If you’ve ever felt stuck or unsure about how to create and customize your menus, you’re not alone. This simple step can transform your site’s user experience and keep people coming back. You’ll learn exactly how to add a menu in WordPress Appearance quickly and without hassle.
Keep reading—you’ll have your menu set up in no time!

Credit: wordpress.org
Accessing The Appearance Menu
Accessing the Appearance menu is the first step to customize your WordPress site. This menu lets you control how your site looks and functions. Finding it is simple and takes just a few clicks. Follow these steps to get started.
Locating The Dashboard
Log in to your WordPress admin area. The Dashboard is the main screen you see after login. It shows an overview of your site’s activity. On the left side, you will find a vertical menu. This menu contains all the options you need to manage your site.
Navigating To Menus Section
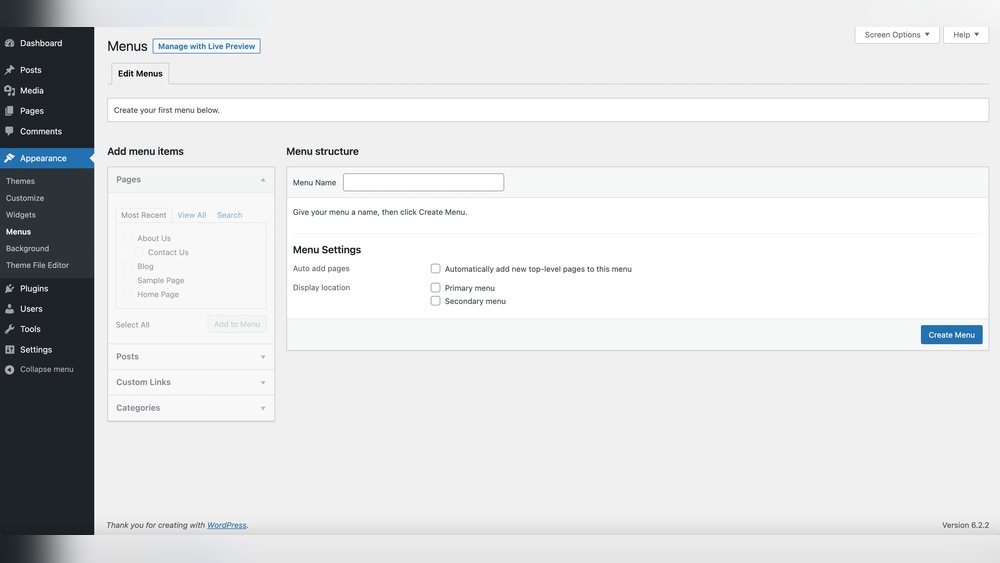
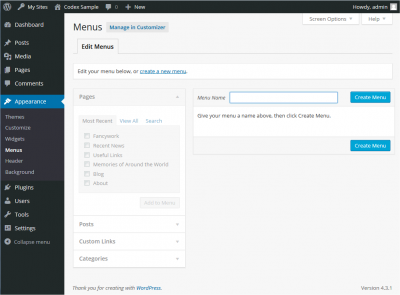
In the left menu, find the “Appearance” tab. Click on “Appearance” to open a submenu. Select “Menus” from the submenu. This opens the menu editor screen. Here, you can create and manage your site’s navigation menus easily.
Creating A New Menu
Creating a new menu in WordPress lets you organize your site’s links. Menus help visitors find important pages quickly. The process is simple and takes just a few steps. Follow along to create a menu that fits your site’s needs.
Naming Your Menu
Start by giving your menu a clear name. This helps you recognize it later. Use names like “Main Menu,” “Footer Menu,” or “Sidebar Menu.” Keep the name short and simple. A clear name makes managing menus easier as your site grows.
Adding Menu Items
After naming your menu, add items to it. You can add pages, posts, categories, or custom links. Select items from the left side and click “Add to Menu.” Arrange items by dragging them up or down. This order shows how they appear on your site. Adding the right links improves navigation for visitors.
Organizing Menu Structure
Organizing your menu structure helps visitors find content easily. A clear menu improves site navigation and user experience.
WordPress allows simple ways to arrange menu items. You can reorder them or create submenus to group related links.
Reordering Menu Items
To reorder menu items, drag and drop them in the menu editor. Place important pages at the top for quick access.
Keep the order logical and simple. Avoid cluttering the menu with too many items.
Creating Submenus
Submenus group related items under one main menu. Drag an item slightly to the right below another item to create a submenu.
Use submenus to organize content by topics or categories. This keeps the menu clean and easy to use.
Credit: codex.wordpress.org
Assigning Menu Locations
Assigning menu locations is a key step in setting up your WordPress site. It helps you decide where your menus will appear on your website. Each theme has specific spots for menus. You must assign your menu to these spots to make it visible to visitors.
This process is simple and quick. It ensures your site navigation is clear and easy to use. Let’s explore how to assign menu locations effectively.
Choosing Display Areas
WordPress themes offer different display areas for menus. Common spots include the header, footer, and sidebar. You can select one or multiple locations for your menu. Choose areas that suit your website’s design and user needs.
Some themes label these spots clearly, like “Primary Menu” or “Footer Menu.” Pick the location that matches your menu purpose. For example, use the header for main navigation. Use the footer for extra links or information.
Customizing Menu Settings
After selecting the menu location, customize its settings. You can control how the menu looks and behaves. Adjust options like menu style, alignment, and dropdown effects.
Some themes allow you to set menus for mobile views separately. This helps your site stay user-friendly on phones and tablets. Save your settings and preview the menu on your site. Make sure it fits well and functions smoothly.
Saving And Previewing Menu
After creating or editing a menu in WordPress, saving your work is essential. This step makes sure all the changes stay safe. Without saving, all your edits might be lost. Previewing the menu lets you see how it looks on your site. This helps catch any errors before visitors see the menu.
Saving Changes
Click the “Save Menu” button to keep your edits. It appears below the menu settings. Always save after adding or removing menu items. This action updates the menu on your website. You can save as many times as needed. Saving does not refresh your page or lose your work.
Previewing On Website
Visit your website to check the menu’s appearance. Open a new tab and load your homepage. Look at the menu to confirm it shows correctly. Check links by clicking each menu item. Make sure the menu matches your expectations. If it needs fixing, return to the menu editor and update it. Repeat saving and previewing until satisfied.
Credit: www.wpbeginner.com
Troubleshooting Common Issues
Sometimes, adding a menu in WordPress does not go as planned. You might face common problems that stop your menu from showing or working right. Understanding these issues helps fix them fast. This section covers two frequent problems and how to solve them.
Missing Menu Locations
Menu locations are spots in your theme where menus appear. Sometimes, these spots do not show up in the menu settings. This happens if the theme does not support menus or if the theme’s code lacks menu location registration.
Check if your theme supports menus by going to Appearance > Menus > Manage Locations. If no locations appear, switch to a default theme like Twenty Twenty-Three. If locations show up there, your original theme may lack menu support.
To fix missing locations, update your theme or add code to register menu locations in the functions.php file. This task may need help from a developer if you are not comfortable with coding.
Menu Not Displaying Correctly
Menus may appear but look wrong or have missing items. Styling issues often cause this. It can happen if the theme’s CSS conflicts with menu styles or if a plugin changes menu behavior.
Clear your browser cache and refresh the page. Sometimes, old styles cause display errors. Disable all plugins to see if a plugin causes the problem. If the menu looks right after disabling plugins, enable them one by one to find the culprit.
Switch to a default theme to test if the problem is theme-related. If the menu displays correctly with the default theme, your theme’s style or code may need fixing. Contact the theme developer for support or consider using a different theme.
Frequently Asked Questions
How Do I Add A New Menu In WordPress Appearance?
To add a new menu, go to Appearance > Menus in your WordPress dashboard. Click “Create New Menu,” name it, and add pages or links. Save the menu to apply changes.
Can I Customize Menu Locations In WordPress?
Yes, WordPress allows custom menu locations. After creating a menu, assign it to a theme location under “Menu Settings. ” This controls where the menu appears on your site.
What Items Can I Add To A WordPress Menu?
You can add pages, posts, custom links, and categories. Use the checkboxes in the Menus section to select items, then click “Add to Menu. “
How Do I Edit An Existing Menu In WordPress?
Go to Appearance > Menus, select your existing menu, then edit by adding or removing items. Rearrange items by dragging and drop. Save changes when done.
Conclusion
Adding a menu in WordPress Appearance is simple and quick. You just create a menu, add pages, and save it. Menus help visitors find your site’s content easily. Changing menus lets you keep your site fresh and organized. Practice a few times to get comfortable with the steps.
Your website will look better and work well for users. Keep menus clear and easy to use. This small task improves your whole site’s navigation and user experience.



