
Your website’s logo is more than just a picture—it’s the face of your brand. Adding your logo to your WordPress site helps visitors instantly recognize you and builds trust.
If you’re wondering how to add your logo quickly and easily, you’re in the right place. You’ll discover simple steps to get your logo on your site, even if you’re not tech-savvy. Stick with me, and by the end, your WordPress site will look more professional and truly yours.
Let’s dive in!
Credit: www.gavick.com
Choose The Right Logo Format
Choosing the right logo format is key to a clear and fast-loading website. A good logo format keeps your site looking professional. It also helps your site load quickly on all devices. This section guides you on the best file types and how to optimize logo size.
Best File Types For WordPress
PNG is a popular choice for logos. It keeps transparency and sharp edges. JPEG works well for logos with many colors. It compresses files to save space. SVG is perfect for vector logos. It scales without losing quality. Most WordPress themes support these formats. Pick one that fits your logo style best.
Optimizing Logo Size
Keep your logo file size small. Large files slow down your website. Aim for under 200 KB if possible. Resize the logo to fit your theme’s header. Usually, 250 to 400 pixels wide works well. Use tools like Photoshop or online compressors. They reduce size without losing clarity. A small, sharp logo helps your site load fast.
Accessing The WordPress Customizer
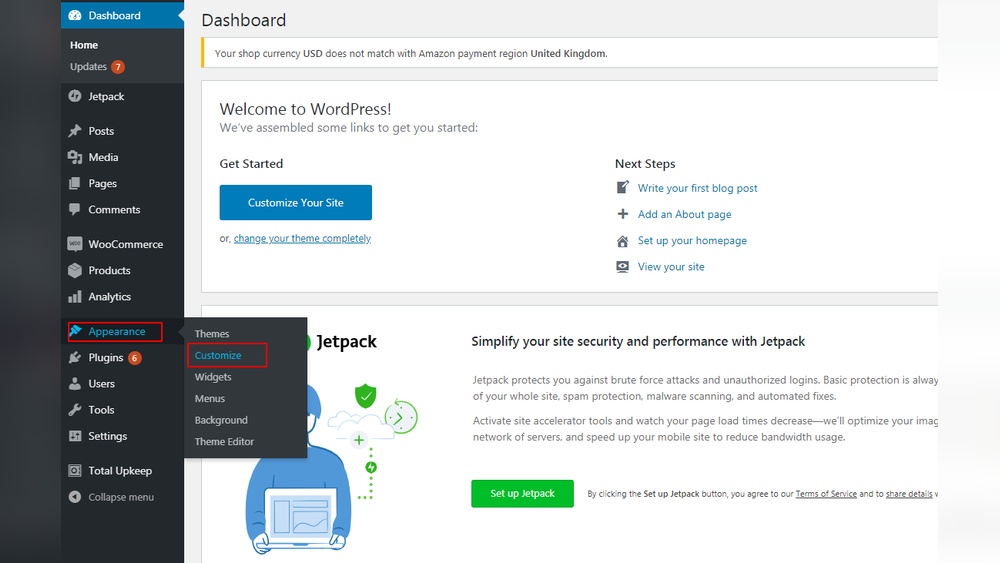
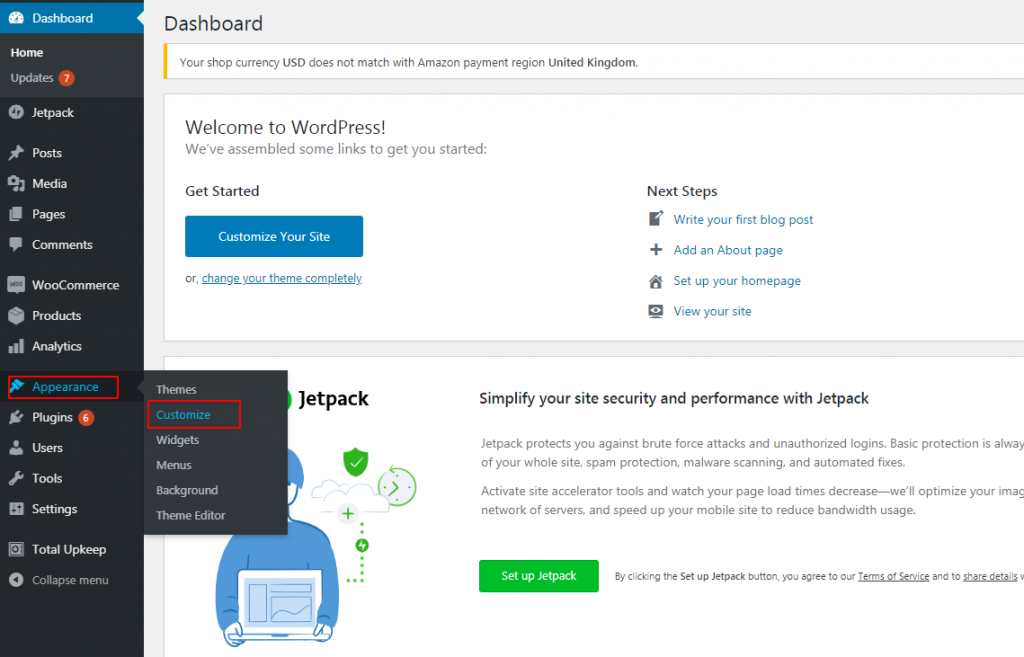
Accessing the WordPress Customizer is the first step to adding a logo. This tool lets you change many parts of your site. You can see your changes live before saving them. It makes editing easy and quick for anyone.
To start, you need to open the Customizer from your WordPress dashboard. It keeps all design settings in one place. You don’t need any special skills to use it.
Navigating To Site Identity
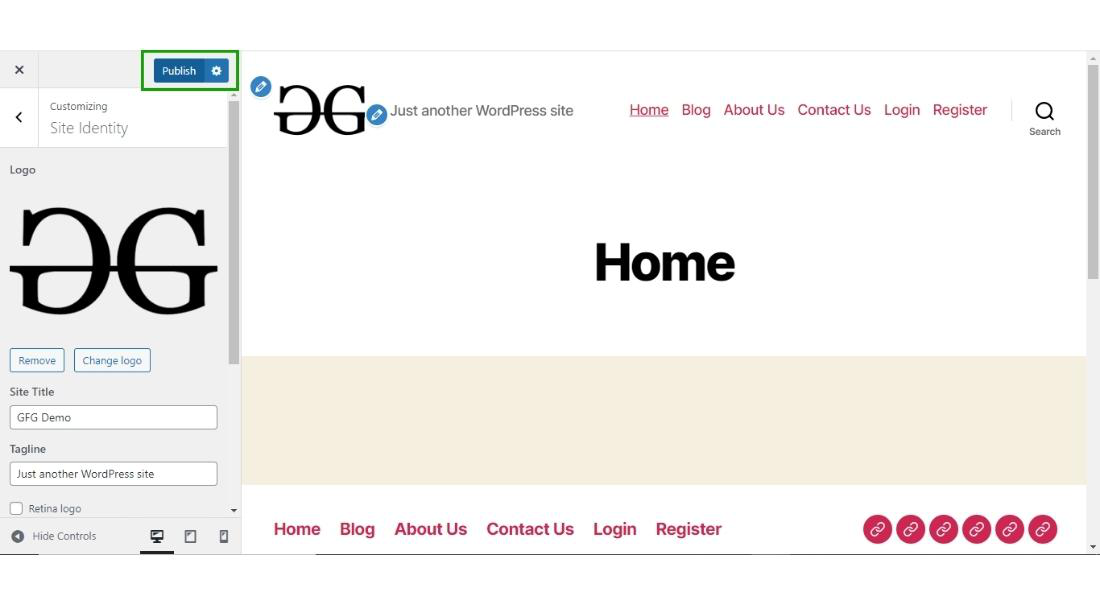
After opening the Customizer, find the “Site Identity” option. It is usually near the top of the menu. Click on it to open settings for your site’s name, tagline, and logo.
This section controls how your site looks to visitors. You can change your site title or add a logo. Everything is simple and clear here.
Locating The Logo Upload Section
Inside “Site Identity,” look for the logo upload area. It often says “Logo” or “Site Logo.” Click the button to upload a new image from your computer.
WordPress supports common image formats like PNG and JPEG. Choose a logo that fits your site well. After uploading, you can adjust its size if needed.
Uploading Your Logo
Uploading your logo in WordPress is a simple step to make your site look professional. A clear logo helps visitors recognize your brand instantly. This section guides you through the process of uploading your logo and adjusting its size.
Selecting And Uploading The File
Start by preparing your logo file. Use common formats like PNG, JPG, or SVG. PNG is best for logos with transparent backgrounds.
Go to your WordPress dashboard. Click on Appearance, then Customize. Find the Site Identity section.
Click on the Select Logo button. Choose your logo file from your computer. Upload it and click Select.
Adjusting Logo Dimensions
After uploading, you may see options to crop your logo. Crop only if necessary. Avoid cutting important parts.
Next, check how the logo looks on your site. Resize it if it appears too big or small.
Use the theme’s built-in controls or add custom CSS for precise sizing. Keep the logo clear and balanced with your site design.
Credit: www.inmotionhosting.com
Using Themes With Logo Options
Choosing a theme with built-in logo options makes adding your brand mark simple. These themes let you upload and show your logo without extra plugins or coding. The process saves time and keeps your site looking professional.
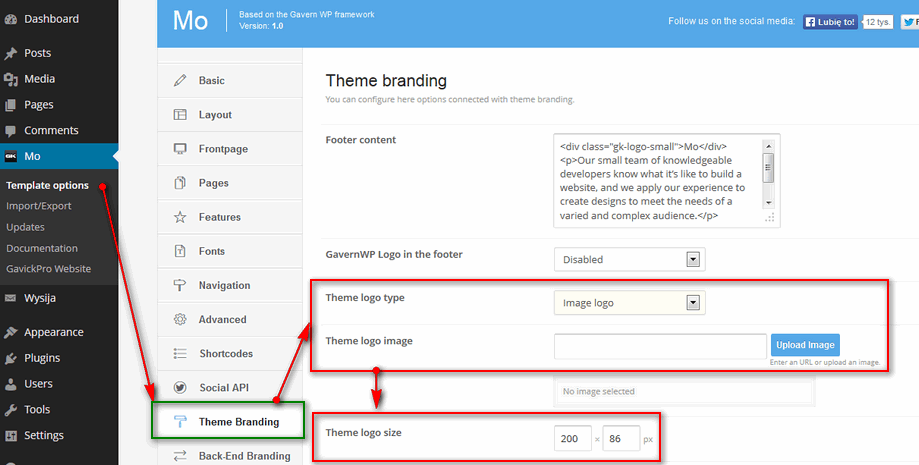
Many WordPress themes support logo uploads directly in their settings. You can change the logo size, style, and sometimes its position. This flexibility helps match your website’s design perfectly.
Popular Themes Supporting Logo Uploads
The most used themes include Astra, OceanWP, and GeneratePress. Each supports easy logo uploads through the WordPress Customizer. These themes are lightweight and work well for blogs, shops, and business sites. They offer clear options to upload and preview your logo live.
Other themes like Twenty Twenty-Three and Neve also have logo upload features. They provide simple controls for logo size and alignment. This makes them perfect for beginners who want quick customization.
Customizing Logo Placement
Logo placement can vary by theme. Some themes allow you to place the logo on the left, center, or right of the header. This gives your site a unique look that fits your brand style.
Use the WordPress Customizer to test different logo positions. Check how the logo looks on desktop and mobile screens. Adjust spacing and size to keep your logo clear and balanced.
Some themes offer advanced options like sticky headers with logos or logo display on scroll. Explore these to enhance your site’s user experience without extra plugins.
Adding A Logo Via Plugins
Adding a logo using plugins in WordPress offers an easy way to customize your website. Plugins simplify the process and give extra features. You can manage logos without touching code or theme files.
Plugins let you upload, resize, and position your logo with just a few clicks. They work well for beginners and users who want quick results. Many plugins also support multiple logos for different devices.
Top Plugins For Logo Management
Several plugins help you add and manage logos in WordPress. “WP Logo Showcase” is popular for creating logo grids and sliders. “Logo Carousel” allows rotating logos with smooth animations. “Customify” offers logo upload options with live preview. “Site Logo” plugin focuses on simple logo placement without extra settings.
Step-by-step Plugin Setup
Start by installing your chosen logo plugin from the WordPress dashboard. Go to Plugins > Add New, then search the plugin name. Click Install and then Activate.
Next, open the plugin settings page. Usually found under Appearance or in the main menu. Upload your logo file using the provided upload button. Adjust size, alignment, or other options as needed.
Save changes and visit your site to see the logo in place. Clear cache if the logo does not appear immediately. Repeat these steps to change or update your logo anytime.
Credit: www.geeksforgeeks.org
Troubleshooting Common Issues
Adding a logo to your WordPress site should be simple. Sometimes, problems happen. These issues can stop your logo from showing or make it look bad. Troubleshooting helps fix these problems fast. It saves time and keeps your site looking professional. Below are common issues and how to solve them.
Logo Not Displaying Correctly
Sometimes the logo does not appear or looks broken. This can happen if the file is not uploaded properly. Check the image file path in your theme settings. Make sure the file format is supported, like PNG or JPEG. Clear your browser cache to see changes. Disable any plugins that might block images. Also, confirm your theme supports custom logos.
Fixing Image Quality Problems
Low-quality logos look pixelated or blurry. This happens when the image size is too small. Use a high-resolution image for better clarity. Resize the logo to fit your site’s recommended dimensions. Avoid stretching the image as it lowers quality. Compress the image to reduce file size without losing sharpness. Tools like TinyPNG help with compression. Upload the optimized image for a crisp, clear logo.
Tips For Stunning Branding
Creating a strong brand starts with a clear and attractive logo. Your logo must look great on all devices. It should also match your website’s style. These tips help you build a stunning and consistent brand.
Consistency Across Devices
Your logo needs to appear perfect on phones, tablets, and desktops. A logo that looks good on a big screen might look blurry on a small one. Choose a high-quality image that scales well. Test your logo on different devices to check its clarity and size. Keep the logo placement the same on all pages. This consistency helps visitors recognize your brand easily.
Complementing Site Design
Your logo should match your site’s colors and style. Pick logo colors that blend with your website’s theme. Avoid clashing colors that distract visitors. The logo’s shape and size should fit well with your site layout. A neat and simple logo works best for most designs. This harmony creates a smooth and professional look.
Frequently Asked Questions
How Do I Add A Logo In WordPress Header?
To add a logo in WordPress header, go to Appearance > Customize > Site Identity. Upload your logo image and save changes. This method works with most themes and improves brand visibility instantly.
What Image Size Is Best For WordPress Logos?
The best WordPress logo size is usually between 200×50 and 400×100 pixels. Check your theme’s recommended size for optimal display. Using the right size ensures your logo looks crisp and fits well on all devices.
Can I Add A Logo Without A Plugin In WordPress?
Yes, you can add a logo without a plugin by using the WordPress Customizer. Navigate to Appearance > Customize > Site Identity and upload your logo directly. This keeps your site lightweight and easy to manage.
How To Replace An Existing Logo In WordPress?
To replace your current logo, go to Appearance > Customize > Site Identity. Click on the existing logo and upload a new image. Save changes to update your site’s branding instantly.
Conclusion
Adding a logo to your WordPress site is simple and quick. It helps visitors recognize your brand easily. You can use the WordPress Customizer or theme options to upload your logo. Make sure your logo looks good on all devices.
Check the size and format before uploading. A clear logo builds trust and makes your site look professional. Keep your branding consistent across your website. Now, your site feels more personal and inviting. Start today and give your website a fresh, unique look.



