

Are you looking to make your WordPress posts more engaging and visually appealing? Adding images is one of the easiest ways to grab your readers’ attention and keep them interested.
But if you’re unsure how to add an image to your WordPress post, you’re not alone. This guide will walk you through the simple steps to insert images quickly and effectively, so your content stands out. Keep reading, and you’ll learn how to make your posts look professional and inviting in no time.
Choosing The Right Image
Choosing the right image for your WordPress post is important. The image should match your content and catch readers’ attention. A good image makes your post look professional. It also helps explain your message better. Picking the right image format, size, and source matters a lot. This guide covers key points to help you select the best image.
Image Formats To Use
Use common image formats that work well on the web. JPEG is good for photos with many colors. It keeps quality and file size balanced. PNG works best for images with transparent backgrounds or simple graphics. GIF is suitable for small animations but has limited colors. Avoid using large or uncommon formats. They might slow down your site or not display properly.
Optimizing Image Size
Large images slow down your website. Resize images to fit your post layout. Aim for a width around 1200 pixels. Compress images to reduce file size without losing quality. Tools like TinyPNG or ImageOptim help shrink images. Faster loading keeps visitors happy and improves SEO. Always check your image size before uploading.
Sources For High-quality Images
Choose clear, sharp images for the best look. Use trusted sources for free or paid images. Websites like Unsplash, Pexels, and Pixabay offer many free photos. Stock photo sites like Shutterstock provide professional images for a fee. Avoid blurry or pixelated pictures. Always respect copyright rules and give credit if needed.
Accessing The WordPress Editor
Accessing the WordPress editor is the first step to adding images to your post. This editor is where you create and format your content. WordPress offers two main types of editors. Each editor has its own way of working with images and text. Knowing the difference helps you add images smoothly.
Classic Editor Vs Block Editor
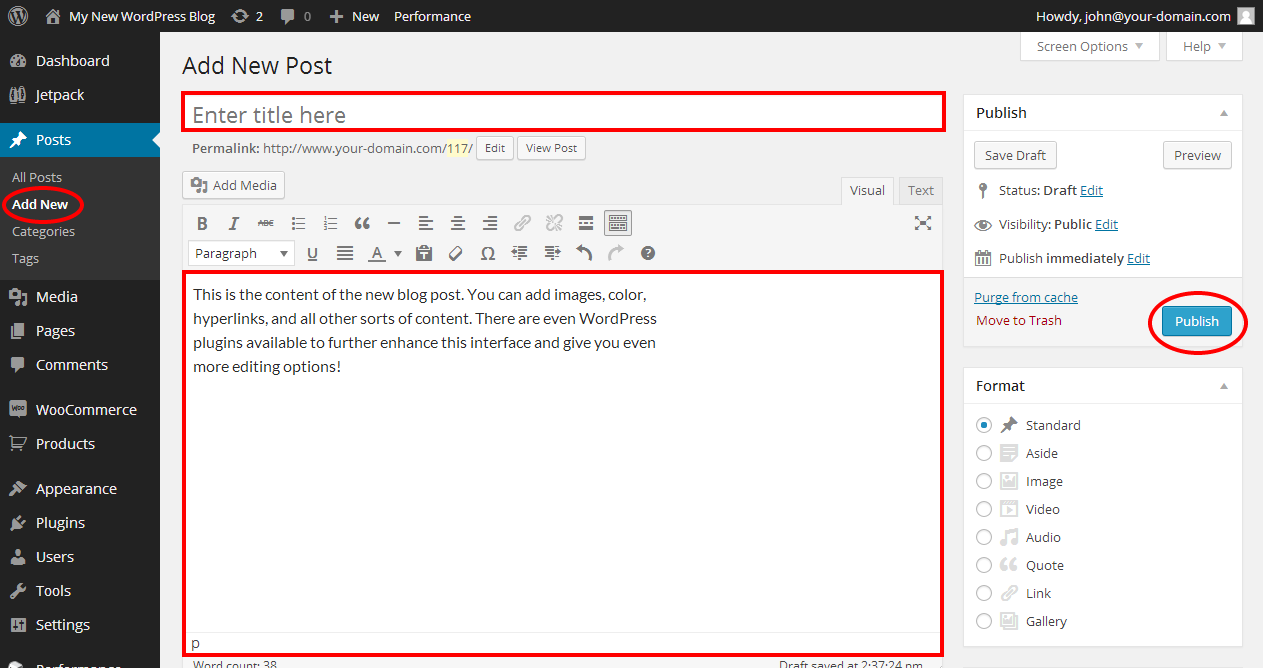
The Classic Editor looks like a simple word processor. It has a toolbar with buttons for bold, italics, and adding images. You add images by clicking the “Add Media” button above the text box. The image then appears where your cursor is.
The Block Editor, also called Gutenberg, works differently. It uses blocks for each content type. You add an image block for pictures. This block lets you upload, select, or drag images easily. The Block Editor gives more control over layout and design.
Navigating To Your Post
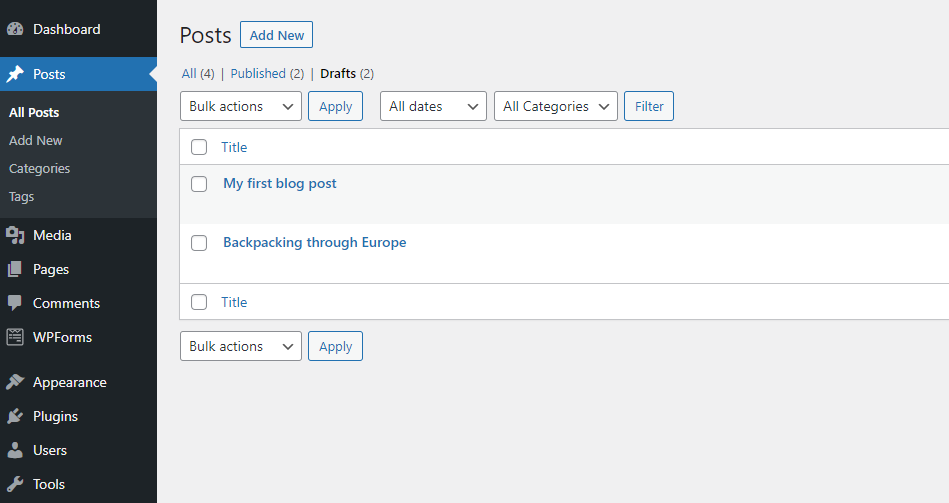
Start by logging into your WordPress dashboard. On the left menu, find the “Posts” section. Click “All Posts” to see your existing posts. Choose the post you want to edit by clicking its title.
If you want to create a new post, click “Add New” under the “Posts” menu. The editor will open automatically. Now you can start adding images and text. The process is simple and quick in both editors.
Uploading Images
Uploading images to a WordPress post is simple and fast. Images make your content more attractive and easier to understand. This section explains three easy ways to upload images.
Using The Media Library
The Media Library stores all your uploaded images. Click the “Add Media” button above the post editor. Choose “Upload Files” to select images from your computer. After uploading, click “Insert into post” to add the image. You can also pick images already in the library. This method keeps your images organized and ready for use.
Drag And Drop Upload
Drag and drop lets you add images quickly. Open the post editor and drag an image file from your desktop. Drop it into the editor area. WordPress will upload and place the image automatically. This method saves time and is easy for beginners. No need to open the media library separately.
Uploading From Url
Upload images directly from a web address. Click the “Add Media” button, then select “Insert from URL.” Paste the image’s link into the box. WordPress will fetch the image and add it to your post. This method is useful for images hosted elsewhere. Make sure you have permission to use the image.
Credit: www.ipage.com
Inserting Images Into Posts
Images make posts more attractive and clear. They help explain ideas better than words alone. Adding pictures to your WordPress posts is simple. This guide shows how to insert images easily.
Adding Images In Classic Editor
Open the post in the Classic Editor. Click the “Add Media” button above the toolbar. Choose an image from your library or upload a new one. Select the image and click “Insert into post.” The picture appears where the cursor is placed.
You can edit the image by clicking on it. Resize or add a link to the image quickly. Save or update the post to keep changes.
Adding Images With Gutenberg Blocks
Gutenberg uses blocks for content. Click the plus (+) icon to add a block. Select the “Image” block from the list. Upload a new picture or pick one from the media library. The image will show inside the block.
You can drag and drop images directly into the editor. This method is fast and easy. Each image block is independent, so you can move or edit it freely.
Positioning And Alignment
Place images to improve post flow and look. Select an image to see alignment options. Choose left, center, or right alignment. This controls how text wraps around the image.
Use “Full Width” for large images across the post. “Wide Width” fits a bigger area but not full screen. Adjust image size using drag handles or settings panel.
Customizing Image Appearance
Customizing the appearance of images in a WordPress post helps make your content clear and attractive. Small changes can improve how visitors see your images and understand your message. Focus on simple steps to enhance each image without much effort. These tweaks make your post look professional and easy to read.
Adding Captions And Alt Text
Captions provide a short description below the image. They explain what the image shows. Captions can help readers understand the picture better. Alt text describes the image for people who use screen readers. It also helps search engines know what the image is about. Write clear and simple alt text with important keywords. Keep captions brief and relevant.
Resizing And Cropping
Resizing changes the size of the image to fit your post. It helps keep the page fast and neat. Use WordPress tools to make images smaller or bigger. Cropping removes unwanted parts of the image. It focuses attention on the main subject. Crop images to match the space in your post. Always keep the image clear and not stretched.
Applying Image Links
Image links make pictures clickable. You can link to a larger version of the image. Or link to another page or website. Adding links adds value and guides readers. Use WordPress settings to add or remove links easily. Make sure links open in a new tab. This keeps readers on your site longer.
Enhancing Visuals With Plugins
Adding images to WordPress posts is easy and effective. Plugins help improve how images look and work on your site. They make your posts more engaging and help pages load faster. Plugins also help with SEO, so your images can bring more visitors. Using the right plugins can enhance your visuals without slowing your site.
Popular Image Gallery Plugins
Image gallery plugins help create beautiful photo displays. They offer layouts like grids, sliders, and mosaics. Some popular plugins include Envira Gallery, NextGEN Gallery, and FooGallery. These tools let you organize many images neatly. Visitors enjoy browsing pictures in a clean, easy way.
Lazy Loading For Faster Pages
Lazy loading delays image loading until they appear on the screen. This speeds up page load times and saves bandwidth. Plugins like a3 Lazy Load and Lazy Load by WP Rocket handle this well. Faster pages keep visitors happy and reduce bounce rates. Lazy loading also improves your site’s performance on mobile devices.
Image Seo Plugins
Image SEO plugins optimize images to rank better on search engines. They add alt text, titles, and captions automatically or with ease. Plugins such as SEO Friendly Images and Smush help with this task. Optimized images bring more traffic from image search results. These plugins also compress images without losing quality.
Troubleshooting Common Issues
Troubleshooting common issues can save time and frustration when adding images to WordPress posts. Some problems appear often but have simple fixes. Understanding these can improve your site’s look and speed.
Image Not Displaying
Sometimes images do not show on your post. Check if the image file is uploaded correctly. Confirm the file format is supported like JPG, PNG, or GIF. Also, verify the image URL is correct in the post editor. Clear your browser cache to see recent changes. Ensure your theme or plugins are not blocking images.
Slow Loading Times
Large image files cause slow page loading. Use smaller or compressed images to speed up your site. Resize images before uploading to match the display size. Use plugins that optimize images automatically. Slow loading can hurt user experience and SEO rankings. Fast images keep visitors engaged.
Broken Links
Broken links happen if the image URL changes or the file is deleted. Check the link in the post editor for typos or errors. Upload images to your WordPress media library to avoid broken links. Avoid using external image URLs that might become unavailable. Regularly check your posts for broken image links.

Credit: wordpress.org
Credit: www.hostinger.com
Frequently Asked Questions
How Do I Add An Image To A WordPress Post?
To add an image, open your post editor and click the “Add Media” button. Upload your image or select one from the media library. Insert it into the post and adjust the size or alignment as needed before publishing.
Can I Add Images From My Computer To WordPress Posts?
Yes, you can upload images directly from your computer. Click “Add Media” in the post editor, select “Upload Files,” then choose your image. WordPress will store it in the media library for easy insertion and reuse.
How Do I Optimize Images For WordPress Posts?
Optimize images by resizing them to appropriate dimensions and compressing the file size. Use descriptive file names and add ALT text for SEO and accessibility. This ensures faster loading times and better search engine rankings.
What Image Formats Are Supported In WordPress Posts?
WordPress supports JPEG, PNG, GIF, ICO, and WebP image formats. JPEG is best for photos, PNG for graphics with transparency, and GIF for animations. Choose the format that fits your image quality and file size needs.
Conclusion
Adding images to your WordPress post is simple and fast. Just follow the steps carefully. Images make your content more interesting and clear. They help readers understand your message better. Always choose good quality pictures that fit your topic. Don’t forget to add alt text for SEO and accessibility.
Practice a few times to get comfortable with the process. Soon, adding images will feel natural and easy. Keep your posts fresh and engaging by using pictures wisely. Your readers will appreciate it.



