
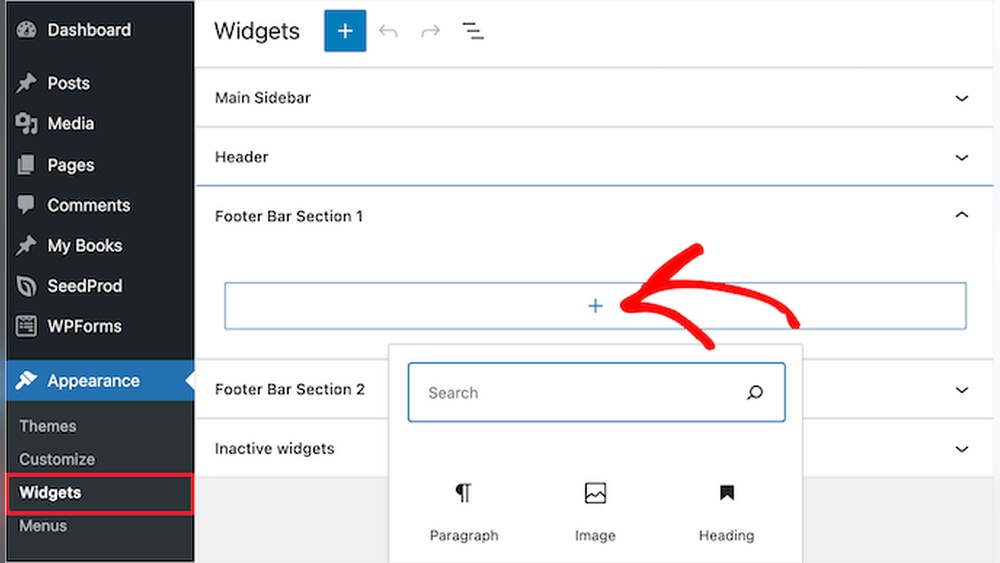
Are you looking to make your WordPress site easier to navigate and more professional? Adding a footer menu is a simple yet powerful way to do just that.
A well-designed footer menu helps your visitors find important links quickly, boosting their experience and keeping them engaged longer. In this guide, you’ll learn exactly how to add a footer menu in WordPress, step by step, without any confusion. By the end, you’ll have a clean, organized footer that makes your site look polished and user-friendly.
Let’s get started!
Prepare Your Footer Menu Items
Preparing your footer menu items is the first step to creating a useful footer. Choose the right pages and links that your visitors need. Organize them clearly. This helps users find important information easily. A well-planned footer menu improves your website’s navigation.
Choose Pages And Links
Pick pages that are important for your visitors. Common choices include About Us, Contact, Privacy Policy, and Terms of Service. These pages provide key information. Avoid cluttering the menu with too many links. Keep it simple and relevant.
Create Custom Links
Add custom links to your footer for extra navigation options. For example, link to social media profiles or external resources. Custom links help users connect with your brand on other platforms. Use clear and short link names for easy understanding.
Organize Menu Structure
Arrange your footer menu items in a logical order. Group related links together. Use categories if needed, like Support or Legal. A neat structure makes your footer look clean and professional. It guides visitors to find information quickly.
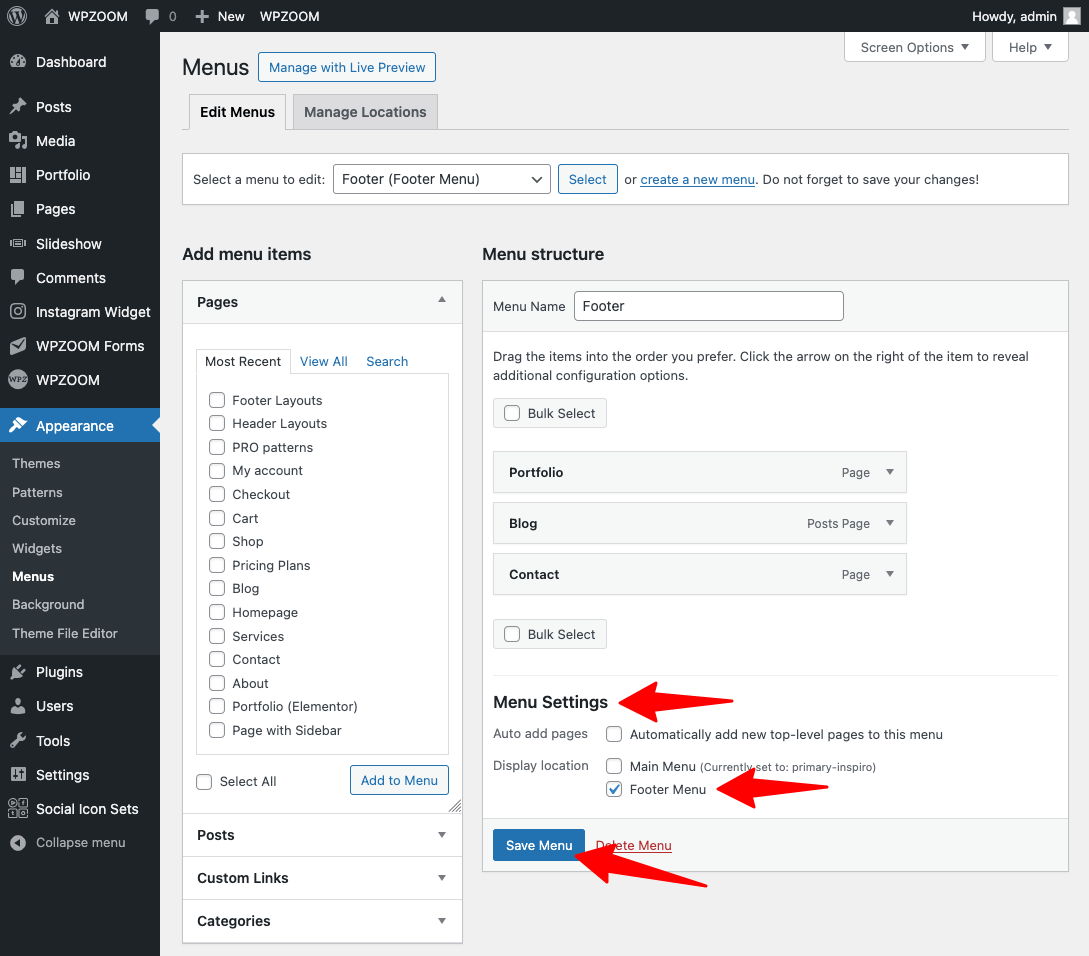
Credit: www.wpzoom.com
Access WordPress Menu Settings
Accessing the WordPress menu settings is the first step to create a footer menu. These settings let you control the links shown in your site’s footer area. Finding and using the menu editor is simple and fast.
Follow the steps below to open the menu settings and start organizing your footer menu. This will help you make your website easier to navigate for visitors.
Navigate To Appearance Menu
Log in to your WordPress dashboard. Look at the left side panel. Find the option called “Appearance.” Click on it. A list of options will appear. Choose “Menus” from this list. This leads you to the menu settings page.
Open Menu Editor
The menu editor shows all your current menus. You can select an existing menu or create a new one. To make a footer menu, click on “create a new menu.” Name your menu something like “Footer Menu.” Now, you can add pages, links, or categories to this menu. Arrange them by dragging up or down. Save your menu when done. This menu can now be set to appear in the footer area of your website.
Create A New Footer Menu
Creating a new footer menu in WordPress is a simple process. It helps organize links at the bottom of your website. This section guides you through the steps to set up your footer menu easily.
First, you will create the menu structure. Then, you add important links that visitors can use. Follow these steps to make your footer menu clear and useful.
Name Your Menu
Start by going to the WordPress dashboard. Find the “Appearance” section, then click on “Menus.” Click the “Create a new menu” button. Give your menu a clear name, like “Footer Menu.” This helps you identify it later. Click “Create Menu” to save the name.
Add Items To Menu
After naming your menu, add items to it. On the left side, you will see pages, posts, and custom links. Select the pages or links you want in the footer. Click “Add to Menu” to include them. Arrange the items by dragging them up or down. Save the menu when you finish.
Assign Menu To Footer Location
Assigning a menu to the footer area is a key step in customizing your WordPress site. This process places your chosen menu at the bottom of every page. Visitors can then easily find important links in the footer section.
The footer menu often includes links like Contact, Privacy Policy, or About Us. Setting this up correctly improves navigation and user experience. Follow the steps below to assign your menu to the footer location.
Locate Footer Menu Area
Start by logging into your WordPress dashboard. Go to the Appearance menu and select Menus. Here, you will see different menu locations set by your theme.
Look for the area labeled Footer, Footer Menu, or similar. This name varies depending on your active theme. Identifying this area is essential to assign the correct menu.
Set Menu As Footer
After locating the footer menu area, choose the menu you want to display. Use the dropdown menu to select your desired menu.
Check the box next to Footer or Footer Menu to assign it. Click the Save Menu button to confirm your choice.
Visit your site to see the footer menu live. Adjust the menu items anytime by returning to the Menus page.
Customize Footer Menu Appearance
Customizing the footer menu appearance helps create a consistent look for your website. It improves user experience and makes navigation easier. You can change colors, fonts, spacing, and more. WordPress offers simple tools to style your footer menu without complex coding.
Use Theme Customizer
The Theme Customizer is the easiest way to change your footer menu style. Go to Appearance > Customize in your WordPress dashboard. Look for the Footer or Menu section. Here, you can adjust colors, fonts, and layout options. Some themes let you set background colors or add borders to the footer menu.
Changes appear in real-time, so you see how your menu looks before saving. This tool works well for basic style tweaks. It keeps your design consistent with the theme’s overall style.
Add Custom Css If Needed
Custom CSS lets you control your footer menu style more precisely. Use this if the Theme Customizer options are limited. Go to Appearance > Customize > Additional CSS. Add your CSS code here to change fonts, spacing, or hover effects.
For example, you can change menu link colors or add padding around items. Custom CSS helps match your footer menu to your brand colors. It also lets you fix small style problems quickly.

Credit: www.youtube.com
Test Footer Menu On Website
Testing the footer menu on your website is important. It ensures that visitors have a smooth experience. A well-tested footer menu improves site usability and navigation. You can catch errors before users do. This step helps maintain a professional website look. Follow these checks to confirm your footer menu works perfectly.
Check Responsiveness
Open your website on different devices. Use a smartphone, tablet, and desktop. See if the footer menu looks good on each screen. The menu should adjust and fit well. Text and links must be easy to read and click. Test in portrait and landscape modes. A responsive footer keeps visitors engaged everywhere.
Verify Links Functionality
Click each link in the footer menu. Make sure they lead to the correct pages. No broken or empty links allowed. Check if links open in the right way. External links should open in a new tab. Fix any wrong or missing URLs. Working links build trust and improve user experience.
Troubleshoot Common Issues
Troubleshooting helps fix common problems with your WordPress footer menu. Some issues may stop the menu from showing or cause wrong items to appear. Styling problems can make the menu look different than expected. This section explains how to solve these common issues quickly.
Menu Not Showing
Check if you assigned the menu to the footer location in WordPress. Go to Appearance > Menus and confirm the menu is set for the footer area. Clear your website cache and browser cache to refresh changes. Disable plugins one by one to find conflicts. Sometimes, a theme may not support footer menus. Try switching to a default theme to test this.
Incorrect Menu Items
Verify the menu contains the correct links in the Menu editor. Remove any unwanted items and add missing pages or links. Save the menu after making changes. Check if you created multiple menus and assigned the wrong one to the footer. Also, check for custom links that may have wrong URLs. These small errors cause incorrect items to appear.
Styling Problems
Styling issues may result from theme CSS or custom code. Use browser developer tools to inspect menu elements and find CSS conflicts. Add custom CSS in the Customizer or child theme to fix colors, fonts, or spacing. Avoid inline styles as they can break on theme updates. Clear caches after updating styles to see changes. Test your site on different devices to ensure consistent appearance.
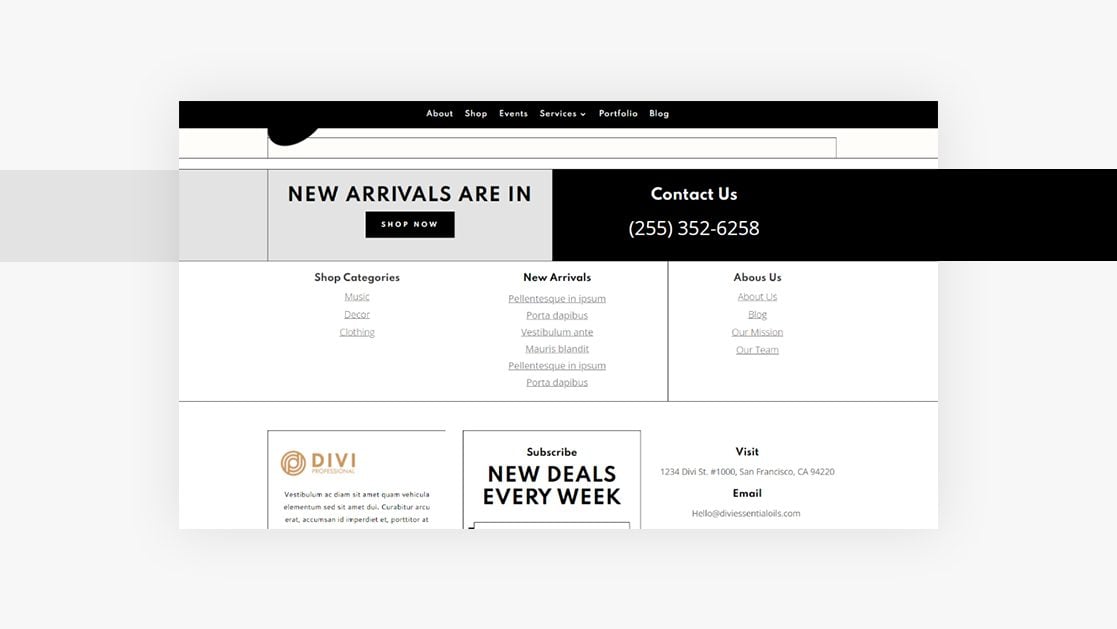
Credit: www.elegantthemes.com
Frequently Asked Questions
How Do I Create A Footer Menu In WordPress?
To create a footer menu, go to Appearance > Menus in your WordPress dashboard. Create a new menu, add desired pages, and assign it to the footer location. Save changes, and your footer menu will appear on your website’s footer area.
Can I Customize The Footer Menu Appearance?
Yes, you can customize the footer menu appearance using the WordPress Customizer or by adding custom CSS. Many themes also offer specific footer menu styling options. This helps match the footer menu with your site’s overall design and branding.
What Pages Should I Include In A Footer Menu?
Include important but less prominent pages like Privacy Policy, Terms of Service, Contact Us, and About Us. Footer menus provide easy access to essential information without cluttering the main navigation.
Is A Footer Menu Important For Seo?
Yes, a footer menu helps improve website navigation and user experience. It allows search engines to discover important pages easily, enhancing your site’s SEO performance and structure.
Conclusion
Adding a footer menu in WordPress helps visitors find important links easily. It improves your site’s navigation and user experience. Creating and customizing the menu takes just a few simple steps. You can update the footer anytime to keep your site fresh.
A clear footer menu makes your website look more professional. Try adding one today to help your visitors explore better.



