

Are you looking to give your WordPress site a fresh, unique look? Changing fonts can make a big difference in how your visitors feel and engage with your content.
But how do you add new fonts to your WordPress theme without breaking anything? You’ll discover simple, step-by-step methods to add fonts that match your style and brand. By the end, you’ll have the tools to make your website stand out and keep your readers coming back for more.
Ready to transform your site’s appearance? Let’s dive in!

Credit: www.hosted.com
Choose The Right Font
Choosing the right font is key to making your website look good and feel right. Fonts show your site’s personality and help visitors read your content easily. Picking a font that fits your theme makes your site more inviting and professional.
Consider Your Brand Style
Your font should match your brand’s look and feel. Think about your brand’s tone: Is it serious, fun, or casual? A clean, simple font suits a professional brand. A playful font works for creative or casual sites. Keep fonts consistent with your brand colors and logo.
Explore Popular Font Libraries
Many free and paid font libraries offer great choices. Google Fonts is popular and easy to use. Adobe Fonts has many stylish options. These libraries make it easy to find fonts that fit your style. They also provide code to add fonts to your WordPress theme.
Check Font Compatibility
Make sure your chosen font works well on all devices. Test it on phones, tablets, and desktop screens. Check if it loads fast without slowing your site. Use fonts that show correctly in different browsers. Good compatibility keeps your site looking great for everyone.
Credit: www.greengeeks.com
Prepare Font Files
Preparing font files is an important first step to add custom fonts to your WordPress theme. Fonts come in different formats and need to be ready for the web. Organizing these files helps avoid problems later. This section explains how to download and arrange your font files properly.
Download Font Formats
Fonts must be in web-friendly formats. Common formats include TTF, OTF, WOFF, and WOFF2. WOFF and WOFF2 are best for websites because they load fast. Download all available formats to ensure compatibility with different browsers. Choose fonts from trusted sources to avoid legal issues.
Organize Files For Upload
Create a folder on your computer for your fonts. Name it clearly, like “custom-fonts”. Place all downloaded font files inside this folder. Keep the folder simple and neat. This helps you upload fonts quickly to WordPress later. Proper organization saves time and prevents mistakes.
Add Fonts Via Theme Customizer
Adding fonts to your WordPress theme can improve your website’s look. The Theme Customizer lets you change fonts easily. No need to touch code or use extra plugins.
This method works for many themes that support font customization. You can upload custom fonts or choose from Google Fonts. Then, apply fonts to headings, paragraphs, and more.
Access Theme Customizer
Log in to your WordPress dashboard. Go to Appearance > Customize. The Theme Customizer will open on the left side. Here you find options to change fonts and styles.
Upload Fonts Or Select Google Fonts
Look for the Typography or Fonts section in the Customizer. Some themes let you upload font files like .woff or .ttf. Others offer a list of Google Fonts to choose from. Pick fonts that fit your site’s style and are easy to read.
Apply Fonts To Different Elements
Inside the Typography settings, you see options for headings, body text, and menus. Select each element and choose the font you want. Save changes and preview your site to see how fonts look on different parts.
Use Custom Css For Fonts
Using custom CSS to add fonts in your WordPress theme gives you control over your site’s style. You can choose fonts that match your brand or personal taste. Custom CSS lets you define fonts without changing theme files directly. This way, your changes stay safe during theme updates.
Adding fonts through custom CSS is simple. Write CSS rules that tell the browser which fonts to use. You can apply fonts to the whole site or just specific parts. This method works well with fonts from services like Google Fonts or fonts you upload yourself.
Write Font-family Rules
Start by writing a CSS rule with the font-family property. This tells the browser which font to use. List several fonts as fallbacks in case the first font is unavailable. For example:
body { font-family: 'Open Sans', Arial, sans-serif; }This rule sets “Open Sans” as the main font. If it’s not available, it uses Arial or a generic sans-serif font.
Target Specific Elements
Fonts don’t have to apply everywhere. Use CSS selectors to target headings, paragraphs, or menus. For instance:
h1, h2, h3 { font-family: 'Roboto Slab', serif; } p { font-family: 'Lato', sans-serif; }This code gives headings a serif font and paragraphs a sans-serif font. Targeting specific elements lets you create a clear style hierarchy.
Test Font Appearance
After adding your CSS, check how fonts look on different devices. Some fonts may appear too small or hard to read. Adjust font sizes or line heights as needed. Use browser tools to preview your changes quickly. Testing ensures your site looks good and stays readable.
Install Font Plugins
Installing font plugins is a simple way to add new fonts to your WordPress theme. Plugins help you manage fonts without editing code. They offer many font choices and easy controls. This method saves time and keeps your site looking professional.
Choose Reliable Plugins
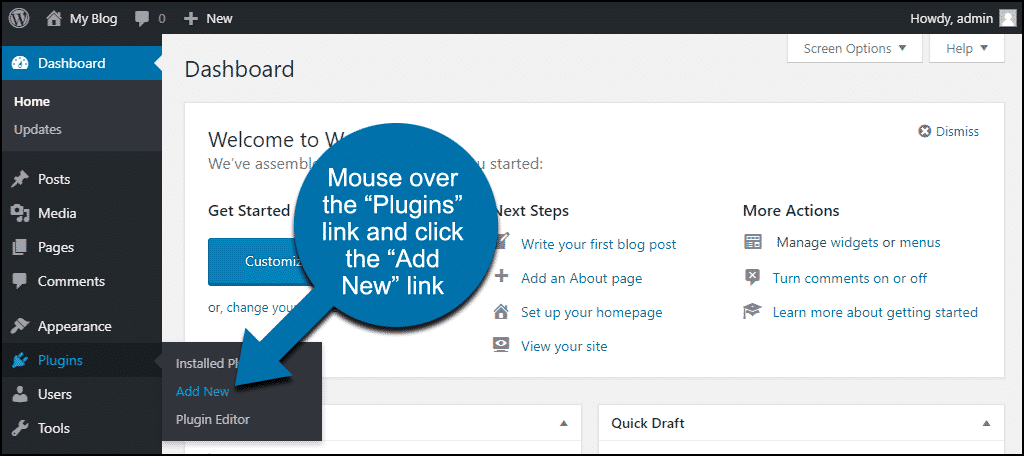
Select plugins with high ratings and many downloads. Check user reviews to see if they work well. Pick plugins updated regularly for security and compatibility. Popular options include Easy Google Fonts and Custom Fonts.
Configure Plugin Settings
After installing, go to the plugin settings page. Choose the fonts you want to use on your site. Set font styles for headings, paragraphs, and menus. Save your changes to apply the fonts across your theme.
Add Fonts Without Coding
Font plugins let you add fonts using simple menus. No need to touch HTML or CSS files. Use the plugin interface to select fonts and assign them to site elements. This makes font changes fast and safe for beginners.
Optimize Fonts For Performance
Optimizing fonts for performance is key to a fast and smooth WordPress site. Fonts can slow down your pages if not managed well. Fast loading improves user experience and helps your SEO rankings.
Focus on reducing font load times and avoiding layout shifts. Small changes make a big difference.
Limit Number Of Fonts
Use only a few font families on your site. Each font adds extra loading time. Stick to two or three fonts to keep your site fast and clean.
Too many fonts create clutter and slow page speed. Pick fonts that work well together for a simple design.
Use Font Display Swap
Font display swap tells the browser to show a fallback font first. Then it swaps to your custom font when ready. This avoids blank text during loading.
This method keeps text visible and improves user experience. It reduces the chance visitors see nothing while fonts load.
Leverage Browser Caching
Browser caching stores fonts locally on a visitor’s device. Returning visitors load fonts from their cache, not your server.
This cuts down load times for repeat visits. Use caching headers to set font expiry times in your server settings.
Troubleshoot Common Font Issues
Adding fonts to a WordPress theme can sometimes cause issues. Fonts may not load, clash with other fonts, or display poorly on mobile devices. Fixing these problems improves your site’s look and user experience.
Here are common font problems and how to solve them quickly.
Fix Loading Problems
Fonts might not load if the link is broken or slow. Check your font URL for errors. Use reliable font providers like Google Fonts. Clear your website cache to refresh changes. Sometimes, slow internet or server delays cause loading issues. Try loading the site on different browsers to test.
Resolve Font Conflicts
Multiple fonts can clash and cause display errors. Avoid using too many fonts on one page. Check your CSS for font-family conflicts. Use specific font names in your style rules. Remove extra font declarations that override each other. Test your site visually to spot font clashes early.
Ensure Mobile Compatibility
Fonts that look good on desktop may fail on mobile. Use responsive font sizes with CSS media queries. Test your site on phones and tablets regularly. Choose fonts designed for web and mobile use. Avoid very thin or small fonts that are hard to read on small screens. Mobile-friendly fonts improve readability and user comfort.
Credit: www.hostinger.com
Frequently Asked Questions
How Do I Add Google Fonts To My WordPress Theme?
To add Google Fonts, use the wp_enqueue_style function in your theme’s functions. php file. Include the Google Fonts URL and enqueue the style properly. This method ensures fonts load efficiently and stay updated with Google’s servers.
Can I Upload Custom Fonts To WordPress Themes?
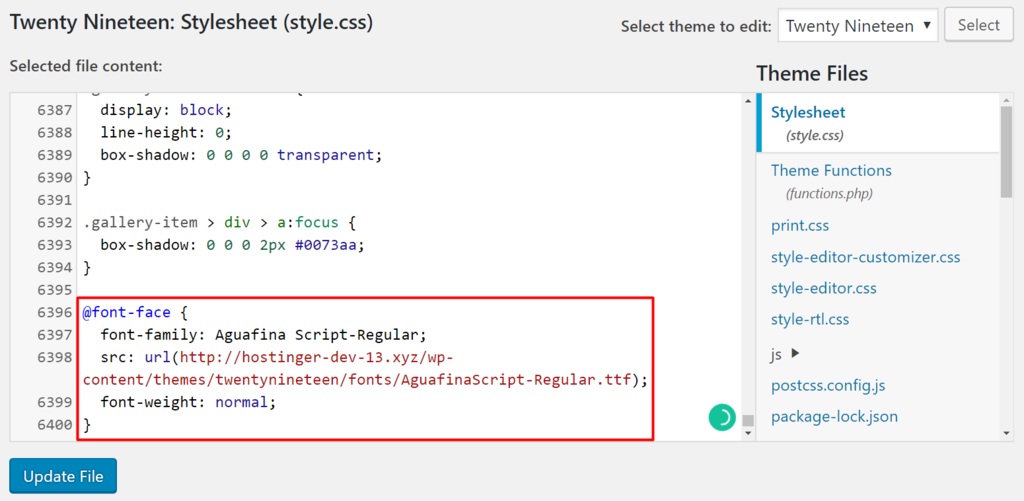
Yes, you can upload custom fonts by adding font files to your theme folder. Use @font-face in your CSS to link them. This approach allows full control over font styles but requires proper file formats and licensing.
What Plugins Help Add Fonts Easily In WordPress?
Plugins like “Easy Google Fonts” and “Use Any Font” simplify font addition. They provide user-friendly interfaces to select and customize fonts without coding. These plugins improve workflow and support various font types.
Will Adding Fonts Affect My Website’s Loading Speed?
Adding fonts can impact load times if not optimized. Use font subsets and limit font weights to improve speed. Loading fonts from reliable CDNs like Google Fonts also helps maintain fast performance.
Conclusion
Adding fonts to your WordPress theme is simple and helpful. It lets you change your site’s look and feel. Use the steps shared to pick and add fonts easily. Choose fonts that match your style and keep reading clear. Remember to test your site after adding fonts.
This way, you keep your site nice and easy to read. Enjoy customizing your WordPress site with new fonts today.



