
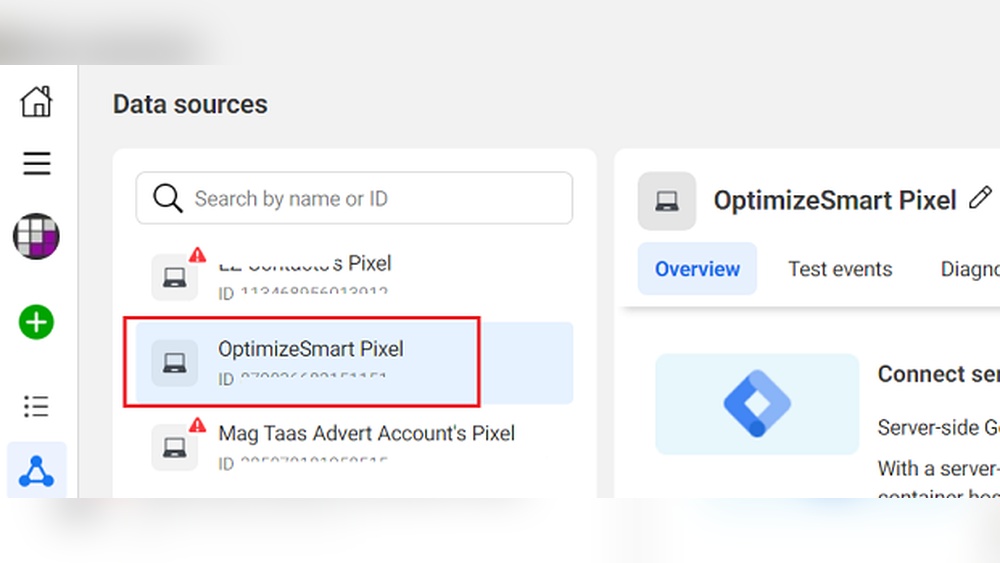
If you want to get the most out of your Facebook ads, adding Facebook Pixel events to your WordPress site is a game-changer. It helps you track what visitors do on your site, so you can target the right people and boost your sales.
But if you’re unsure how to set it up, don’t worry. You’ll learn simple, step-by-step ways to add Facebook Pixel events to your WordPress site—no tech skills needed. Keep reading, and you’ll unlock powerful insights that can take your marketing to the next level.
Credit: www.monsterinsights.com
Facebook Pixel Basics
Facebook Pixel is a tool that helps track visitor actions on your WordPress site. It collects data to improve your ads and understand user behavior. Installing the Pixel correctly is the first step to using it well.
What Is Facebook Pixel
Facebook Pixel is a small piece of code. You add it to your WordPress site. It tracks what visitors do, like page views or purchases. This data helps you measure ad success and reach the right audience.
The Pixel sends information back to Facebook. You can see which ads bring visitors and what they do after clicking. This helps improve your marketing efforts.
Benefits Of Using Pixel On WordPress
Using Facebook Pixel on WordPress offers many benefits. It helps track conversions from your ads. You know which ads lead to sales or sign-ups.
The Pixel allows better ad targeting. You can show ads to people who visited your site before. This increases the chance they will buy or engage.
It also lets you create custom audiences. You can reach visitors with specific interests or actions. This makes your ads more relevant and effective.
Credit: www.monsterinsights.com
Preparing Your Facebook Pixel
Preparing your Facebook Pixel is the first step to track your website visitors. This helps you understand user actions. It also improves your ad targeting and campaign results.
You need to create a Facebook Pixel if you don’t have one. Next, find your Pixel ID to connect it with WordPress. These tasks are simple and take just a few minutes.
Creating A Facebook Pixel
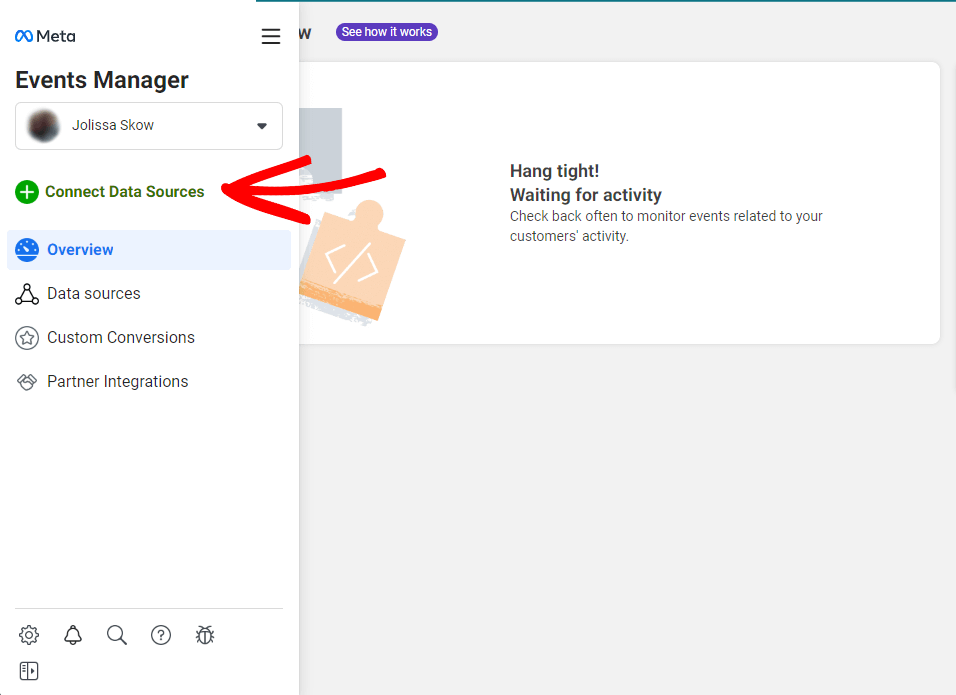
Go to Facebook Events Manager to start. Click on “Connect Data Sources” and select “Web”. Choose “Facebook Pixel” and click “Connect”.
Give your Pixel a clear name. Enter your website URL for easy setup. Click “Continue” to finish creating your Pixel.
Finding Your Pixel Id
In Events Manager, select your Pixel from the list. The Pixel ID appears under the Pixel name. Copy this ID for your WordPress setup.
This ID links your website to Facebook. It helps track events like page views and purchases. Keep it handy for the next steps.
Adding Pixel To WordPress
Adding Facebook Pixel to your WordPress site helps track visitors and measure ad performance. It gives useful data about actions people take on your site. This data lets you improve ads and reach more customers. There are two main ways to add Pixel: using a plugin or installing it manually. Both methods work well and depend on your comfort level with WordPress.
Using A Plugin For Easy Setup
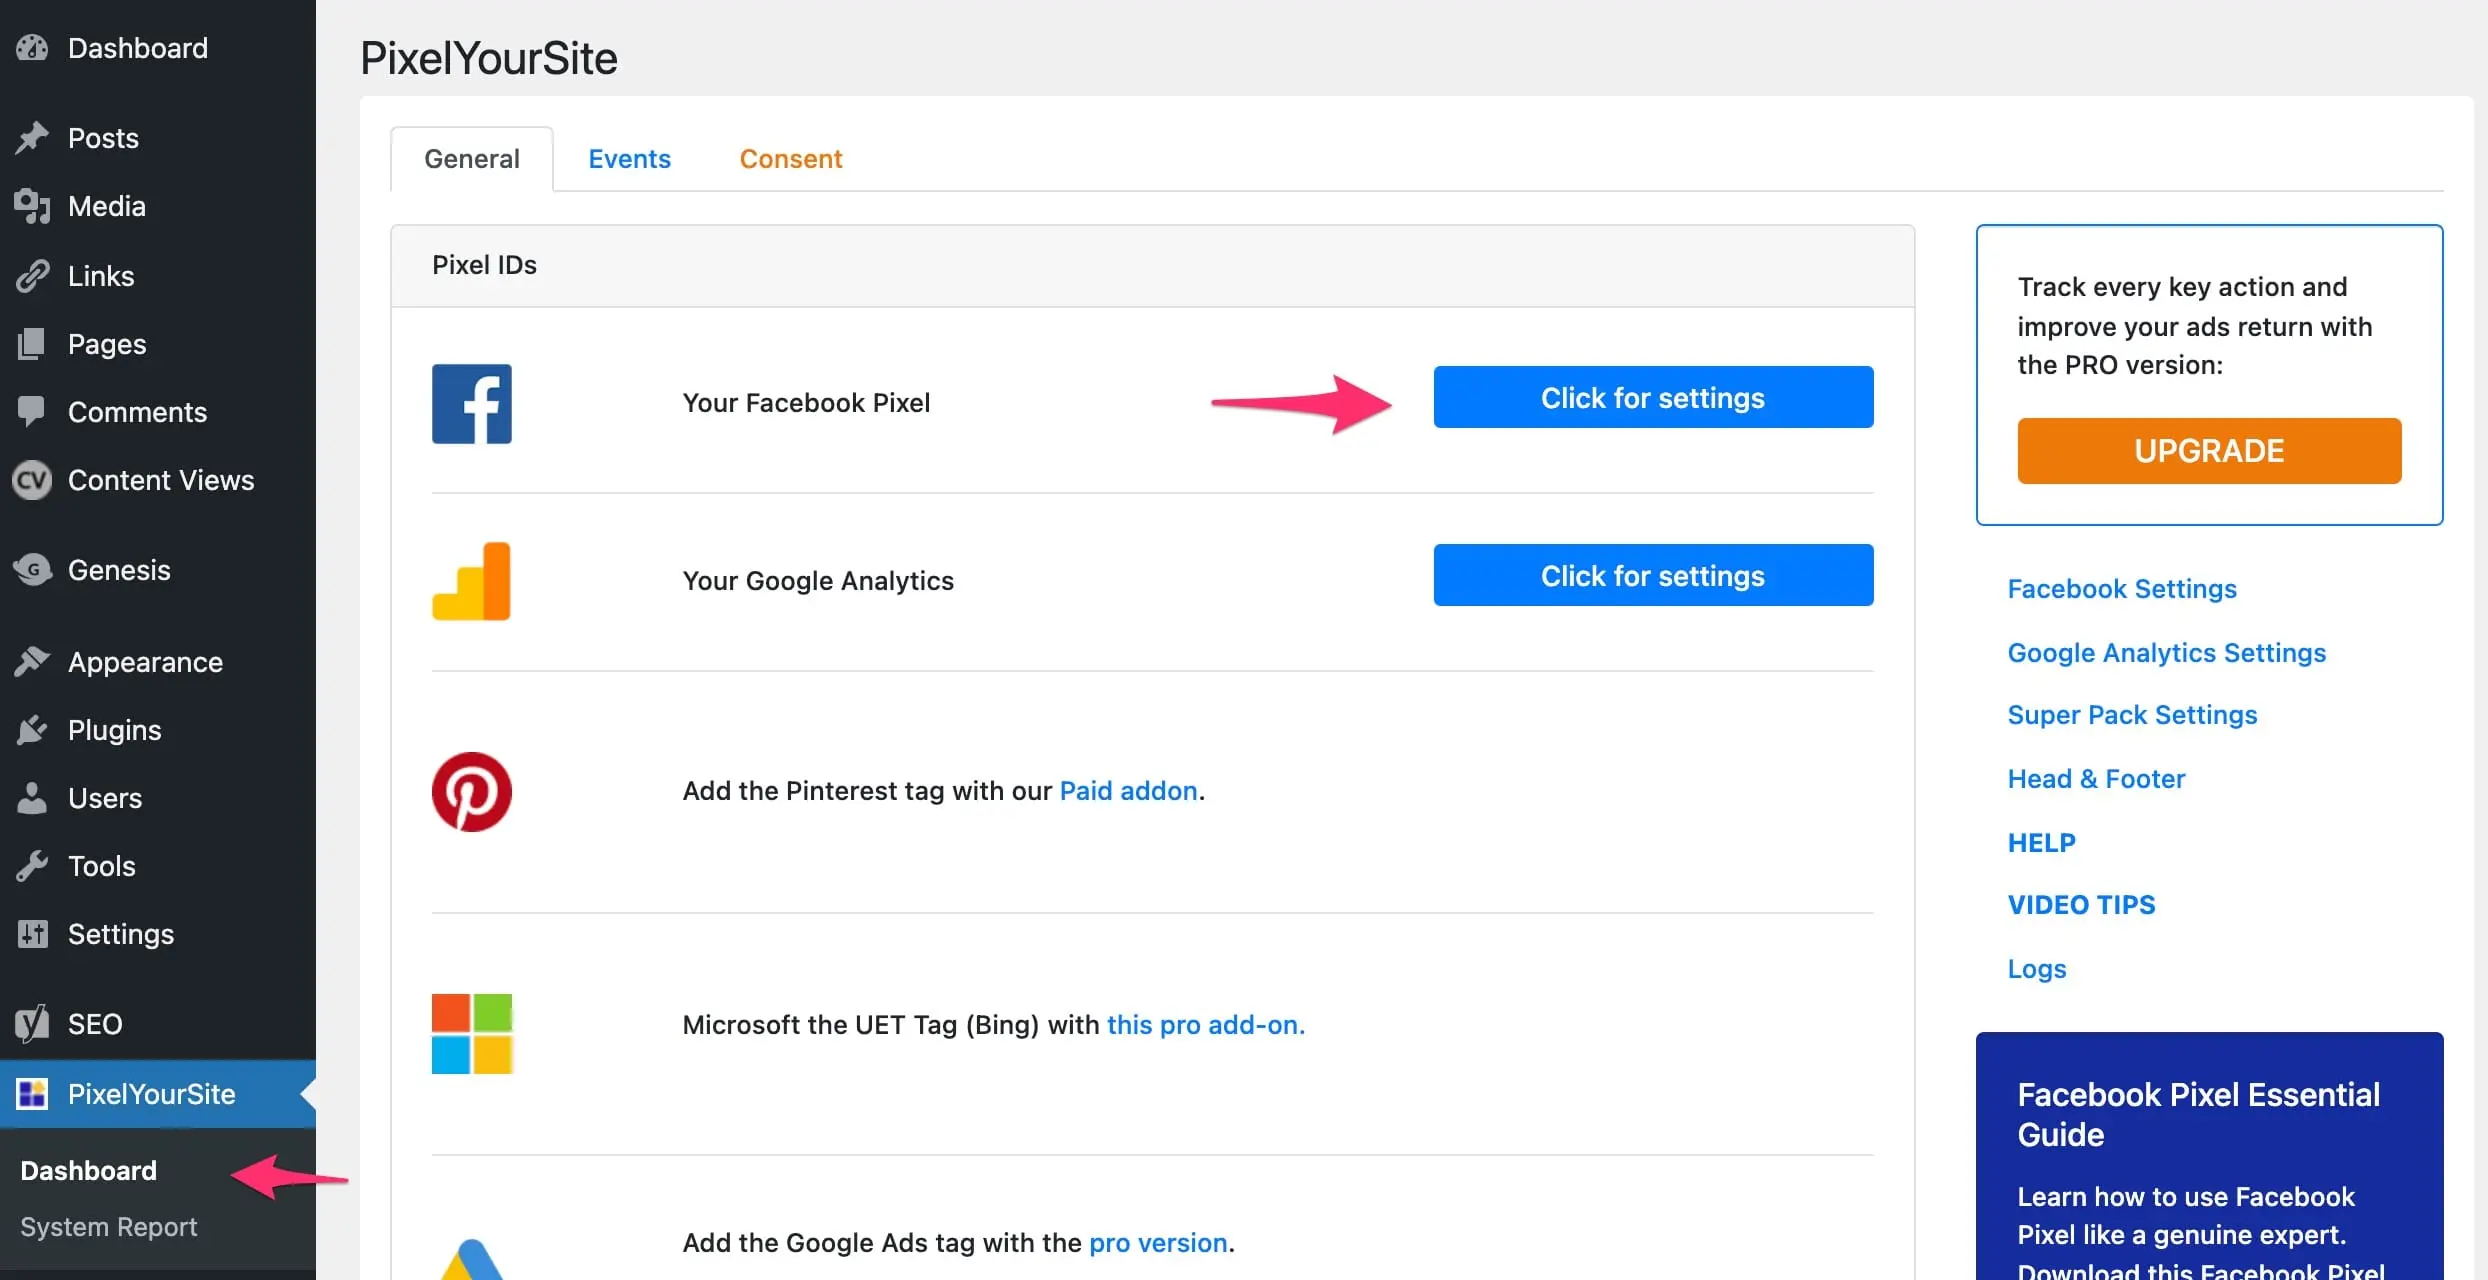
Many WordPress plugins simplify adding Facebook Pixel. They do the work without coding. You just install the plugin and enter your Pixel ID. The plugin places the Pixel code on every page automatically.
Popular plugins include “PixelYourSite” and “Facebook for WordPress.” They also let you add events like purchases or sign-ups. This setup saves time and reduces errors. It suits beginners and those who want fast results.
Manual Pixel Installation
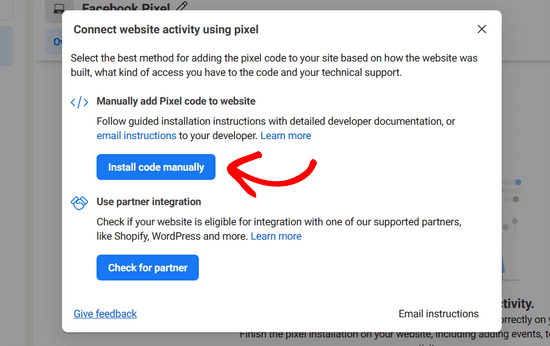
Manual installation means adding Pixel code yourself. You copy the Pixel base code from Facebook. Then paste it into your WordPress theme’s header file. This puts the Pixel on every page of your site.
To track specific actions, add event code snippets on the right pages. This method needs some basic coding knowledge. It gives full control over where and how Pixel tracks events. Good for users comfortable editing theme files.
Setting Up Standard Events
Setting up standard Facebook Pixel events on your WordPress site helps track specific actions visitors take. This tracking lets you understand user behavior and improve ad performance. You can set these events easily with or without plugins.
Common Facebook Pixel Events
Facebook offers several standard events for most websites. These include PageView, ViewContent, AddToCart, InitiateCheckout, and Purchase. Each event tracks a key action. For example, AddToCart tracks when someone adds a product to their cart. Using the right events gives clear insights into customer activity.
Adding Events Via Plugin
Many WordPress plugins simplify adding Facebook Pixel events. Plugins like PixelYourSite or Facebook for WooCommerce let you add events with few clicks. After installing, you enter your Pixel ID and select events to track. Plugins handle the code behind the scenes. This method works well for beginners and saves time.
Adding Events Manually
Manual event setup requires adding code snippets directly to your WordPress site. You place the base Pixel code in the header, then add event code where needed. For example, add the AddToCart event on product pages. This method offers full control but needs some coding knowledge. Use a child theme or custom code plugin to avoid losing changes during updates.
Tracking Custom Events
Tracking custom events with Facebook Pixel helps you measure specific actions on your WordPress site. This tracking gives insights beyond standard events like page views or purchases. You can track clicks, form submissions, video plays, and more. Custom events let you see how visitors interact with your site in detail. This data helps improve marketing strategies and site performance.
When To Use Custom Events
Use custom events to track actions unique to your site. For example, button clicks that lead to signups or downloads. Also, track interactions that standard events do not cover. Custom events fit well for tracking user engagement on specific features. They help understand visitor behavior better than basic events.
Creating Custom Event Code
Create custom event code using Facebook’s standard event format. Use the fbq('trackCustom', 'EventName', {parameters}); function. Replace EventName with a clear, descriptive name. Add parameters to send extra details, like value or content type. Keep code simple and easy to read. Test the code in Facebook Pixel Helper to ensure it works.
Implementing Custom Events In WordPress
Add custom event code to your WordPress site using a plugin or theme files. Insert the code in the header, footer, or specific page templates. Use plugins like “Insert Headers and Footers” for easy placement. For button clicks, add JavaScript to trigger the event on user action. Always test events in real-time to confirm tracking works correctly.
Verifying Pixel And Events
Verifying your Facebook Pixel and events is essential after setting them up on WordPress. It ensures the pixel tracks the right actions on your site. This step helps you check if the pixel fires correctly and records events like page views, purchases, or sign-ups.
Proper verification improves ad targeting and reporting accuracy. It also helps identify issues early, so you can fix them fast. Let’s explore how to verify your pixel and events effectively.
Using Facebook Pixel Helper
The Facebook Pixel Helper is a free browser tool from Facebook. It shows if your pixel works on any webpage. Install it on Chrome to start testing your WordPress site.
Visit your site, then click the Pixel Helper icon. It displays pixel IDs and event status. Green checkmarks mean the pixel is firing correctly. Red warnings indicate problems that need fixing.
This tool helps confirm if events like purchases or leads trigger properly. It also shows errors like missing parameters or duplicate pixels. Use this information to improve your setup.
Troubleshooting Common Issues
Sometimes, pixels do not work as expected. Common issues include no pixel detected, wrong event firing, or duplicate events.
Clear your browser cache and reload the site. This step fixes many pixel loading problems. Make sure you placed the pixel code in the right WordPress section, often in the header.
Check for plugin conflicts that might block the pixel. Disable other plugins one by one to find conflicts. Also, verify your event parameters match Facebook’s requirements.
If events fire multiple times, ensure you don’t have pixel code in more than one spot. Use the Pixel Helper to spot duplicates. Fix these issues to get accurate data for your ads.
Optimizing Pixel Performance
Optimizing Facebook Pixel performance on your WordPress site helps track user actions better. It improves data quality for smarter ad campaigns. Clear event tracking and pixel accuracy make your efforts more effective.
Best Practices For Event Tracking
Choose events that match your business goals. Track actions like purchases, sign-ups, and page views. Use standard events for easy integration with Facebook ads. Avoid tracking too many events to prevent clutter. Test events regularly to confirm they fire correctly.
Maintaining Pixel Accuracy
Place the pixel code in the header or use trusted plugins. Keep the pixel updated with Facebook’s latest version. Check for duplicate pixels that can cause errors. Use Facebook’s Pixel Helper tool to verify pixel status. Remove old or unused events to keep data clean.
Credit: www.reliablesoft.net
Frequently Asked Questions
What Is Facebook Pixel And Why Use It On WordPress?
Facebook Pixel is a tracking code for your WordPress site. It helps monitor user actions and optimize ad campaigns effectively. Using it improves ad targeting and measures conversions precisely.
How Do I Install Facebook Pixel On WordPress?
Install Facebook Pixel by adding the Pixel code to your WordPress header. Use plugins like PixelYourSite or manually insert code via theme settings for easy setup.
Which Facebook Pixel Events Should I Track On WordPress?
Track key events like PageView, AddToCart, Purchase, and Lead. These events provide valuable data to optimize your ads and understand user behavior clearly.
Can I Add Custom Facebook Pixel Events On WordPress?
Yes, you can add custom events using code snippets or plugins. Custom events help track specific user actions tailored to your business goals.
Conclusion
Adding Facebook Pixel events to your WordPress site helps track user actions easily. This tracking lets you see what visitors do and improves ad targeting. The process is simple and takes just a few steps. Regularly check your pixel to ensure it works correctly.
With clear data, you can make smarter marketing choices. Start today and watch your website performance grow steadily. Keep learning and adjusting for the best results. Your efforts will pay off over time.



