Are you ready to take control of your website’s online presence? Adding DNS records is a crucial step in managing your domain and ensuring everything runs smoothly.
If you use Namecheap, you’re in luck—it’s known for its user-friendly interface, making DNS record management a breeze. But where do you start? In this guide, we’re breaking down the process step-by-step, so you can effortlessly add DNS records to your Namecheap account without any hassle.
Whether you’re a seasoned pro or a complete beginner, by the end of this article, you’ll have the confidence and knowledge to enhance your website’s functionality. Let’s dive in and empower you with the skills to optimize your domain settings!
Accessing Your Namecheap Account
Adding DNS records in your Namecheap account is simple. Log into your account, navigate to the “Domain List”, and select “Manage”. Under the “Advanced DNS” tab, click “Add New Record” to input the required details. Save changes to update your DNS settings.
Accessing your Namecheap account is the first step to managing your DNS records effectively. Whether you’re a seasoned webmaster or a beginner, knowing how to navigate your account is crucial. Picture yourself sitting down with a cup of coffee, ready to tackle your domain settings—it’s simpler than you might think. ###Log Into Your Namecheap Account
Start by visiting the Namecheap website. Look for the “Sign In” button at the top right corner. You’ll need your username and password to access your account. Can’t remember your credentials? Don’t worry. You can easily reset your password using the “Forgot Password” link. It’s a common hurdle many face, but Namecheap’s support makes it a breeze to overcome. ###Navigate To Your Dashboard
Once logged in, you’ll be greeted by your dashboard. This is where all the magic happens. Your domains, settings, and tools are just a click away. Take a moment to familiarize yourself with the interface. Notice how everything is laid out intuitively. This design makes it easy for you to find what you need without unnecessary searching. ###Find Your Domain List
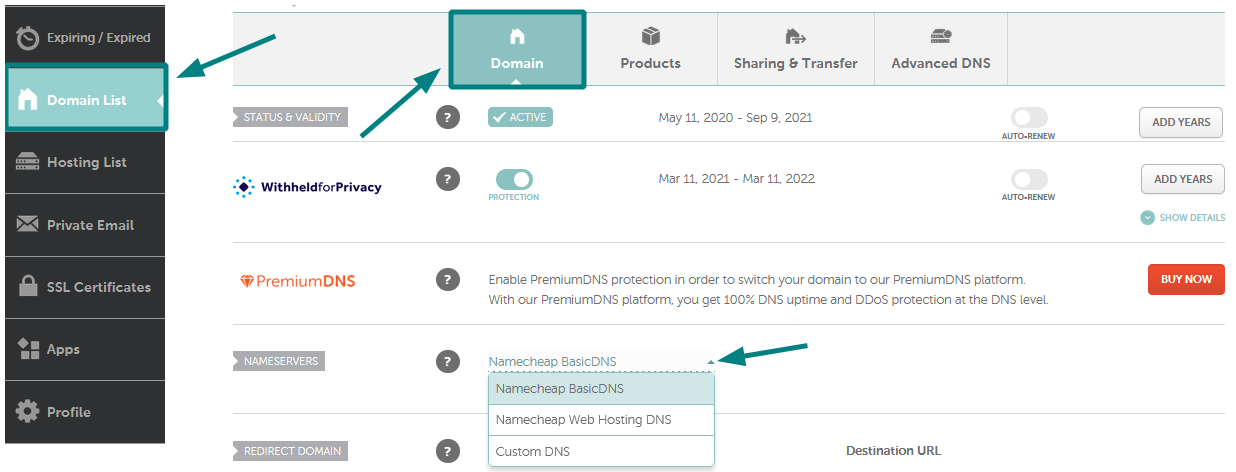
Next, head to the “Domain List” section. This is where you’ll see all the domains you own. It’s a bit like having your own personal library of digital real estate. Click on the domain you wish to manage. Imagine you’re opening a book to the exact page you need—no fumbling around. This intuitive system saves you time and effort. ###Access Dns Settings
After selecting your domain, look for the “Advanced DNS” tab. This is your gateway to configuring DNS records. It’s like having the keys to your own digital kingdom. Wondering what all those technical terms mean? You’re not alone. Namecheap provides helpful explanations for each setting, so you can make changes confidently. ###Why Accessing Your Account Matters
Consider this: without access to your account, you’d be unable to manage your domain settings. It’s akin to owning a car without the keys—frustrating, right? Ensuring smooth access keeps your domain secure and functional. Have you ever felt overwhelmed by tech jargon? Knowing where to find things in your account simplifies the process. This empowerment is what makes Namecheap a preferred choice for many. ###Final Thoughts
Accessing your Namecheap account is the cornerstone of effective DNS management. It’s your starting point on the journey to mastering your online presence. Embrace the simplicity and take control of your digital assets today. Isn’t it refreshing to know that complex tasks can be straightforward with the right tools? Namecheap’s user-friendly design is here to ensure that your DNS records are always within reach.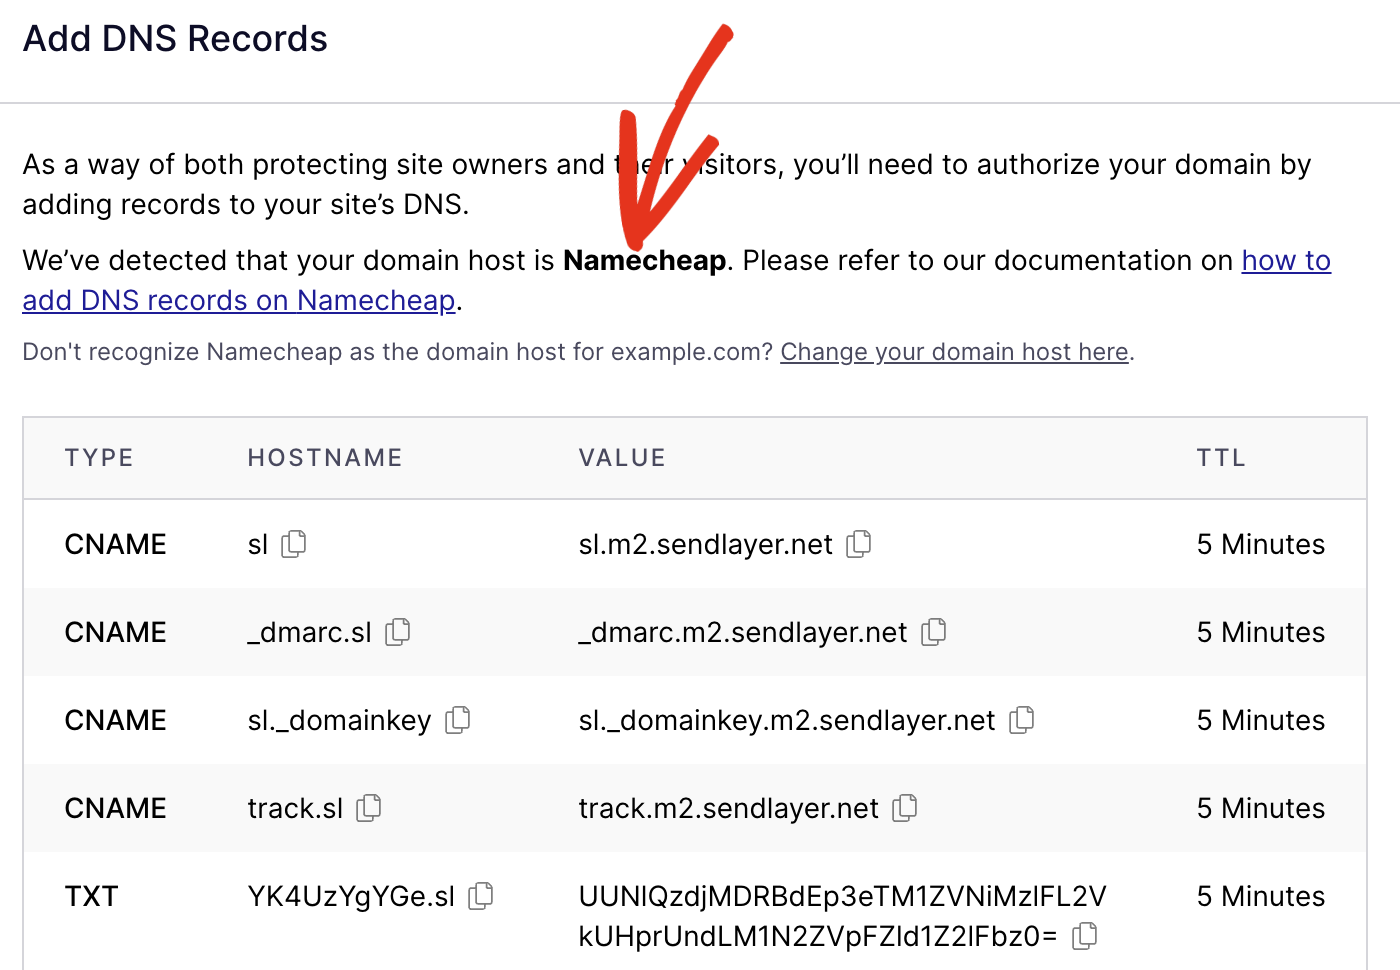
Credit: sendlayer.com
Navigating To Dns Settings
Getting started with managing your domain settings can seem daunting. But with Namecheap, it’s a straightforward process. Learning to navigate to DNS settings is the first step. This guide will help you understand each step clearly.
Access Your Namecheap Account
Log into your Namecheap account using your credentials. Once logged in, find the dashboard. It’s your main hub for managing domains.
Select Domain List
On the left sidebar, click on “Domain List.” This section shows all your registered domains. Identify the domain you wish to modify.
Manage The Domain
Next to your chosen domain, find the “Manage” button. Click on it to access more settings. This is where you can make changes to your DNS records.
Locate Dns Settings
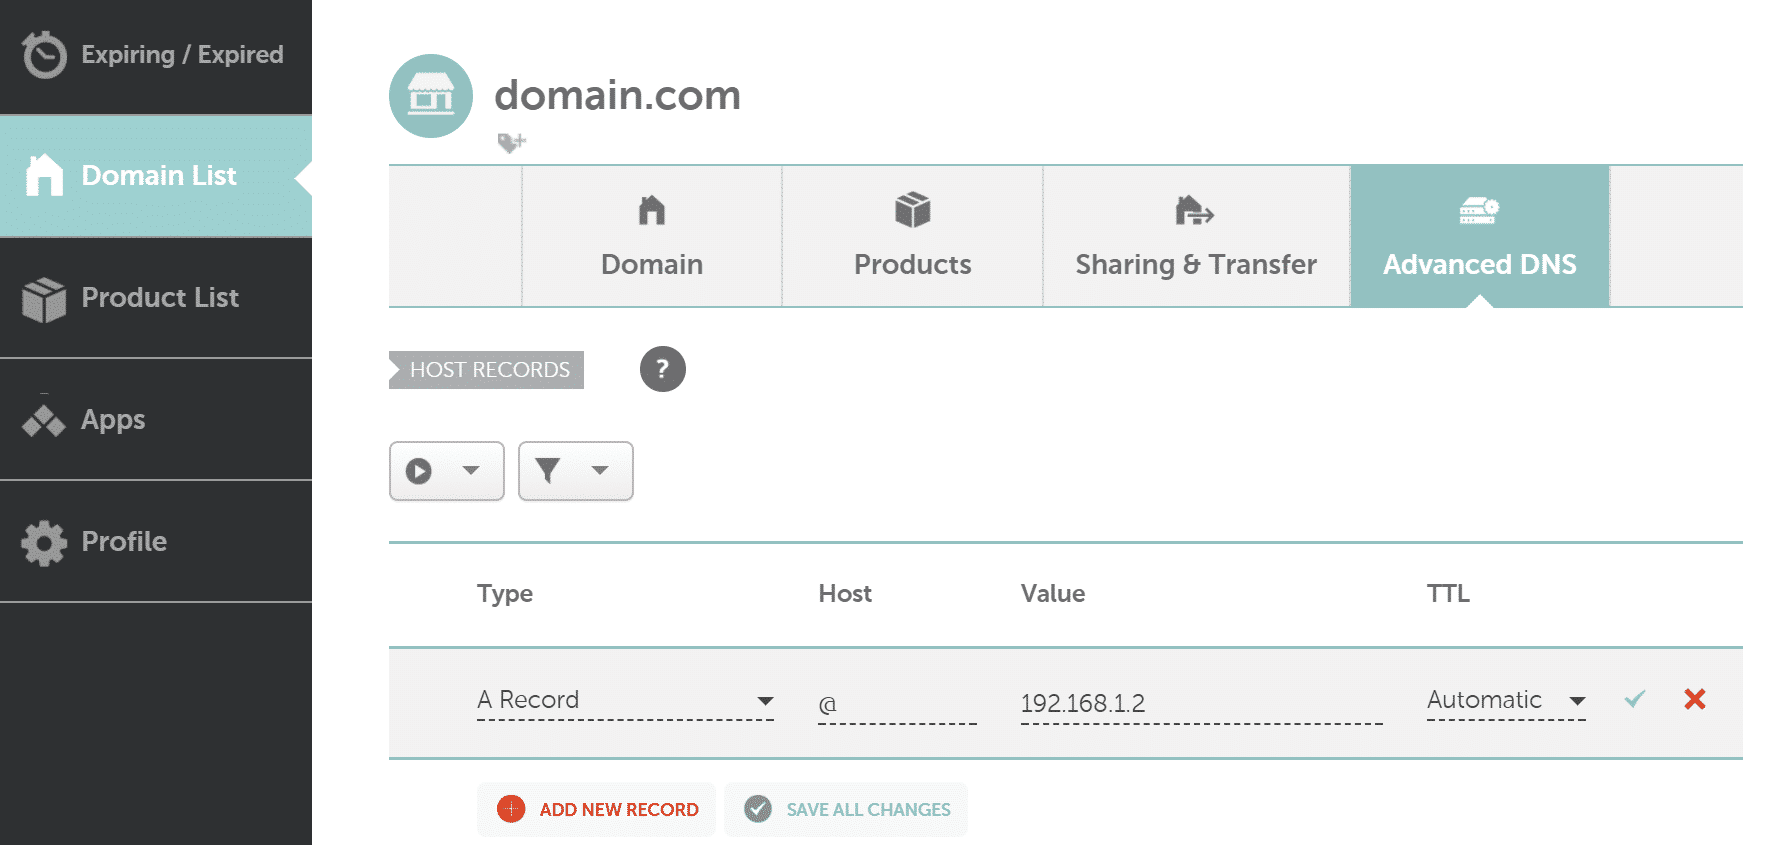
Within the management page, locate the “Advanced DNS” tab. Clicking this opens the DNS settings page. Here, you can add, edit, or remove DNS records.
Understanding these steps makes managing your domain easy. With practice, these actions become second nature. Happy domain managing!
Adding A New Dns Record
Adding a new DNS record on Namecheap is straightforward. This process helps control how your domain interacts with the internet. DNS records direct traffic and ensure your domain operates smoothly. Whether setting up email, pointing your domain to another host, or verifying ownership, DNS records are essential. Understanding how to add a new DNS record ensures your domain functions optimally.
Step-by-step Guide To Adding A New Dns Record
First, log into your Namecheap account. Locate the ‘Domain List’ from the left sidebar. Click on the domain you want to manage. This takes you to the domain’s dashboard. Find the ‘Advanced DNS’ tab and click it.
Select The Correct Dns Record Type
DNS records come in various types like A, CNAME, MX, and TXT. Choose the record type based on your needs. A records point your domain to an IP address. CNAME records alias one name to another. MX records handle email routing. TXT records store text information. Understanding each type ensures you select the right one.
Fill In The Required Fields
After choosing the record type, fill in the necessary fields. For an A record, input the host name and IP address. For CNAME, enter the alias and the domain name. Ensure the details are correct to avoid issues.
Save Your Changes
Once you fill in the details, save your changes. Namecheap usually updates DNS records quickly. Propagation might take a few minutes to several hours. Check if your changes are active using DNS lookup tools.
Credit: kinsta.com
Credit: www.namecheap.com
Frequently Asked Questions
How Do I Add A Dns Record To Namecheap?
Log into your Namecheap account. Go to “Domain List” and click “Manage” next to your domain. Select the “Advanced DNS” tab. Click “Add New Record” and enter your DNS details. Save changes to update your DNS record.
How Do I Add A Dns Record To My Domain?
Log into your domain registrar’s account. Navigate to DNS settings. Select “Add DNS record”. Enter required details like record type and value. Save changes to update your DNS record. This process may vary slightly depending on your registrar.
How Do I Manually Add Dns Records?
Access your domain registrar’s website and log into your account. Navigate to the DNS settings section. Select “Add Record” and choose the type (A, CNAME, MX, etc. ). Enter the required details, such as hostname and IP address. Save your changes to update the DNS records.
How Do I Add Dns Resource Records?
To add DNS resource records, access your DNS management console. Select the domain and choose “Add Record. ” Enter the record type, name, and value. Save the changes. Ensure propagation by checking the DNS status. Use a reputable DNS provider for better performance and security.
Conclusion
Adding DNS records on Namecheap is simple with these steps. Follow each instruction carefully. Your domain will connect seamlessly. Always double-check your entries for accuracy. Keep this guide handy for future changes. Troubleshooting becomes easier with practice. Remember, patience is key.
Internet updates might take time to show. Stay calm and check your settings regularly. This ensures everything works smoothly. Enjoy your online experience with Namecheap. You now have control over your domain’s DNS settings. Happy managing!