
Are you looking to give your WordPress site a unique look that stands out? Adding custom CSS in Elementor lets you do just that—without needing to be a coding expert.
Imagine having full control over every design detail, making your website truly yours. You’ll discover simple, step-by-step ways to add custom CSS to Elementor. By the end, you’ll have the tools to create a site that not only looks great but also feels professional and polished.
Ready to unlock your website’s full potential? Let’s dive in!
Why Add Custom Css In Elementor
Adding custom CSS in Elementor lets you control your website’s style deeply. It helps you change colors, fonts, and layouts beyond the default options. You get a unique look that fits your brand perfectly.
Custom CSS also fixes small design issues quickly. It avoids extra plugins and keeps your site fast. This way, you improve user experience and keep visitors engaged.
Benefits Of Custom Css
Custom CSS offers precise control over your website’s appearance. It helps you create a consistent design across all pages. You can style elements exactly as you want without limits.
Using custom CSS reduces reliance on many plugins. Fewer plugins mean faster site speed and less chance of conflicts. It also saves your hosting space and resources.
CSS customization improves mobile responsiveness. You can adjust styles for different screen sizes easily. This ensures your site looks great on phones and tablets.
When To Use Custom Css
Use custom CSS when Elementor’s built-in tools don’t meet your needs. For example, if you want a special hover effect or custom spacing.
Apply CSS to fix small layout problems that appear on some devices. It helps keep your design consistent everywhere.
Custom CSS is useful to match your website style with branding guidelines. If colors or fonts need fine-tuning, CSS is the best choice.
Credit: kinsta.com
Preparing Your WordPress Site
Before adding custom CSS in Elementor, prepare your WordPress site properly. Preparation helps avoid problems and saves time. It ensures your site runs smoothly during the changes. Start by securing your site and updating key elements. This process makes your site ready for custom CSS edits.
Backup Your Site
Backing up your site protects your content and settings. It creates a copy of your entire website. Use a reliable plugin or your hosting service to make a backup. Save the backup file in a secure location. This step helps you restore your site if something goes wrong.
Update Elementor And WordPress
Keep Elementor and WordPress updated to the latest versions. Updates fix bugs and improve security. They also ensure compatibility with new features like custom CSS. Check for updates in your WordPress dashboard. Install updates before starting any design changes.
Methods To Add Custom Css
Adding custom CSS to your WordPress site using Elementor allows you to personalize your design easily. There are several ways to add CSS code, each fitting different needs and skill levels. This section covers the main methods to help you choose the best option.
Using Elementor’s Built-in Css Feature
Elementor Pro offers a built-in CSS feature for adding custom styles directly in the editor. You can write CSS for specific widgets, sections, or the entire page. This method keeps your styles organized within Elementor. It is simple and fast for small style changes.
Adding Css Via WordPress Customizer
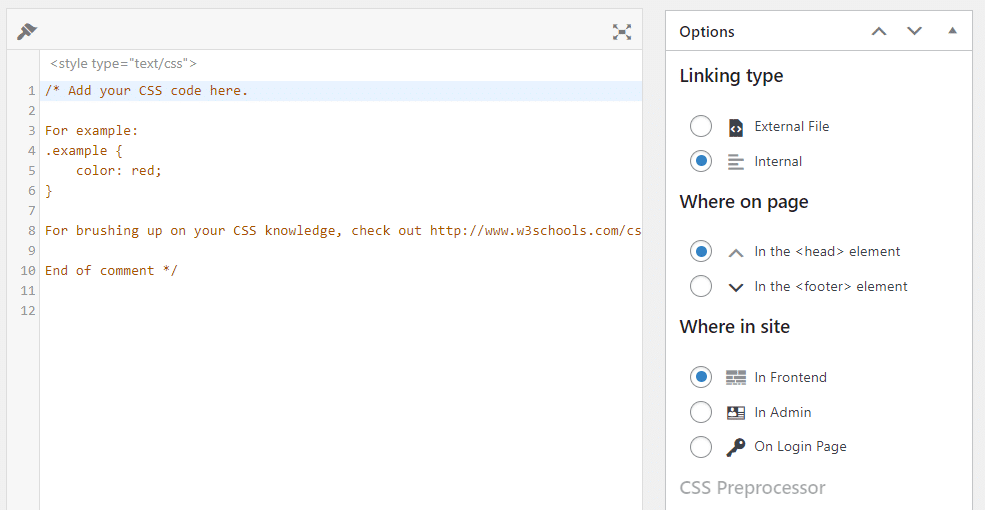
The WordPress Customizer provides a place to add CSS that affects the whole site. Navigate to Appearance > Customize > Additional CSS. Paste your CSS code here, and see live previews. This method works well for site-wide style adjustments without touching theme files.
Using A Child Theme’s Style Sheet
Creating a child theme allows safe CSS changes without losing them after updates. Add your custom CSS to the child theme’s style.css file. This method suits users comfortable with FTP or file managers. It keeps your CSS separate and secure.
Installing A Custom Css Plugin
Several plugins let you add custom CSS easily through the WordPress dashboard. These plugins often offer features like CSS organization and version control. This method is user-friendly and does not require theme editing skills. It works well for those who want a dedicated CSS management tool.
Credit: elementor.com
Adding Css Directly In Elementor
Adding CSS directly in Elementor lets you style your site without extra plugins. It saves time and keeps your design consistent. Elementor’s built-in tools make it easy to write and apply CSS to any element.
This method suits users who want precise control over their page’s look. No need for advanced coding skills. Just simple CSS rules and a bit of practice.
Accessing The Custom Css Panel
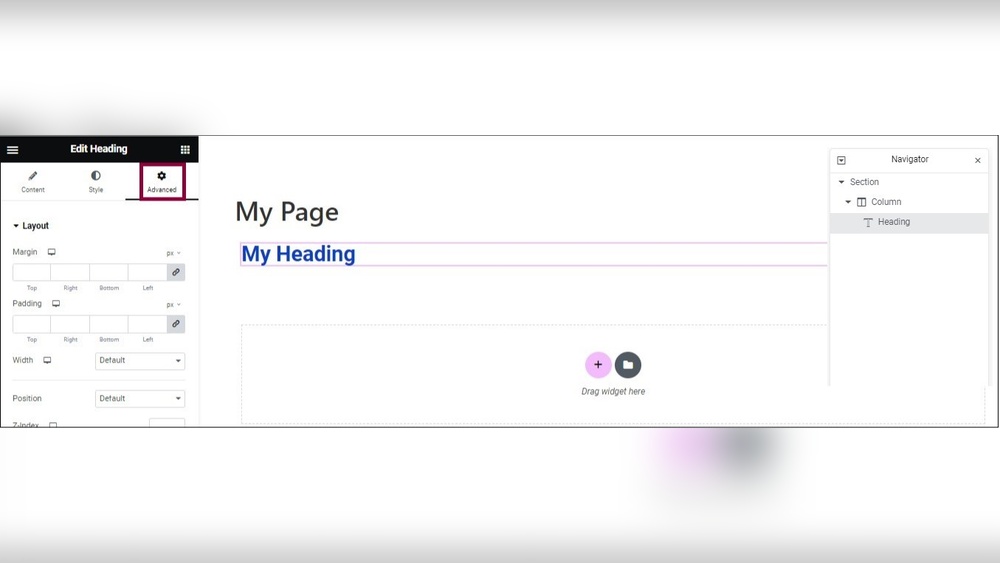
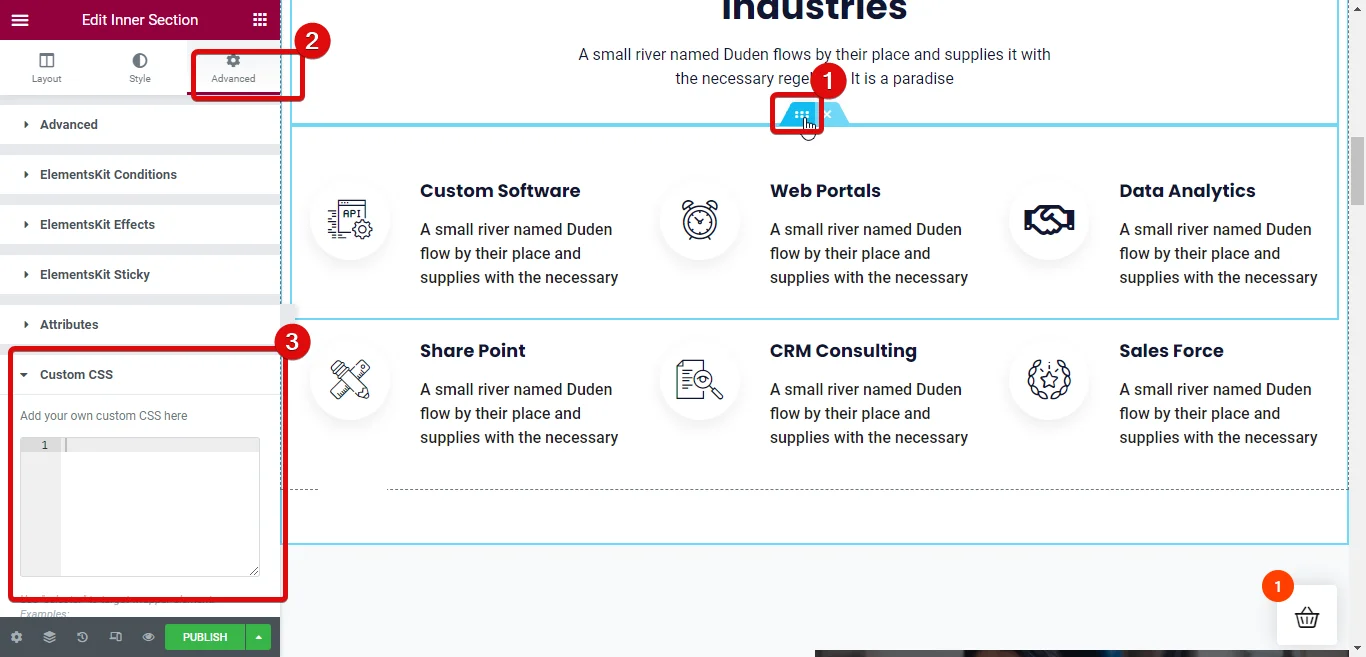
Start by opening Elementor editor on your page. Select the element you want to style. Look for the “Advanced” tab in the left panel. Scroll down to find the “Custom CSS” section. Click it to open the CSS editor. This panel allows you to write your CSS code directly.
Writing And Applying Css Rules
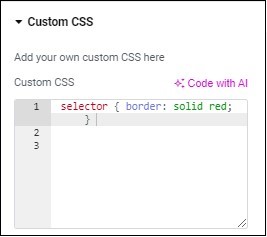
Type your CSS inside the editor. Use the correct selectors for the chosen element. For example, selector { color: red; } changes text color to red. You can add multiple rules to style fonts, backgrounds, margins, and more. The CSS applies immediately to the selected element only.
Previewing Changes
After adding CSS, check how it looks on your page. Elementor updates the preview in real-time. This helps you see the exact effect of your code. Make adjustments as needed to perfect your design. Preview on different devices using Elementor’s responsive mode.
Tips For Writing Effective Css
Writing effective CSS improves your WordPress Elementor design. Clear and precise CSS makes your website look better. It also helps your site load faster and work well on all devices. Follow simple tips to write CSS that works smoothly and looks great.
Targeting Elements Correctly
Always select the right elements for your styles. Use classes or IDs from Elementor widgets. Avoid styling generic tags like div or p unless necessary. Targeting specific elements keeps your CSS clean and avoids unwanted changes.
Using Specificity And Importance
Understand CSS specificity to solve conflicts. More specific selectors override less specific ones. Use IDs for high specificity and classes for medium. Avoid using !important unless absolutely needed. Overusing it can cause problems later.
Testing Across Devices
Check your CSS on different screen sizes. Use mobile, tablet, and desktop views in Elementor. Make sure styles look good everywhere. Responsive CSS improves user experience and keeps your site professional.
Credit: wpmet.com
Troubleshooting Common Issues
Troubleshooting common issues helps you get the most from custom CSS in Elementor. Some problems stop styles from showing or cause layout troubles. Understanding these issues saves time and frustration. The tips below address frequent CSS problems in Elementor. Follow them to fix your design quickly.
Css Not Applying
Check if you added the CSS in the right place. Elementor has multiple areas for custom CSS. Use the page or widget custom CSS section for specific changes. Clear your browser cache after adding CSS. Cached files can block new styles. Also, check if your CSS selectors match the correct elements. Wrong selectors cause styles to fail.
Conflicts With Theme Styles
Theme styles may override your custom CSS. Themes load their CSS after Elementor’s styles. Use the !important rule to force your style to apply. For example, color: red !important; overrides other color rules. Another method is to increase CSS specificity. Write more specific selectors to beat theme styles.
Fixing Responsive Problems
Responsive issues appear if CSS does not adapt to screen size. Elementor allows custom CSS for desktop, tablet, and mobile. Add different CSS for each device under Elementor’s responsive mode. Use media queries for precise control. For example, @media (max-width: 768px) { ... } targets tablets and phones. Test changes on multiple devices to ensure proper display.
Best Practices For Managing Custom Css
Managing custom CSS in Elementor helps keep your website clean and fast. Good practices make your styles easy to update and fix. They also avoid conflicts with other parts of your site. Follow these tips to handle custom CSS smartly.
Organizing Your Code
Organize CSS by grouping related styles together. Use comments to separate sections clearly. Name your classes and IDs in a simple, consistent way. This helps you find and change code quickly. Keep your CSS files tidy and avoid random code blocks.
Keeping Css Lightweight
Write only the CSS you need for your design. Avoid repeating styles or using heavy code. Use short selectors and avoid deep nesting. Minimize the use of unnecessary properties. Lightweight CSS speeds up your site and reduces errors.
Documenting Your Changes
Always add comments to explain why you made changes. Note the date and purpose of each update. Clear documentation helps you and others understand your CSS later. It also makes troubleshooting easier. Never leave unexplained code in your stylesheets.
Frequently Asked Questions
How Do I Add Custom Css In Elementor?
To add custom CSS, go to Elementor’s page editor, click the Advanced tab, and then select Custom CSS. Enter your CSS code in the box. This feature is available in Elementor Pro.
Can I Add Custom Css Globally In WordPress Elementor?
Yes, you can add global CSS by navigating to Elementor > Custom Code in the WordPress dashboard. Add your CSS and assign it to load site-wide. This method applies styles across all pages.
Is Custom Css In Elementor Compatible With All Themes?
Custom CSS added through Elementor generally works with most themes. However, some themes may have conflicting styles. Always test your CSS changes on different devices to ensure compatibility.
Do I Need Coding Skills To Add Custom Css In Elementor?
Basic CSS knowledge helps but isn’t mandatory. Elementor’s interface allows easy insertion of CSS. You can copy and paste pre-written CSS snippets to customize your design.
Conclusion
Adding custom CSS in WordPress Elementor helps you control your site’s look. It lets you change colors, fonts, and layouts with ease. You can make your website unique and fit your style perfectly. Just follow the steps carefully and test your changes on different devices.
Keep your code simple and organized for better results. Custom CSS is a useful tool that improves your site’s design without complex tools. Try it today to see how small changes make a big difference.


