

Are you looking to make your WordPress site truly stand out? Adding Advanced Custom Fields (ACF) can take your website from basic to brilliant by giving you the power to customize content exactly how you want it.
Imagine having full control over your pages without needing to touch a single line of code. You’ll discover simple, step-by-step ways to add ACF to your WordPress site. By the end, you’ll know how to create unique, dynamic content that captures your visitors’ attention and keeps them coming back.
Ready to unlock the full potential of your website? Let’s dive in.
Why Use Advanced Custom Fields
Advanced Custom Fields (ACF) helps you create custom content easily. It makes WordPress more flexible and user-friendly. ACF lets you add extra fields to posts, pages, and custom post types. This way, you can store and display different kinds of information without coding.
Using ACF improves how your website looks and works. It helps you organize content better. ACF saves time by simplifying the editing process. Even beginners can use it to build complex layouts.
Enhance Content Management
ACF gives you control over your content structure. You can add text, images, links, and more in custom fields. This keeps your content neat and easy to update. Editors find it easier to add or change information.
Create Unique Page Layouts
With ACF, design pages that stand out. Use different field types to build custom sections. Show data exactly how you want. This makes your site more attractive and professional.
Save Development Time
ACF reduces the need for custom coding. Developers can use its tools to build features fast. It speeds up site creation and changes. This lowers costs and effort.
Improve User Experience
Custom fields help display information clearly. Visitors find it easier to read and navigate. A well-organized site keeps users engaged longer. This can increase site visits and interaction.
Installing The Plugin
Installing the Advanced Custom Fields (ACF) plugin is the first step to customize your WordPress site. This plugin allows you to add extra fields to your posts, pages, and custom post types easily. There are two common ways to install the plugin: using the WordPress dashboard or manual installation. Both methods are simple and quick.
Using WordPress Dashboard
Log in to your WordPress dashboard. Go to the “Plugins” section and click “Add New.” In the search bar, type “Advanced Custom Fields.” Find the plugin in the results and click “Install Now.” Wait a few seconds, then click “Activate.” The plugin is now ready for use. This method is fast and perfect for beginners.
Manual Installation
Download the Advanced Custom Fields plugin from the official website. Save the ZIP file to your computer. Go to your WordPress dashboard and open the “Plugins” menu. Click “Add New” and then “Upload Plugin.” Choose the ZIP file and click “Install Now.” After installation, click “Activate Plugin.” Manual installation works well if you cannot use the dashboard or prefer to upload files yourself.
Creating Custom Field Groups
Creating custom field groups is a key step in using Advanced Custom Fields in WordPress. Custom field groups organize your fields, making content easier to manage. Grouping fields also helps you control where and how fields appear on your site.
Setting up these groups is simple. You start by giving your group a clear title. Then, you add different types of fields based on your needs. Each field type collects specific information, such as text, images, or dates. This structure allows you to customize content input in a user-friendly way.
Setting Field Group Title
Begin by naming your field group. Choose a title that describes the fields it contains. This name appears in the WordPress dashboard, so keep it clear and short. A good title helps you find the group quickly later. Avoid vague or long titles to keep things simple.
Adding Different Field Types
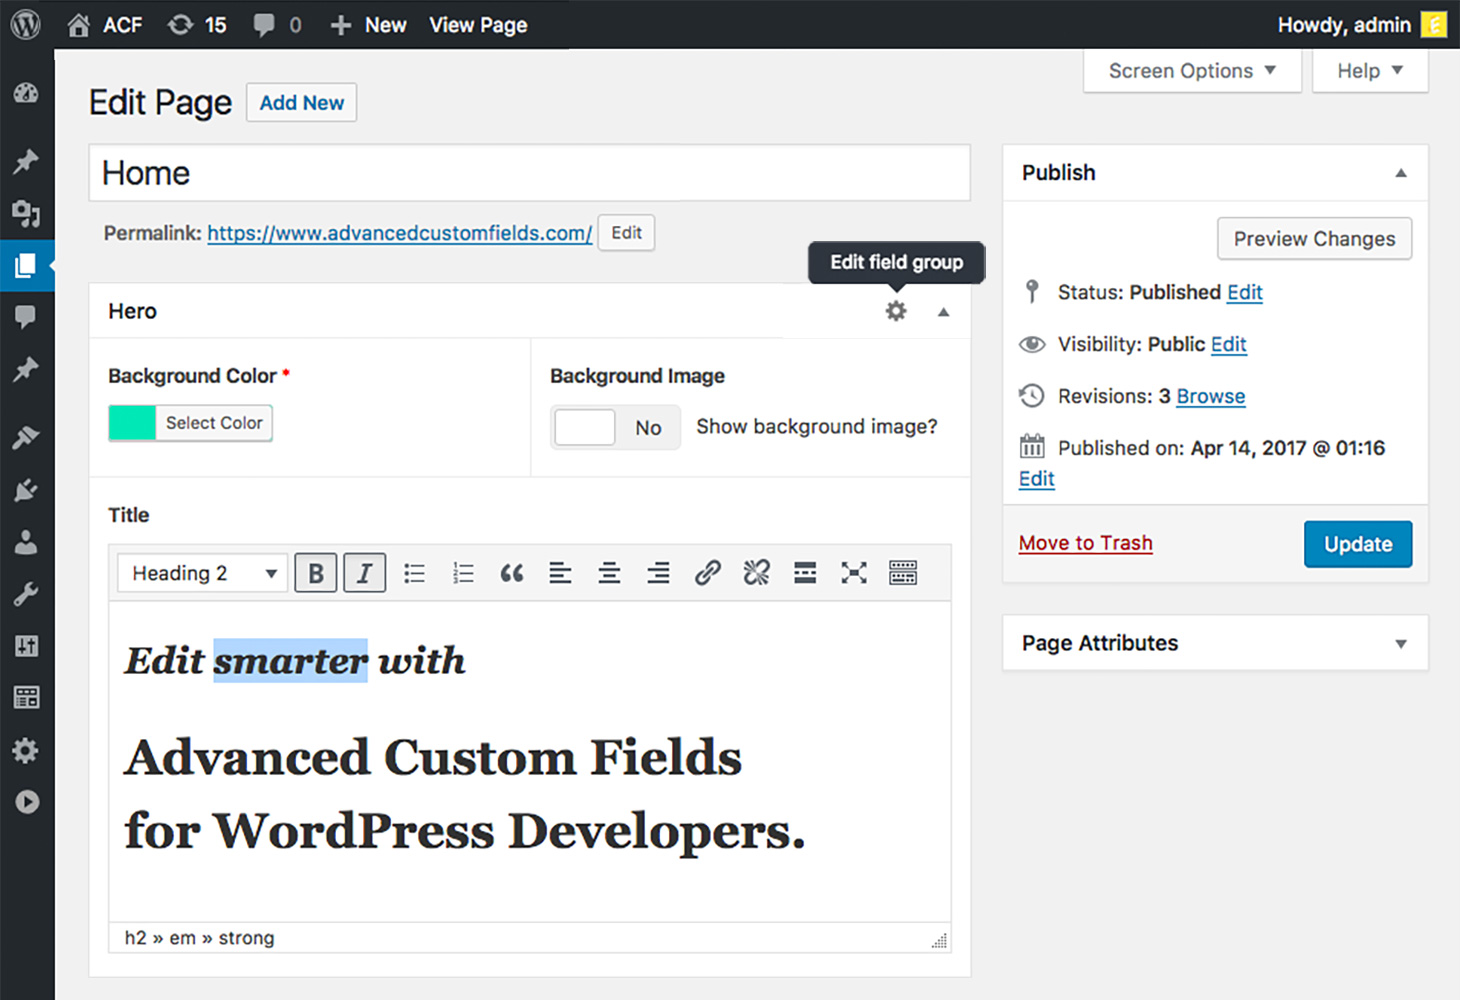
After naming your group, add fields to it. Advanced Custom Fields offers many field types like text, textarea, image, and select. Each type serves a different purpose. For example, use text for short input and textarea for longer text. Choose the right field type to match the content you want to add.
You can also add fields like date picker, checkbox, or URL. Each field has settings to customize its behavior. Set labels, instructions, and default values for better usability. Arrange fields in order for smooth data entry. This flexibility makes your content management efficient and tailored to your needs.
Credit: www.advancedcustomfields.com
Configuring Field Settings
Configuring field settings is a key step when using Advanced Custom Fields in WordPress. These settings control where and how your custom fields appear. Proper setup ensures fields show in the right places and look good.
Adjusting these options helps create a better editing experience. It also keeps your site organized and easy to manage. Focus on assigning location rules and setting display options for best results.
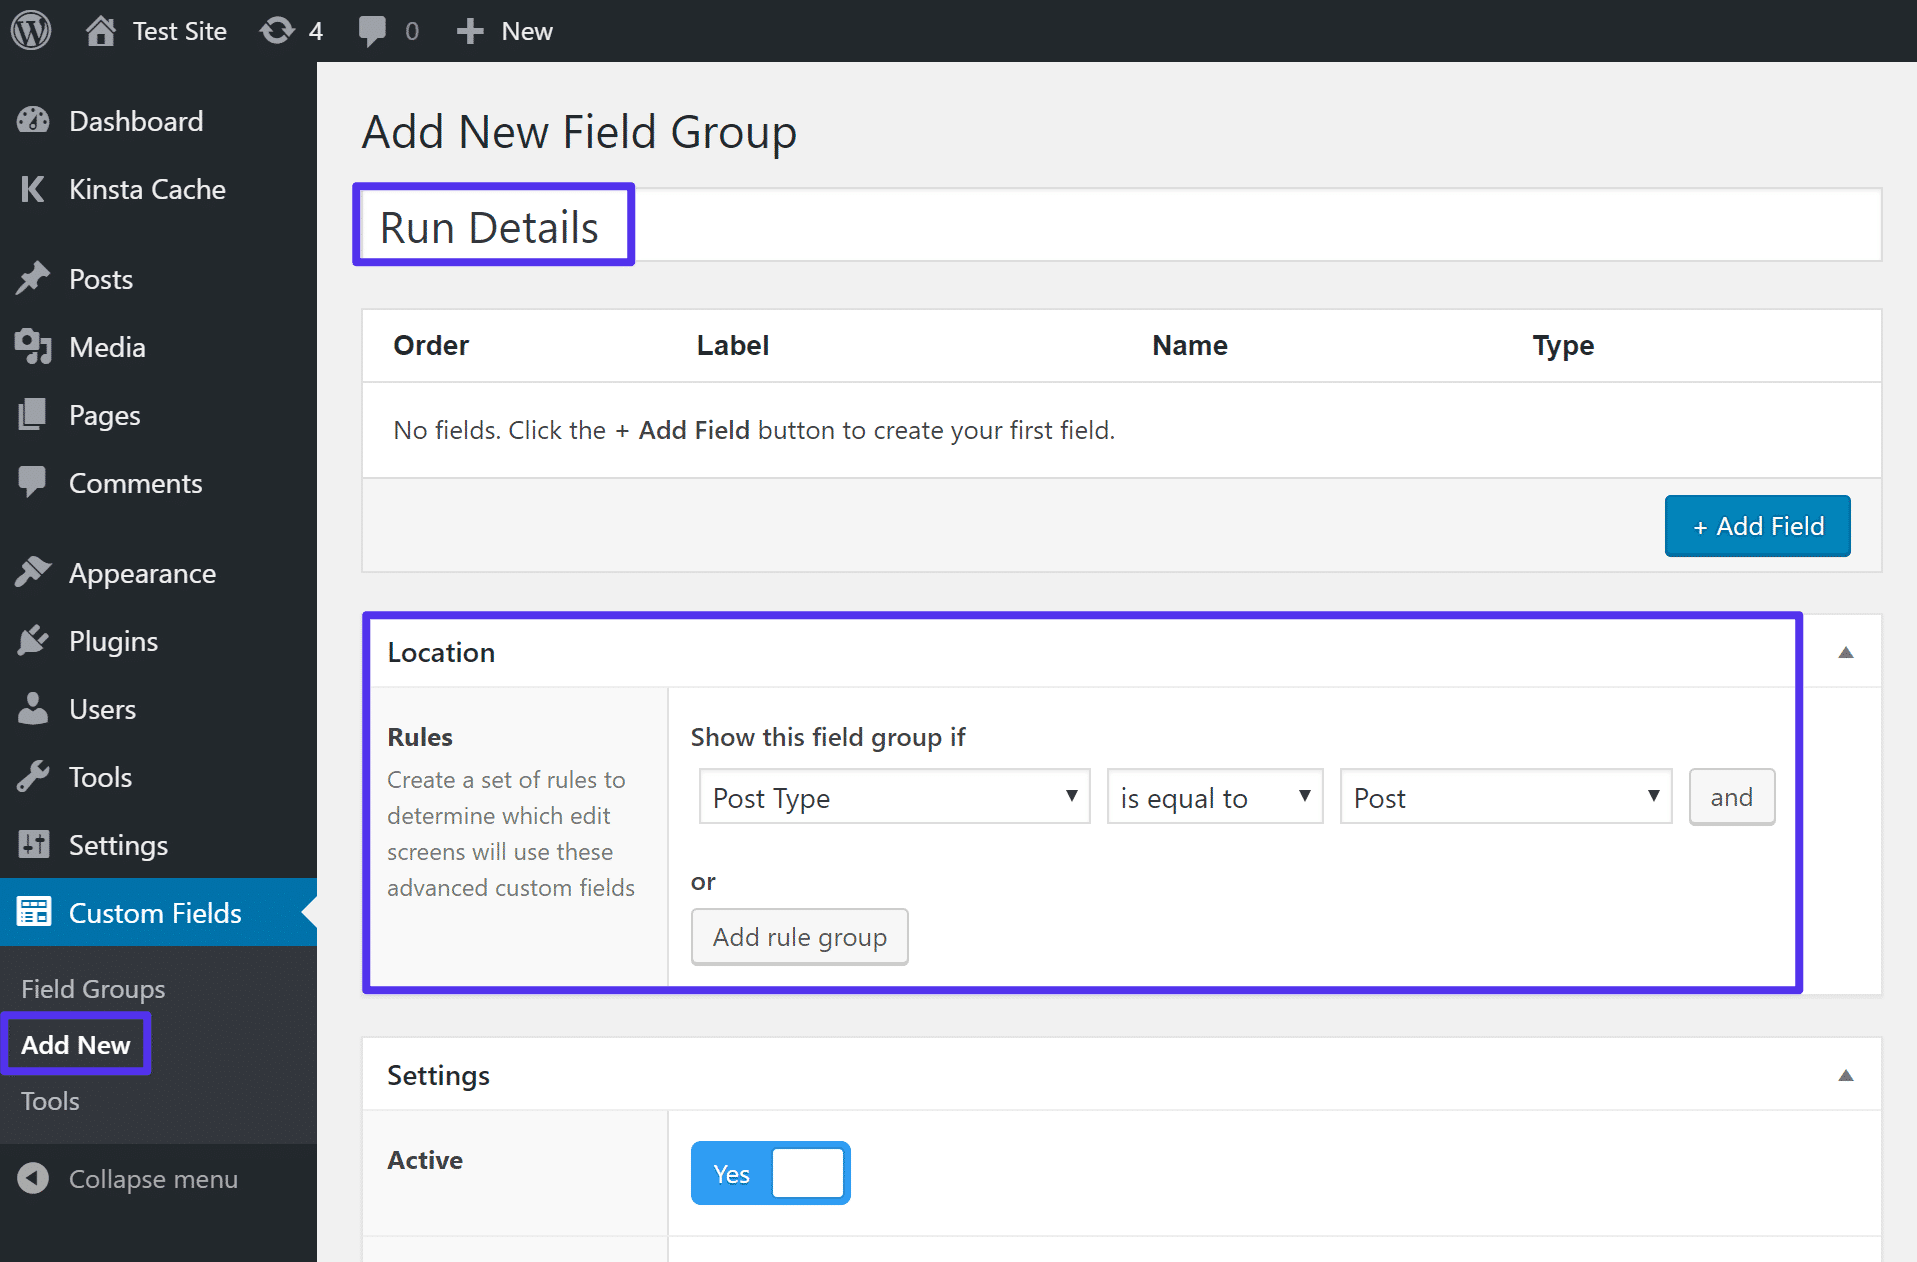
Assigning Location Rules
Location rules decide where your custom fields appear. You can select posts, pages, or custom post types. For example, show fields only on blog posts or product pages.
Use simple conditions like “Post Type is equal to Page.” You can add multiple rules for more control. This ensures fields appear only where needed.
Careful location settings reduce clutter in the WordPress editor. Editors see only relevant fields, making their work faster.
Setting Display Options
Display options control how fields look on the edit screen. You can choose field order and label placement. This keeps the editor clean and easy to read.
Decide if fields appear in a metabox or inside the content area. You can also hide labels or instructions for a simpler view.
These settings improve the editing flow. They help users focus on the important fields first.
Adding Custom Fields To Posts And Pages
Adding custom fields to posts and pages lets you include extra information easily. This feature helps you show unique data for each post or page. It works well for things like author details, ratings, or special notes. You control what content appears and how it looks.
Using Advanced Custom Fields (ACF) makes this process simple. You create fields once, then fill them in for each post or page. This adds flexibility and keeps your site organized. Follow these steps to add custom fields efficiently.
Editing Post Or Page
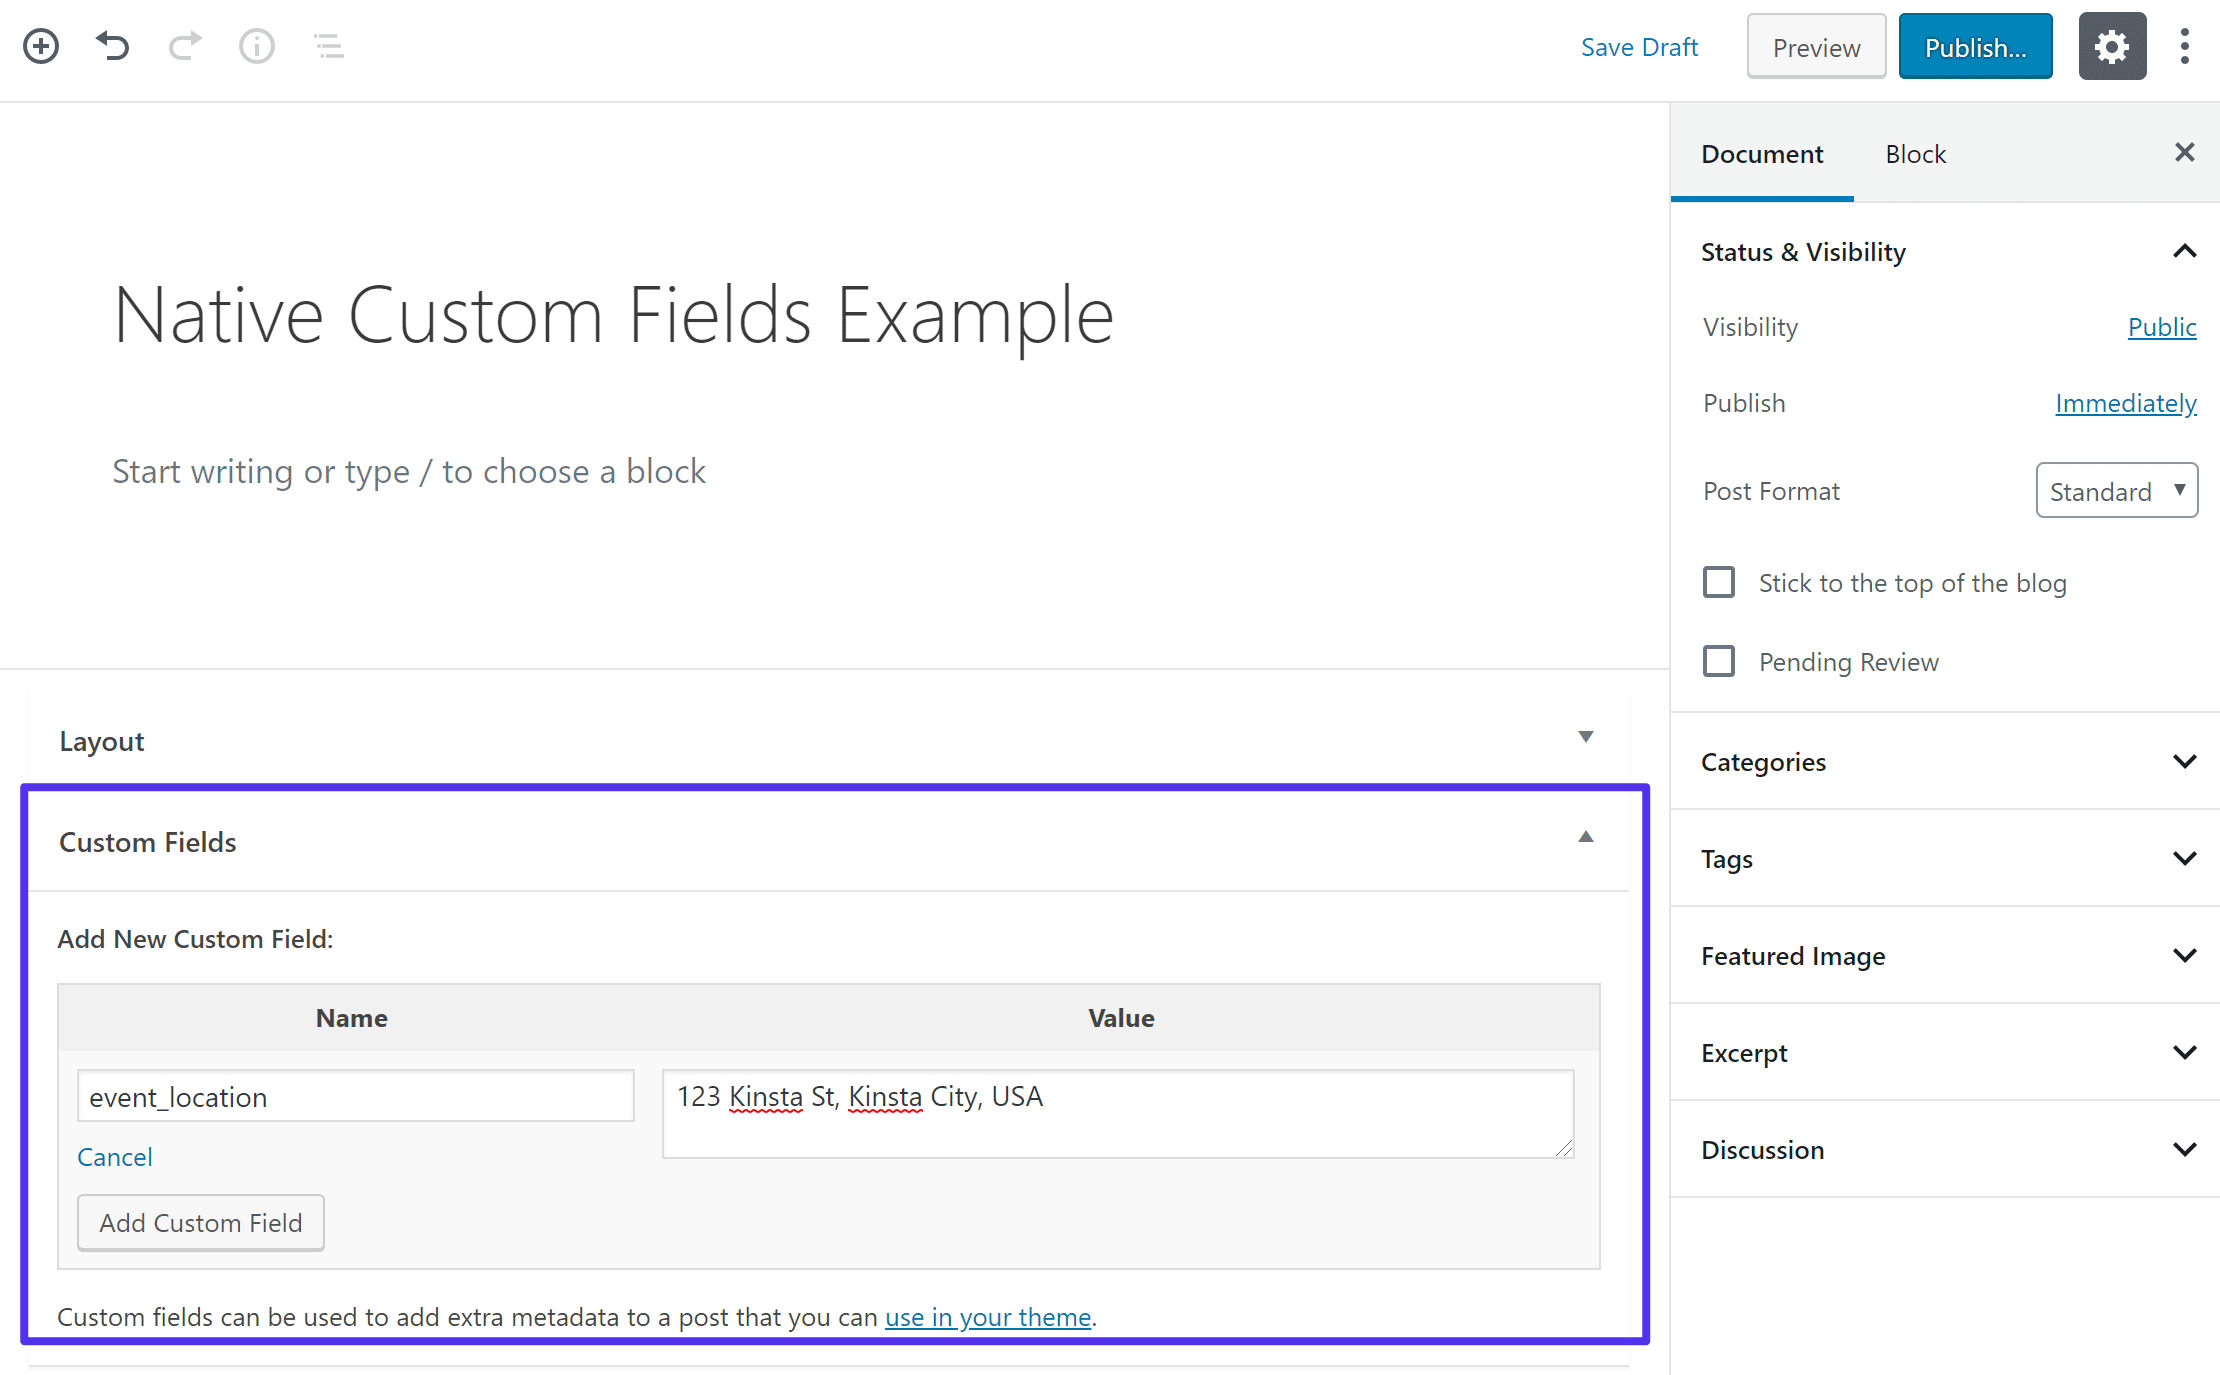
Start by opening the post or page you want to edit. In the WordPress dashboard, go to Posts or Pages and select the item. Scroll down to find the custom fields section created by ACF. If you don’t see it, check your screen options to enable custom fields.
ACF fields appear below the main content editor. These fields match the types you set up before. You can add text, images, dates, or other formats. Each field has a clear label for easy identification.
Filling In Custom Fields
Click inside the field to enter your data. For text fields, type your information directly. For image fields, click the upload button to select a file. Use the calendar popup for date fields. Save your changes by updating or publishing the post.
Custom fields display only the content you enter here. Leave a field empty to hide it from the post or page. This keeps your content clean and relevant for visitors. Check your site’s front end to see how the fields appear.
Displaying Custom Fields In Themes
Displaying custom fields in your WordPress theme helps show extra information. This extra content can improve your site’s look and functionality. You control what appears and where it shows. Custom fields make your theme more flexible and unique.
Using Php Functions
Use PHP functions to display custom field data in your theme files. The function get_field('field_name') pulls the value from Advanced Custom Fields. Replace 'field_name' with your actual field name.
This code outputs the content saved in the ‘custom_text’ field. Place this inside your theme’s template files like single.php or page.php. You can also use the_field('field_name') to echo the value directly.
Template Integration Tips
Integrate custom fields carefully to keep your theme clean. Check if the field has a value before showing it. Use conditional statements to avoid empty content.
Example: php the_field('custom_text'); ?php if( get_field('custom_text') ): ?
php endif; ?
Organize your custom field code inside theme parts like headers or footers. This keeps your theme easy to update. Use comments to mark where custom fields appear. It helps future edits and teamwork.
Using Advanced Features
Advanced Custom Fields (ACF) offers powerful features to build dynamic WordPress sites. Using advanced features lets you create smart and flexible content. These tools help display content based on conditions and allow repeating or flexible layouts.
Explore how to use Conditional Logic, Repeater Fields, and Flexible Content to enhance your site’s design and user experience.
Conditional Logic
Conditional Logic shows or hides fields based on user choices. It makes forms cleaner and easier to use. For example, show extra fields only if a checkbox is selected. This reduces clutter and guides users through the form.
Set rules in the field settings to control visibility. Use simple conditions like “show this field if another field equals X.” This keeps your content relevant and organized.
Repeater Fields
Repeater Fields let you add multiple sets of the same group of fields. Useful for lists like team members, testimonials, or FAQs. Users can add or remove items without limits.
This feature creates flexible, scalable content sections. Each item can have text, images, or other field types. It saves time and keeps content consistent.
Flexible Content
Flexible Content lets you build custom layouts with different content blocks. Add various field groups like text, images, or videos in any order. Change the layout without coding.
This feature is perfect for complex pages with mixed content. Users drag and drop blocks to create unique designs. It offers great control over page structure.
Credit: kinsta.com
Best Practices And Tips
Adding advanced custom fields (ACF) in WordPress makes your site more flexible. Following best practices helps keep your site clean and fast. It also makes managing fields easier. Use these tips to work smarter and avoid common mistakes.
Organizing Field Groups
Group related fields together. This keeps your admin area neat and clear. Name field groups with simple, clear titles. Avoid long or confusing names. Place fields in a logical order. This helps editors find what they need quickly. Use tabs or sections to separate different types of data. Limit the number of fields per group. Too many fields can overwhelm users. Review and update groups regularly. Remove old or unused fields to keep things tidy.
Performance Considerations
Advanced Custom Fields can slow down your site if used poorly. Keep the number of fields low on each page. Use only the fields needed for display or editing. Avoid loading fields on every page unless necessary. Use caching plugins to store field data temporarily. Optimize queries to load data faster. Test your site’s speed after adding new fields. Disable unused ACF features to reduce overhead. Regularly update the plugin to improve performance and security.
Credit: kinsta.com
Frequently Asked Questions
What Are Advanced Custom Fields In WordPress?
Advanced Custom Fields (ACF) is a plugin that adds extra content fields to WordPress. It lets you create custom input fields beyond the default options, improving website flexibility and customization without coding.
How Do I Install Advanced Custom Fields Plugin?
To install ACF, go to your WordPress dashboard. Navigate to Plugins > Add New, search for “Advanced Custom Fields,” click Install, then Activate. It’s quick and requires no technical skills.
Can I Create Custom Fields Without Coding?
Yes, ACF allows you to create custom fields through an easy interface. You don’t need coding knowledge to add text, images, or other field types to posts and pages.
How To Display Acf Fields On My Site?
After creating fields, use PHP functions like get_field() in your theme templates. This pulls the custom field data and displays it dynamically on your site.
Conclusion
Adding Advanced Custom Fields in WordPress helps you build better websites. It lets you create custom content easily. You control how your site looks and works. Start with simple fields and grow your skills step by step. Practice makes perfect, so try different options.
Your site will stand out and feel unique. Keep learning to improve your WordPress experience. Custom fields give you more power without coding. Use them to make your site match your needs. It’s a smart way to enhance your site’s content.



