
If you’re running ads on your WordPress site, you know how important it is to keep everything clear and secure. Adding an Ads.txt file helps protect your ad revenue and ensures advertisers know your site is legitimate.
But what if you want to add this file without using a plugin? It might sound tricky, but it’s easier than you think—and it gives you more control over your site. In this post, you’ll learn simple, step-by-step ways to add an Ads.
txt file to your WordPress site quickly and safely. Keep reading to discover how you can do this yourself and boost your site’s ad performance.
What Is Ads.txt
Ads.txt is a simple text file that helps protect your website’s ad revenue. It stands for “Authorized Digital Sellers.” This file lists companies allowed to sell ads on your site. It stops unauthorized sellers from taking your earnings.
Website owners place this file in their site’s root directory. Advertisers and ad networks check this file to verify sellers. This process builds trust in the online advertising system.
Purpose Of Ads.txt
The main purpose is to stop ad fraud. Ads.txt shows who can sell your ad space. It makes ad buying safer for advertisers. This leads to better ad prices and more revenue.
It also helps improve transparency. Buyers can see exactly who sells your ads. This reduces fake ads and scams on your site.
Benefits For Website Owners
Ads.txt protects your income by blocking fake sellers. It helps advertisers trust your site more. This trust can bring higher paying ads.
It is easy to use and free to implement. You do not need technical skills to create this file. It also improves your website’s reputation in the ad market.

Credit: themehunk.com
Prepare Your Ads.txt Content
Preparing your ads.txt content is a key step in adding the file to WordPress without a plugin. This step ensures your file contains the correct information. The ads.txt file helps protect your ad revenue by listing authorized sellers. Follow simple steps to gather and format the content properly.
Gathering Required Information
Start by collecting data from your ad network or platform. You need the domain name of the advertising system. Find the publisher ID or account ID next. This information is usually available in your ad account settings. Write down the type of relationship. Common types are “DIRECT” or “RESELLER.”
Make sure to get accurate details. Incorrect data can block ads or reduce earnings. Check your ad network’s documentation for correct entries. Keep the information ready before moving to the next step.
Formatting The Ads.txt File
The ads.txt file is a plain text file. Each line lists one authorized seller. The format uses commas to separate parts. The basic line looks like this:
Do not add extra spaces or special characters. Use uppercase letters for “DIRECT” or “RESELLER.” Add one line per ad partner. Save the file as “ads.txt” with no extra extensions.
Keep the file simple and clean. This helps ad networks read your file correctly. A well-formatted ads.txt file improves ad delivery and revenue.
Accessing WordPress File System
Accessing the WordPress file system is the first step to add an ads.txt file without a plugin. This file system holds all the important files that make your website work. You need to reach the right folder to place your ads.txt file correctly. There are two common ways to access these files: through cPanel File Manager or using FTP. Both methods let you upload files directly to your WordPress site.
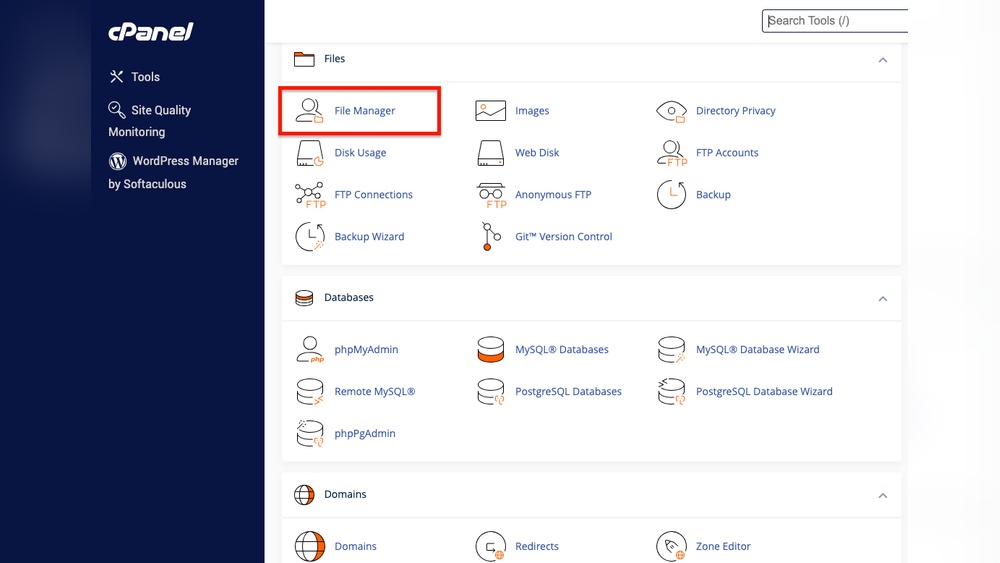
Using Cpanel File Manager
cPanel is a popular control panel provided by many web hosts. It offers a simple way to manage your website files. Log in to your hosting account and open cPanel. Find the “File Manager” tool. It shows all your website files in a folder structure. Navigate to the public_html folder or the folder where WordPress is installed. Here, you can upload or create your ads.txt file. This method is fast and does not need extra software.
Connecting Via Ftp
FTP (File Transfer Protocol) lets you connect to your website files using special software. Download an FTP client like FileZilla. Enter your FTP credentials, usually provided by your host. Connect to your website server. You will see your WordPress folders. Go to the root directory where WordPress is installed. Upload your ads.txt file here. FTP offers more control and works well for larger file transfers.
Uploading Ads.txt Without Plugins
Uploading the ads.txt file without a plugin is simple and quick. This method keeps your WordPress site clean and fast. You just need to access your site’s root directory and upload the file there. No extra tools or plugins are required.
Follow these clear steps to upload your ads.txt file manually. This helps ad networks verify your site and improves ad revenue.
Locating The Root Directory
The root directory is where your WordPress files live. It is the main folder on your web server. You can find it using an FTP client or your hosting control panel’s file manager.
Look for folders like wp-content, wp-admin, and wp-includes. These show you are in the right place. The ads.txt file must go here, not inside any subfolder.
Uploading The File Correctly
Make sure your ads.txt file is ready on your computer. It should be a plain text file with the exact name ads.txt. Use an FTP tool or your hosting file manager to upload it.
Place the file directly in the root directory. After uploading, check by typing yourwebsite.com/ads.txt in a browser. The file content should appear correctly.
This simple step ensures ad networks find your ads.txt and trust your site. No plugin needed and no risks to your WordPress setup.
Verifying Ads.txt Implementation
Verifying your Ads.txt implementation is a key step after uploading the file to your WordPress site. This ensures ad networks can read the file correctly. A proper Ads.txt file helps protect your ad revenue and prevents unauthorized sellers. Checking the file’s availability and validity is simple and quick. Follow these steps to confirm your Ads.txt is set up right.
Checking File Accessibility
Start by visiting your website’s Ads.txt URL. Type your website address followed by /ads.txt in the browser. For example, www.yoursite.com/ads.txt. The file should open and display the list of authorized sellers. If you see a 404 error or a blank page, the file is not accessible. Check your upload location and file name. Make sure it is placed in the root directory of your WordPress site. The file must be public and readable by all visitors.
Using Online Validation Tools
Use free online tools to validate your Ads.txt file. These tools scan the file for errors and formatting issues. Copy your Ads.txt URL and enter it into the validator. The tool will show any mistakes or warnings. Fix any reported problems immediately. A clean Ads.txt file improves trust with ad networks. Repeat this process after every file update to maintain accuracy.

Credit: www.youtube.com
Troubleshooting Common Issues
Troubleshooting common issues helps keep your ads.txt file working well. Fixing errors quickly stops ad revenue loss and improves ad delivery. Below are typical problems and how to solve them.
File Not Found Errors
This error occurs when your ads.txt file is not in the right place. The file must be in your website’s root folder. Check your hosting file manager or use FTP to confirm the file location.
Make sure the file name is exactly “ads.txt”. It is case sensitive and must not have extra spaces. Try accessing yoursite.com/ads.txt in a browser to see if it loads.
Clear your site cache and browser cache after uploading the file. Sometimes, cached versions hide the new file. If using CDN, refresh its cache too.
Incorrect File Content
Ads.txt file must have correct syntax and data. Each line should follow this format: domain, publisher ID, type. Wrong entries cause ads to stop showing.
Check for typos, missing commas, or extra spaces in the file. Use a plain text editor to avoid hidden formatting issues. Save the file in UTF-8 encoding without BOM.
Review the publisher IDs and domains from your ad network dashboard. Copy them exactly as given. Remove any blank lines or comments that do not follow the ads.txt rules.
Maintaining Ads.txt Over Time
Maintaining your ads.txt file is key to keeping your ad revenue safe. This file helps ad partners confirm you control your site. Over time, your ads.txt needs updates and checks. Staying on top of this keeps your ads running smoothly.
Updating Ad Partners
Ad partners may change or add new sellers. Check your ads.txt file regularly to include new partners. Remove partners who no longer work with you. This prevents unauthorized ads from showing on your site. Update the file by editing it through your WordPress dashboard or FTP.
Regular File Checks
Check your ads.txt file often. Look for errors like typos or outdated information. Use online tools to verify the file is correct. A small mistake can block your ads or reduce earnings. Set a reminder to review the file every few weeks.

Credit: www.youtube.com
Frequently Asked Questions
What Is An Ads.txt File In WordPress?
Ads. txt is a text file that lists authorized digital sellers for your website. It prevents unauthorized ad sales and ensures ad revenue transparency.
Why Add Ads.txt Without Using A Plugin?
Adding Ads. txt without plugins keeps your WordPress site faster and reduces security risks from third-party plugins.
How To Create An Ads.txt File Manually In WordPress?
Use a text editor to create the Ads. txt file with authorized seller info, then upload it to your website’s root directory via FTP.
Where To Upload Ads.txt File In WordPress?
Upload the Ads. txt file to your website’s root folder, usually in the public_html directory, using an FTP client or hosting file manager.
Conclusion
Adding an ads. txt file in WordPress without a plugin is simple. Just follow the steps carefully. This method keeps your site clean and fast. You control your ads and protect your earnings. No need to rely on extra tools.
Keep your website secure and trustworthy. Try this easy way to manage ads. txt today. It helps ad networks verify your site quickly. Your ad setup stays clear and effective. This small change can improve your site’s ad performance. Start now and see the difference yourself.


