Are you looking to make your WordPress website more dynamic and eye-catching? Adding a scrolling banner is a simple way to grab your visitors’ attention and highlight important messages, promotions, or updates.
In this guide, you’ll learn exactly how to add a scrolling banner to your WordPress site—step by step. By the end, you’ll have a sleek, professional banner that keeps your audience engaged and coming back for more. Let’s get started and make your website stand out!

Credit: www.wpbeginner.com
Choosing The Right Plugin
Choosing the right plugin is key to adding a smooth scrolling banner in WordPress. The plugin you pick affects your site’s speed, design, and user experience. A good plugin should be easy to use and match your website’s style. It must work well with your current WordPress setup and other tools.
Not all plugins are the same. Some offer more features but cost money. Others are free but may have limits. Knowing the pros and cons helps you decide what fits your needs best.
Popular Scrolling Banner Plugins
Several plugins are popular for creating scrolling banners. “Smart Slider 3” is user-friendly and offers many design options. “MetaSlider” allows quick setup with simple controls. “Advanced WordPress Backgrounds” gives more animation styles for banners. These plugins have good reviews and regular updates. Choose one that matches your design and technical skills.
Free Vs Premium Options
Free plugins provide basic banner features at no cost. They are good for simple scrolling banners. Premium plugins cost money but offer extra features. These include more design templates, better support, and advanced animations. Premium versions often update more frequently. Consider your budget and the features you need before choosing.
Plugin Compatibility
Plugin compatibility is crucial for smooth website performance. Check if the plugin supports your WordPress version. It should work well with your theme and other plugins. Poor compatibility can cause errors or slow your site. Always test the plugin on a staging site before full use. This prevents problems and keeps your website safe.

Credit: www.youtube.com
Preparing Your Banner Content
Preparing your banner content is the first step to a great scrolling banner. It helps you create a clear and attractive message. Good preparation makes your banner work well on your WordPress site.
Focus on choosing the right images and text. Make sure everything fits your site’s style. Keep your message simple and strong. This way, visitors will notice and remember it.
Selecting Images And Text
Choose images that match your brand and message. Use clear, high-quality pictures. Avoid cluttered or confusing photos. Pair images with short, easy words. This keeps visitors interested and informed.
Optimizing Banner Size
Resize images to fit your banner space perfectly. Large images slow down your website. Small images look blurry or pixelated. Aim for a balance between quality and speed. This helps your site load fast and look good.
Creating Eye-catching Messages
Write short sentences that grab attention. Use action words to make your message strong. Highlight offers or important news clearly. Make sure text is easy to read on all devices. Clear and bold text attracts more visitors.
Installing And Activating The Plugin
Installing and activating a plugin is the first step to add a scrolling banner in WordPress. Plugins extend your website’s features without coding. This process is simple and fast. Follow these steps carefully to get your scrolling banner ready.
Accessing The WordPress Dashboard
Start by logging into your WordPress admin area. Use your username and password. The dashboard is the control center for your site. From here, you manage plugins, themes, and content.
Searching For Plugins
On the dashboard, find the “Plugins” menu on the left. Click “Add New” to open the plugin search page. Type “scrolling banner” in the search box. A list of plugins will appear below.
Installation Steps
Look for a plugin that fits your needs. Check ratings and reviews. Click the “Install Now” button next to your chosen plugin. WordPress will download and install it automatically.
Activating The Plugin
After installation, click the “Activate” button. Activation turns the plugin on. You can now start setting up your scrolling banner. The plugin will appear in your dashboard menu for easy access.
Configuring Scrolling Banner Settings
Configuring the scrolling banner settings is key to making it effective and visually appealing. This process lets you control how the banner looks and moves on your website. Adjusting these options ensures the banner fits your site’s style and grabs visitor attention.
Setting Banner Speed And Direction
Choose how fast the banner scrolls across the screen. A slower speed helps visitors read the message comfortably. Faster speeds create more movement but can be hard to follow.
Set the direction to scroll left, right, up, or down. Horizontal movement works well for most banners. Vertical scrolling suits limited space or special effects. Pick the best direction to match your page design.
Adjusting Banner Style And Colors
Change font style and size for better readability. Use bold or clear fonts that stand out against the background. Adjust colors to match your website’s color scheme.
Background color can highlight the banner or blend it subtly. Use contrasting colors to make text easy to read. Keep the style simple to avoid distracting visitors.
Adding Links And Call-to-actions
Include clickable links to direct visitors to important pages. Links can lead to sales, promotions, or contact forms. Make calls-to-action clear and inviting.
Use short phrases like “Learn More” or “Shop Now.” Position them visibly on the banner. This encourages visitors to interact with your site and increases engagement.
Adding The Banner To Your Site
Adding a scrolling banner to your WordPress site helps catch visitor attention. It highlights key messages and improves user experience. There are simple ways to add the banner. Choose the method that fits your skills and site setup best.
Using Shortcodes
Shortcodes are small pieces of code that add features easily. Many banner plugins provide shortcodes. Copy the shortcode from the plugin settings. Paste it into the post, page, or widget area where you want the banner. This method works well for quick banner placement. No coding skills needed.
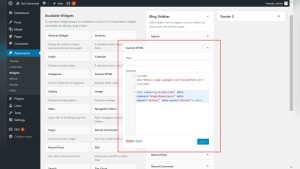
Adding Via Widgets
Widgets let you add content to sidebars or footers. Go to Appearance > Widgets in your dashboard. Find the Text or Custom HTML widget. Drag it to the desired widget area. Paste the banner shortcode or HTML code inside the widget. Save and check your site. Widgets make banner placement flexible and simple.
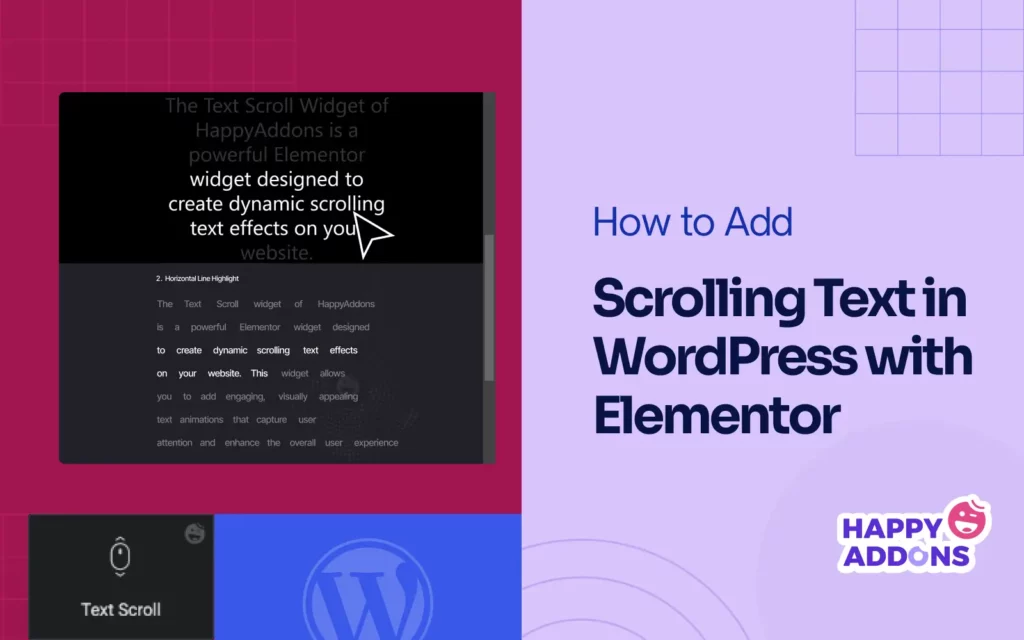
Inserting With Page Builders
Page builders like Elementor or Beaver Builder offer drag-and-drop ease. Open your page in the page builder editor. Add a shortcode or HTML widget/module. Paste the banner code into the widget. Adjust size and position as needed. Page builders give more control over banner design and layout.
Testing And Troubleshooting
Testing and troubleshooting your scrolling banner is key to a smooth user experience. This step ensures the banner looks good and works well across all devices. It also helps catch any issues early before visitors see them. Let’s explore how to preview your banner, fix common problems, and boost its performance.
Previewing On Different Devices
Check your banner on phones, tablets, and desktops. Each device shows content differently. Use your browser’s developer tools to simulate various screen sizes. This helps find layout or visibility problems. Testing on real devices is best for accuracy. Make sure the banner scrolls smoothly and fits well in every view.
Fixing Common Issues
Look for common problems like slow loading, broken links, or glitches in scrolling. Clear your cache and refresh the page after changes. Check for conflicts with other plugins or themes. Disable plugins one by one to spot the cause if the banner misbehaves. Use simple code and avoid heavy scripts to reduce errors.
Improving Performance
Optimize images used in the banner to speed up loading times. Compress files and choose the right format. Limit the number of slides to keep it light. Use lazy loading if possible to load images only when needed. Keep the banner’s code clean and minimal. Fast banners keep visitors engaged and lower bounce rates.
Alternative Methods Without Plugins
Adding a scrolling banner in WordPress can improve your site’s look and user engagement. Plugins are common tools for this task. Yet, some users prefer not to use plugins. This may be due to site speed or a wish to keep things simple. Alternative methods exist to add scrolling banners without plugins.
These methods require basic coding but give you full control. You can customize the banner style and behavior easily. The two popular ways involve using custom HTML and CSS or embedding JavaScript banners. Both are effective and lightweight options.
Using Custom Html And Css
Create a scrolling banner using simple HTML and CSS. Start with a container div for the banner text. Use the marquee effect with CSS animations instead of the outdated tag.
Write HTML like this:
Then add CSS for smooth scrolling:
.scroll-banner { width: 100%; overflow: hidden; background: 333; color: fff; white-space: nowrap; box-sizing: border-box; } .scroll-banner span { display: inline-block; padding-left: 100%; animation: scroll-left 10s linear infinite; } @keyframes scroll-left { 0% { transform: translateX(0); } 100% { transform: translateX(-100%); } } This code creates a simple, smooth scrolling banner. Adjust the animation speed by changing the time in animation. Place this code in your theme’s header, footer, or a text widget using the HTML block.
Embedding Javascript Banners
JavaScript offers more control over scrolling banners. You can create dynamic effects and pause on hover. Start by adding a container in HTML for your banner.
Example HTML:
Next, use this JavaScript to animate the text:
const banner = document.getElementById('js-scroll-banner'); let position = banner.offsetWidth; function scrollBanner() { position--; if (position <= -banner.scrollWidth) { position = banner.offsetWidth; } banner.style.transform = 'translateX(' + position + 'px)'; requestAnimationFrame(scrollBanner); } scrollBanner(); Add simple CSS for style and overflow:
js-scroll-banner { white-space: nowrap; overflow: hidden; display: inline-block; background: 222; color: eee; padding: 10px; position: relative; font-size: 18px; } This JavaScript method runs smoothly and uses less code. You can customize speed by changing how fast position changes. Paste the code in a custom HTML block or your theme files.
Credit: happyaddons.com
Frequently Asked Questions
What Is A Scrolling Banner In WordPress?
A scrolling banner is a moving display of images or text on your WordPress site. It grabs visitors’ attention and highlights key content or promotions effectively.
How Do I Add A Scrolling Banner In WordPress?
You can add a scrolling banner by using plugins like Smart Slider 3 or Elementor. These tools let you create customizable, responsive scrolling banners easily.
Can I Customize The Scrolling Speed And Direction?
Yes, most WordPress banner plugins allow you to adjust scroll speed and direction. This helps you match the banner animation with your website’s design style.
Are Scrolling Banners Mobile-friendly In WordPress?
Most modern WordPress scrolling banner plugins are mobile-responsive. They ensure your banners look great and function smoothly on all devices, including smartphones and tablets.
Conclusion
Adding a scrolling banner in WordPress can boost your website’s appeal. It grabs visitors’ attention and shares important messages. The steps are simple and do not need coding skills. Choose the right plugin or use built-in options to start. Customize the banner to match your site’s style.
Test it on different devices to ensure it works well. Keep your banner content clear and easy to read. Try this feature today to make your site more lively and user-friendly.