
Are you struggling to organize your blog posts in WordPress? Adding a dedicated posts page can make your site look professional and help your visitors find your latest content easily.
If you want to know the simple steps to create a posts page without any hassle, you’re in the right place. By the end of this article, you’ll have a clear, easy-to-follow guide that will transform how your blog displays posts—making your website more user-friendly and engaging.
Let’s dive in and get your posts page set up quickly!
Credit: www.wpbeginner.com
Set Up A Static Front Page
Setting up a static front page in WordPress helps you control what visitors see first. Instead of showing your latest posts, you can display a fixed page. This makes your site look more professional and organized. It also helps guide visitors to important content.
Create A New Page For Posts
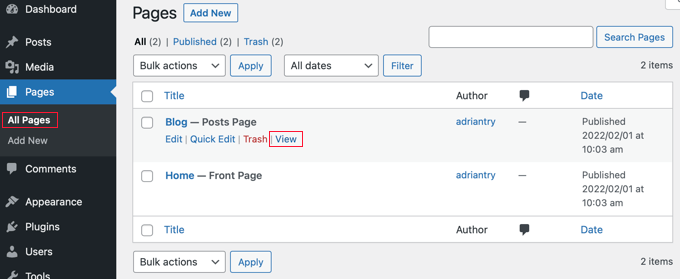
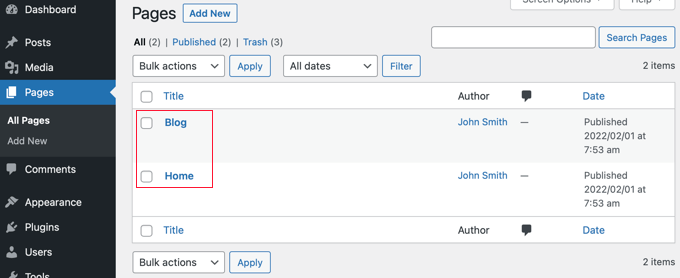
Start by creating a new page to hold your blog posts. Go to Pages and click Add New. Name this page something simple like “Blog” or “News.” You do not need to add any content to this page. WordPress will automatically show your posts here later.
Create A Home Page
Next, create another page for your homepage. Click Add New under Pages again. Name it “Home” or “Welcome.” Add the content you want visitors to see first. This can be text, images, or any important information about your site.
Assign Static Front Page
Now assign your new pages in the WordPress settings. Go to Settings and then Reading. Under Your homepage displays, select A static page. Choose the Home page as your Front page. Set the Blog page as your Posts page. Save your changes. Your site now shows a fixed homepage and a separate posts page.
Credit: www.youtube.com
Assign The Posts Page
Assigning a posts page in WordPress lets you display all your blog posts on one page. This setup helps visitors find your latest articles easily. It also keeps your site organized and professional.
The process is simple and takes just a few steps. Follow along to assign your posts page correctly.
Navigate To Reading Settings
Start by logging into your WordPress dashboard. Find the “Settings” option in the left menu. Click on “Reading” under the Settings menu. This section controls how your site displays content.
Select The Posts Page
Look for the “Your homepage displays” section. Choose the option “A static page.” Then, find the dropdown menu labeled “Posts page.” Select the page you want to show your blog posts. This page must already exist in your Pages section.
Save Changes
Scroll down to the bottom of the Reading Settings page. Click the “Save Changes” button. This saves your new posts page setting. Visit your website to see your posts page in action.
Customize The Posts Page
Customizing the posts page in WordPress helps create a unique look. It also improves user experience and site navigation. Tailoring the posts page fits your brand and content style. Small changes can make a big difference in how visitors engage with your blog.
Choose A Suitable Theme Template
Select a theme template that matches your blog’s purpose. Some themes offer special layouts for posts pages. Pick one that organizes posts clearly and looks clean. Check how the template displays images and text. A good template makes your posts easy to read and attractive.
Add Widgets For Better Layout
Widgets improve the posts page by adding useful elements. Use widgets for recent posts, categories, or search bars. These features help visitors find content faster. Place widgets in sidebars or footers to keep the page tidy. Widgets create a balanced and user-friendly design.
Modify Page Title And Slug
Change the page title to match your blog’s voice. A clear title helps search engines and visitors understand the page. Edit the slug to make the URL simple and readable. A short, relevant slug improves SEO and user experience. Keep titles and slugs consistent with your website’s theme.
Add Posts To The Page
Adding posts to your WordPress page makes your site dynamic. Visitors find fresh content each time they visit. This section shows you how to create and organize posts. Clear organization helps readers find topics they like. Tags improve navigation and user experience.
Create New Blog Posts
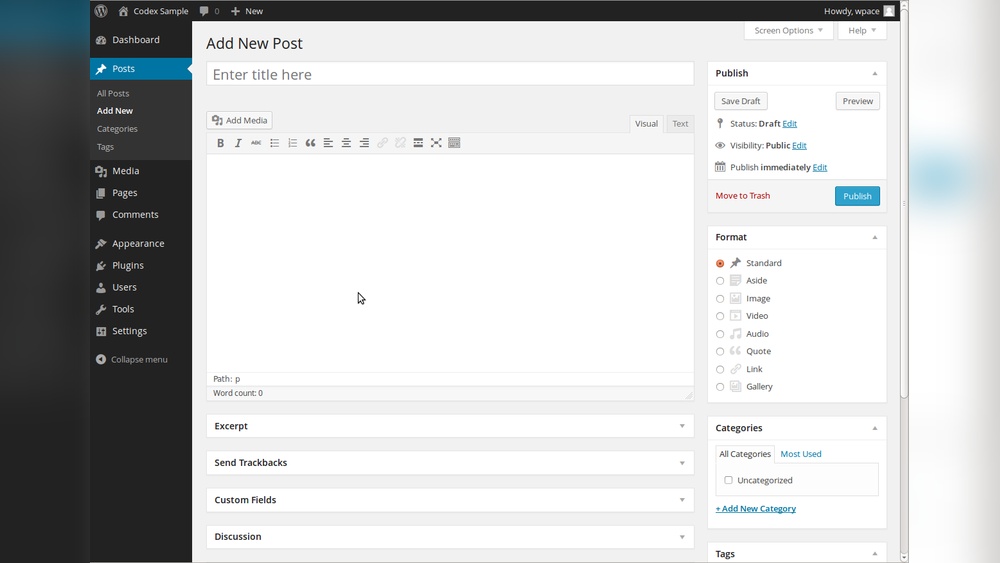
Start by going to your WordPress dashboard. Click on “Posts” and then “Add New.” Write your blog post title and content in the editor. Use short paragraphs and simple words for easy reading. Add images or videos to make posts more engaging. When done, click “Publish” to make it live on your site.
Organize Posts With Categories
Categories group posts by topic or theme. This helps visitors find related content fast. To add categories, go to “Posts” then “Categories.” Create new categories that match your blog topics. Assign categories to posts while editing them. Use clear and simple names for categories.
Use Tags For Better Navigation
Tags describe details in your posts. They work like keywords to improve search. Add tags in the post editor, below the content area. Use words readers might search for. Tags help visitors discover related posts easily. Keep tags relevant and avoid too many per post.
Test And Troubleshoot
Testing and troubleshooting your WordPress posts page is an important step. It helps ensure your content displays correctly and your visitors have a smooth experience. Small errors can affect site performance and user engagement. Checking your setup right after creating the posts page saves time and avoids confusion later.
Preview The Posts Page
Start by previewing the posts page in your browser. Check that all posts appear in the right order. Look for images, titles, and excerpts to ensure they show properly. Confirm the page layout matches your theme’s style. Test on different devices like phones and tablets. This confirms your page looks good everywhere.
Fix Common Issues
Common problems include missing posts, broken links, or wrong page titles. If posts do not appear, check that the correct page is set as the posts page in WordPress settings. Refresh the page after saving changes. Broken links often happen if URLs are incorrect. Update your permalinks by going to Settings > Permalinks and clicking Save Changes. This refreshes the link structure.
Clear Cache If Needed
Caching plugins can show old versions of your posts page. Clear your cache to see the latest updates. Clear your browser cache too, as it may store outdated files. If you use a caching plugin, find the clear cache button in its settings. After clearing, reload your posts page and check for fixes. This step resolves many display errors fast.
Credit: www.wpbeginner.com
Frequently Asked Questions
How Do I Create A Posts Page In WordPress?
Go to WordPress dashboard, navigate to Settings > Reading. Select a static page for “Posts page” and save changes.
Can I Use Any Page As My WordPress Posts Page?
Yes, you can assign any existing page as the posts page. Just select it under Settings > Reading.
Why Is My Posts Page Not Showing Blog Posts?
Ensure the page is assigned as the posts page in Settings > Reading. Also, check your theme supports blog posts.
How To Customize The WordPress Posts Page Layout?
Use your theme’s customization options or page builder plugins to design the posts page layout as desired.
Conclusion
Creating a posts page in WordPress is simple and useful. It helps you organize your blog posts clearly. You can choose any page to show your latest articles. Just follow the steps carefully, and your site will look professional. Keep updating your posts page to keep readers interested.
This small change can improve your site’s navigation a lot. Try it today and see how easy it is to manage your blog content.



